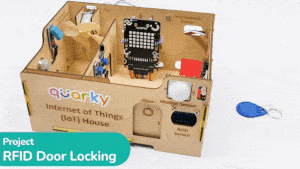


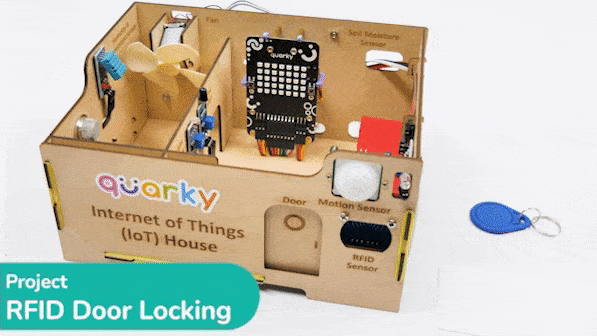
This project demonstrates how to interface an RFID sensor with a Quarky to control the door of an IoT-enabled house using an authorized RFID tag.
RFID to Quarky Circuit

Note: We are connecting the RFID sensor directly to Quakry Board.
RFID is short for “radio-frequency identification” and points to a technology whereby a reader catches digital information encoded in RFID tags. RFID sensors have a lot of pins. You have to connect it according to the following:
- The GND of the RFID sensor is connected to the GND of Quakry.
- The 3.3V of the RFID sensor is connected to the V of Quakry.
- The SDA Pin of the RFID sensor is connected to the A2 Pin of Quakry.
- The SCK Pin of the RFID sensor is connected to the D1 Pin of Quakry.
- The MOSI Pin of the RFID sensor is connected to the D2 Pin of Quakry.
- The MISO Pin of the RFID sensor is connected to the D3 Pin of Quakry.
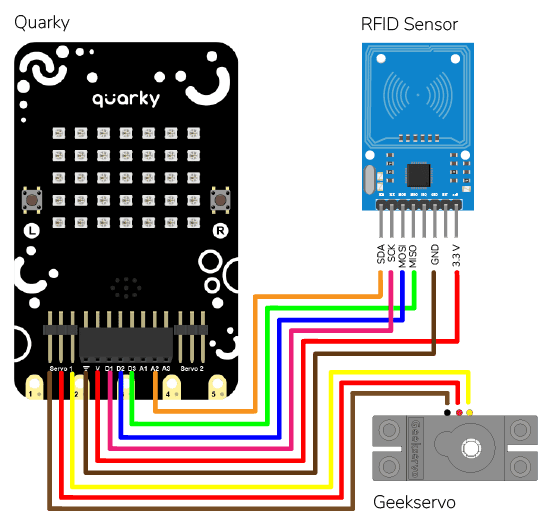
The servo motor is connected to the S1 of Quarky.
Making RFID Master Tag
The following code makes any RFID Tag a master card that can be authorized for security:
- Tobi is a sprite object that helps to create an RFID tag. A Quarky object and an IoTHouse object are also created.
- The IoTHouse object needs to be initialized and a flag (MasterFlag) is set to 0 to indicate if the RFID tag has been written yet.
- Tobi then asks the user for the name of the user for the RFID tag.
- A loop is created that will keep running until the RFID tag is written. Tobi will ask the user to put the RFID tag and then try to write it to the house.
- If it is successful, the MasterFlag is set to 1 and the master tag of the RFID is set. Finally, Tobi will let the user know the RFID tag is created.
- If the RFID tag couldn‘t be written, Tobi will ask the user to put the RFID tag again.
# Create a sprite object for 'Tobi'
sprite = Sprite('Tobi')

# Create a Quarky object
quarky = Quarky()

# Create an IoTHouse object
house = IoTHouse()

# Initialise the RFID tag
house.initialiserfid()

# Set a flag to indicate if the RFID tag has been written
MasterFlag = 0

# Ask the user for the name of the user for the RFID tag
sprite.input("What is the name of the user for this RFID tag?")

# Keep looping until the RFID tag is written
while MasterFlag == 0:
  # Ask the user to put the RFID tag
  sprite.say("Writing on RFID! Please put RFID tag.")

  # Try to write the RFID tag to the house
  if house.writetorfid(sprite.answer(), 2):
    # Set the MasterFlag to 1, indicating the RFID tag has been written
    MasterFlag = 1

    # Set the master tag of the RFID
    house.setmaster()

    # Let the user know the RFID tag is created
    sprite.say("RFID tag created", 2)

  # If the RFID tag couldn't be written
  else:
    # Ask the user to put the RFID tag again
    sprite.say("No tag detected, please put RFID tag", 2)
This is how it looks:

Code for RFID Authentication
This code makes the Quarky open the door when it reads a special RFID card:
- First, it imports the time library. Then, it creates a Quarky object and an IoTHouse object.
- The IoTHouse object is initialized with an RFID reader and it can read the RFID card.
- Then, it moves the servo of the door to 100 degrees to close the door.
- Inside the while loop, it checks if the RFID is read.
- If it is read then it checks if the data scanned is Quarky. If it is, it moves the servo to 0 and then draws a pattern on the Quarky Display. It then waits for two seconds and moves the servo back to 100. After that, it clears the display of the Quarky.
- If the scanned data is not Quarky, then it draws a different pattern on the Quarky object and waits for one second. After that, it clears the display of the Quarky.
# First, we import the time library
import time

# We also create a Quarky object
quarky = Quarky()

# We create an IoTHouse object called 'house'
house = IoTHouse()
# We initialise the RFID of the house object
house.initialiserfid()

# We move the servo of the Quarky object to 100
quarky.moveservo("Servo 1", 100)

# We create a while loop that will go on forever
while True:
  # Check if the RFID is read
  if house.readrfid(3):
    # Check if the scanned data is Quarky
    if (house.readscanneddata() == "Quarky"):
      # Move the servo to 0
      quarky.moveservo("Servo 1", 0)
      # Draw a pattern on the Quarky Display
      quarky.drawpattern("aaaaaaaaaaaaaaaaaaaaaaaaaaaaaaaaaaa")
      # Sleep for 2 seconds
      time.sleep(2)
      # Move the servo to 100
      quarky.moveservo("Servo 1", 100)
      # Clear the display of the Quarky Display
      quarky.cleardisplay()

    # If the scanned data is not Quarky
    else:
      # Draw a different pattern on the Quarky object
      quarky.drawpattern("bbbbbbbbbbbbbbbbbbbbbbbbbbbbbbbbbbb")
      # Sleep for 1 second
      time.sleep(1)
      # Clear the display of the Quarky object
      quarky.cleardisplay()
Output