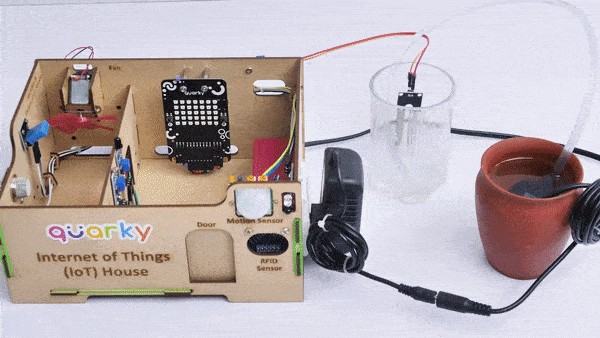
In this example, we will demonstrate how to use the Moisture sensor to detect how much the tank is filled and start the pump whenever the water level is low.
Circuit
We are using 2 devices in this project:
- Moisture Sensor: The moisture sensor provides real-time moisture reading from the tank to estimate the depth of water. The moisture sensor connections are as follows:
- GND Pin connected to GND of the Quarky Expansion Board.
- VCC Pin connected to VCC of the Quarky Expansion Board.
- Signal Pin connected to A2 of the Quarky Expansion Board.
- The Water Pump Connected to the Relay: The water pump is controlled by the smart switch of the IoT house which has a relay controlling the state. If the relay is ON, the smart switch gets ON, turning on the water pump. The relay has the following connections:
- GND Pin connected to GND of the Quarky Expansion Board.
- VCC Pin connected to VCC of the Quarky Expansion Board.
- Signal Pin connected to Servo 4 of the Quarky Expansion Board.

Script
The project has 2 scripts:
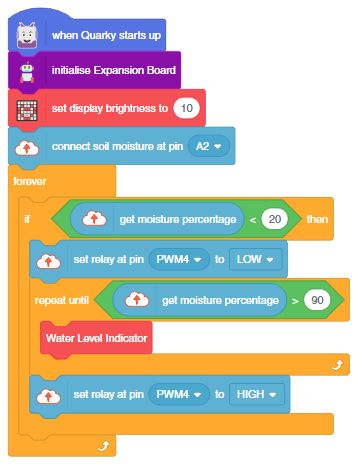
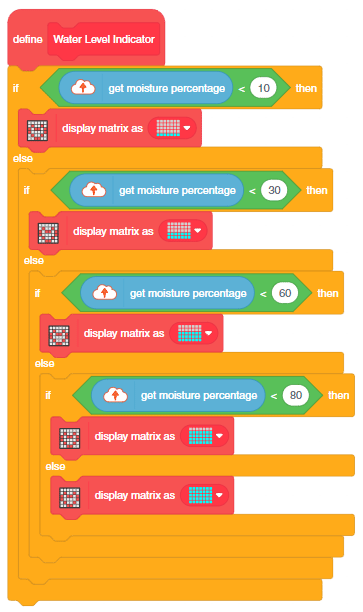
- Script to display the real-time moisture level on the display of the Quakry. Based on the moisture value, the number of LEDs will light up. The script is a custom block defined with the name – Water Level Indicator.
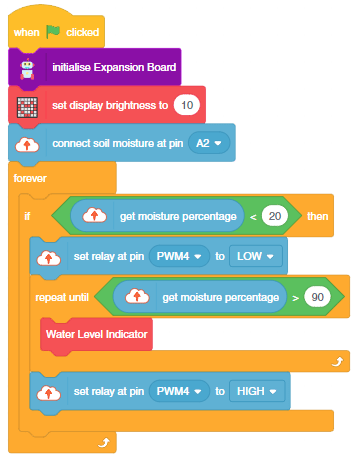
- The final script is the main script which has the logic to detect the moisture value. If the value becomes less than 20%, the pump gets ON and the watering continues until the moisture level gets to 90%.
Output
Uploading Code
You can also make the script work independently of PictoBlox using the Upload Mode. For that switch to upload mode and replace the when green flag clicked block with when Quarky starts up the block.