


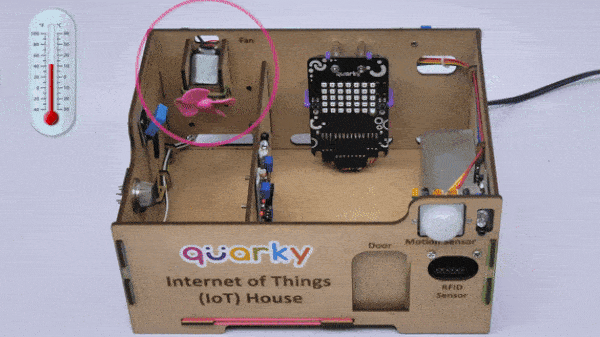
In this example, we are going to learn how to program Quarky to detect the temperature (using DHT Sensor) and make the fan ON and OFF accordingly.
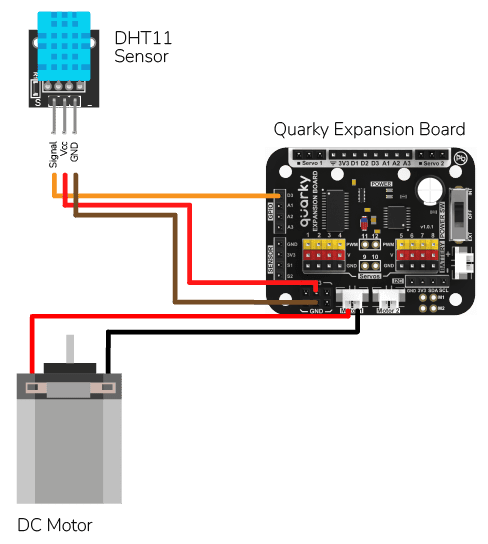
DHT Sensor Connection to Quarky
- DHT sensors have 3 pins: GND, VCC, and Signal. You have to connect the following 3 pins to the Quarky Expansion Board:
- GND to Ground Pin of Quarky Expansion Board
- VCC to 3.3V or VCC Pin of Quarky Expansion Board
- Signal to the D3 (Digital Pin) of the Quarky Expansion Board
- Fan Motor: Connect the Fan Motor to Motor 1 (M1) of the Quarky Expansion Board.
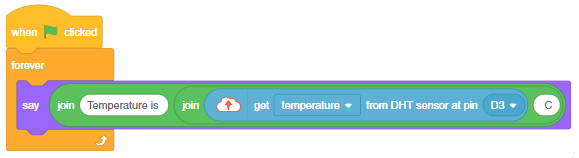
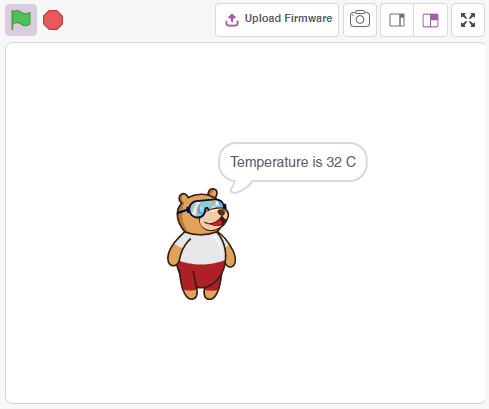
Getting Sensor Reading
The following script displays the real-time sensor reading.
Download Code: https://pictoblox.page.link/eHAFsRRW6CoEifmn9
Connect Quarky and you will start getting the readings.
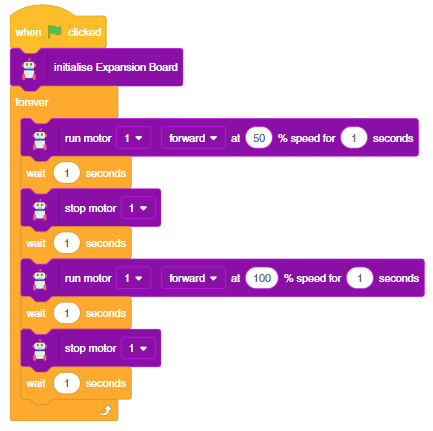
Controlling Fan
The following makes the fan motor turn ON at 50% speed for 1 second, then turn OFF for 1 second, then turn ON at 100% speed for 1 second and finally turn OFF for 1 second. This will repeat in a loop.
Download Code: https://pictoblox.page.link/vWTfiWkgi2w8BhsNA
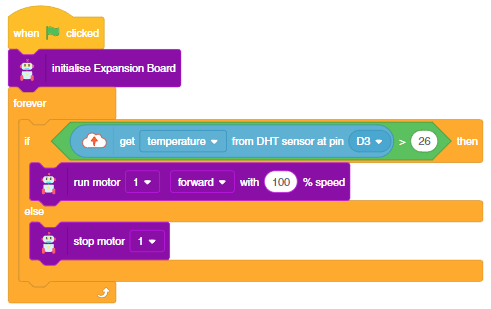
Automatic Fan Control
The following scripts, make the fan turn ON whenever the temperature is greater than 26 degrees.
Uploading Code
You can also make the automatic lighting work independent of PictoBlox using the Upload Mode. For that switch to upload mode and replace the when green flag clicked block with when Quarky starts up block.

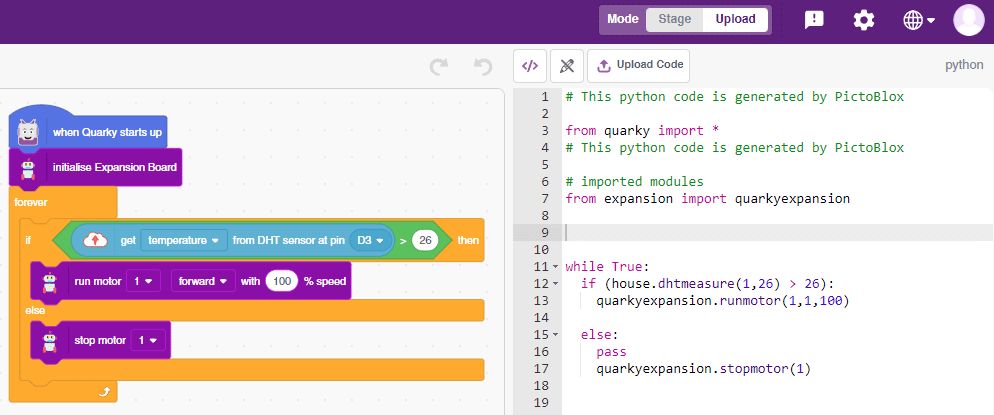
Click on the Upload Code button.