Introduction
In this document, you are going to learn how to assemble the drip irrigation system using the Quarky IoT House Addon kit.
Let’s start!
Assembly Steps
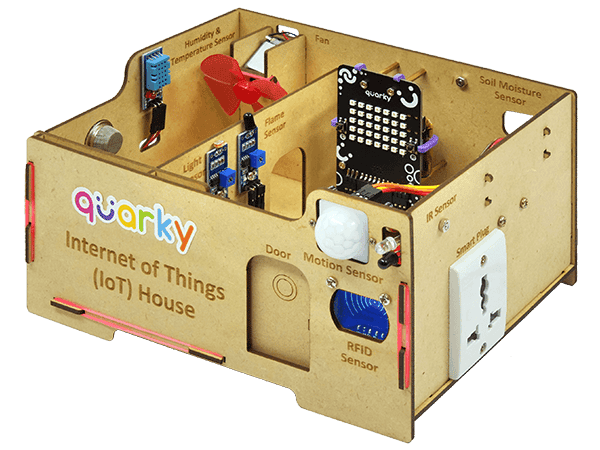
Before you start, make sure you have the IoT house assembled.

Alert: If you do not have the IoT House assembled, please follow this document: https://ai.thestempedia.com/docs/iot-house-quarky-addon-kit-documentation/iot-house-assembly-guide/
Follow the steps:
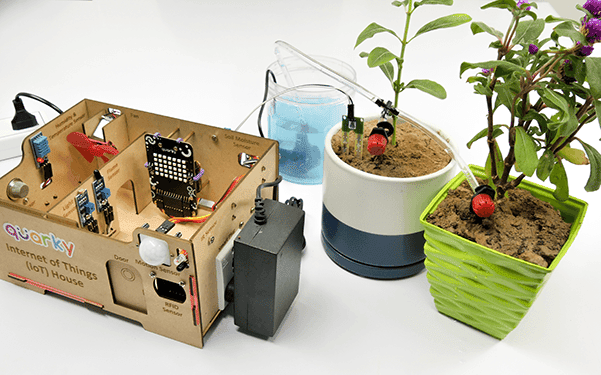
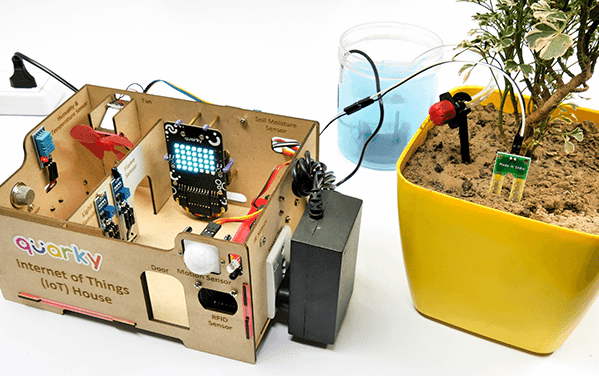
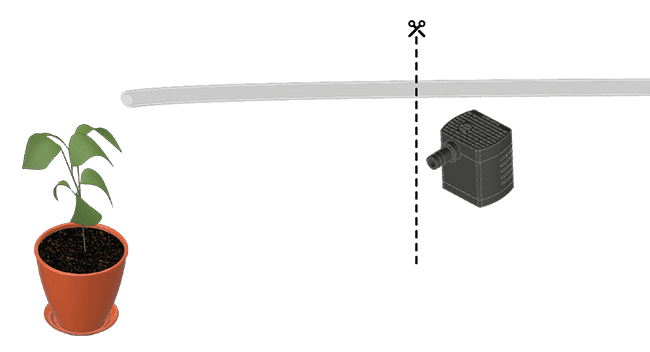
- Place the Water Tank and IoT House near the Plant according to the Drip Irrigation Diagram.
 Note: Water Tank is not provided with the IoT House kit. You have to use a regular household vessel for it.
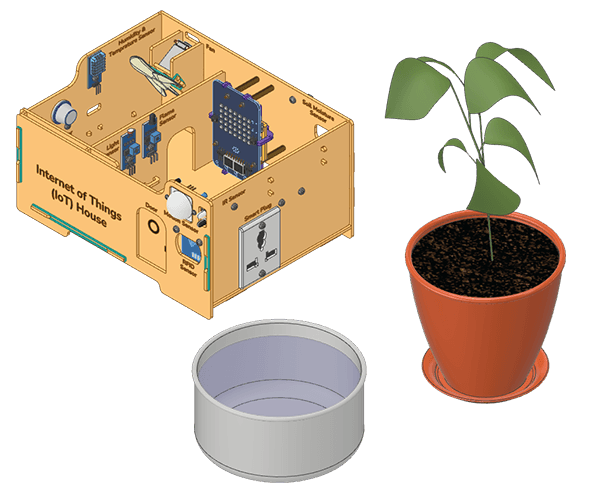
- Cut a piece of the Feeder Pipe accordingly to the distance between the Water Pump and the Plant.
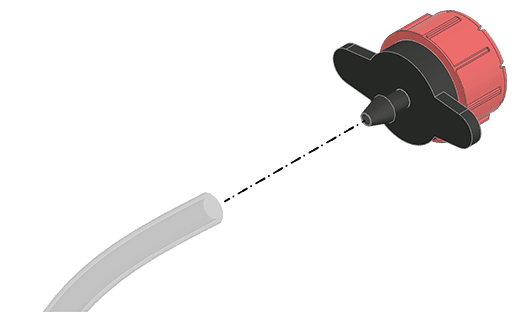
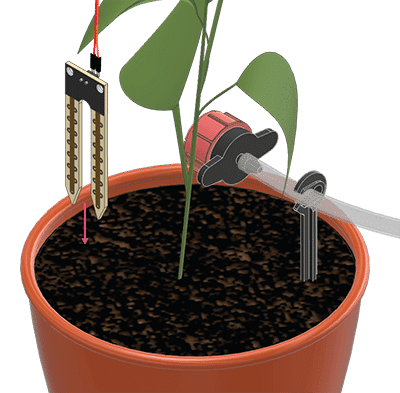
- Attach the Drip Emitter at the end of the Feeder Pipe.
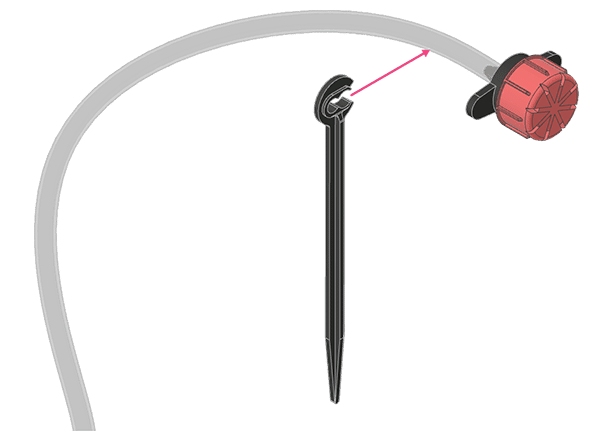
- Attach the Emitter Stake near the Drip Emitter on the Feeder Pipe.
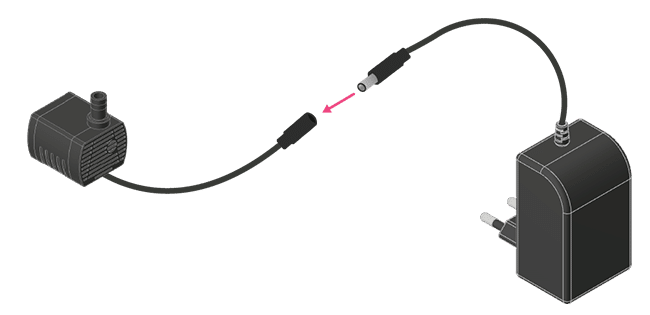
- Attach the Feeder Pipe to the Water Pump.

- Dip the Water Pump into the Water Tank.

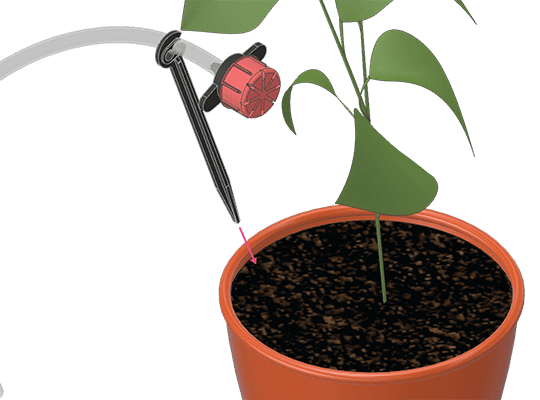
- Fix the Emitter Stake into the soil near the plant’s stem.
- Connect the DC Power Adapter to the Plug Socket on the Right Wall of the IoT House.
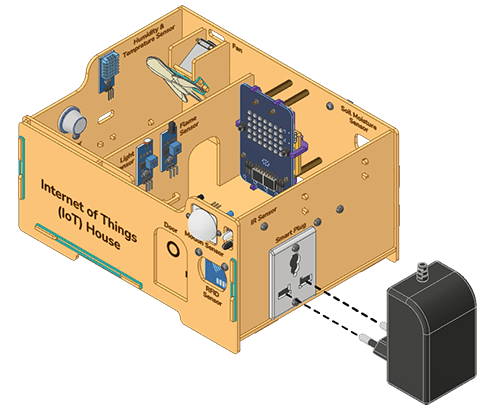
- Connect the Water Pump to the DC Power Adapter.
- Insert the Soil Moisture Sensor into the soil near the plant.
Your 1 plant drip irrigation is ready.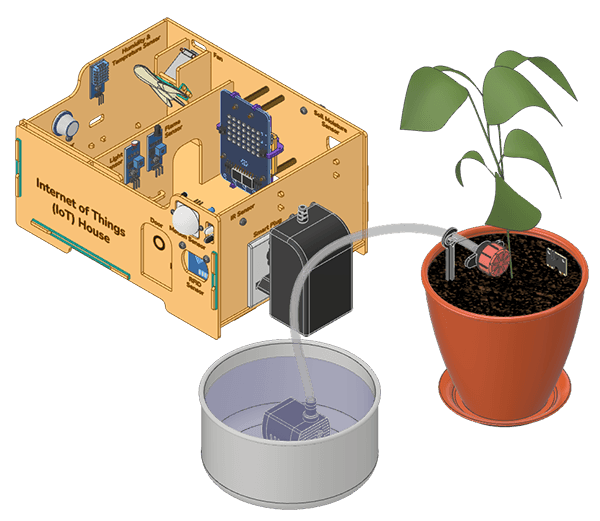
Conclusion
You can explore and code the following projects with the drip irrigation system.
If you want to explore more and make the 2-plant drip irrigation system, follow the link here: 2 Plants Drip Irrigation Assembly