Introduction
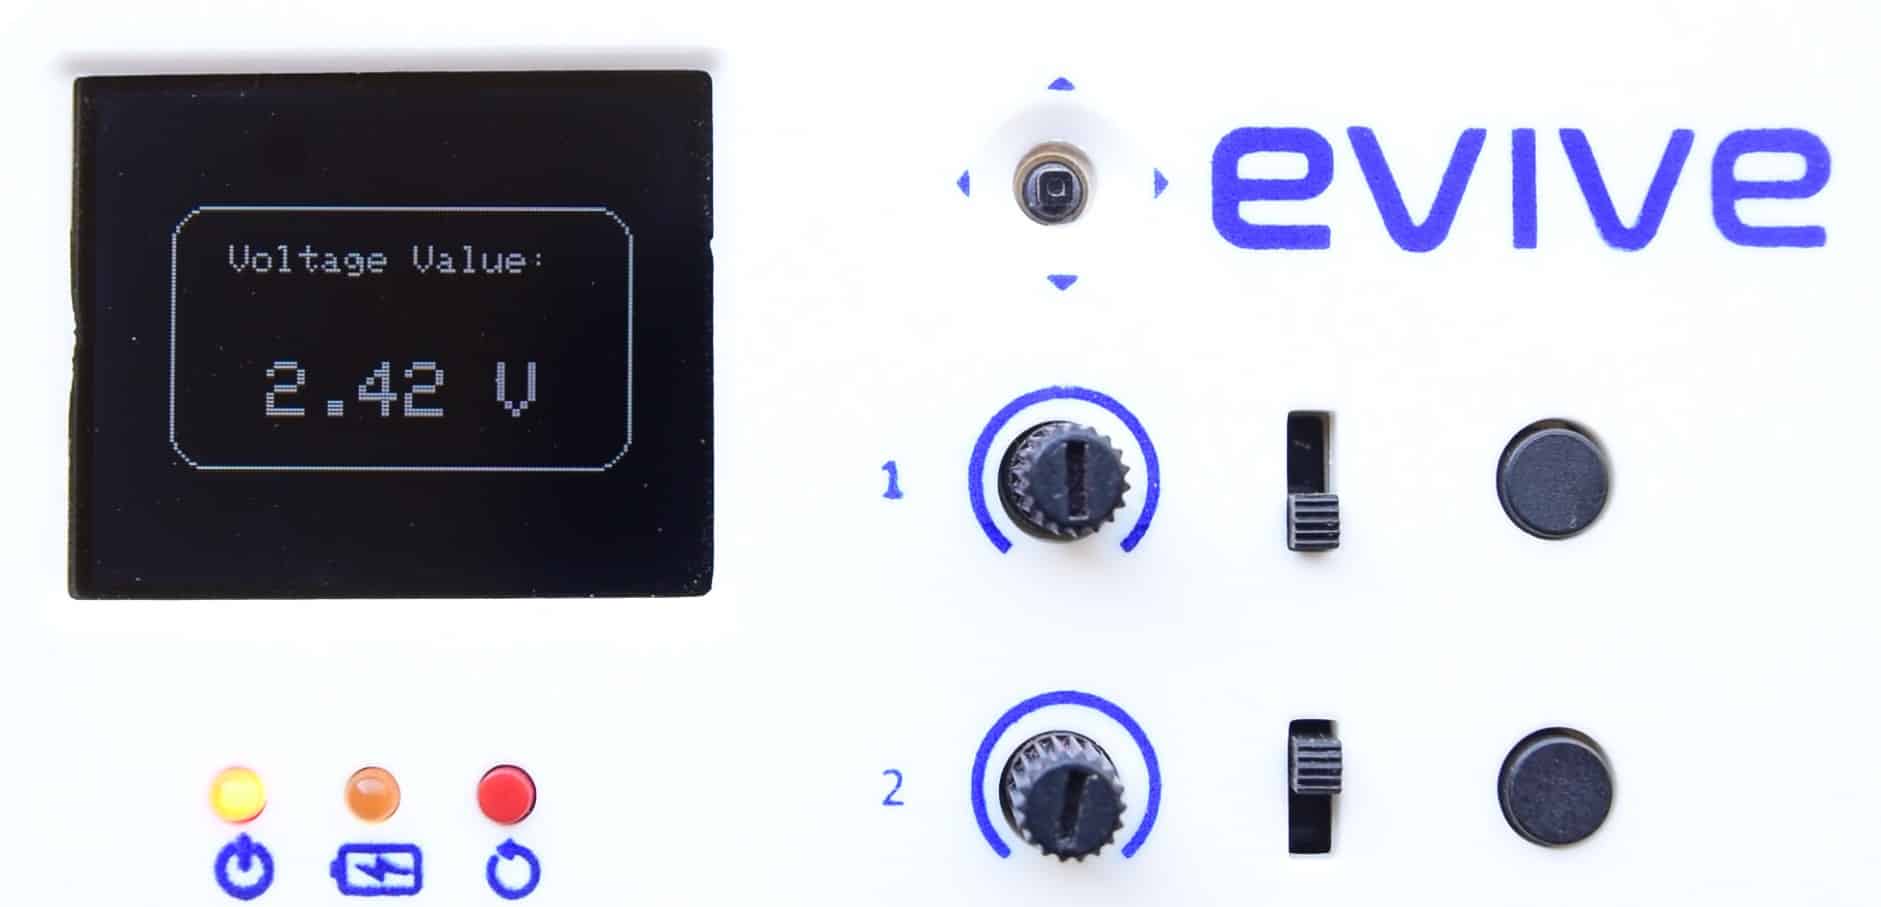
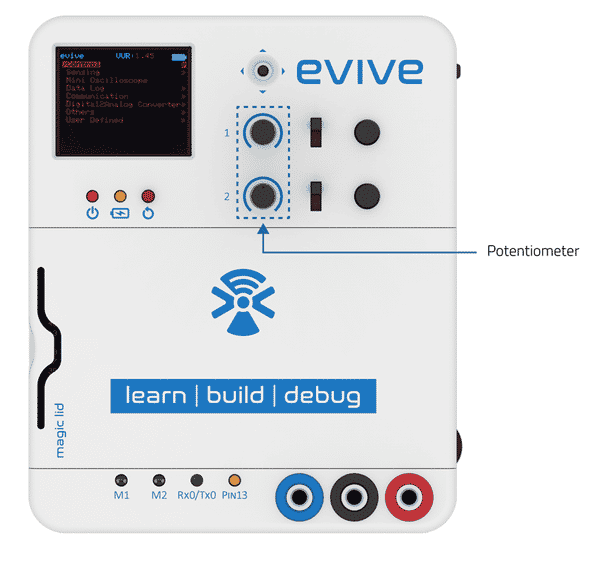
evive has two inbuilt 10kΩ knob potentiometers connected to Arduino Mega pins A9 and A10, respectively.
The two potentiometers are used to control the speed of the motor (through PWM) in firmware as well as for the angle control of the servo motor. It is also used to control the amplitude and frequency of the signal in the function generator.
Programming in Arduino IDE
The test code for the potentiometer is given below:
/*
 evive inbuilt potentiometer

Potentiometer 1 is connected to A9.
 Potentiometer 2 is connected to A10.

This code demonstrates how to use evive inbuilt potentiometers.
 The code read an analog sensor on analog pin 9 or analog pin 10 and
 turn on and off a light emitting diode(LED) connected to
 digital pin 13 (also inbuit in evive).
 The frequency of LED blinking is determined by the potentiometer

Created by Pankaj Kumar Verma and Akshat Agarwal
 On 12 Dec, 2016

This example code is in the public domain.

*/

int sensorPin = A9; // select the input pin for the potentiometer 1
//int sensorPin = A10; // select the input pin for the potentiometer 2
// Note: This code is meant to run for only one potentiometer. Please initialise only one of the analog sensor pin.
int ledPin = 13; // select the pin for the LED
int sensorValue = 0; // variable to store the value coming from the sensor

void setup() {
 // declare the ledPin as an OUTPUT:
 pinMode(ledPin, OUTPUT);
 // open serial port, set data rate at 9600 bps:
 Serial.begin(9600);
}

void loop() {
 // read the value from the sensor:
 sensorValue = analogRead(sensorPin);
 // turn the ledPin on
 digitalWrite(ledPin, HIGH);
 // stop the program for sensorValue milliseconds:
 delay(sensorValue);
 // turn the ledPin off:
 digitalWrite(ledPin, LOW);
 // stop the program for sensorValue milliseconds:
 delay(sensorValue);
 // display sensor value on serial monitor:
 Serial.println(sensorValue);
}
Programming in PictoBlox
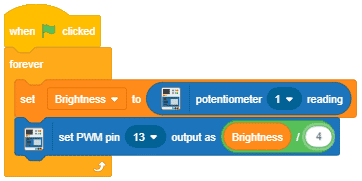
To get the potentiometer value in PictoBlox you can use a potentiometer () reading block. This block can be found under the evive extension. This block returns the analog output of either of the potentiometer (from 0-1023).
![]()
This block can be used in Upload Mode as well as in Stage Mode.
Example
- Controlling the brightness of the LED using potentiometer 1 reading in stage mode.
Conclusion
In conclusion, the evive inbuilt potentiometers are versatile components that can be used to control motors, and servos and generate signals. Programming them in Arduino IDE and PictoBlox is easy and the same code can be used for both. The potentiometer reading block in PictoBlox can be used to get the analog output of the potentiometers for use in various applications.