Introduction
The KY-009 “RGB” module is a handy little component that allows three colors ( Red, Green, and Blue) in a single Led while having only 4 pins:
- Common cathode pin
- Anode for Red LED
- Anode for Blue LED
- Anode for Green LED
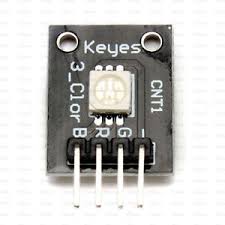
The KY-009 “RGB” module emits ‘Red’, ‘Green’, and ‘Blue’ colors by applying different voltages on the anode pins of each LED.
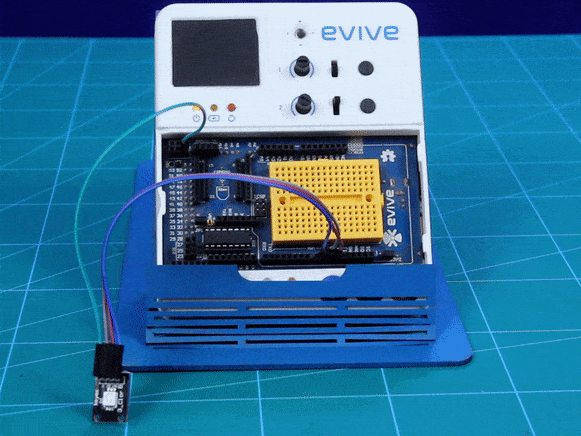
Circuit Diagram
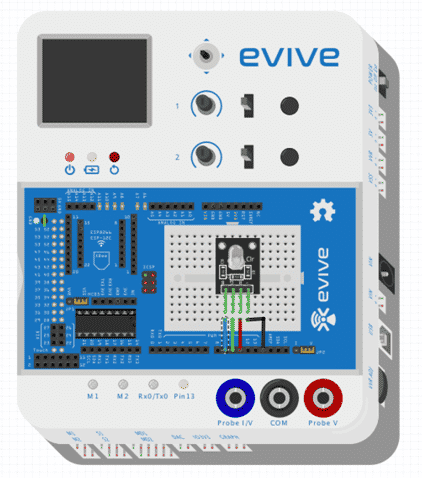
- Connect the common cathode pin of the KY-009 module to the ‘GND’ pin of evive
- Connect the anode of the Red LED to pin number 11 of evive
- Connect the anode of Green LED to pin number 10 of evive
- Connect the anode of Blue LED to pin number 9 of evive

Arduino Code
We use three loops to increase the light intensity in Red, Green, and Blue colors by 100 ms each.
/*
 *  this code demonstrate Interfacing of KY-009 RGB module with evive
 *  Created on 5 may 2018
 *
 *  By Punit chotaliya
 */

const int redpin = 11;       //select the pin for the red LED
const int greenpin = 10;    // select the pin for the green LED
const int bluepin =9;      // select the pin for the  blue LED

void setup()
{
  // code inside setup will execute only one's

  pinMode(redpin, OUTPUT);      // declaring anode pin of "Red" , "Green" and
  pinMode(bluepin, OUTPUT);    // Blue LED as a OUTPUT
  pinMode(greenpin, OUTPUT);
  Serial.begin(9600);          // setting Buad rate of 9600 for Serial communication

}

void loop()
{
  //code inside loop will execute infinite time's

  for (int i=0; i <255;i++)     // Initializing for loop for producing red color
  {
    analogWrite(redpin,i);      // Increasing the brightness of Red led
    analogWrite(greenpin,0);   // removing the component of Green and Blue
    analogWrite(bluepin,0);   // color's
    delay(100);
    Serial.println("red");   // printing Red on Serial monitor
  }
  analogWrite(redpin,0);
  delay(2000);              // producing delay of 2 second's

  for (int i=0; i <255;i++)   // Initializing for loop for producing Green color
  {
    analogWrite(greenpin,i);     // Increasing the brightness of Green led
    analogWrite(redpin,0);      // removing the component of red and Blue
    analogWrite(bluepin,0);    // color's
    delay(100);
    Serial.println("green");   // printing Green on Serial monitor
  }
   analogWrite(greenpin,0);
   delay(2000);                 // producing delay of 2 second's

 for (int i=0; i <255;i++)    // Initializing for loop for producing Blue color
  {

    analogWrite(bluepin,i);        // Increasing the brightness of Blue led
     analogWrite(greenpin,0);     // removing the component of Green and Red
    analogWrite(redpin,0);       // color's
     delay(100);
     Serial.println("blue");    // printing Blue on Serial monitor
  }
    analogWrite(bluepin,0);
   delay(2000);              // producing delay of 2 second's
}
Expected Result
Conclusion
In this lesson, we learned how to use the KY-009 “RGB” module with evive. We used three loops to increase the light intensity in Red, Green, and Blue colors by 100 ms each. We also established Serial communication to print the three colors on the Serial Monitor.