Introduction
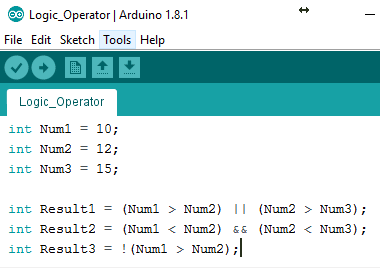
Logical operators evaluate either one or two relational or logical statements. There are 3 logical operators in Arduino IDE:
| Logical Operator | Operator Symbol | Example |
|---|---|---|
| OR | || | a || b |
| AND | && | a && b |
| NOT | ! | ! a |
Logic OR (||) Operator
Structure
(Statement 1) || (Statement2)
The logic OR operator results in true if either Statement1 or Statement2 or both are true. If both the statements are false, then it will result in false. Below is its truth table:
| Statement1 | Statement2 | Statement1 || Statemen2 |
|---|---|---|
| 0 | 0 | 0 |
| 0 | 1 | 1 |
| 1 | 0 | 1 |
| 1 | 1 | 1 |
Below is an example showing how to use the logic OR operator:
int Result1;
int Result2;
int Result3;
int Result4;

void setup() {
 Serial.begin(9600);

 Result1 = (5 < 3) || (6 > 5);
 Result2 = (5 < 3) || (6 > 5);
 Result3 = (5 > 3) || (6 < 5);
 Result4 = (5 < 3) || (6 < 5);

Serial.print("Result 1: ");
 Serial.println(Result1);
 Serial.print("Result 2: ");
 Serial.println(Result2);
 Serial.print("Result 3: ");
 Serial.println(Result3);
 Serial.print("Result 4: ");
 Serial.println(Result4);
}

void loop() {

}
Serial monitor output:
Result 1: 1
Result 2: 1
Result 3: 1
Result 4: 0
Logic AND (&&) Operator
Structure
(Statement 1) && (Statement2)
The logic AND operator gives true only if both Statement 1 and Statement 2 are true. If either Statement1 or Statement2 or both are false, then it will result in false. Below is the truth table:
| Statement1 | Statement2 | Statement1 || Statemen2 |
|---|---|---|
| 0 | 0 | 0 |
| 0 | 1 | 0 |
| 1 | 0 | 0 |
| 1 | 1 | 1 |
Below is an example showing how to use the logic AND operator:
int Result1;
int Result2;
int Result3;
int Result4;

void setup() {
 Serial.begin(9600);

 Result1 = (5 > 3) && (6 > 5);
 Result2 = (5 < 3) && (6 > 5);
 Result3 = (5 > 3) && (6 < 5);
 Result4 = (5 < 3) && (6 < 5);

Serial.print("Result 1: ");
 Serial.println(Result1);
 Serial.print("Result 2: ");
 Serial.println(Result2);
 Serial.print("Result 3: ");
 Serial.println(Result3);
 Serial.print("Result 4: ");
 Serial.println(Result4);
}

void loop() {

}
Serial monitor output:
Result 1: 1
Result 2: 0
Result 3: 0
Result 4: 0
Logic NOT (!) Operator
Structure
! Statement
The NOT operator checks whether the Statement evaluates to 0 or not. If it is 0 it results in true; otherwise, it results in false.
Below is an example showing how to use the NOT operator:
int Result1;
int Result2;

void setup() {
 Serial.begin(9600);

 Result1 = !(5 > 3);
 Result2 = !(5 < 3);


Serial.print("Result 1: ");
 Serial.println(Result1);
 Serial.print("Result 2: ");
 Serial.println(Result2);
}

void loop() {

}
Serial monitor output:
Result 1: 0
Result 2: 1
Conclusion
In conclusion, logical operators allow us to evaluate relational and logical statements in Arduino IDE. The 3 logical operators are OR (||), AND (&&), and NOT (!). Each of these operators has its own structure and truth table. Understanding how these operators work is important as they can help us in making decisions and solving problems in our Arduino projects.


