Introduction
A variable is used to store a value or information so that we can refer to or/and manipulate it at a later stage during the life of the Arduino sketch. Memory is set aside for storing the variable and the variable is given a name which allows us to access it in the sketch.
Types of variables
Below are some variable types that are frequently used in Arduino sketches:
| Datatype | Size in Bytes | Description |
|---|---|---|
| char | 1 Byte | It stores 8 bit numerical ASCII value of characters like alphabets, symbols etc. It can also store a signed number that is in range of -128 to 127. Character literals are written in single quotes like 'a', '#' etc and their ASCII numerical is stored at corresponding variable location. |
| unsigned char | 1 Byte | It can store 8 bit numerical ASCII values of characters, symbols etc and can also store any unsigned number in range of 0 to 255. Character literals are written in single quotes like 'a', '#' etc and their ASCII numerical is stored at corresponding variable location. |
| int | 2 Bytes | Stores a 2 byte(16 bits) signed integer value that is in range of -32,768 to 32,767. |
| unsigned int | 2 Bytes | Stores an unsigned integer value of 2 bytes(16 bits) that is in range of 0 to 65,536. |
| long | 4 Bytes | Stores a 4 byte (32 bit) signed integer value that is in range of -2,147,483,648 to 2,147,483,647. |
| unsigned long | 4 Bytes | Stores an unsigned 4 byte(32 bit) integer that is in range of 0 to 4,294,967,295 (2^32 - 1). |
| float | 4 Bytes | Stores a signed 4 byte(32-bit) value that is integer or a value with decimal point (say 12.15) that is in range of -3.4028235E+38 to 3.4028235E+38. |
| double | 4 Bytes | Same as float for evive. |

Defining a Variable
The standard form of variable definition is:
Variable_Datatype Varible_Name;
Variable_Datatype can be int or float depending on the type of variable you want. Variable_Name is the name of the variable. The variable is referenced or used by its name later in the program.
By giving the variable a type and name, space is made available in memory for this variable.
E.g. if you want to count the number of times the main loop is executed, you must first define a variable count as shown below:
int count;
How to Name a Variable
You can give a variable any name as long as it sticks to the rules set out below. It is best to give variables meaningful names that help you and others understand the sketch better.
- Variables can consist of both uppercase (A-Z) and lowercase(a-z) letters.
- Variables can contain numbers 0 to 9, but cannot start with a number.
- Variables may not have the same names as Arduino language keywords, e.g. you cannot have a variable named float.
- Variables must have unique names, i.e. you cannot have two variables with the same name.
- Variable names are case-sensitive, so Count and count are two different variables.
- Variables may not contain any special characters, except the underscore (_).
Assigning Value to a Variable
You can assign a value to a variable with the following statement:
Variable_Name = Expression;
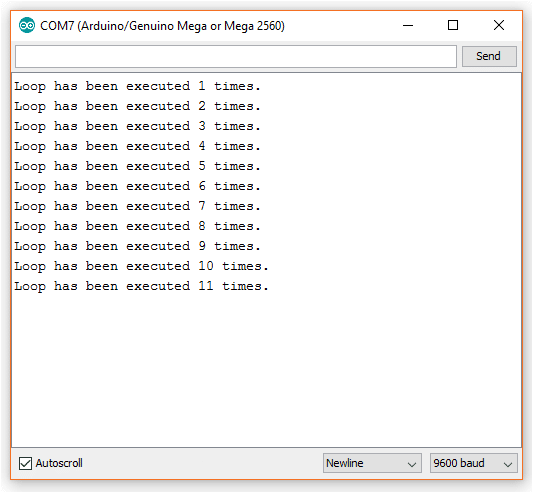
The expression will give a valid number that will be assigned to the variable. Let’s count how many times the loop is executed. Below is the Arduino sketch:
//This code prints number of times for which the loop functions has run.
int count;

void setup() {
  Serial.begin(9600);
  count = 0;
}

void loop() {
  count = count + 1;
  Serial.print("Loop has been executed ");
  Serial.print(count);
  Serial.println(" times.");
  delay(1000);
}
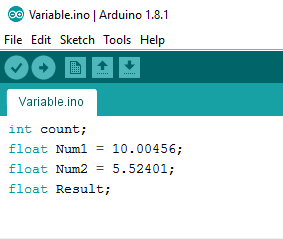
Let’s make a new sketch, where we’ll add two float variables to a new variable. Below is the code:
float Num1 = 10.00456;
float Num2 = 5.52401;
float Result;

void setup() {
  Serial.begin(9600);
  Serial.print("The first number is ");
  Serial.println(Num1);
  Serial.print("The second number is ");
  Serial.println(Num1);
  Result = Num1 + Num2;
  Serial.print("Sum with 2 digit precision is ");
  Serial.println(Result);
  Serial.print("Sum with 5 digit precision is ");
  Serial.println(Result, 5);
}

void loop() {

}
When the value of the variable is sent to the serial monitor window, println() automatically rounds the number off to two decimal places, i.e. the number of digits after the decimal.
The second time that println() is used to send the value of the variable to the serial monitor window, the number of decimal places is specified as 5. This is done by passing a second parameter value of 5 to the println() function.
Conclusion
In this lesson, we learned about variables and how to use them in Arduino sketches. We discussed the different types of variables, how to define and name variables, and how to assign values to them. We also saw how to use different parameters when printing the value of a variable to the serial monitor window. Variables are a powerful tool in Arduino programming and they allow us to store and manipulate data easily.