Introduction
While loops execute a statement, or a group of statements continuously, and infinitely, until the expression inside the parenthesis, () results in false. Something must change the tested variable inside the body of the while loop or the control of the program will never exit the while loop. When you don’t know how many times the loop should execute, you should go for a while loop.
Structure
The following example shows the general while loop syntax in Arduino IDE. The control expression, i.e. the condition is written inside the parentheses. Unlike the for loop, the while loop has only one expression within its parentheses, and the looping behavior depends on the activity inside the loop’s body.
Body of while loop
}
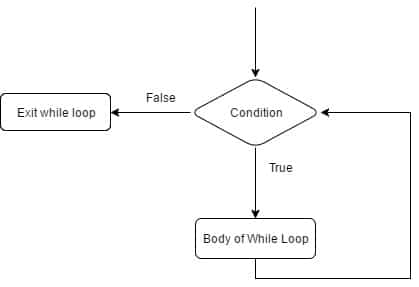
Below is the flowchart showing how a while loop works:
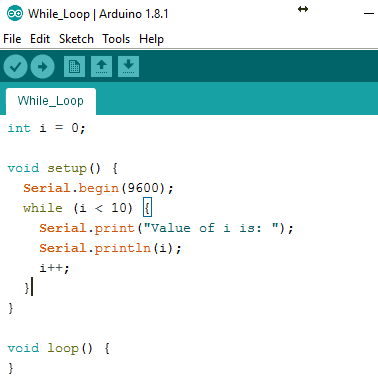
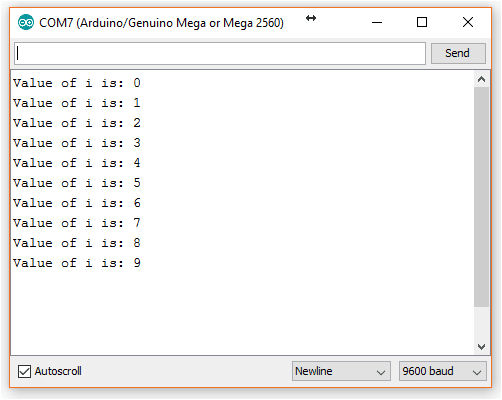
Example
int i = 0;

void setup() {
 Serial.begin(9600);
 while (i < 10) {
 Serial.print("Value of i is: ");
 Serial.println(i);
 i++;
 }
}

void loop() {
}
Conclusion
In conclusion, while loops are a powerful tool to create loops that can execute an unknown number of times until a condition is met. A while loop has one condition that is tested before and after the execution of the loop body. The condition is written within parentheses and the loop body is written inside the curly braces. A flowchart is a useful tool to help visualize the flow of a while loop.