Introduction
Touch sensors, as the name suggests, sense, or detect a touch, i.e. a physical contact made by something, typically a human. Unlike a button or switch, touch sensors are more sensitive, and are often able to respond differently to different kinds of touch, such as tapping, and swiping.
Working Principle
A touch sensor works in a way similar to a tactile (momentary) switch. When someone or something touches the sensor, there is a contact between the touch surface and the lower surface of the sensor and the circuit is complete. As a result, current flows through the circuit. When there is no contact between the two surfaces the circuit is open and no current flows.
Capacitive Touch Sensor
Capacitive touch sensors are one of the most commonly used types of touch sensors. They are widely used in portable electronic devices such as Smartphones and MP3 players. The capacitive touch sensors are designed keeping in mind the fact that human beings have a certain amount of free charge. The sensor, when not touched has a certain amount of charge that is the reference. Whenever you touch the surface of the sensor, the amount of charge at the surface goes beyond the set reference and the sensor is activated.
evive has 12 touch inputs, which are interfaced via the MPR121 chip using the SPI interface.
These touch inputs can be attached to any fruit or metal surface and can be used as inputs. These inputs, otherwise complicated to interface, but can easily be interfaced with Arduino IDE using the Adafruit MPR121 library.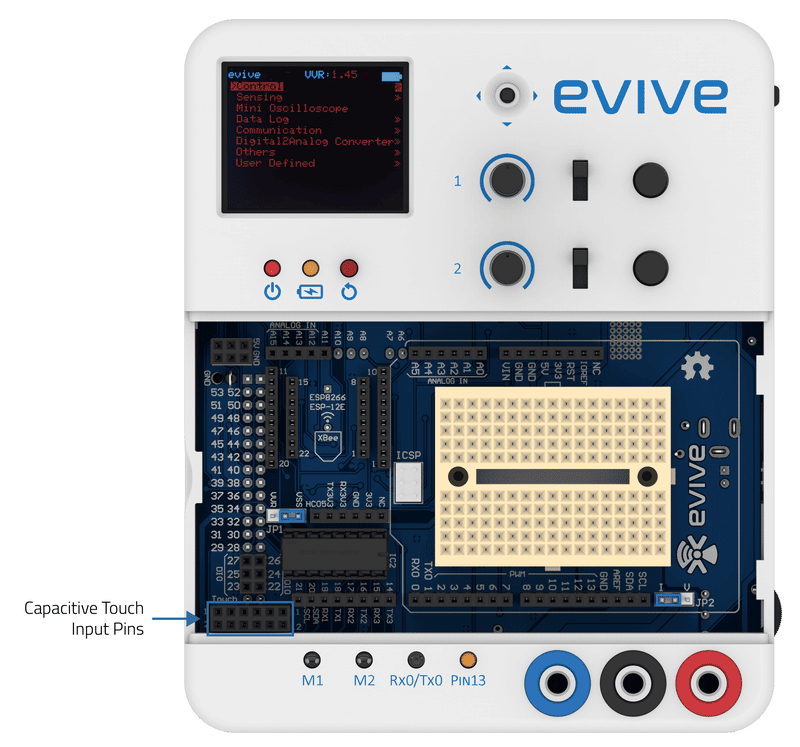
Example
In this example, we will connect a banana or any other fruit to channel 1 and detect if someone has touched the banana or not, and display the result accordingly on the TFT Screen.
Below is the Arduino IDE sketch:
/*
   evive Touch TFT Display

   This code detects if someone have touched banana attached to channel 1
   of Touch inputs and display the state on TFT Screen.

  Explore more on:https://thestempedia.com/tutorials/arduino-ide-touch-input/

*/

#include <evive.h>
void setup() {
  // put your setup code here, to run once:
  tft_init(INITR_BLACKTAB);              // initialize a ST7735S chip, black tab
  tft.fillScreen(ST7735_BLACK);
  touchPins.begin(0x5A);
}

void loop() {
  tft.drawRoundRect(20, 30, 120, 68, 10, ST7735_WHITE);
  tft.setTextColor(ST7735_WHITE);
  tft.setTextSize(2);
  tft.setCursor(50, 40);
  tft.println("STATE");
  if (touchPins.isTouched(1))
    tft.fillRoundRect(40, 65, 80, 25, 5, ST7735_GREEN);
  else
    tft.fillRoundRect(40, 65, 80, 25, 5, ST7735_RED);
}

Conclusion
The example code above provides a good introduction to working with touch sensors in the Arduino IDE. Touch sensors are useful in a wide variety of applications, and can be easily implemented in the Arduino IDE with the help of the Adafruit MPR121 library. With the help of this tutorial, you can now easily use evive’s touch sensors in your projects.