Introduction
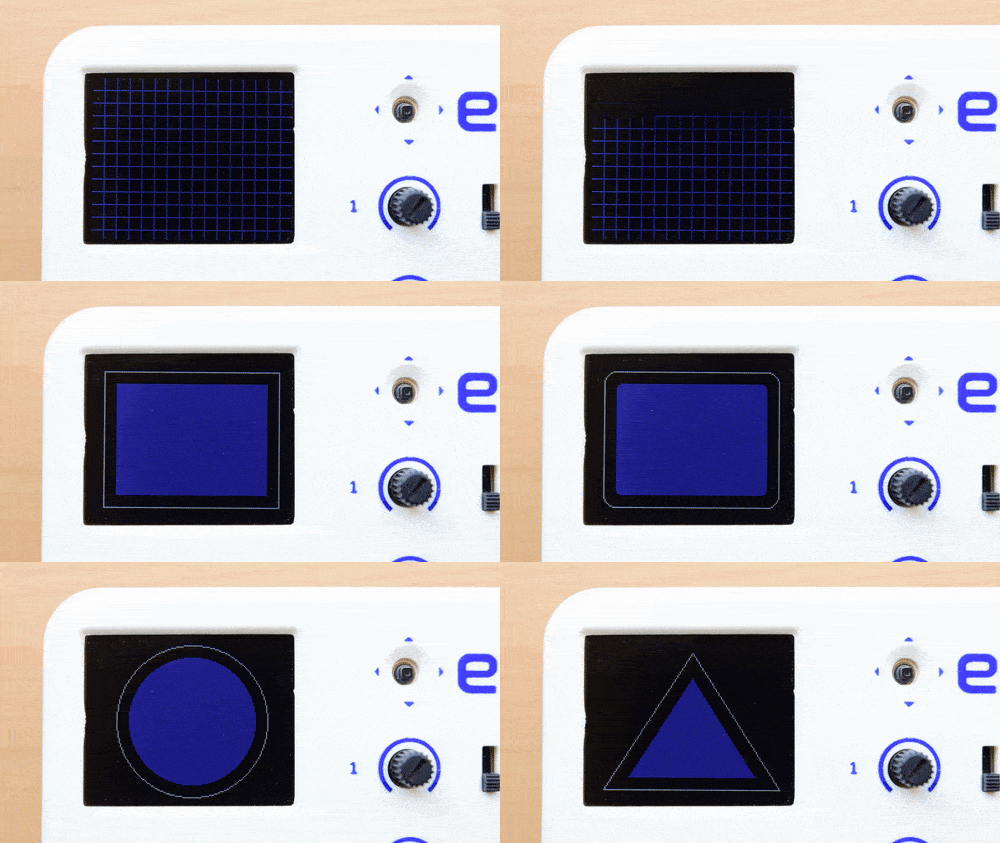
evive library for TFT Screen in Arduino IDE includes certain functions that allow you to draw lines and different shapes such as:
- Rectangle
- Circle
- Triangle
Functions
Below is the list of the functions present in the library:
| Function | Description |
|---|---|
| drawLine(int16_t x0, int16_t y0, int16_t x1, int16_t y1, uint16_t color) | Draw a line using two points |
| drawFastVLine(int16_t x, int16_t y, int16_t h, uint16_t color) | Draw a vertical line |
| drawFastHLine(int16_t x, int16_t y, int16_t w, uint16_t color) | Draw a horizontal line |
| drawRect(int16_t x, int16_t y, int16_t w, int16_t h, uint16_t color) | Draw a rectangle using one point coordinate, width and height |
| fillRect(int16_t x, int16_t y, int16_t w, int16_t h, uint16_t color) | Draw a filled rectangle using one point coordinate, width and height |
| drawCircle(int16_t x0, int16_t y0, int16_t r, uint16_t color) | Draw a circle using center point coordinate and radius of the circle |
| fillCircle(int16_t x0, int16_t y0, int16_t r, uint16_t color) | Draw a filled circle using center point coordinate and radius of the circle |
| drawTriangle(int16_t x0, int16_t y0, int16_t x1, int16_t y1, int16_t x2, int16_t y2, uint16_t color) | Draw a triangle using three points coordinate |
| fillTriangle(int16_t x0, int16_t y0, int16_t x1, int16_t y1, int16_t x2, int16_t y2, uint16_t color) | Draw a filled triangle using three points coordinate |
| drawRoundRect(int16_t x0, int16_t y0, int16_t w, int16_t h, int16_t radius, uint16_t color) | Draw a round rectangle using one point coordinate, width, height and radius |
| fillRoundRect(int16_t x0, int16_t y0, int16_t w, int16_t h, int16_t radius, uint16_t color) | Draw a filled round rectangle using one point coordinate, width, height and radius |
Example
This example is a simple Arduino IDE sketch that displays the use of each function discussed above. It demonstrates how to draw lines and shapes.
/*
  Using TFT Display to draw shapes

  This code shows how to use TFT display attached on evive for drawing different shapes.
  Explore more on : https://thestempedia.com/tutorials/tft-graphics/
*/

#include <evive.h>
void setup() {
  tft_init(INITR_BLACKTAB); // this is used to initialize TFT display
  tft.fillScreen(ST7735_BLACK); // this filles display with black colour
}
void loop() {
  // Drawing Lines
  tft.drawLine(10, 10, 150, 118, ST7735_BLUE);
  tft.drawLine(10, 118, 150, 10, ST7735_BLUE);
  delay(1000);
  tft.fillScreen(ST7735_BLACK);

  // Drawing Fast Verticle Lines
  for (int i = 10; i < 151; i = i + 10)
  {
    tft.drawFastVLine(i, 1, 128, ST7735_BLUE);
  }

  // Drawing Fast Horizontal Lines
  for (int i = 10; i < 121; i = i + 10)
  {
    tft.drawFastHLine(1, i, 160, ST7735_BLUE);
  }
  delay(1000);
  tft.fillScreen(ST7735_BLACK);

  // Draw Rectangle
  tft.drawRect(10, 10, 140, 108, ST7735_WHITE);
  tft.fillRect(20, 20, 120, 88, ST7735_BLUE);
  delay(1000);
  tft.fillScreen(ST7735_BLACK);

  // Draw Round Rectangle
  tft.drawRoundRect(10, 10, 140, 108, 10, ST7735_WHITE);
  tft.fillRoundRect(20, 20, 120, 88, 4, ST7735_BLUE);
  delay(1000);
  tft.fillScreen(ST7735_BLACK);

  // Draw Circle
  tft.drawCircle(80, 64, 60, ST7735_WHITE);
  tft.fillCircle(80, 64, 50, ST7735_BLUE);
  delay(1000);
  tft.fillScreen(ST7735_BLACK);

  // Draw Triangle
  tft.drawTriangle(80, 10, 10, 118, 150, 118, ST7735_WHITE);
  tft.fillTriangle(80, 30, 30, 108, 130, 108, ST7735_BLUE);
  delay(1000);
  tft.fillScreen(ST7735_BLACK);
}
Conclusion
In this lesson, we learned how to draw lines and shapes using the evive library for TFT Screen in Arduino IDE. We learned about the different functions available in the library and how to use them in a sketch. We went through the example sketch and understood how to draw lines, rectangles, circles, and triangles on the display. With some practice and experimentation, you can create amazing visuals for your projects.


