
Introduction
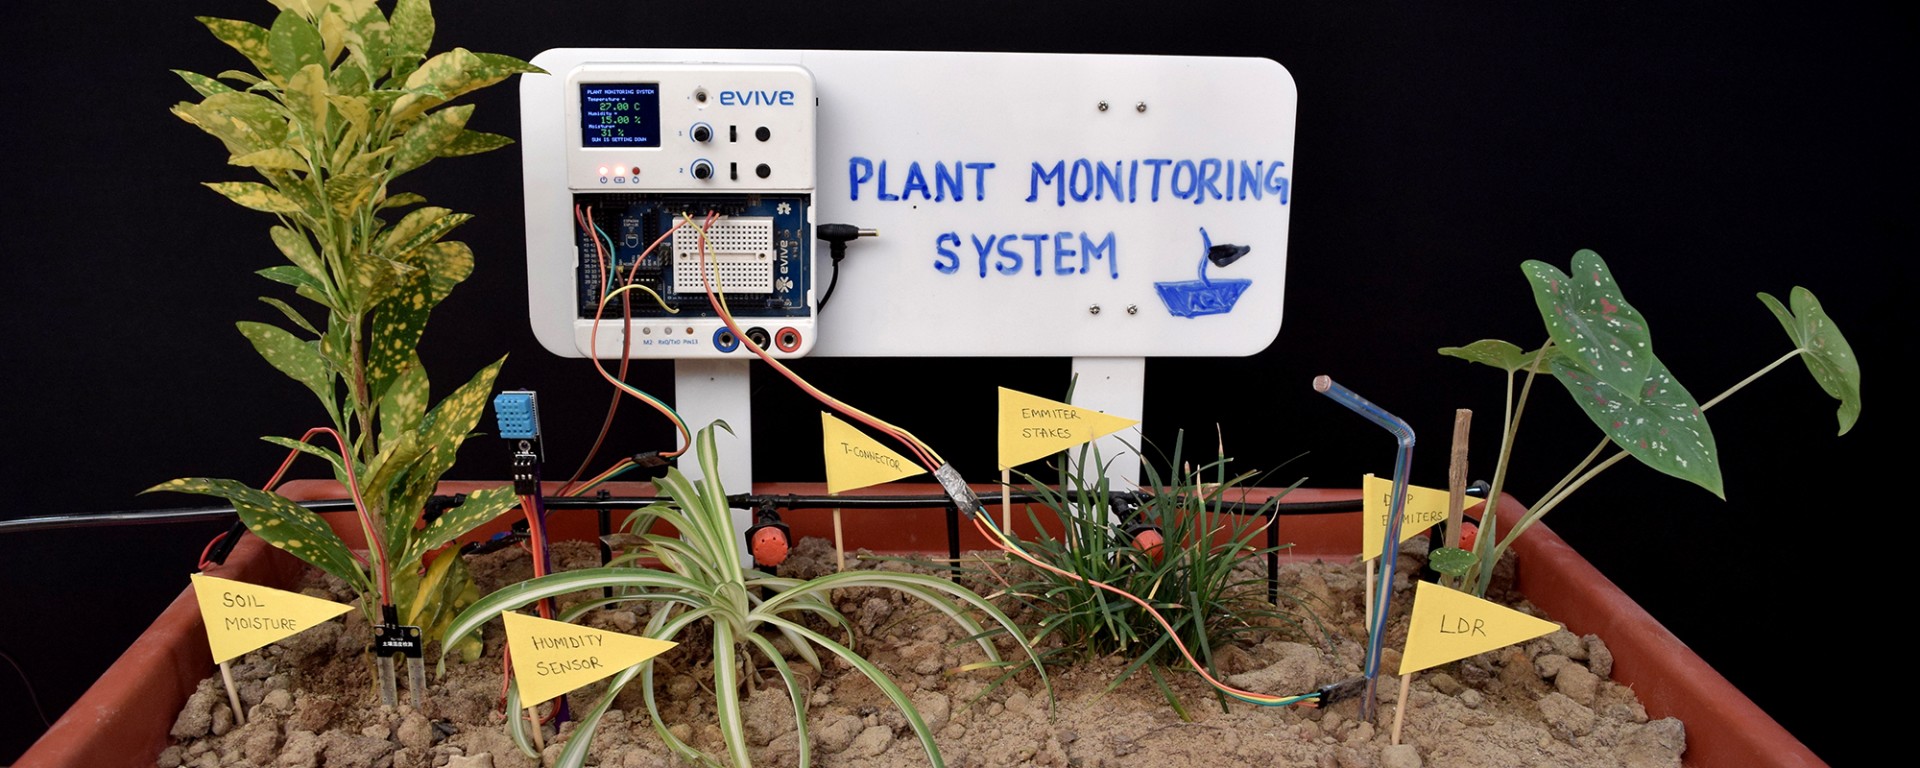
Monitoring plant health is very important for their fast growth. In this busy world, people usually forget to water their plants which leads to bad growth and health of their plants. For ensuring complete development of plants it is necessary to develop proper surrounding conditions in which plants grow. We are now going to make a small DIY Plant Monitoring system whose data will be displayed on the evive screen. The evive screen will display the following data:
- Moisture sensor will sense the amount of moisture present in the soil.
- The humidity of the surrounding is sensed by Humidity sensor DHT11 sensor.
- The temperature of the surroundings is sensed by the Humidity sensor DHT11.
- Amount of sunlight is sensed by the LDR sensor.
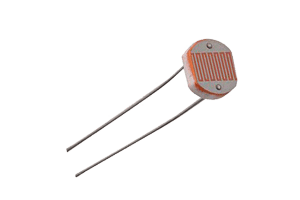
LDR sensor
LDR (wikipedia) are light sensitive devices most often used to indicate the presence or absence of light or to measure the light intensity. An LDR can be applied in light-sensitive detector circuits and light-activated and dark-activated switching circuits.
How does LDR sensor work?
The resistance of a photoresistor decreases with increasing incident light intensity. In other words, it exhibits photoconductivity. A photoresistor is made of a high resistance semiconductor. In the dark, a photoresistor can have a resistance as high as several megohms (MΩ), while in the light, a photoresistor can have a resistance as low as a few hundred ohms.

Setting up the circuit for LDR sensor
The circuit of LDR sensor is explained below
-
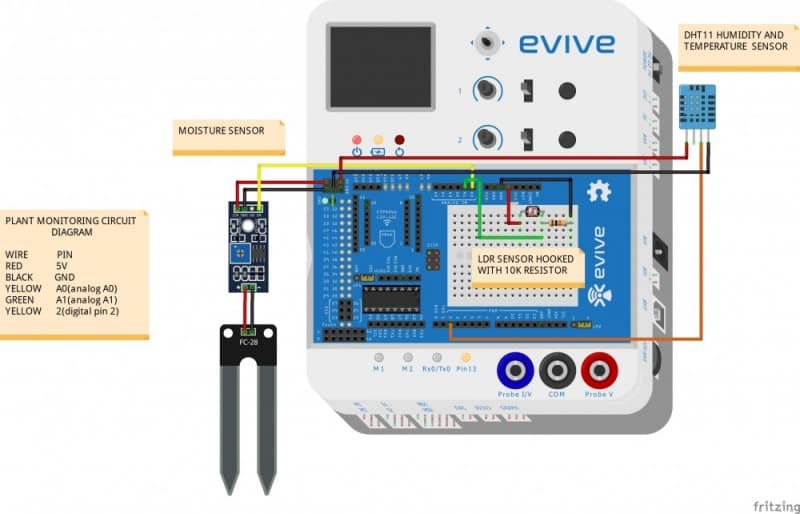
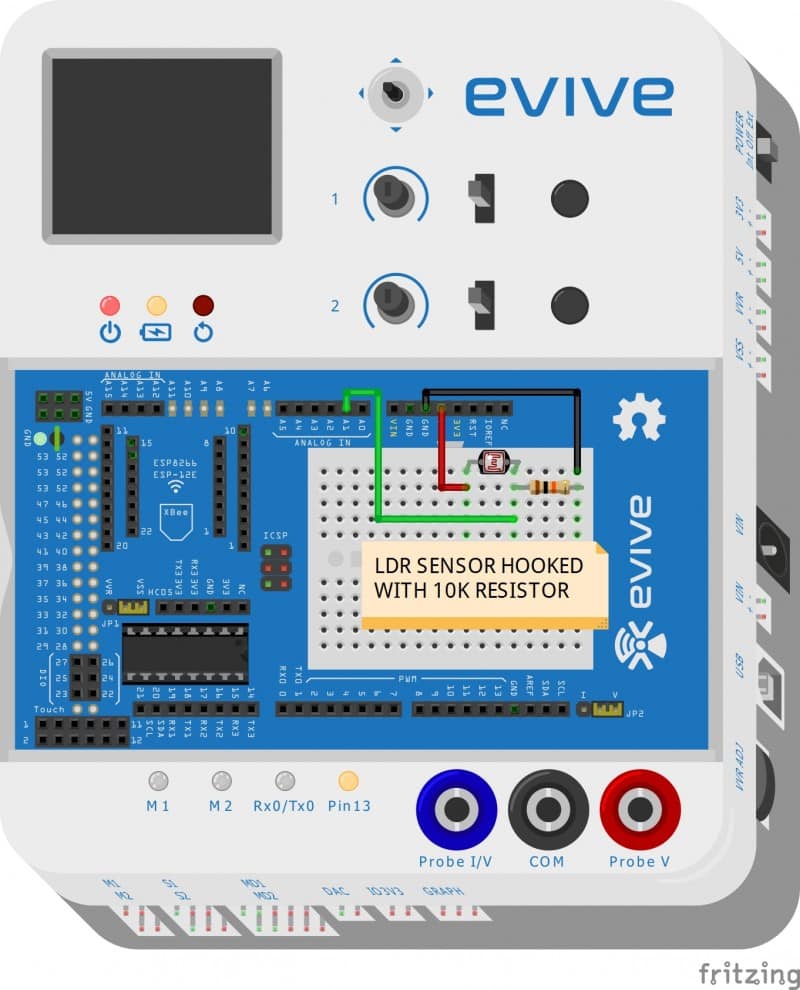
One end of LDR is connected through jumper wire(red wire ) to the 5V power supply in the evive board.
-
Another end of LDR is soldered with 10K resistor. Through the common junction of LDR and 10K resistor, a jumper wire is taken and hooked into the analog input(here we have used A1 pin number in the evive board) of the evive board.
-
The free end of the resistor is grounded with the help jumper wire(to make it more attractive the circuit can be placed inside the straw).

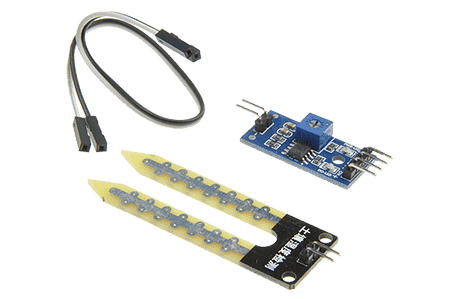
Soil Moisture sensor
Soil moisture sensors (Wikipedia) measure the volumetric water content in the soil. The two probes of moisture sensor are connected to LM293 comparator. This sensor uses the two probes to pass current through the soil, and then it reads that resistance to get the moisture level.
How does soil moisture sensor work?
The Soil Moisture Sensor uses capacitance to measure the water content of soil (by measuring the dielectric permittivity of the soil, which is a function of the water content).M393 IC do the voltage comparing here, a reference voltage (UR) is set by the adjustable potentiometer, when the analog output value over this value, the LM393 comparator will output a digital value to indicate this sensor is triggered by reaching this setup threshold.For more visit soil-moisture-sensor-interfacing-evive

Setting up the circuit for soil moisture sensor
The circuit of soil moisture sensor is explained below:
- + pin of the comparator is connected to the 5V pin of the evive board.
- – pin of the comparator is connected to GND pin of the evive board.
- Out of AO(Analog output) and DO(digital output) AO pin is connected to the analog pin(here in our code we have used A0 pin) of the evive board.

Humidity and temperature sensor
DHT11 is a temperature and humidity sensor which uses a capacitive humidity sensor and a thermistor to measure the surrounding air and spits out a digital signal on the data pin (no analog input pins needed).
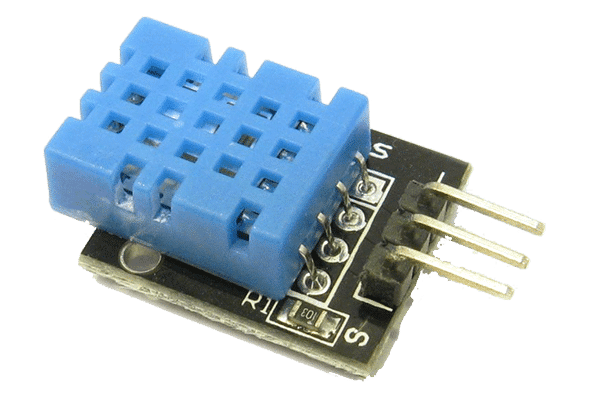
How does Humidity and temperature sensor work?
The DHT11 Humidity and Temperature Sensor consists of 3 main components. A resistive type humidity sensor, an NTC (negative temperature coefficient) thermistor (to measure the temperature) and an 8-bit microcontroller, which converts the analog signals from both the sensors and send out single digital signal.
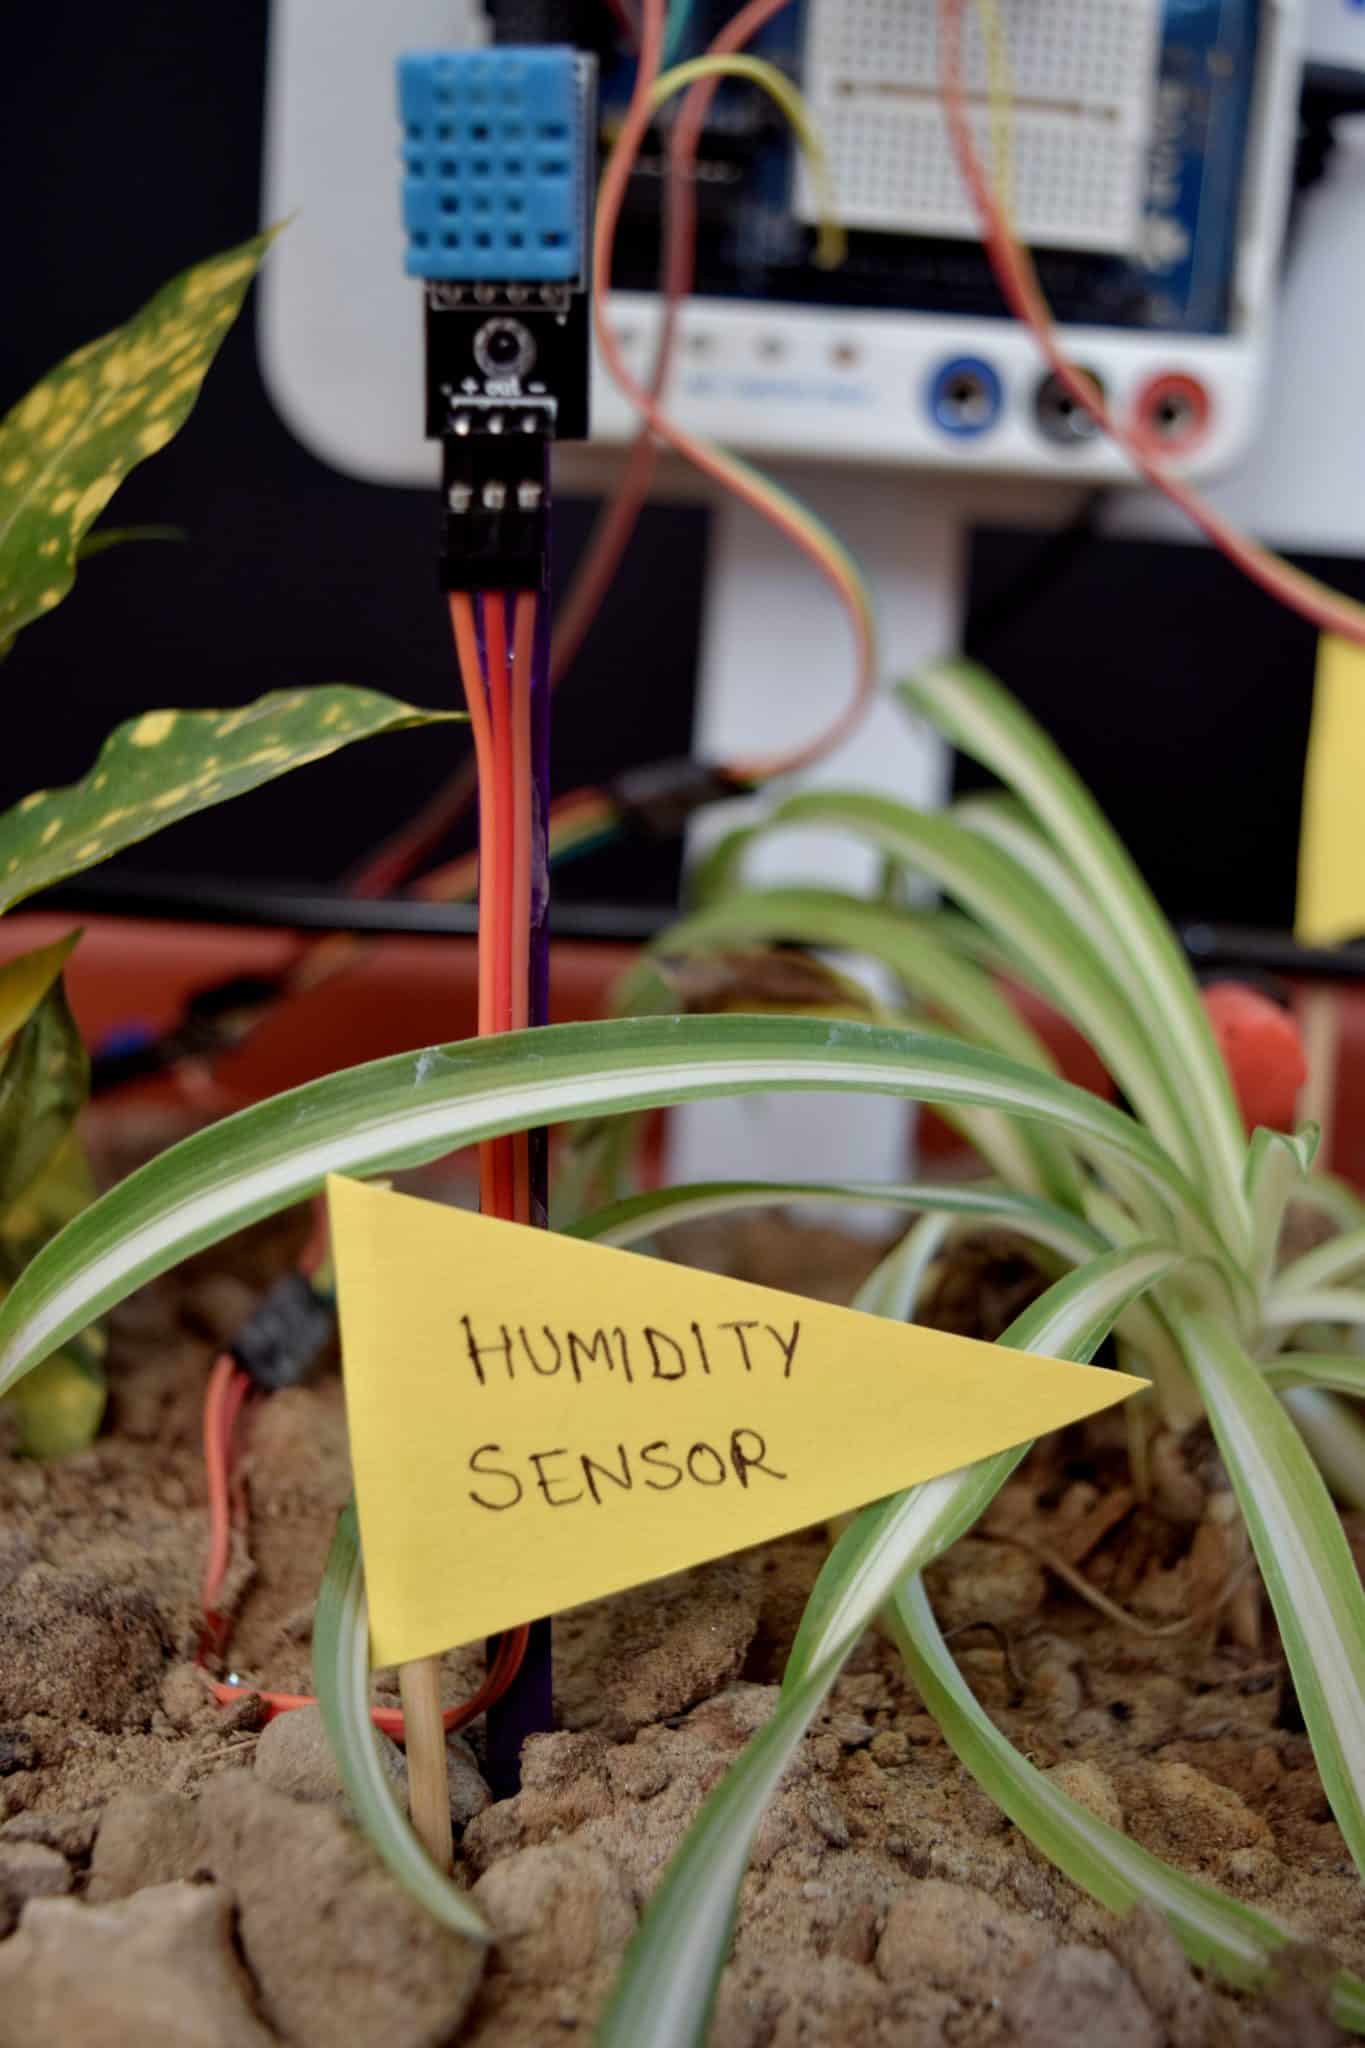
Setting up the circuit for humidity and temperature sensor
The connections between humidity and temperature sensor are explained below
- + Pin is connected with the female jumper wire and the male end to the 5V power supply on evive board.
- – Pin is connected with the female jumper wire and the male end to the ground on evive board.
- OUT Pin is connected with the female jumper wire and the male end to the digital pin.

PictoBlox (Scratch) Code (For PictoBlox User)
- Open PictoBlox, select the board as evive and connect your COM port to evive.
- Make four blocks:
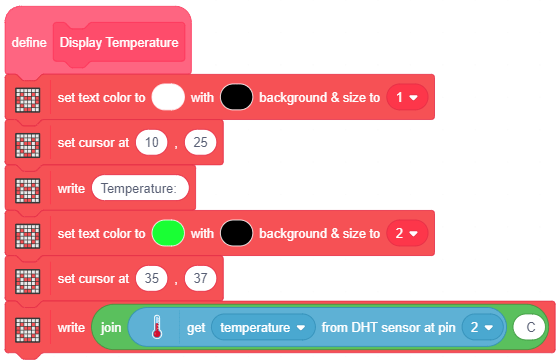
- Display Temperature
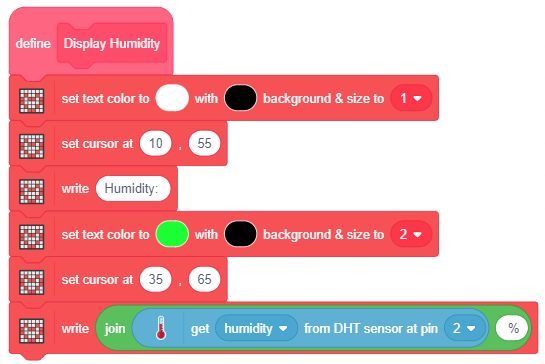
- Display Humidity
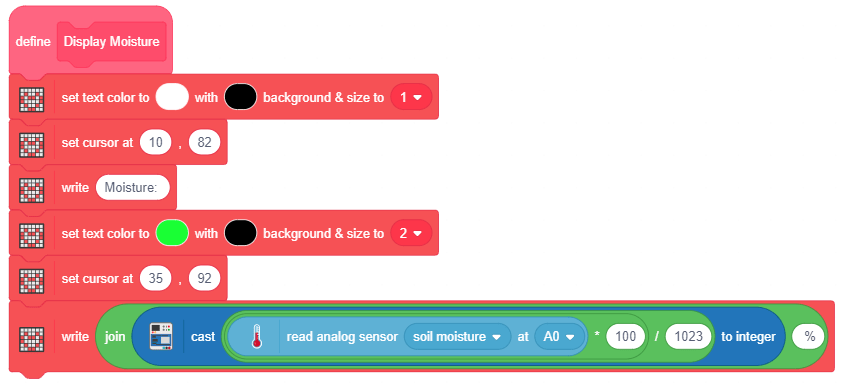
- Display Moisture
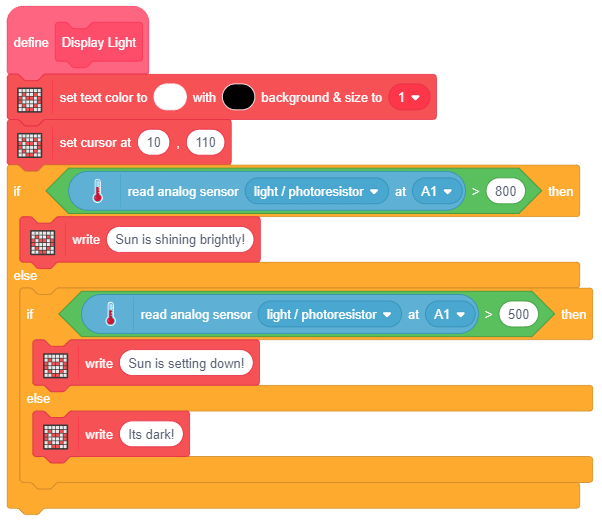
- Display Ligh
- Make the following script to display the temperature from the DHT sensor:
- Make the following script to display the humidity from the DHT sensor:
- Make the following script to display the soil moisture data on TFT Screen:
- Make the following script to display the status of Light:
- If the reading is more than 800, Sun is bright.
- If the reading is between 500 to 800, Sun is setting down.
- If the reading is less than 500, it is dark.
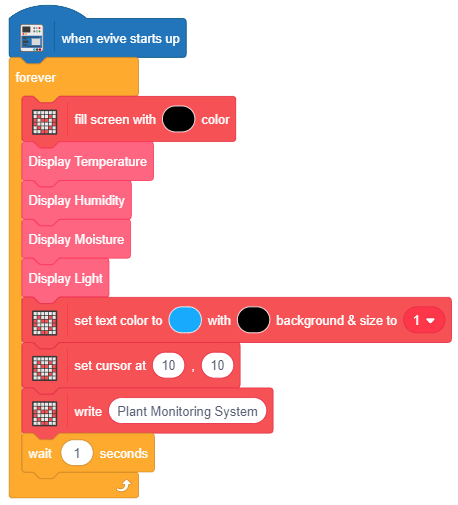
- Finally, make the following script using when evive starts up block to display all the sensors data on TFT.
- Upload the code onto evive.
Arduino Code (For Arduino Users)
After the circuit has been set up upload the Arduino code. The data will be displayed on your evive screen.
Output
The values of the soil moisture sensor, plant temperature and humidity and energy state is displayed on the evive screen.