
Introduction
Now you can check the weather of any place in the world in real-time and plan your days and trips without depending on the weather agencies! In this project, we’re going to make a weather station based on the Internet of Things (IoT) using evive, ESP8266 WiFi module, and PictoBlox – a Scratch 3.0-based graphical programming software. With the weather station, you will be able to monitor the temperature, humidity, wind speed, and visibility of any location in real-time by providing its coordinates.
You can download PictoBlox from HERE.
So, are you ready? Let’s begin right away!
All about OpenWeatherMap API
What is the OpenWeatherMap API?
OpenWeatherMap is one of the leading digital weather information providers. Using OpenWeatherMap API you can get
- Current weather data.
- Access current weather data for any location including over 200,000 cities.
- Current weather data is frequently updated based on global models and data from more than 40,000 weather stations.
The data is available in JSON, XML, or HTML format for Free and all other paid accounts.
Creating Account on OpenWeatherMaps
Go to OpenWeatherMap website: https://openweathermap.org and create a free account.
Connectign evive to the Internet
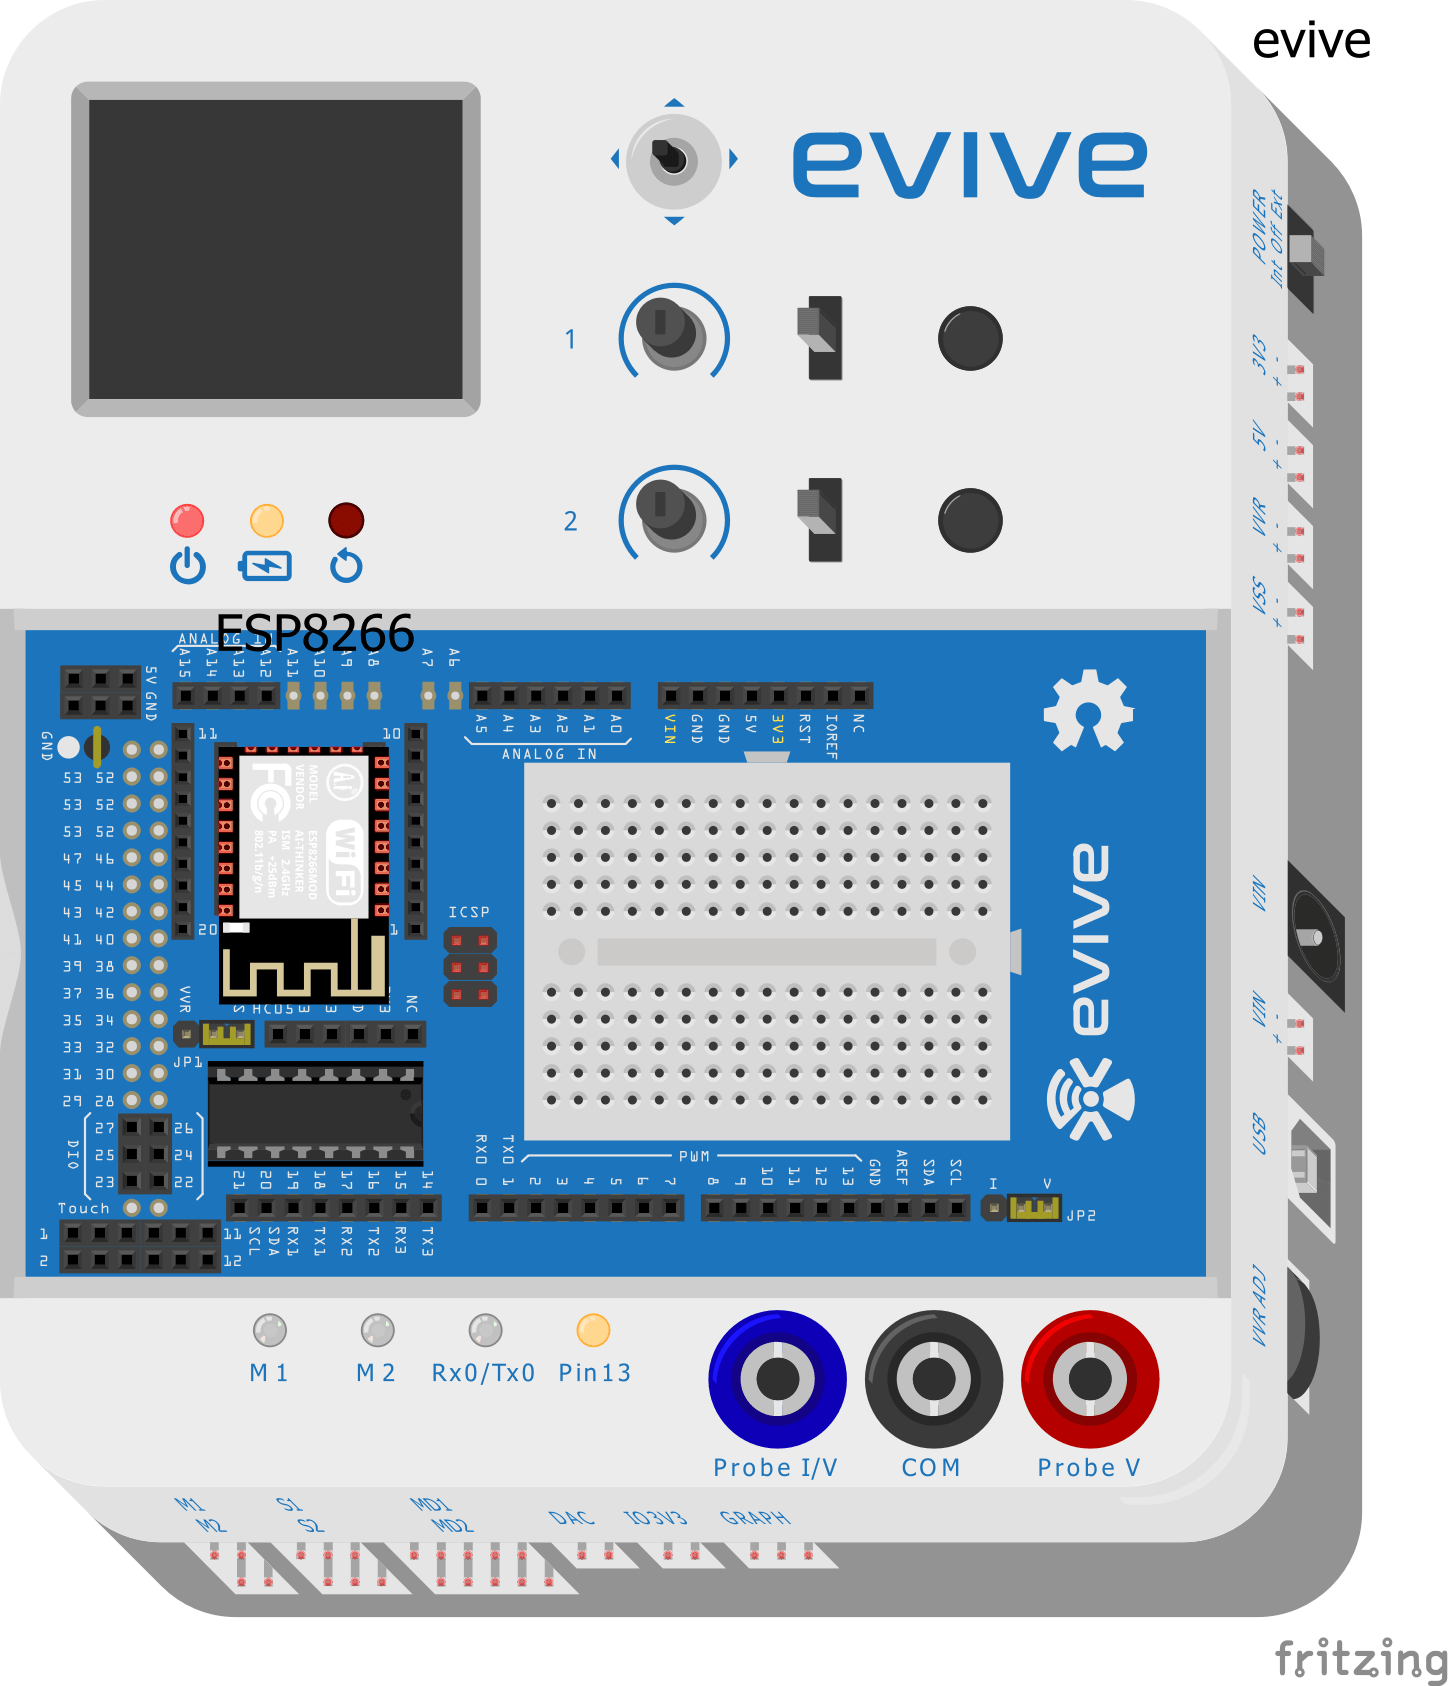
To connect evive with the internet we will use the ESP8266 module. Connect ESP8266 Module to the header on evive
Interfacing evive with PictoBlox
We are going to write the script in PictoBlox.
- First, connect the evive to your computer using a USB Cable.
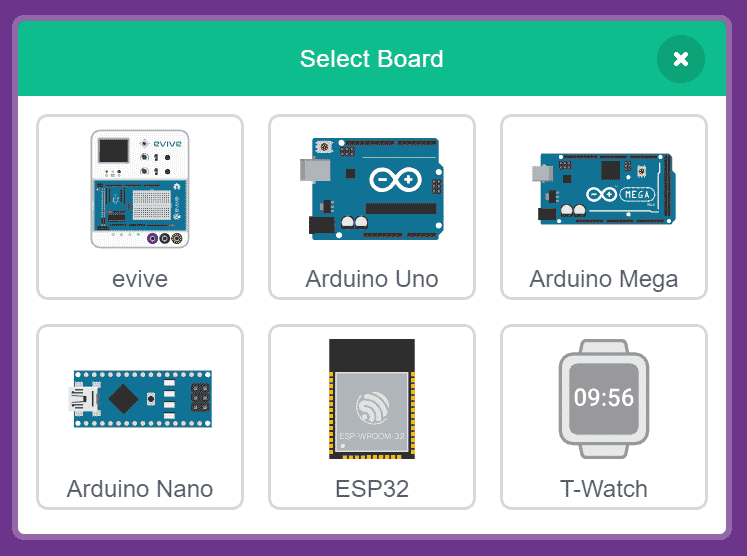
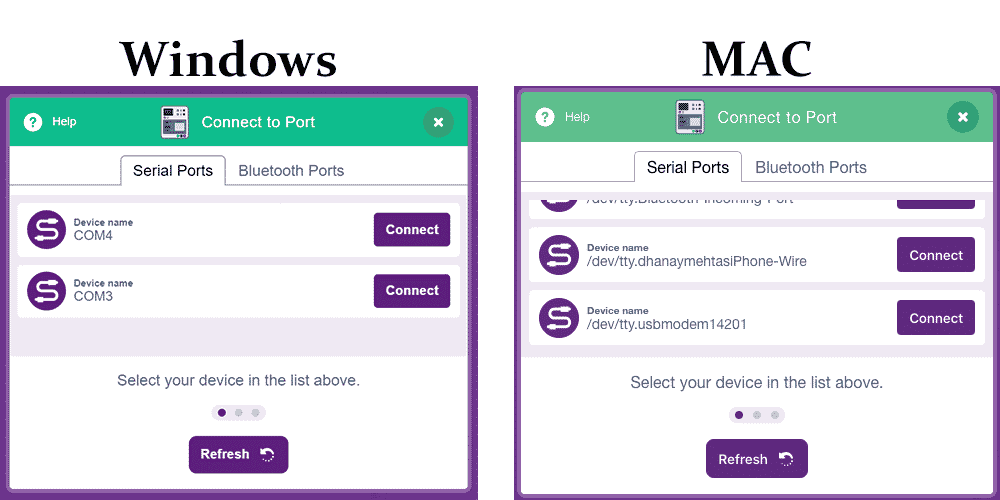
- Next, select evive as your board and choose the appropriate serial port.
- Then, Switch to upload mode.
- Now, to create the script, we must add the Internet extension. Click on the Add Extension and select the Internet of Things from the list.
Understanding IoT Extension Blocks
Connect to Wi-Fi () with password ()
This block connects ESP8266 module connected to evive to the Wi-Fi. The user has to specify the Wi-Fi name and password in the block.
get weather data for latitude () & longitude () with API ()
This block gets the weather data of the specified location (using latitude and longitude) and stores in the internal variables.![]()
get (float) data
The block reports the weather data specified in the input:
- Latitude
- Longitude
- Temperature in C
- Temperature in F
- Humidity
- Visibility
- Wind Speed
- Wind Direction
- Clouds
 get (string) data
The block reports the weather data specified in the input:
- Weather
- Weather Description
- Country code
- City name
- Time of captured data
- Sunrise time
- Sunset time

Let’s begin writing the script.
Writing the Script to Make Weather Reporting System
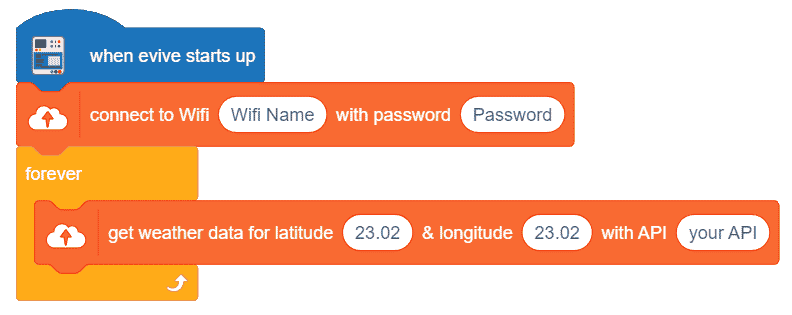
Let’s begin by writing the code to control evive to the Internet.
- Place a connect to WiFi () with password () block and write the name of the WiFi and it’s password to connect evive to your WiFi.
- Place a forever block to run the code continuously.
- Drag and drop a get weather data for latitude () & longtitude () with API () block and fill in the necessary details.
- Finally, place a when evive starts up hat block to execute the script.
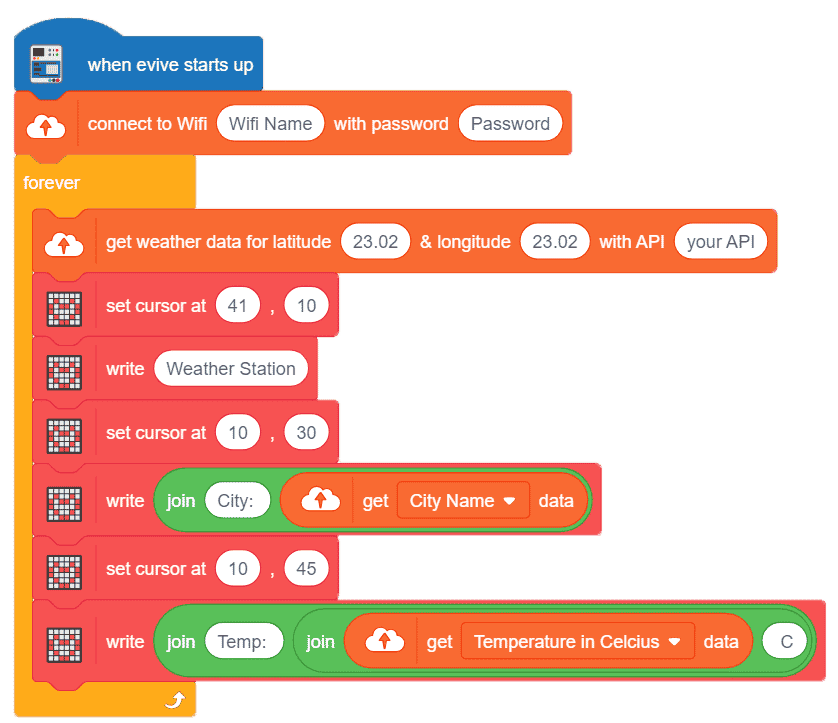
Writing the Complete Script
Now, let’s complete the above script:
- Now, that we will receive the data from the API, let’s display it on evive’s display screen.
- Set the cursor to start writing on the display.
- Place a write () block and place a join block into the space given. Write City in the first space and place a get () data into the second space given and choose City Name from the drop-down below.
- Similarly, write Temperature on the screen.
Upload the code to evive.
Reading the Signals
When you start your evive, you will see two things happening:
- M1 LED glowing:
- Yellow: Wi-Fi is connected successfully.
- Red: When Wi-Fi fails to connect. Check if your Wi-Fi name and password are correct.
- M2 LED glowing:
- Yellow: When it is connected to Cloud.
- Red: If it is not connected to Cloud.
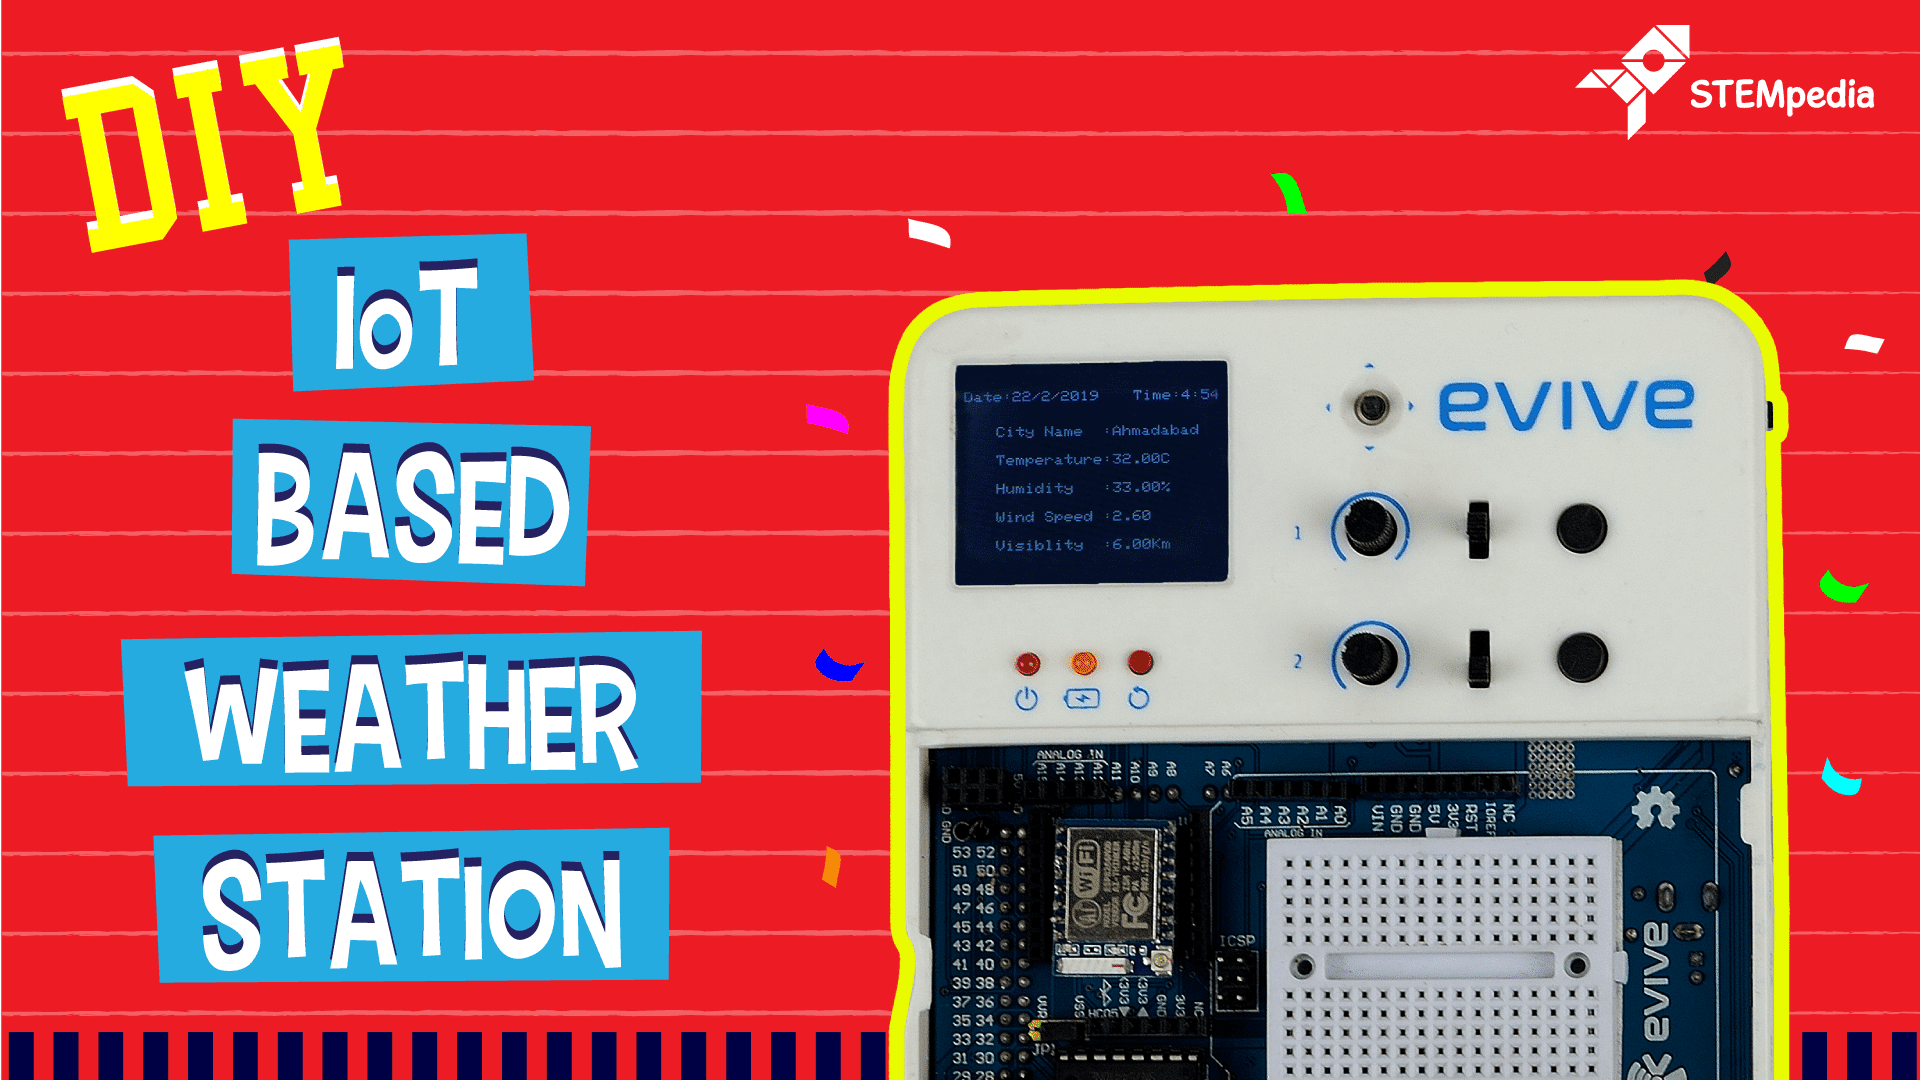
Once both the LEDs are Yellow, you will see the requested data on the evive Screen.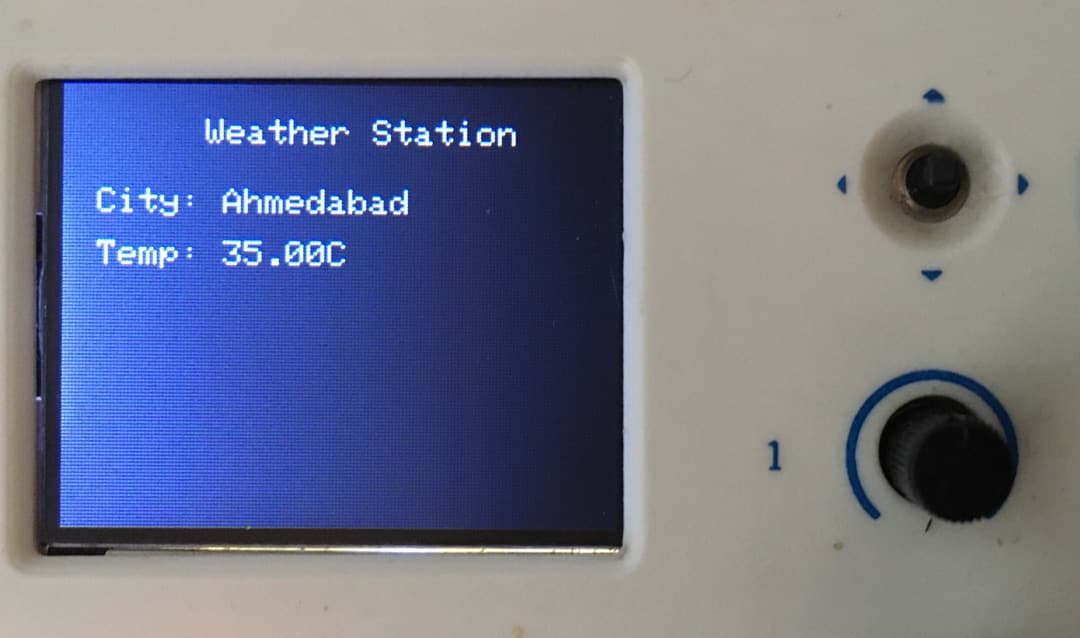
Conclusion
With this, your IoT based weather station is now ready!
BTW, did you check out our amazing campaign yet? If not, go HERE to have a look at why everybody is loving us so much and perhaps even show some love by backing us!