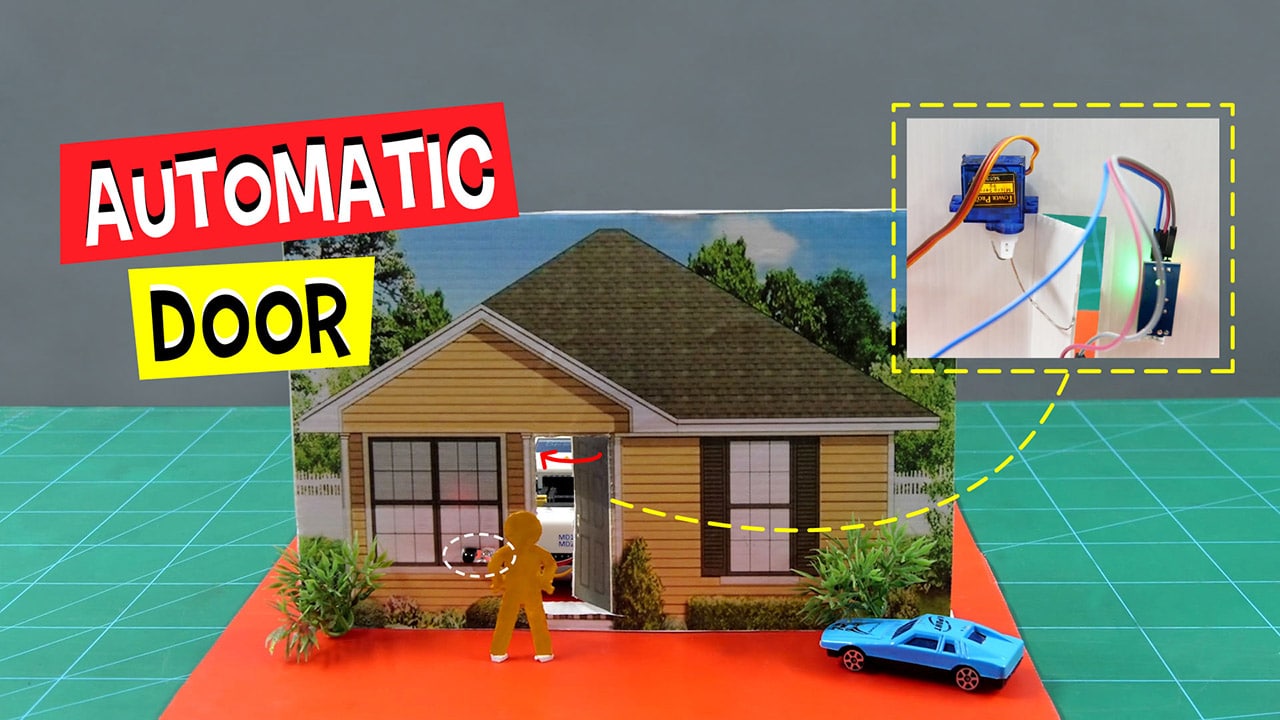

Introduction
The DIY automatic door opening and closing system is a simple version of the automatic door that shopping complexes and lifts have. Our automatic door uses an IR sensor to sense a presence and opens and closes with the help of a servo motor. You’ll find all the components you need to make your own DIY automatic door opening and closing system in the evive Starter Kit. Also, don’t forget to get PictoBlox ‘cause we’ll be writing the code in it!
You can download it from HERE.
Begining in 3, 2, 1… NOW!
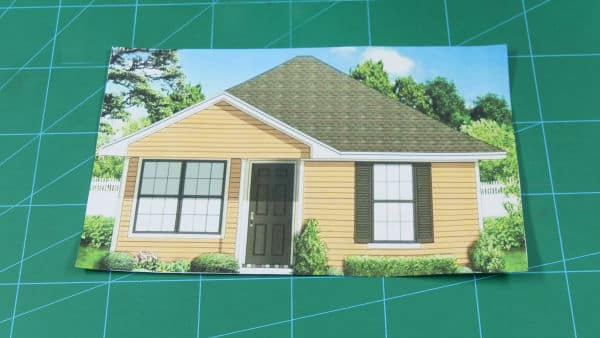
Making the facade of the House
The project will show how to implement the Automatic Opening and Closing System in the miniature house. Thus, we need to build our mini home for the same!

- To make the face, take a print out of your dream house image. Also, if your ideal is Da Vinci, you can even go for drawing the house all by yourself.
- We need to stabilize the house to implement our entire system. Thus, we are going to glue our house on a corrugated sheet.
You can any hard material like the cardboard to hold up your system.
- Take a corrugated sheet and mark the dimensions of the house on it.
- There might be some extra sheet left, thus cut the corrugated sheet along with the markings you have done.
- You have the house’s image and you have the corrugated sheet of the same size. Now, what? Glue them together.
With this the face of our house is ready. B)
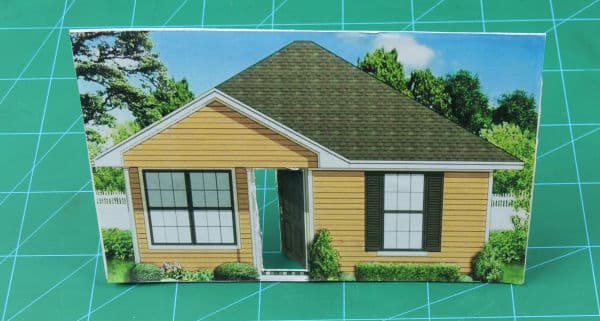
Cutting the Edges of our Automatic Door
The hero of the project is “THE DOOR”. It’s time to introduce him. Let’s again just revise our aim, to make the automatic door that opens and closes when we get near the door. Thus, let’s the edges of the door out to make it moveable.
Cut along three sides of the door using a cutter. This will make the door open and close but not smoothly. Thus, create a slit from the backside for the fourth side.

By doing the above step, we have created a hinge structure for our door, which makes the door opens and closes smoothly.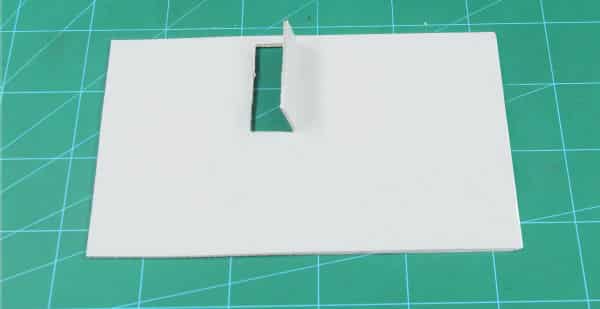
Introducing IR Sensor
We need to implement the Automatic Door Opening and Closing System and make it sense our presence sense and work accordingly.
Thus, Infrared Sensor (IR Sensor) does all the needful.
Why IR Sensor?
An infrared (IR) sensor a proximity sensor, or a ‘nearness’ sensor that senses whether an object(in our case, us!) is near it or not. If yes, the sensor will turn ON; if not, it will remain OFF.
Before, using the Sensor for our Automatic Door, test it first!
Testing the IR sensor
To make the implementation simpler, we will make the testing simpler! How? Using evive- Arduino Based embedded platform.
To debug any electronic component, Pin State Monitor always saves the day. And evive has an inbuilt pin state monitor, thus, just connect the IR sensor and follow the below set of steps:
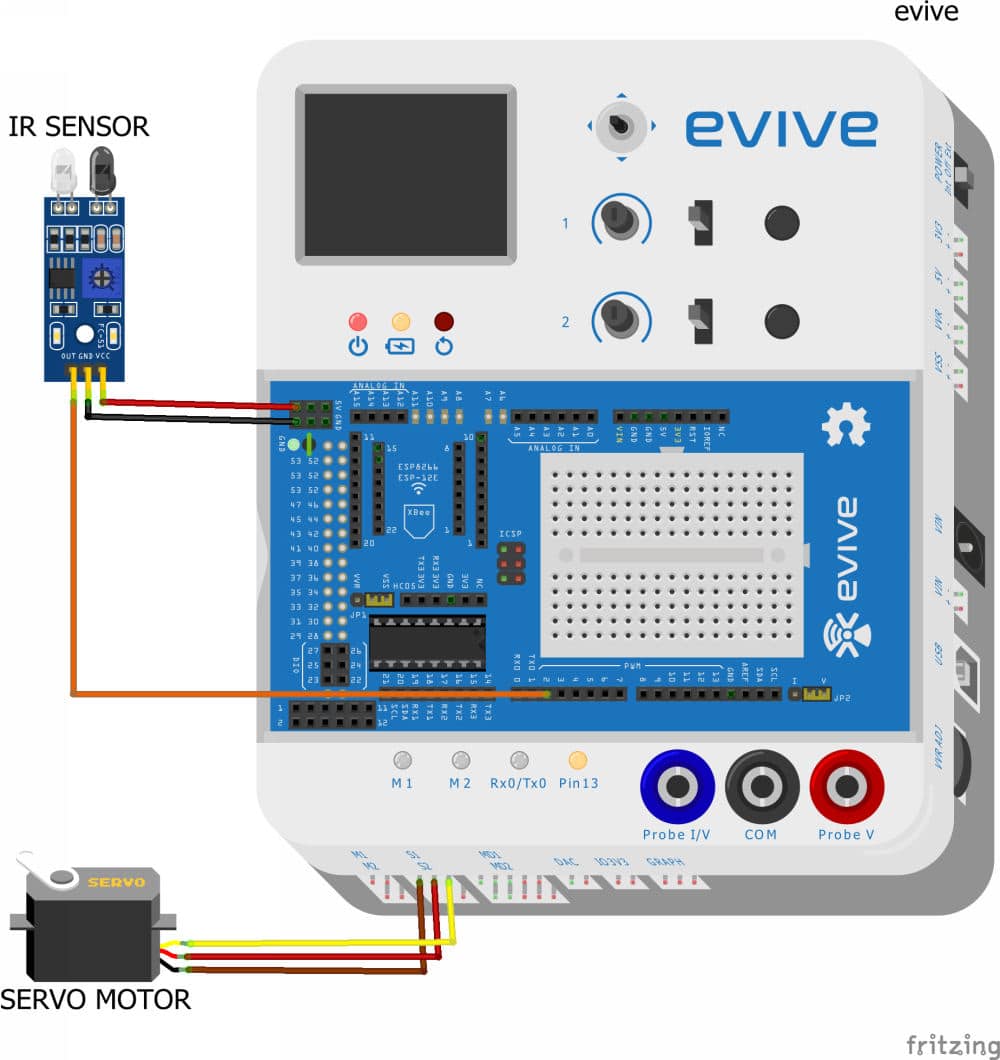
Connect:
- OUT of IR sensor to Digital pin 2 of evive.
- VCC of IR Sensor to +5V pin of evive.
- GND of IR Sensor to GND of evive.
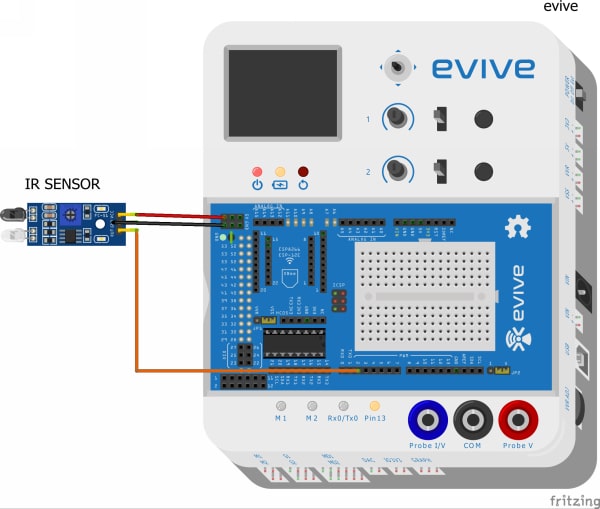
Switch evive ON – Choose Pin State Monitor from the menu – Select Digital Pins – Observe!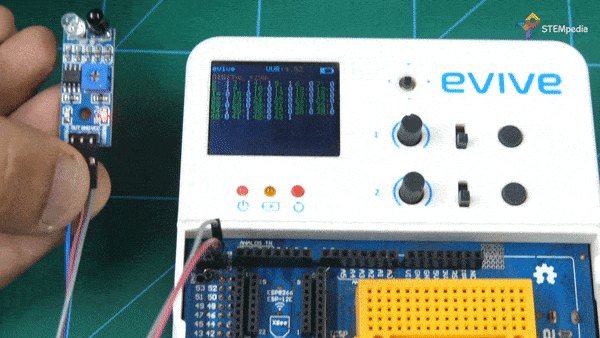
You may notice that as soon as you bring your hand close to the IR Sensor, the value next to pin 2 changes to 0 and if the hand is away it changes back to 1.
Attaching the sensor
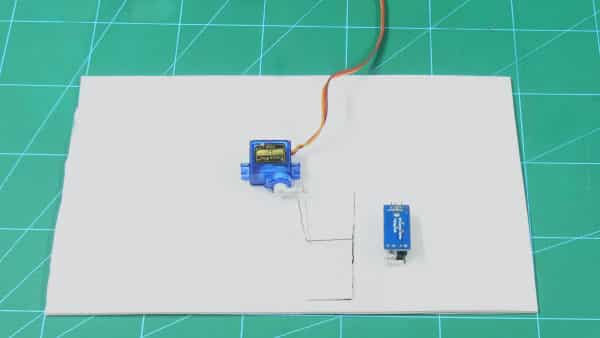
Once we have made sure that the sensor is working correctly, we need to now install it in our house to make the door open and close automatically.
As we need the Proximity Sensor to sense our presence as soon as we approach the door. Create a small hole in front of the house near the door.
Place the Proximity sensor in such a way that both its LEDs i.e. Signal LED and the Power LED is in front of the house. Fix it in that position using a Hot Glue.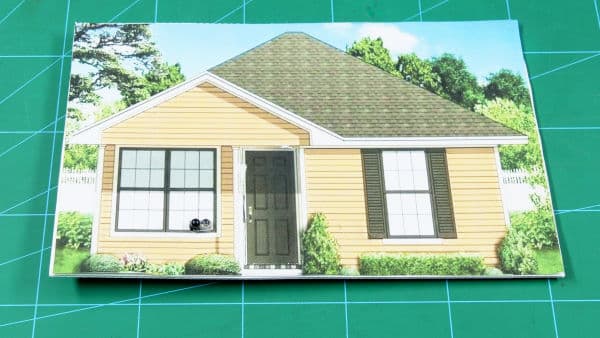
 Now, we have added the part where the sensor will detect the presence but what happens next? Follow the below steps to make the door’s opening and closing system using IR Sensor implement successfully.
Opening and Closing Mechanism of the Automated
Now, we need that our automatic door should open as soon as the signal Digital Pin reads 0. How will we make sure to open the door? Using the servo motor.
As soon as Digital Pin reads 0 the servo should turn 90 and when it is 1 then the servo should return to its initial position i.e. 0 degrees.
Now, as we have worked with IR, set the Servo to 0 degrees first so that the door should always be closed.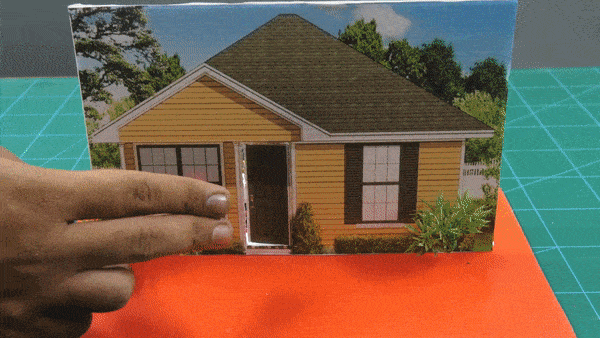
Setting the Servo Angle
We have tested the IR Sensor, similarly, we are going to set the servo angle in an easy and simple way! Using evive. B)
- Connect your Servo to Servo Channel 1 or S1 on evive.
Alert: Make sure that the brown wire is connected in the left-most side. - Switch evive ON.
- Choose Controls.
- Select Servo Motor.
- Select Servo Motor 1.
Now, using evive’s potentiometer 1 and set the angle to 0 degrees.
Attaching Servo Assembly
Wonders Paper Clip can do!
- We are going to use a paper clip to connect the servo horn to the door.
- Take a paper clip and reshape it.
- Once done, attach the servo horn to the paperclip so that it gets fixed to the paper clip.
- Once, we have the servo horn and the paper clip assembly with us. It’s time to add the side-kick of the hero, “THE SERVO MOTOR”. Once the signals are been sent by the IR Sensor, it is servo’s time to execute the next action i.e. opening and closing the door. Now, we know the job of the servo motor, thus, we need to give it the position it should be on! Glue the servo motor at the back of the house but near the door.
- Once done, fix the servo horn attached to the paper clip to the servo head and the other end of the paper clip to the door.
Creating the base of the House
- To make the base, we are again going to use the corrugated sheet of size 30 cm x 30 cm and mark a line a few centimeters away from one of the edge.
- Apply hot glue on the line drawn. Now, take a thin strip of the corrugated sheet of width 3 cm and glue it on the This will give support for the face of the house.
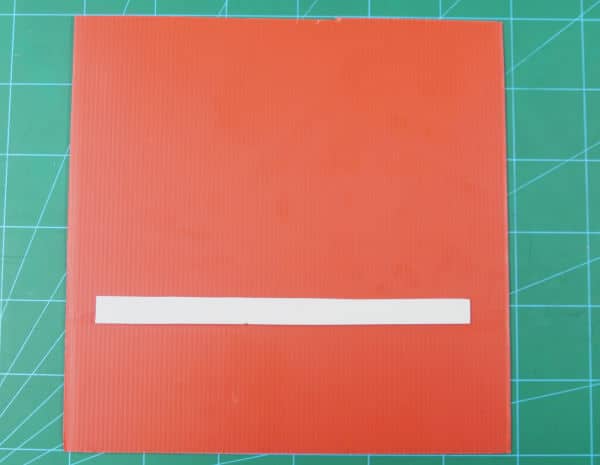
- Now, to this strip, attach our facade using hot glue.

With this, our structure of Arduino Based Automatic Door is ready.
Making the Connection
Make the connections of the IR Sensor and Servo Motor as given below:
Servo Motor
- Connect the servo motor to evive’s Servo Channel 1.
IR sensor
- Connect OUT to Digital pin 2 of evive.
- Connect VCC to +5V pin of evive.
- Connect GND to GND of evive.
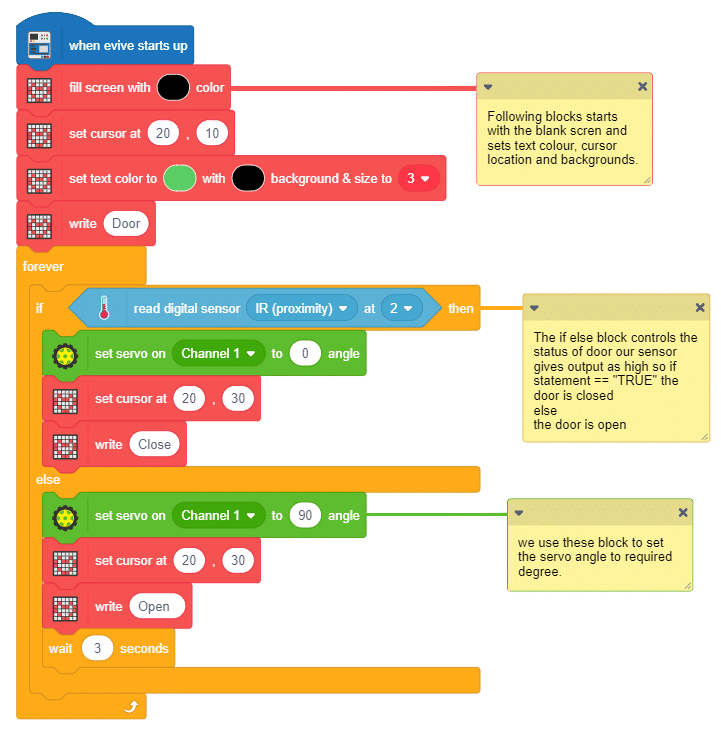
Writing the PictoBlox Code for Automatic Door
The program will start running from the very first block. Which makes the program to execute as soon as evive starts up.
The next block, i.e. forever block will make sure that the sensor reads the proximity of the objects continuously.
The default state of the door is closed i.e. the servo angle is 0degrees.
If the Digital Pin 2 at which our proximity sensor is connected reads 1 or HIGH when nothing is, then the door remains closed.
The door will open if the reading from the IR sensor i.e on the Digital Pin 2 is 0 or LOW when it senses the presence and would close after a few seconds.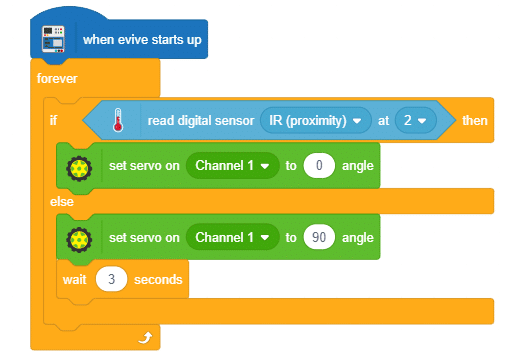
Adding an Extra Feature
Apart from the basic function, we can also display the Door Status on evive’s TFT Display. Just upload the below code and make the project run!
Conclusion
With this, your DIY automatic door opening and closing system is ready!


