

Introduction
‘Tis the season of joy, giving gifts, and sharing sweets and treats! How about doing something special for Satns this time? Learn how to make your own automatic chocolate dispenser a.k.a. a chocolate vending machine and make your Christmas sweeter than ever before by sharing treats with dear Santa! All the electronic components that you need to make the chocolate dispenser is available in the evive Starter Kit. And you can program it without any kind of hassle in PictoBlox – a Scratch block based graphical programming software. You can download PictoBlox from HERE.
What is more, is that the automatic chocolate dispenser can also act a beautiful piece of Christmas decor!
So, are you ready for some “sweet” DIY?
Let’s begin!
Collecting the 3D Printed Parts
Before we begin the assembly of our chocolate vending machine, we need to 3D printed some of the components.
You can directly download the STL files from Thingiverse.
Setting the Servo Angle
Once, we have all the 3D printed parts ready!
We can start the assembly, but there is just one more thing that we need to make sure. i.e the metal servo angle should be 0°.
Thus, to ensure that we’ll check the angle using evive– an Arduino embedded all-in-one prototyping platform.
- Take a metal servo and connect it to evive’s Servo Channel 1 i.e. S1.
- Then, switch ON evive.
- From the menu select Controls.
- Then navigate to Servos.
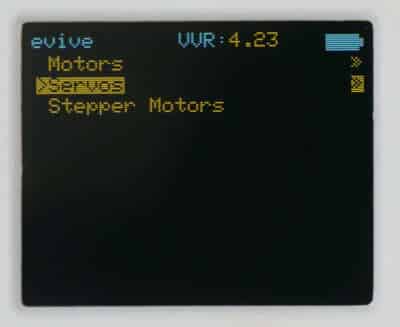
- Finally, select Servo 1 as we have connected our servo to Servo Channel 1.
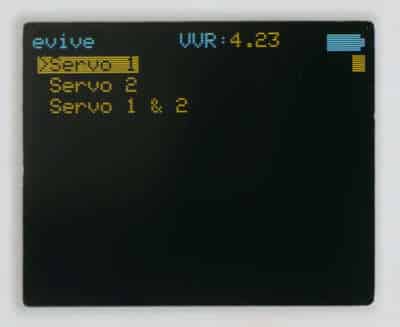
- Now, set the angle to 0° using potentiometer 1.
Making the Dispensing Mechanism
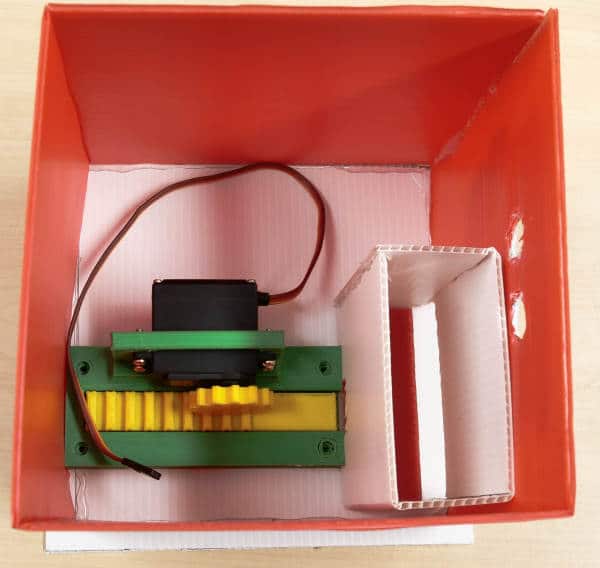
Let’s begin by making the chocolate dispensing mechanism with the metal servo and the 3D printed parts.
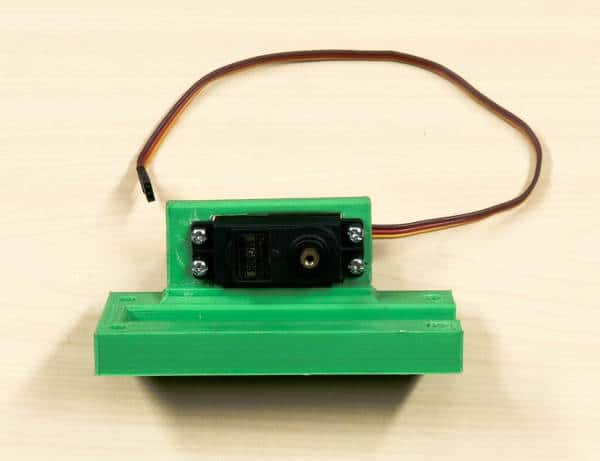
- First, take the 3D printed gear, slider and the baseplate.
- Next, mount the servo motor onto the baseplate using M3 bolts of 12mm length such that the servo head faces outwards.
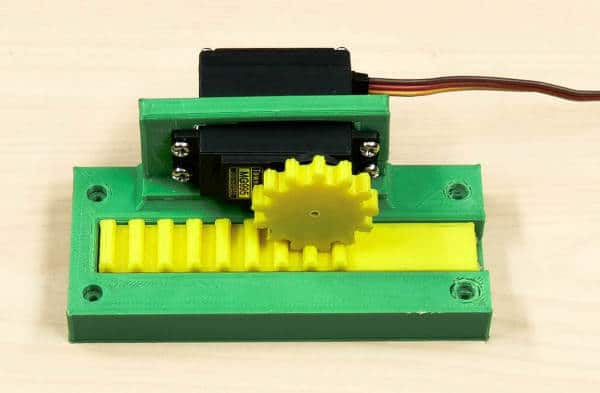
- Then, place the slider inside the slot given on the baseplate.
- Finally, fix the gear onto the servo head such that the teeth of the gear match the teeth on the slider.
Making the Structure of the Chocolate Dispenser
Now that the dispensing mechanism is ready, it’s time to make the chocolate/candy dispenser.

We will first make the structure of the box i.e. the top and the bottom plate and the sidewalls and then add the details in them in the later steps.
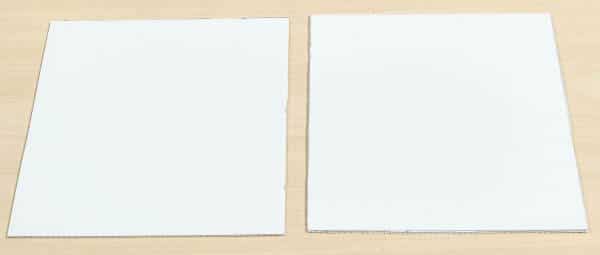
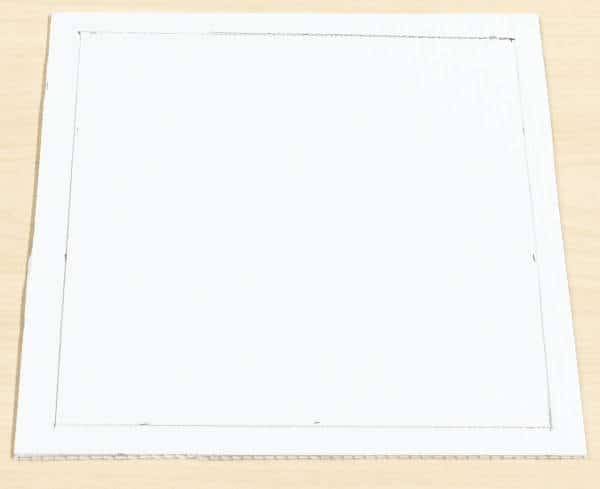
- For making the top and bottom side of the dispenser box. Take a white corrugated sheet and cut two squares of 17 cm * 17 cm each.
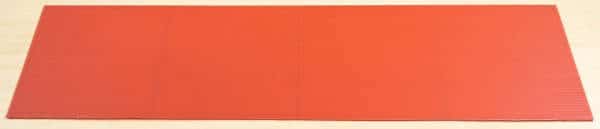
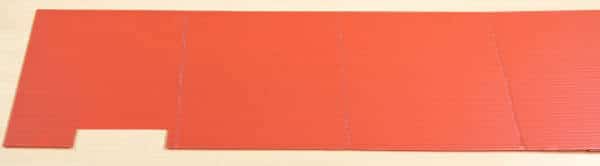
- Next, are the sidewalls. Take the red corrugated sheet of 60 cm * 15 cm.
- Now, mark three lines 15cm apart from each other along the 60 cm side to make the four sides of the box.
- Next, cut along those lines and fold it into a box to make the sidewalls of the dispenser.
 Make sure that you only cut through the first layer so that the sheet can be folded easily.
 - With this, the basic structure of the candy dispenser is ready.
Making the Candy Collector Box
Now, we would need a box i.e. the collector or the storage box to collect the dispensed box, if you don’t want your chocolates to fall on the ground.
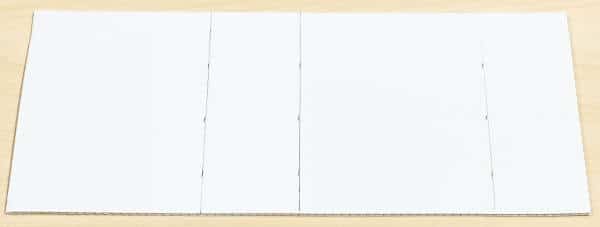
- Take a piece of white corrugated sheet of size 10 cm * 18 cm.
- Now mark two lines leaving 5cm from both the edges.
- Cut along the lines marked and fold it along.
Make sure to cut through the first layer of the sheet only.
- With this, we have a pair of two opposite sides and the bottom of the box.
- Next, take two rectangles of size 5 cm * 8 cm from the red corrugated sheets to make the remaining sidewalls.
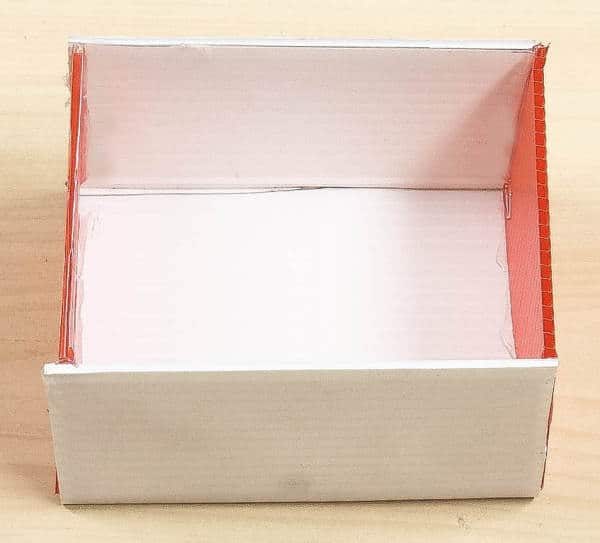
With this, your collector box is ready.
Making the Globe to Hold the Chocolates
Now, comes the globe, that is the container for holding the chocolates into your chocolate vending machine. This is where all your chocolates/candies will be hidden before being dispersed.
- Take a white corrugated sheet of 10 cm * 24 cm.
- Next, mark three lines at 4 cm, 12 cm and 16 cm along the longer side i.e. along the 24 cm side.
- Next, cut along the first layer of the marked lines.
- Fold along the lines and glue them together to make the globe.
- Next, take a red corrugated sheet of 8 cm *3 cm, the chocolate support plate that will give appropriate level to the chocolates so that it could be dispensed easily.
Now that we have the structure of all the parts of our vending machine ready, it’s time to add the details.
Adding the Details to our Vending Machine
It’s time to add small details into our vending machine. Make sure you follow each of them carefully.
- Take the globe, a.k.a the candy holder and cut out a small rectangle of 2 cm * 2 cm from one side of the globe for the slider.
- Next, cut another rectangle of 8 cm * 2 cm on the opposite side of the first rectangle on the globe for dispensing chocolates.
- Then, glue the chocolate support plate at the bottom end of the globe.
- Now, take the corrugated sheet with sidewalls and cut out a rectangle of 8 cm * 2 cm from the bottom left corner of the front sidewall leaving 1 cm from the left side for dispensing the chocolates.
Decorating the Chocolate Vending Machine
Since ‘CHRISTMAS IS COMING‘. let’s make the chocolate dispenser more “Christmas-y”!
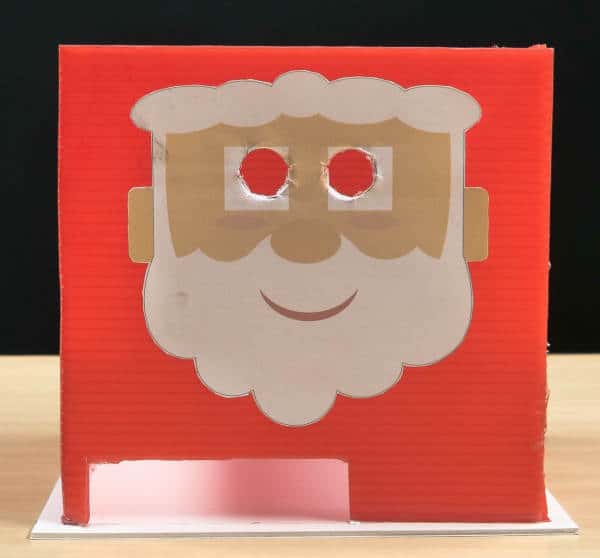
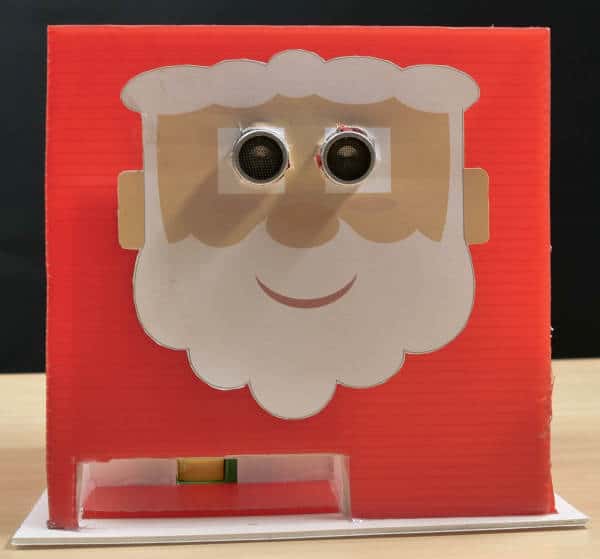
Glue the Santa cutout on the front plate i.e. on the plate with rectangle on it. You can decorate it the way you want it to.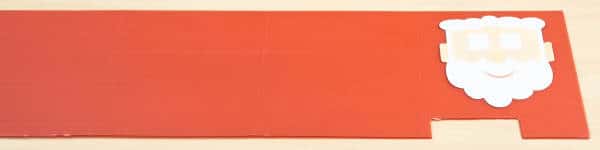
Also, make two holes into the eyes of the Santa of the size of the ultrasonic sensor.
Completing the Chocolate Dispenser Assembly
Now all the components are ready, it’s time to assemble the dispenser.
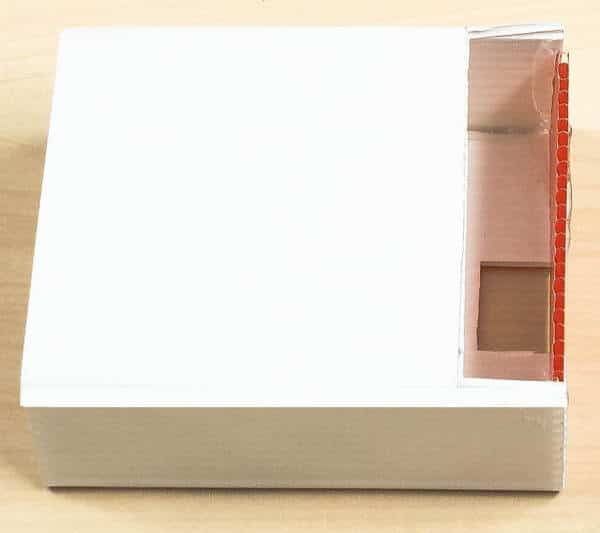
- Firstly, let’s assemble the side walls.
- Take the base plate and draw a square of 15 cm * 15 cm on it.
- Next, take the sidewalls and glue them to the base plate on the markings using hot glue.
- Now, let’s attach the globe.
- Match the slots on the globe and sidewalls and carefully glue the globe to the bottom plate using hot glue.
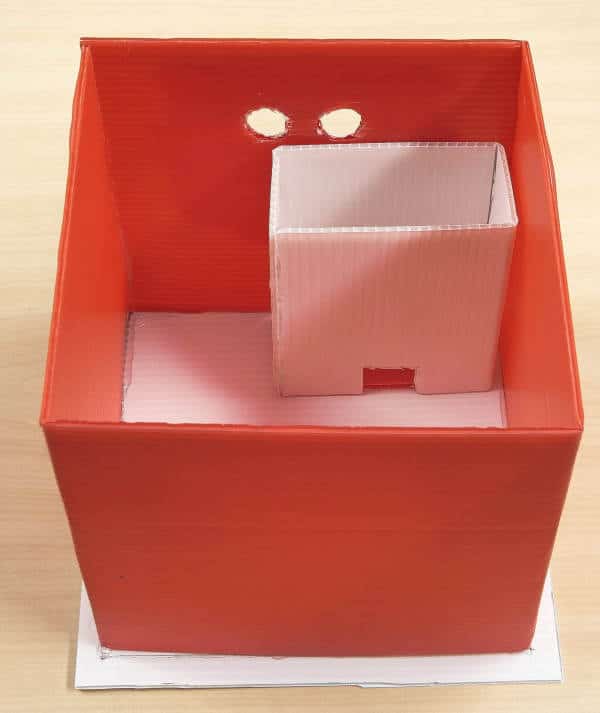
- Next, place the dispensary mechanism behind the globe and make sure that the slider fits into the slot on the globe perfectly.
- Now, let’s make our vending machine automatic i.e. it’s time to add the ultrasonic sensor.
- Attach the ultrasonic sensor on the front wall behind Santa’s face. Make sure that it fits into the ultrasonic sensor perfectly.
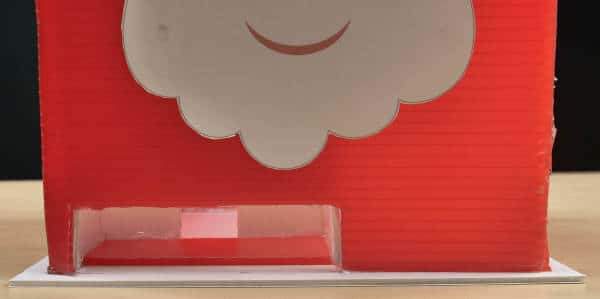
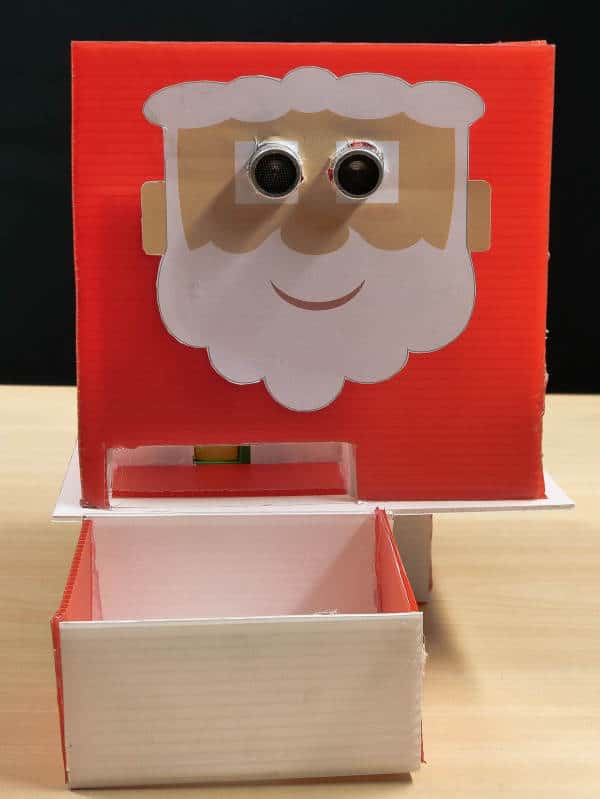
- Now, glue the storage box for catching the chocolates into the front of the vending machine using the hot glue. Again, make sure that the slots on the front side and the storage box.
- Finally, take the top/lid of the box.
- Now, draw a line 3 cm from one of the edges and cut along it only through the first layer. This makes the lid opening and closing easy.
- Finally, attach the lid to the top of the box.
With this, the assembly is done.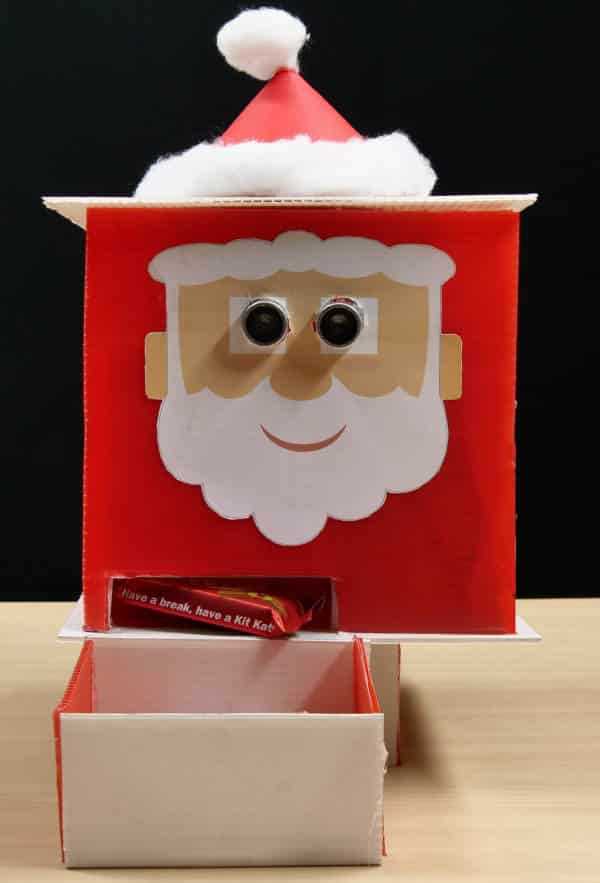
Don’t forget to fill the globe with delicious treats for you and your friends.
Making the Connections
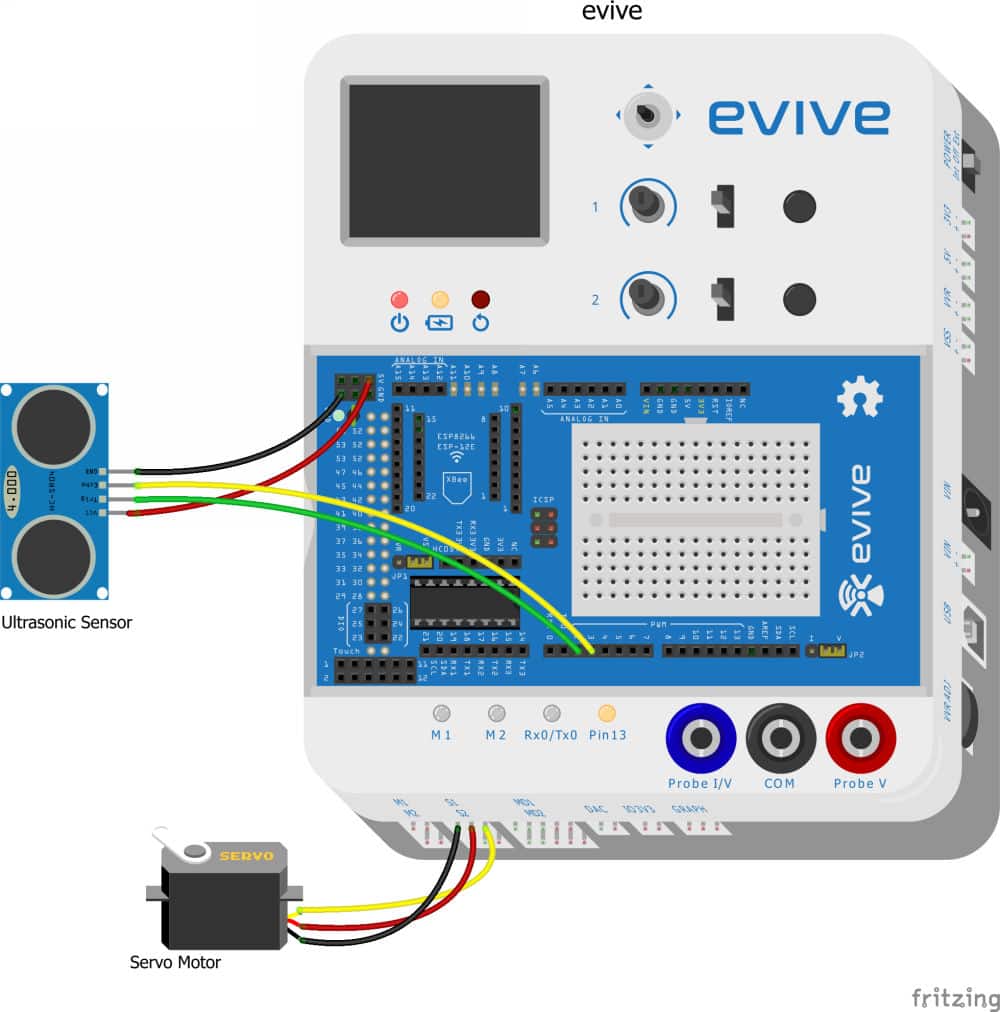
We are going to connect the Metal Servo and the Ultrasonic Sensor to evive.
- Connect Metal Servo to evive’s Servo Channel 1.
- Connect Ultrasonic Sensor as:
- VCC pin to evive’s +5V pin.
- GND pin to evive’s GND pin.
- TRIG pin to evive’s Digital pin 2.
- ECHO pin to evive’s Digital pin 3.
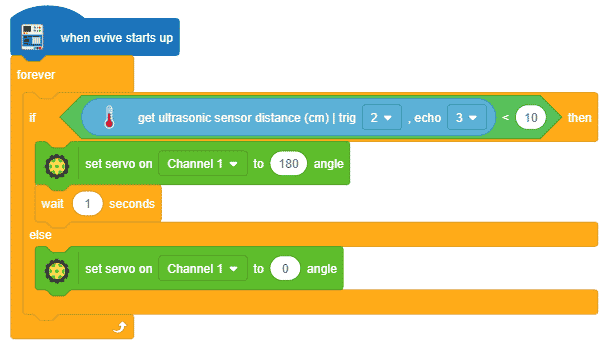
Coding your Chocolate Vending Machine
The program will start executing when evive starts up. It will continuously monitor the readings from the ultrasonic sensor whose trig and echo pins are connected to Digital Pins 2 and 3 respectively.
If the distance is less than 10cm, we’ll set the servo connected to Channel 1 to 180° so that the slider moves outwards, causing the chocolates to fall. Otherwise, the servo will remain in the default position, i.e. at 0°.
Conclusion
With this, your DIY automatic chocolate dispenser is ready. Have a sweet Christmas! ????


 _ CODEVAOUR 2021-22 _ OMOTEC 3-27 screenshot")


