
Introduction
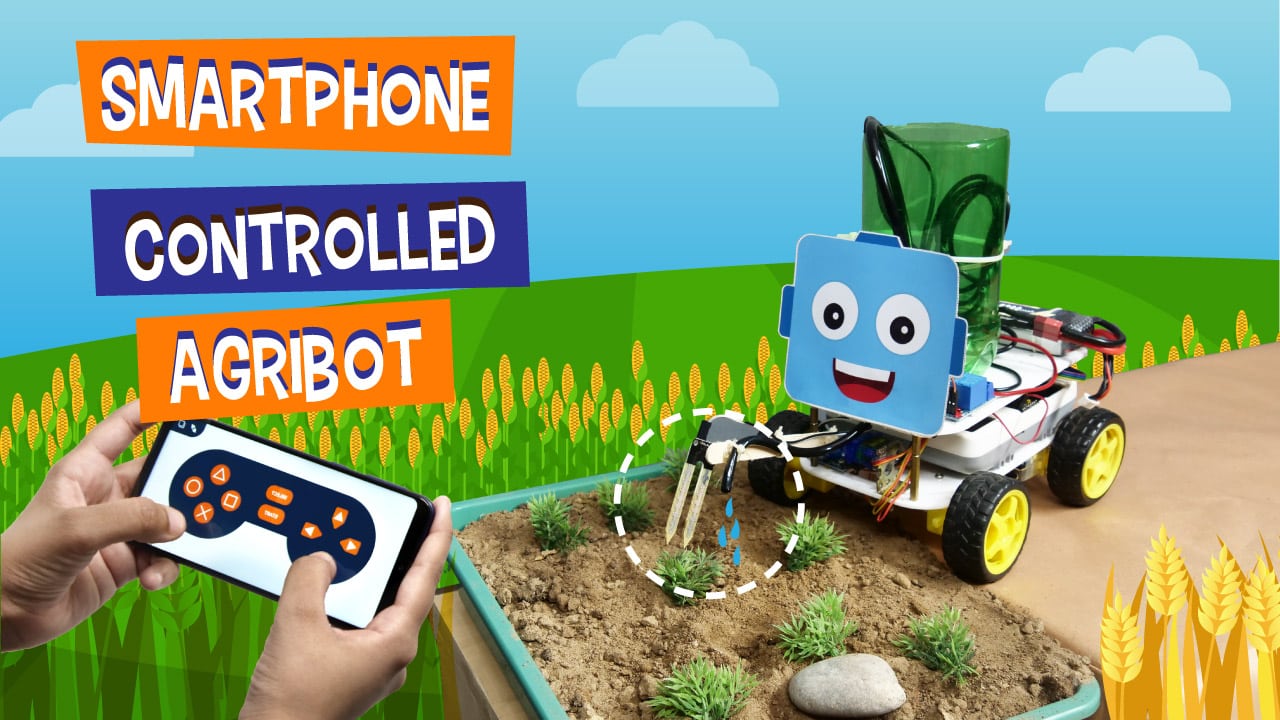
Robots these days help us with a lot of things. But can gardening be one of them? Presenting to you the DIY agribot – a smart agriculture robot with its own automatic irrigation system that measures the moisture of soil and water it when required. Pretty smart, eh? You can easily make the agribot on your own using components from the evive Starter Kit, program it in PictoBlox – our graphical programming software based on Scratch Blocks, and control it with your Smartphone via Dabble – our Bluetooth controller and project interaction Smartphone app. You can download PictoBlox from HERE and Dabble for Android from HERE and for iOS from HERE.
Ready to make automate gardening? Let’s go!
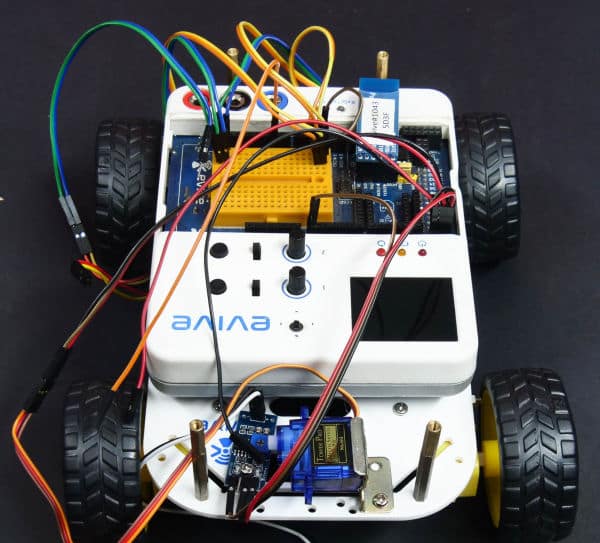
Turning Your 4-Wheel Drive into the AgriBot
We have made the automatic plant watering system and we have our 4-Wheel Drive Robot, why no combine them and make a Smartphone controlled agricultural robot.
Thus, agribot or the agricultural robot is the advanced modified version of the 4-Wheel Drive Robot.
Bringing in the Servo Motor
We will be using a servo motor to move the soil moisture sensor in and out of the ground to get the readings of the soil moisture level.
Setting the Servo Angle to 90°
- Before mounting the servo motor, let’s set the servo angle to 90°.
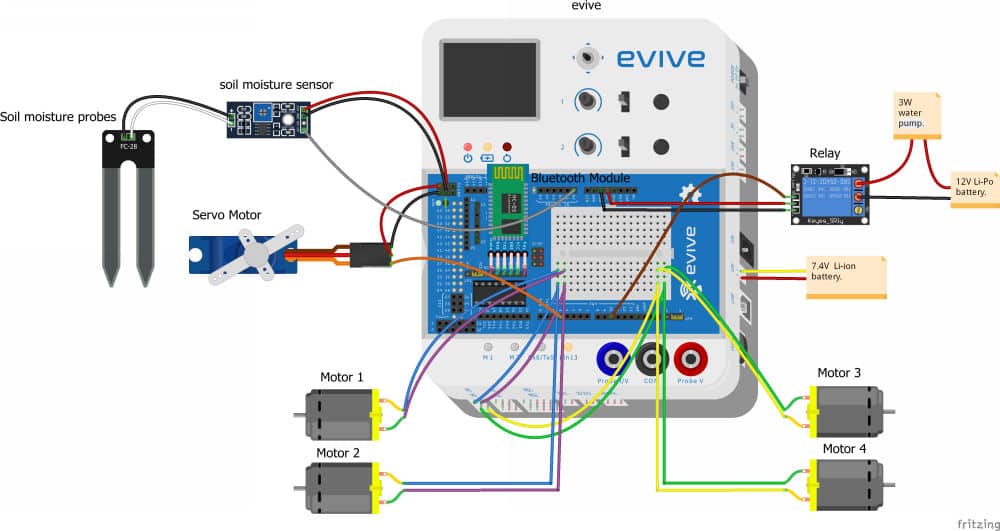
- Connect the servo motor on servo channel 1.

 Make sure to attach the brown wire of the servo to the left-most pin of the S1 Channel of evive.
 - We will be using evive’s firmware to change the servo angle.
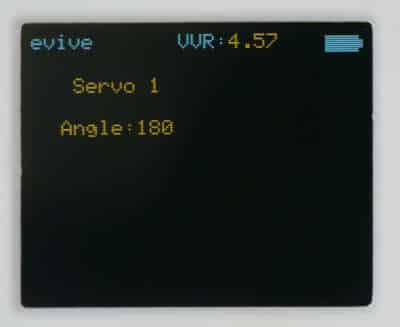
- Switch ON evive.
- From the menu go to Controls.
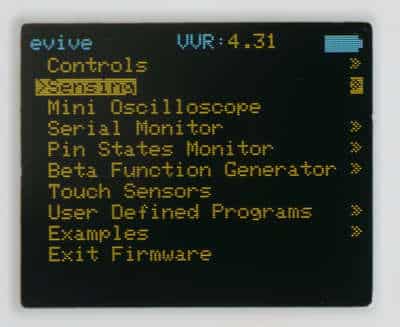
- Then select Servos.
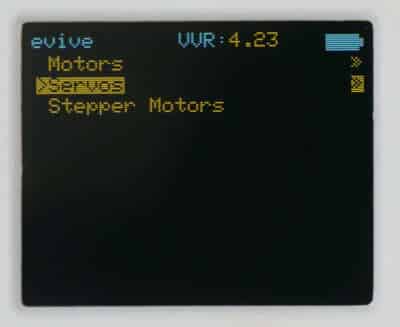
- Finally, navigate to Servo 1.
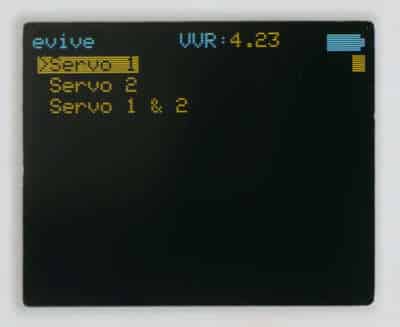
- Using potentiometer 1 set the servo angle to 90 degrees.
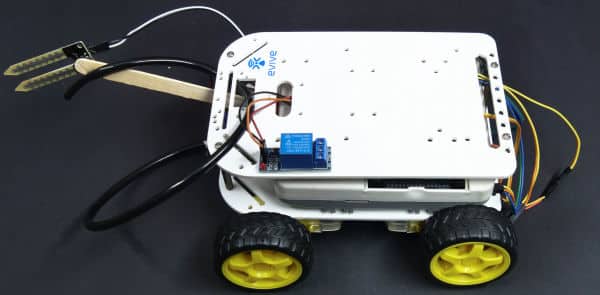
Mounting the Servo Motor
Now, glue the servo motor to the motor clamp using hot glue.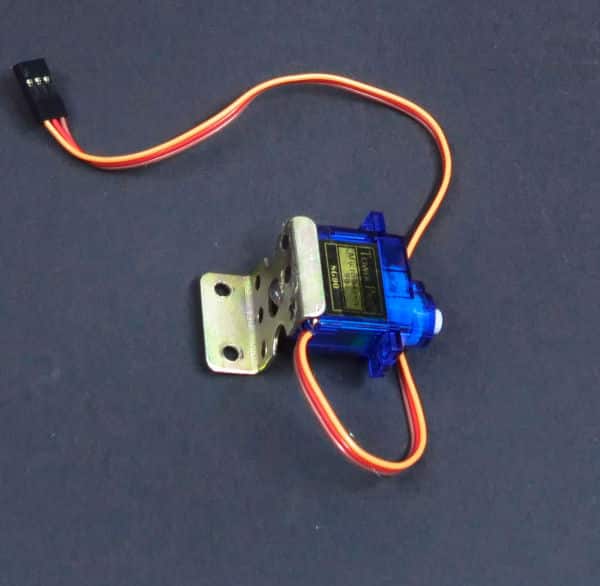
As we need to keep our soil moisture sensor to the front of the 4-wheel robot. Thus attach the clamp to the front of the chassis of the 4-wheel robot using M3 nuts and bolts.
Bringing in the Soil Moisture Sensor
Our main objective for making an agricultural robot is to measure the soil moisture level and water the plants if the soil moisture level is low.
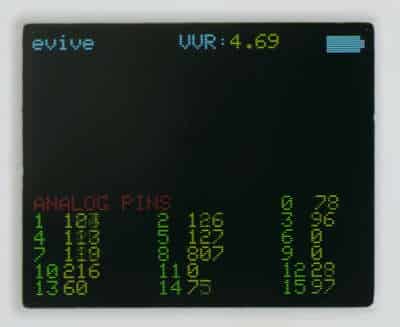
The soil moisture sensor gives different analog values depending upon the moisture level. Thus, before attaching the soil moisture sensor to our agribot, let’s first test it whether it is working properly or not. To make the testing of the sensor easier, we will be using the pin state monitor feature of the evive.
Testing the Soil Moisture Sensor
- Firstly, connect the probes of the soil moisture sensor to the sensor using jumper cables. Then let’s connect the sensor to evive as given here:
- Connect VCC to evive’s +5v pin
- Connect GND to GND on evive
- Connect signal pin to evive’s A0 pin.

- Switch ON evive.
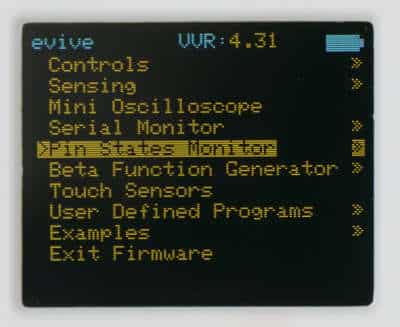
- From the firmware, go to pin state monitor
- And then select Analog pin States.
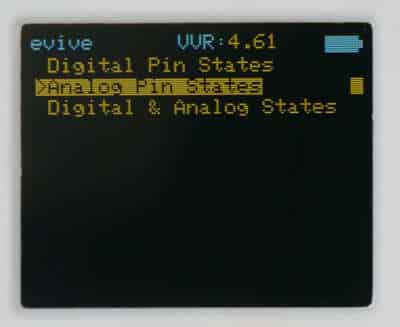
- Observe the value in next of A0
- When the probe is in the open air, the value next to A0 will show value around 1023. Now, as soon as you dip it inside a cup filled with water, the value would decrease significantly.
- Now that our sensor works time to mount it to our agribot.
Mounting the Soil Moisture Sensor
Take the sensor module and mount it in front of the robot chassis by using M3 nuts and bolts.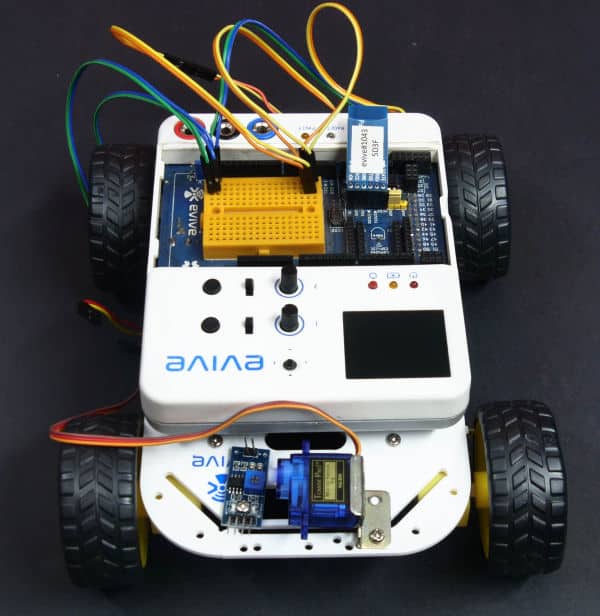
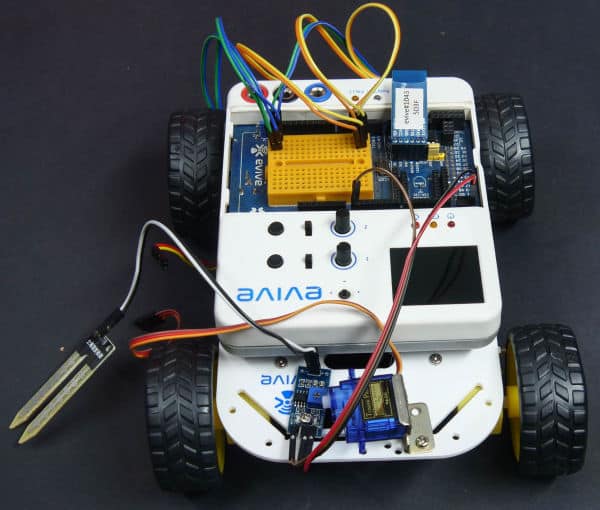
Connecting the Servo Motor and the Soil Moisture Sensor
- Now first we would connect the servo motor by extending the jumper cables.
- Connect VCC to +5v on evive
- Connect GND to GND on evive
- Connect Signal pin to evive’s pin 3
- Now, let’s connect the Soil Moisture Sensor to the Agribot
- Connect VCC to evive’s +5v pon
- Connect GND to GND on evive
- Connect signal pin to evive’s A0 pin.
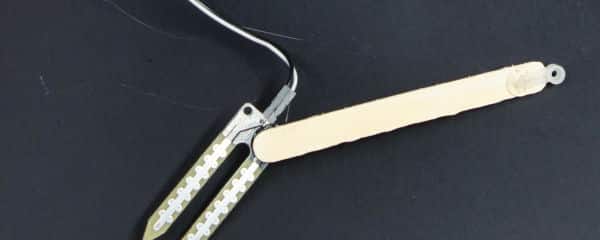
Making the Soil Moisture Tester
Let’s make the soil moisture tester that will dip the probe of the soil moisture sensor upon giving the commands via Dabble.
- Take a single-sided servo horn and attach it to an ice cream stick using some hot glue.
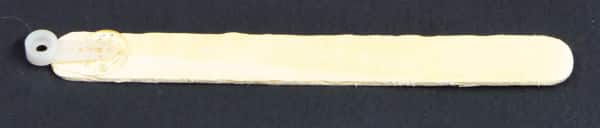
- Take the probes of the soil moisture sensor and glue it to the other end of the ice-cream stick.
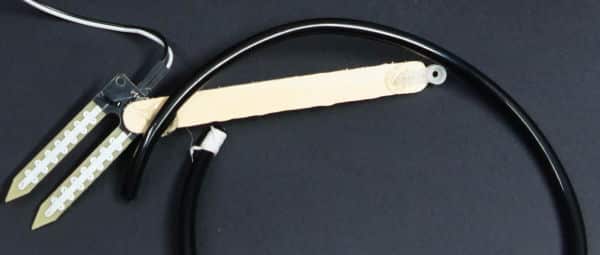
Turning it into Automatic Irrigation System
Now, that we want to make our automatic irrigation system, we need to process the data and maintain the parameters like soil moisture by watering the plants.
- We will be using a relay to switch on and off the water pump so for that we would attach some jumper cables to evive, i.e. connect the cable to VCC, GND and Digital pin 10 of evive.
- Next, take a soft PU pipe and attach it to the ice cream stick.
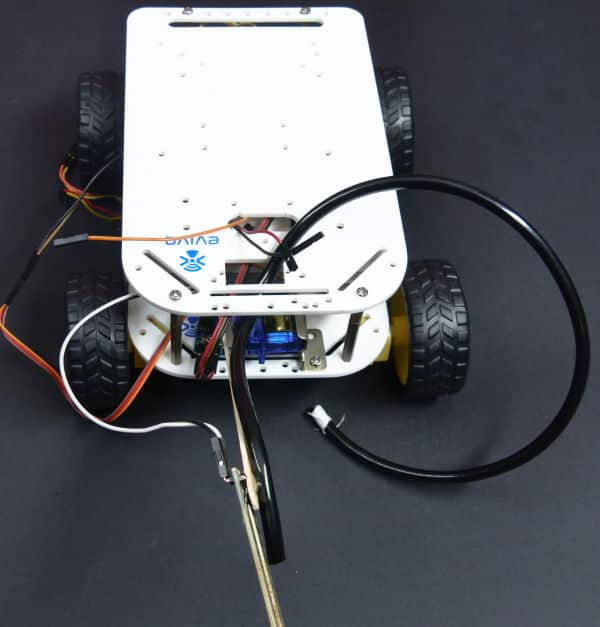
- Now that the assembly of the bottom chassis is complete, we’ll attach another chassis on top of the current one so that we can place our water storage tank on top of it.
- Take 4, 45 mm male to the female spacer and attach it to 4 corners on the base chassis.
- Then, attach the servo horn to the servo motor.
- Next, take another chassis and firstly pass the jumpers for relay and pipe through the space given on chassis and then mount the chassis by using 12mm M3 bolts to the spacers.
Connecting the Relay
- Take the relay and fix it on top of the chassis using double-sided tape.
- Next, connect it to evive.
- Connect VCC to evive’s +5V.
- Connect GND to evive’s GND.
- Connect Signal to evive’s digital pin 10.
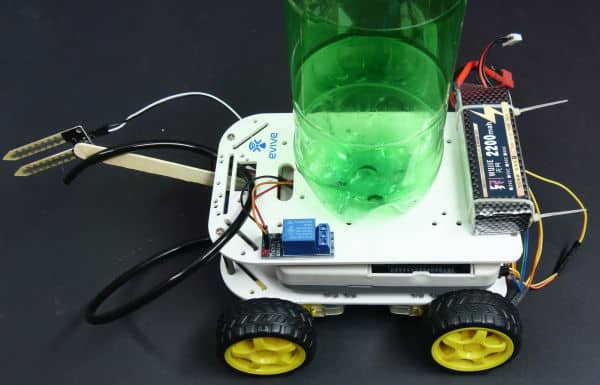
Making the Water Storage Tank for our Agricultural Robot
- For holding water we would be using a PET bottle.
- Take a bottle and cut off the top.
- Glue the bottle on top of the second chassis using hot glue.
- Take a DC Water Pump and fix the PU pipe to its outlet.
- Place the pump inside the bottle.
Powering up our Agricultural Robot
As our water pump works on 12 V DC, we will be using a lipo battery to power up our agricultural robot.
- Take two cable ties and tie it at the back of the upper chassis to make a loop.
- Fit the lipo inside the loop.
Connecting the Battery
We have connected a MALE DC jack which helps us to connect wires to the pumps female connector.
- Connect the negative terminal of the lipo battery to the pump’s negative terminal.
- Connect the positive terminal to the com on lipo.
- Now, take a small wire and connect the positive terminal of the pump to NC on the relay.
With this the assembly of our agricultural robot is ready. You can even decorate the robot if you want.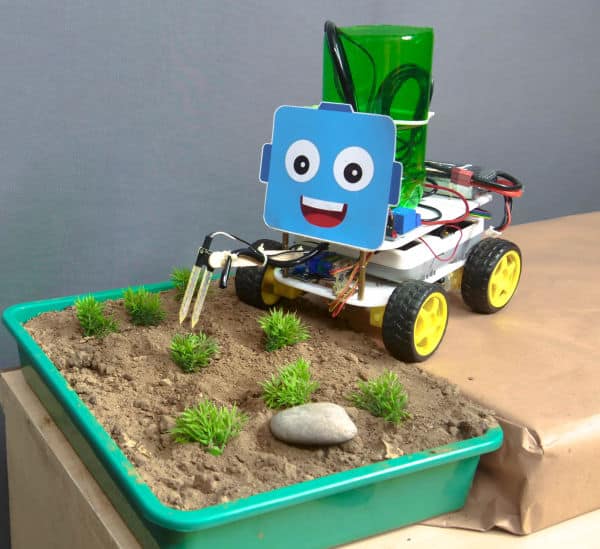
Writing the Code in PictoBlox
To make the programming part of the robot even simpler, we are going to write the code in PictoBlox.
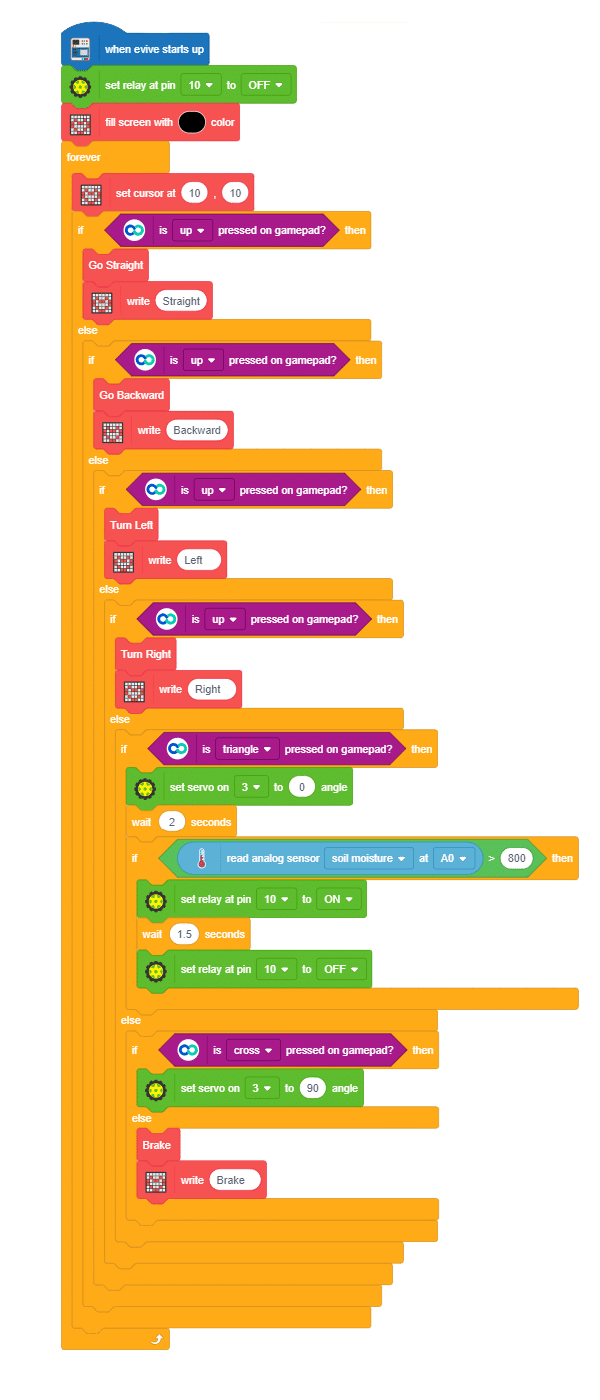
- Since we need to control the agriculture robot wirelessly, we’re going to write the code in the Upload mode.
- The when evive starts up block will make sure that the program starts running as soon as evive starts up.
- The relay connected to pin 10 should initially be OFF and the screen should be blank.
- Since the agribot is a modified 4-wheel drive robot, let’s first write the code for the 4-wheel drive robot.
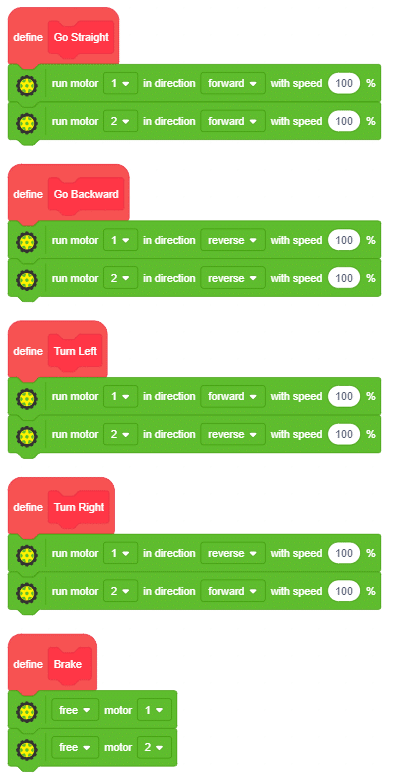
- On pressing Up on gamepad in Dabble, the robot should go straight and Straight should be displayed on the screen. Similarly on pressing down, the robot should move backward and Backward should be displayed on the screen. The robot should turn Left on pressing the Left arrow and Left should be displayed on the screen. Finally, the robot should turn Right on pressing the right button and Right will also be displayed on to the screen.
- To this point, we’ve written the code for controlling the robot’s movements. Now let’s write the code for the automatic irrigation system.
- On pressing the triangle button, the servo angle should change to 0 thus inserting the terminals of the soil moisture sensor into the soil.
- If the reading of the soil moisture sensor at Analog Pin A0 is more than 800, it means that the soil is dry. Therefore, the motor should turn ON and water the soil.
- Once done, it should turn OFF.
- Finally, on pressing the cross, the servo should return to its original angle.
- But, what if nothing is pressed? In that case, the Robot should stop moving and Brake should be displayed onto the screen.
- Upload the code to evive and watch your agribot take care of the soil for you!.
Conclusion
With this, your DIY agribot is ready to make gardening smart for you!


