
Introduction
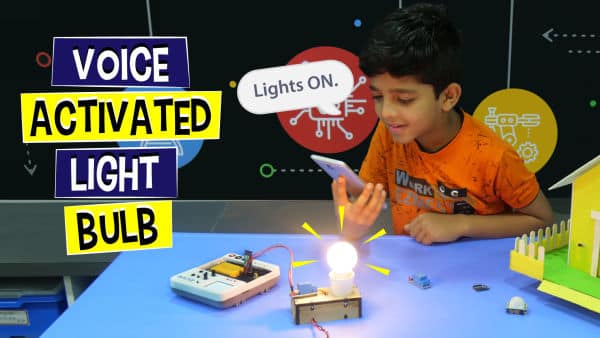
The internet of things is quite a fascinating technology. One of its many applications is home automation i.e. automating the control of the heating, ventilation, lighting, air conditioning of a home. This project on voice-activated lights is a baby version of the bigger home lighting automation system where we’ll show you how to make a DIY voice-activated light bulb. This project is a perfect start for beginners into the world of home automation projects and for educators who want to introduce their students to IoT and home automation in a fun-filled DIY way!
We’re going to make this project using the evive IoT kit and write its code in PictoBlox – a graphical programming software based on Scratch with advanced capabilities. You can download it from HERE.
Ready to light up your life with IoT? Let’s begin!
Attaching the Bulb Holder
- Let’s understand how to make the voice-controlled light bulb. Let’s begin with making the bulb holder for our Smart Bulb.
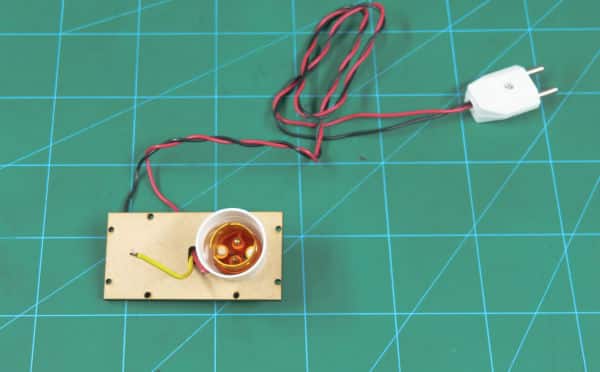
- Take the upper plate which has a hole in it and the bulb holder. Fix the bulb holder into the plate by removing the outer cap from the bulb holder assembly.

- Once we have the bulb holder attached to the plate, we will connect the electrical wires to the bulb holder. These wires will connect it to our AC power supply.
- Take a small piece of electrical wire and attach it to one of the two outlets of the bulb holder.
- Next, take the electrical wires which have a plug attached at one end and the other ends are free. Now, from the two wires, take anyone wire and attach it to the remaining outlet of the bulb holder.
Relay: Most important component of Home Automation
Relays are one of the most important electrical component of your project for the Home Automation system. Relays basically act like the switch which turns ON or turns OFF when big virtual assistants like Alexa gives them the commands that in turn makes your home a Smart Home.
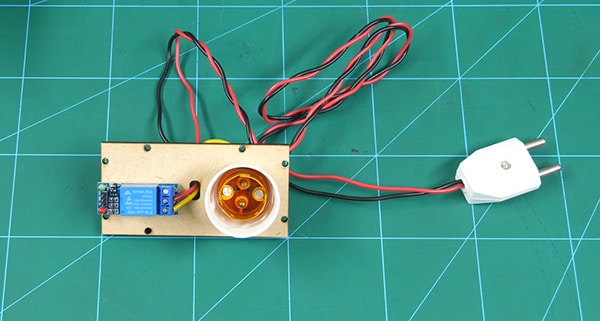
- Coming back to our smart light bulb project, bring the open ends to the top of the plate from the hole given.
- Bring in the relay, we are going to use two of the three ports of relay i.e. NO (Normally Open) and COM.
- Connect one open wire to NO and the other to COM.
 Any wire can be connected to any port. The only compulsion is, to choose the NO port and the COM port. Not the third one.
 - Now, fix the relay onto the plate using hot glue.
Completing the Box for the Smart Light Bulb
Now, it’s time to assemble the rest of the box.
- Attach all the four sides, i.e. front, back, left, and right to the top plate using M3 nuts and bolts.
- Now, a little care needs to be taken while attaching the bottom side. Before fixing the bottom side of the box, make sure that you pass the wires through one of the holes given at the bottom.
- Once done, attach the bottom plate using M3 nuts and bolts.
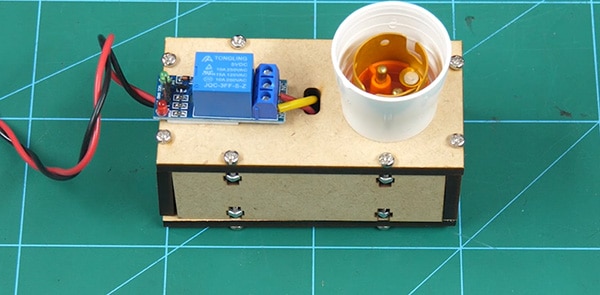 You need to leave the hole through which we have passed the wires through.
Making the connections for our Voice Controlled Light
Now, it’s time to connect the relay to evive- Arduino based embedded platform.
- Connect:
- VCC of the relay to +5V of evive
- GND of the relay to GND of evive
- OUT of the relay to Digital Pin 2 of evive
Now, as we need to a Bluetooth Controlled Home Automation project using Arduino (evive) we will connect our HC05 Bluetooth module to evive.
Finally, connect the light bulb to complete the making of our Smart light bulb.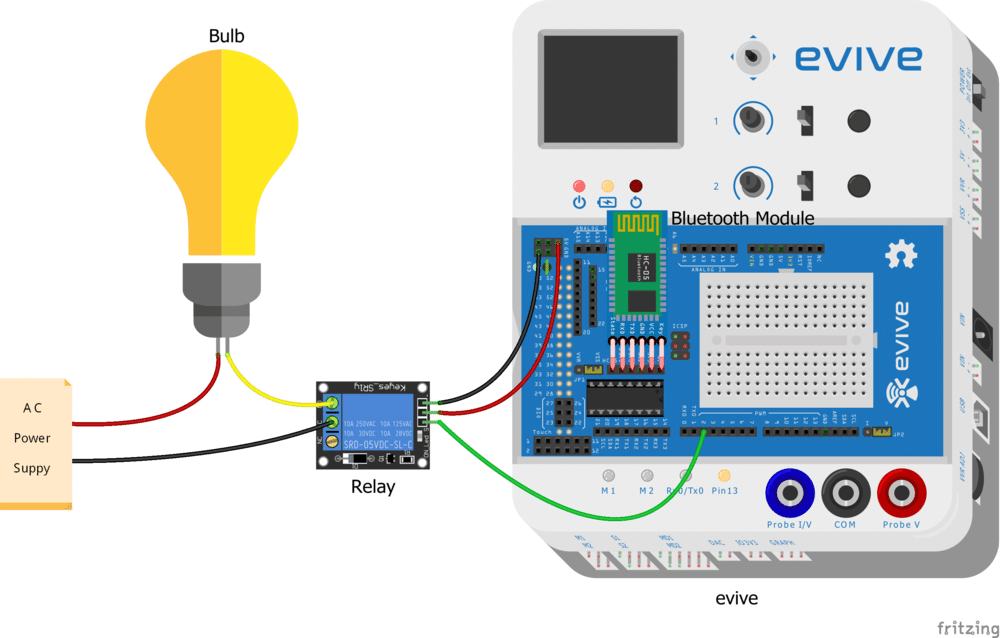
Working of our Mobile Controlled Light Bulb
As we are going to control our bulb wirelessly, we need to install Dabble in our Smartphones. You can download Dabble from here. Also, Dabble is now available for iOS devices too. If done, let’s move on the next step.
- Open Dabble
- Click on the Connect-Disconnect Icon and select your Bluetooth Module from the drop-down list.
- Open the Terminal Module, we are going to send commands to our Arduino platform using it.
- The bulb will turn ON as soon as command “lights on” send and will turn off when the command sent is “lights off”. Also, it is the Google Voice Assistance that makes this IoT project a voice-activated project.
Writing the Code in PictoBlox
We are going to make this project even easier by writing its script in PictoBlox- a Scratch based graphical programming platform. Just make the following code by dragging and dropping a few.
The below code shows the very basic function i.e. Bulb will turn ON on sending the command “lights on” and will turn off by sending “lights off”.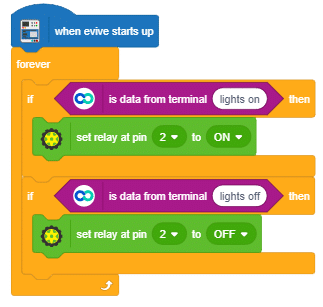
The below code will also write the status of Smart Light Bulb on the TFT Display: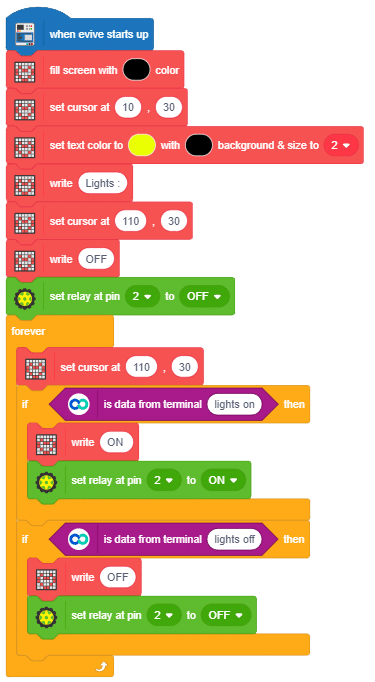
Conclusion
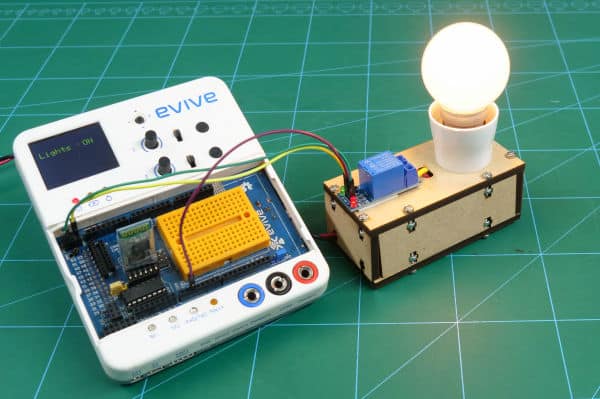
With this, your IoT based voice-activated light bulb is ready!


