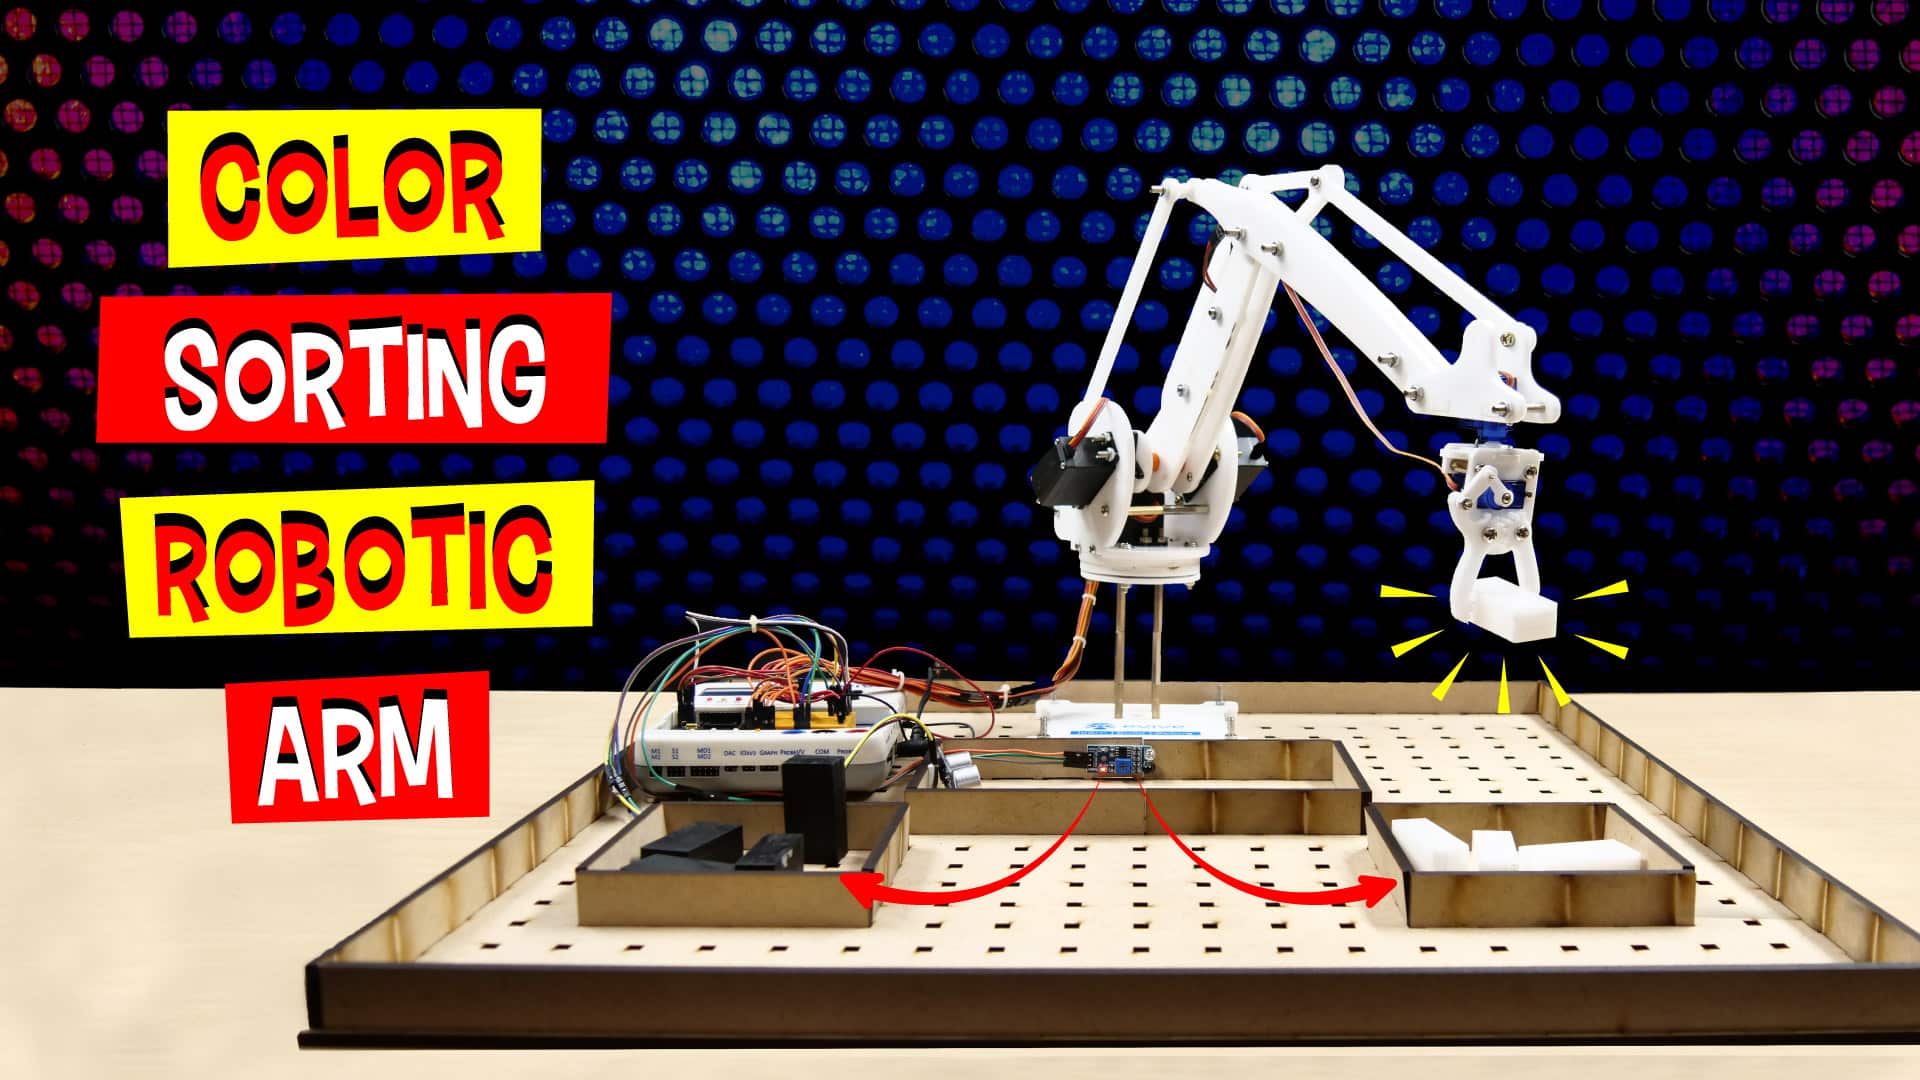

Introduction
Industrial pick and place robotic arms are fascinating, aren’t they? What if we told you that you could one make one that can sort objects based on their color? You heard us! In this project, in this project, we’re going to show you how to make a DIY automatic pick and place color sorting robotic arm using components from the Robotic Arm Kit and cod it with ease in Pictoblox, our Scratch blocks-based graphical programming software. You can download it from it HERE.
Get your DIY-ing attire ready ‘cause we’re beginning in 3, 2, 1… NOW!
Setting up the Areas
Before making the Color Sorting Robotic Arm, we need to make the Robotic Arm first, whose assembly, connections, calibrations, and programming can be found here.
Once done, let’s make a small setup to fix the robotic Arm and make it rigid and give it proper support.
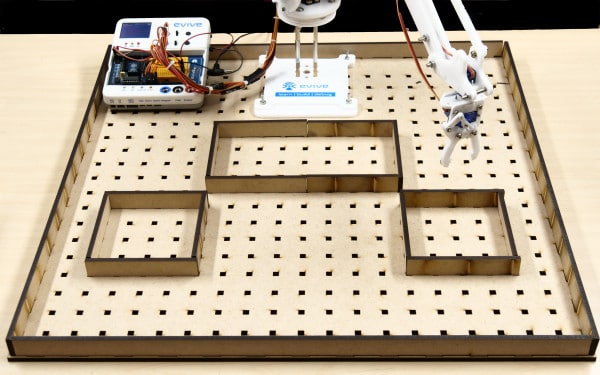
Setting up the shop floor
Firstly, fix the robotic arm to the base, we have created a platform out of the MDF sheet.
For this project, we need to make three 3 areas, one to lift the objects/blocks from and the other two to drop after sorting them.
Making the Pick-Up Point
The pick-up zone is where we will initially place the object. To get it lifted from. The location should be neared to the robotic arm base. In our case, we have kept it 150cm away from the center of the robotic arm base. We have used the MDF sheet to make the spaces. You can simply make it using a cardboard sheet too.
Make an area 20 cm* 10 cm. We will be also housing our sensors in here.
Making the Drop-Off Points
Make two smaller areas of approx size 10 cm * 10 cm for placing the white and black blocks far away from the pickup zone but in the range of the Robotic Arm.

Automating the Pick and Place Robotic Arm
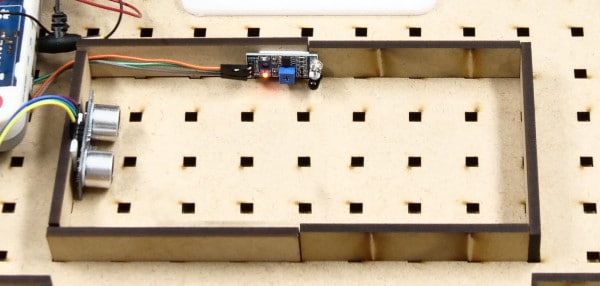
We will not just detect the color of the block, but also the presence of the block. The ultrasonic sensor will detect the presence of the block, upon which the IR sensor will respond by detecting, whether the block is black or white.
As they both are the start point of the cycle. We will attach them to the pick-up zone.
- Fix the ultrasonic sensor using some double-sided tape onto the 10 cm wall in the pickup zone.
- Next, fix the IR sensor to the center of the 20 cm wall.
Make sure to place the blocks to pick up in front of the sensor.
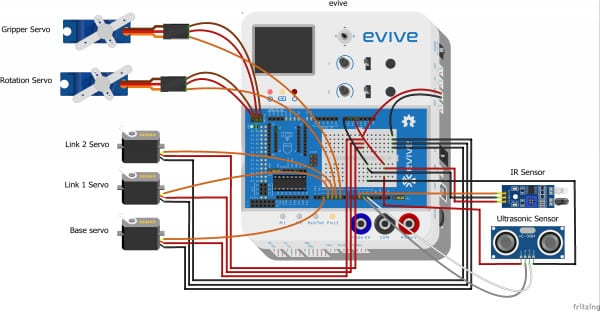
Making the Connections Color Sorting Robotic Arm
The Connection of the basic Robotic Arm remains the same. Thus, first, complete the connection of the normal pick and place robotic arm.
Connect the Jumper cables to the both the sensors and extend them.
Firstly take two male to male jumper cables and connect the +5V and GND on evive to breadboard on the evive. This to make the +5V and GND of both the sensors common.
Now let’s do the connection for the sensors.
- Ultrasonic Sensor
- Connect the +5V and GND of the ultrasonic sensor to the breadboard in the same row as that of the+5V and GND of evive Row on the breadboard.
- Connect trigger pin on Digital Pin 11 of evive
- Connect the echo on Digital pin 12 of evive.
- IR Sensor
- Connect the +5V and GND of the IR sensor to the breadboard +5V and GND Row on the breadboard.
- Connect signal of IR to Digital Pin 10 on evive.

Writing the Code of Color Sorter Robot
To make the project simpler, we’ll write the script using PictoBlox.
Before, writing the script, let’s add the extension for the robotic arm.
Every time you switch ON your board, we need the robotic arm to Initialize every time. Thus, make a custom block named Initialize. Where we will define the servos PWM pins, calibrate the servo angles, add the offset if any. Also, set the opening and closing of the gripper, along with setting the initial angle for the rotational servo and keeping the gripper OPEN. Lastly, we need the robotic arm to return to its home position.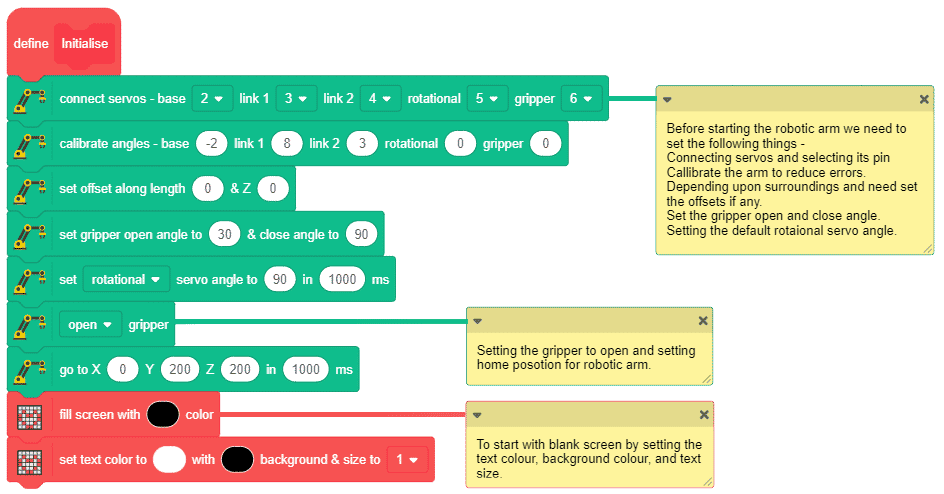
We will also, make a custom block to show the location on the X, Y, and Z axes continuously.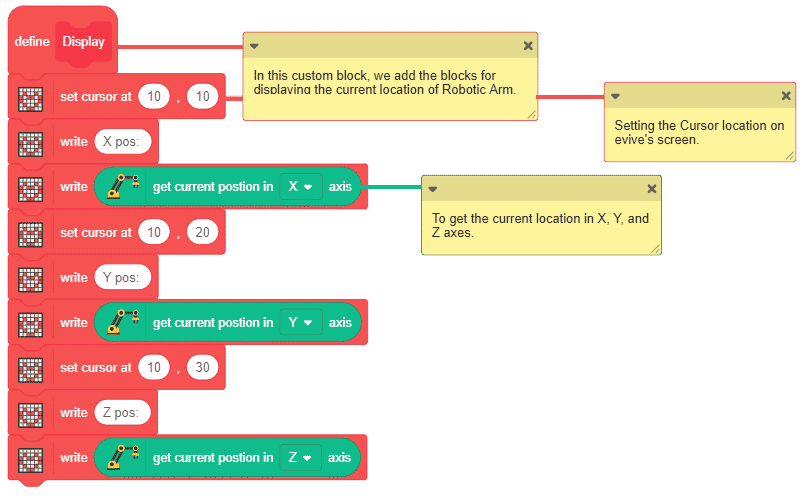
Finally, we need our script to start executing as soon as evive starts up.
The arm always hovers on the initial position for us it is 150cm from the center.
Once the signal from the ultrasonic sensor is received i.e. the block is present, the IR sensor then checks the color of the block i.e. whether it is white or block and then moves the robotic arm to the respective drop locations. In our case, it is (150, 250, 150) for black and (-150, 250, 150) for white. Finally, on reaching the required locations, the arm lowers and open the gripper to do a smooth drop-in designated zone.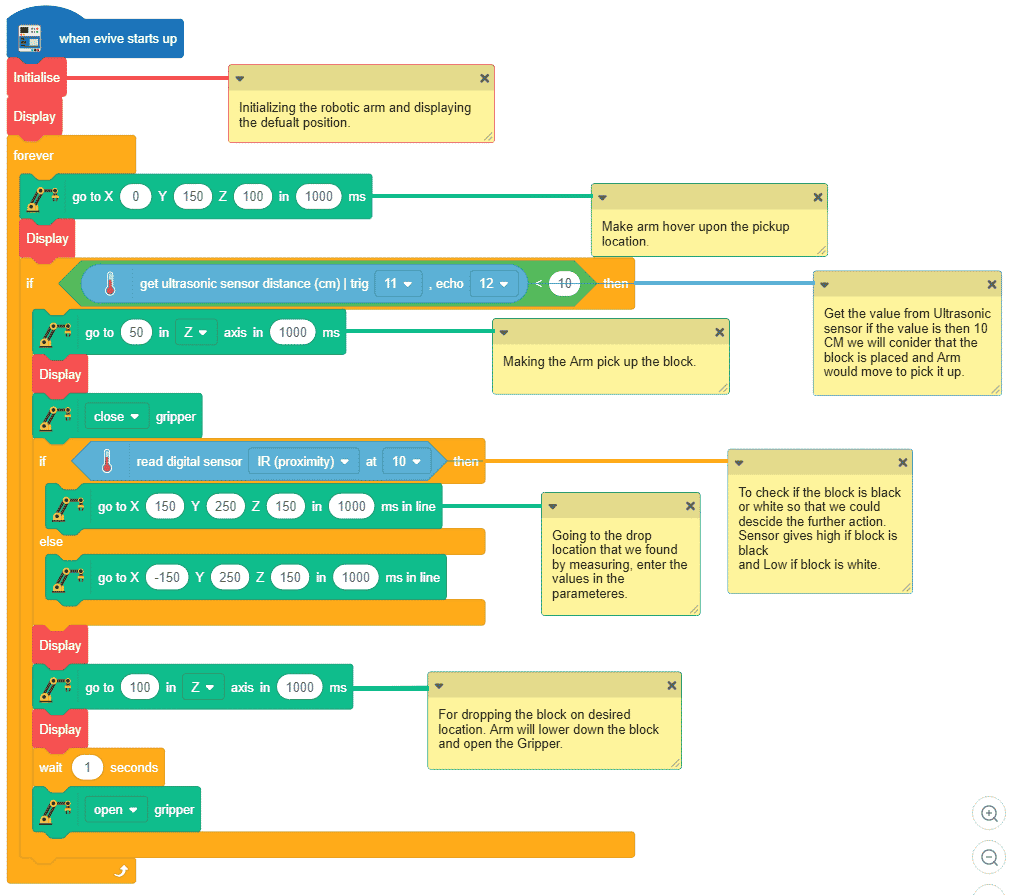
Once the code is ready, upload it to evive.

Conclusion
With this, your pick and place color sorting robotic arm is ready!