
Introduction
Christmas is coming! So is the time to decorate homes! This year, how ‘bout taking Christmas decorations to the next level with a touch of electrifying DIY, like, literally? Here’s presenting to you the DIY Flashing LED Cube – the coolest way to light up your home, that too with just some easy DIYing and programming. A little glue here, a few holes in a cardboard there, et voilà! Your vibrant Flashing LED Cube is all set to add colour to your life.
Sounds exciting, right? Then, let’s get on to it right away!
Making the Base
We are going to make a 4 x 4 x 4 LED Cube.
Let’s begin with making the base of the LED Cube first.
This base will also act as the platform for building the cube layer by layer.
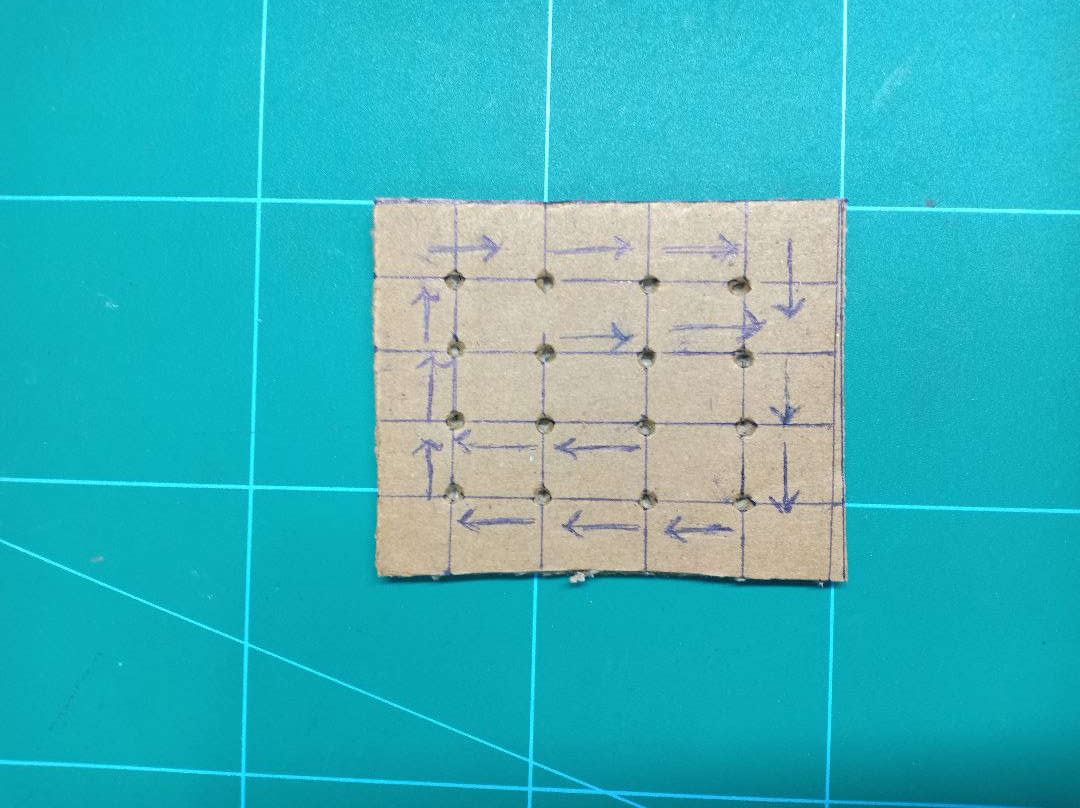
- We have used a thick cardboard for making the base.
- Take a square cardboard piece.
- As we are making 4 x 4 x 4 cube, each layer will consist of 16 LEDs.
- Thus, in the cardboard piece make 16 holes of the size of the LED.
- The distance between the two LEDs is the same as the length of the LED leg.
- Make the pattern as shown in the below image on the cardboard. This is the direction or the path in which you will be connecting the LEDs.
- Once, you are done with this step, it’s time to move to the next step.
Checking the LEDs
It’s time to now connect the LEDs.
But before using the LEDs make sure you check each one of them as if even one of them isn’t working it’s hard to detach the LED once it is in the cube.
You can check it using the coin cell.
Hold the longer leg of the LED to the positive and the shorter one to the negative terminal of the cell.
Thus if the LED lits up, you are good to go. If not, DO NOT use that LED.
Making the Cube
Once you have checked the LEDs, it’s time to make the cube.
We will be making the cube one layer or row at a time.
- Slightly bend the anode or the positive terminal of the LEDs.
- Insert the LEDs into the cardboard.
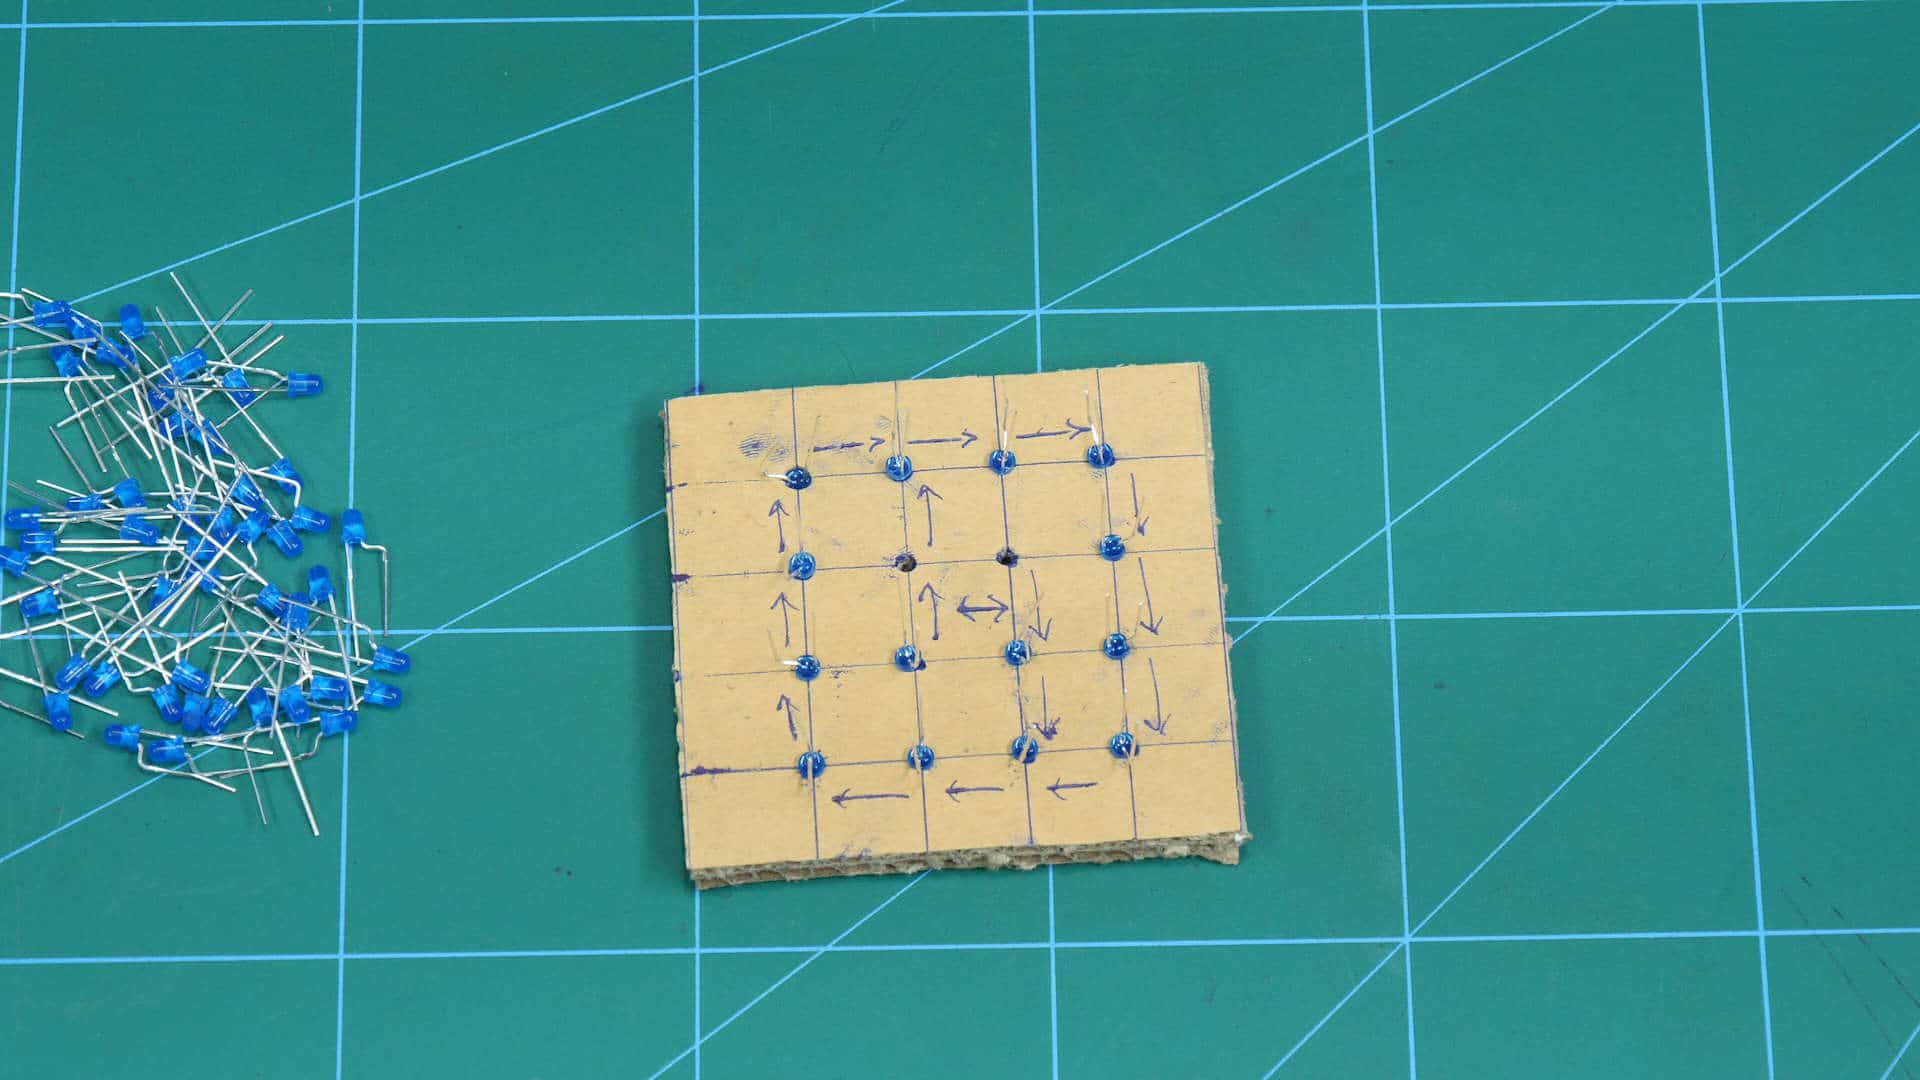
- Leave the Anode as it is.
- Now bend the cathode completely horizontal such that it follows the same direction as given on the cardboard.
- Once you have inserted the LEDs, it’s time to connect them.
- We are going to solder them.
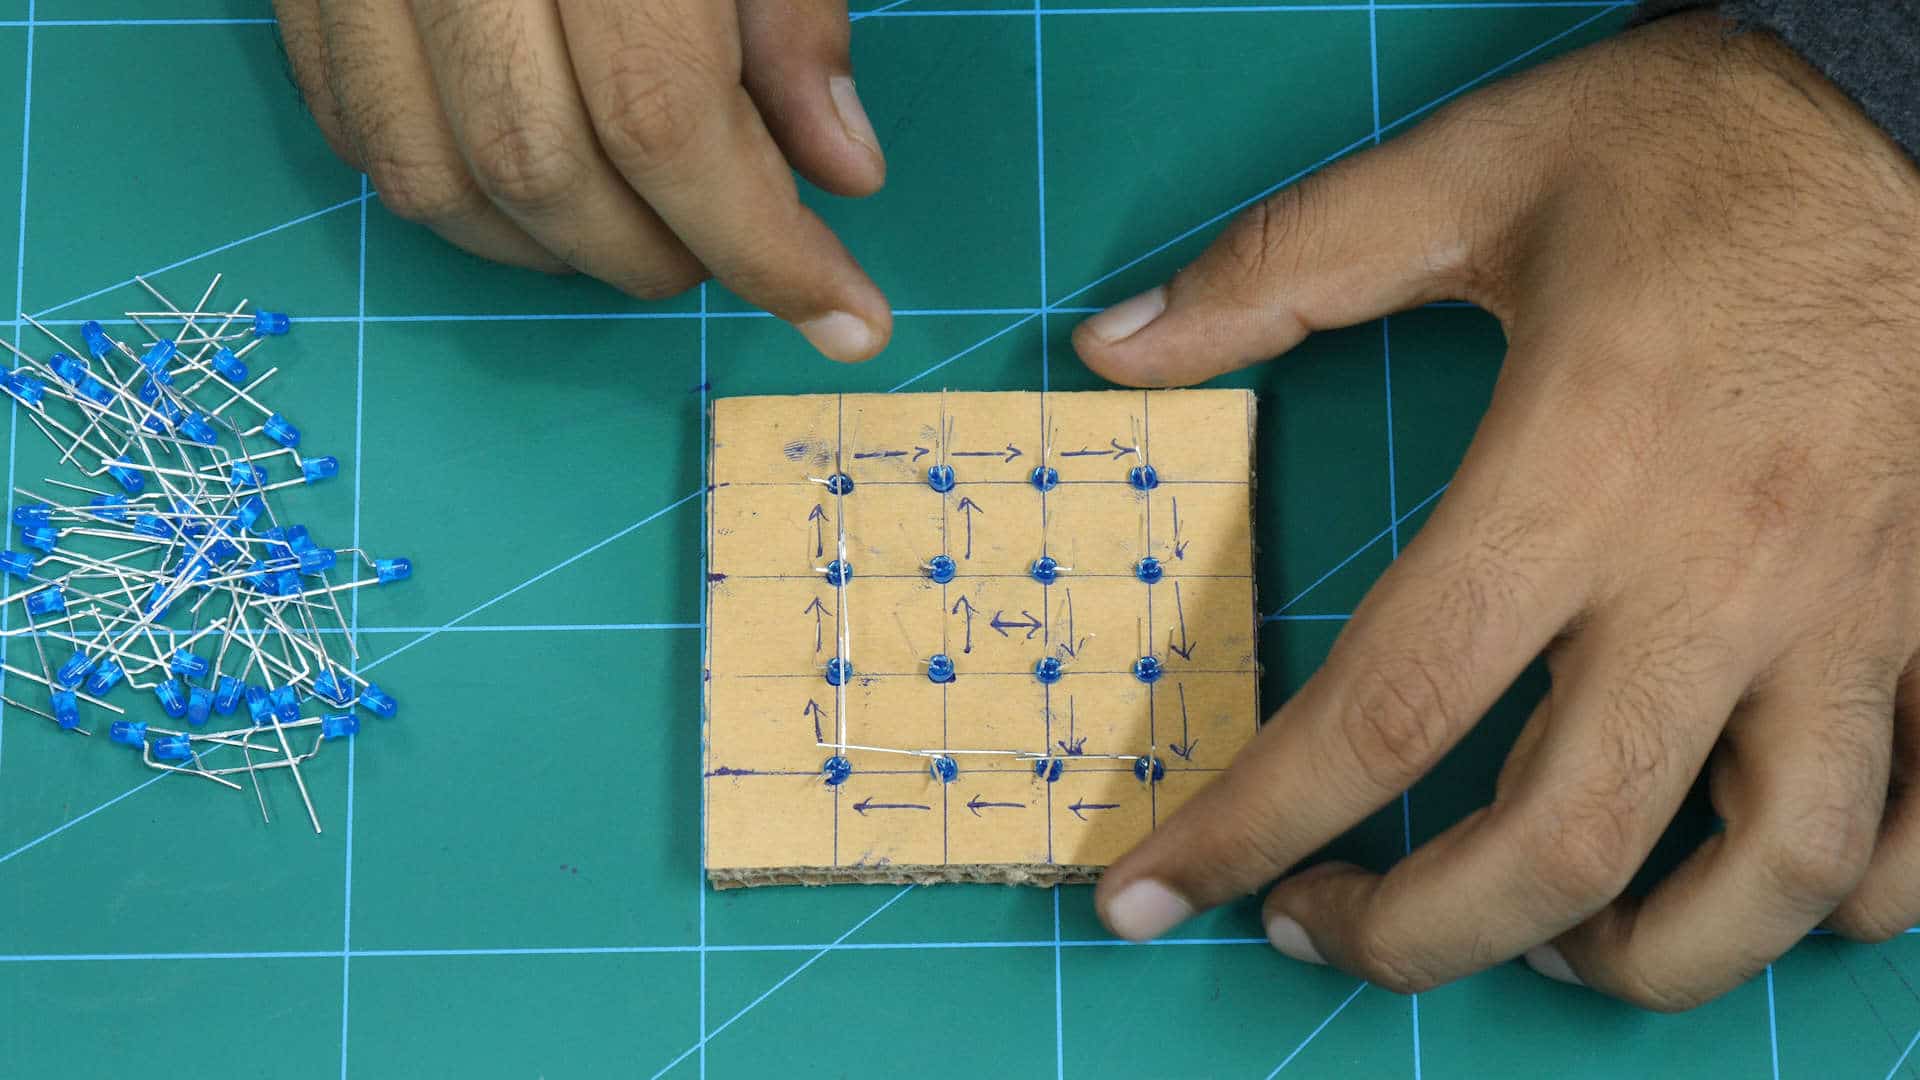
Connecting the LEDs

We have to perform soldering to connect these LEDs.
Solder the bent leg of one LED to the negative terminal of the other, which comes next in accordance with the given direction.
Thus, complete the row.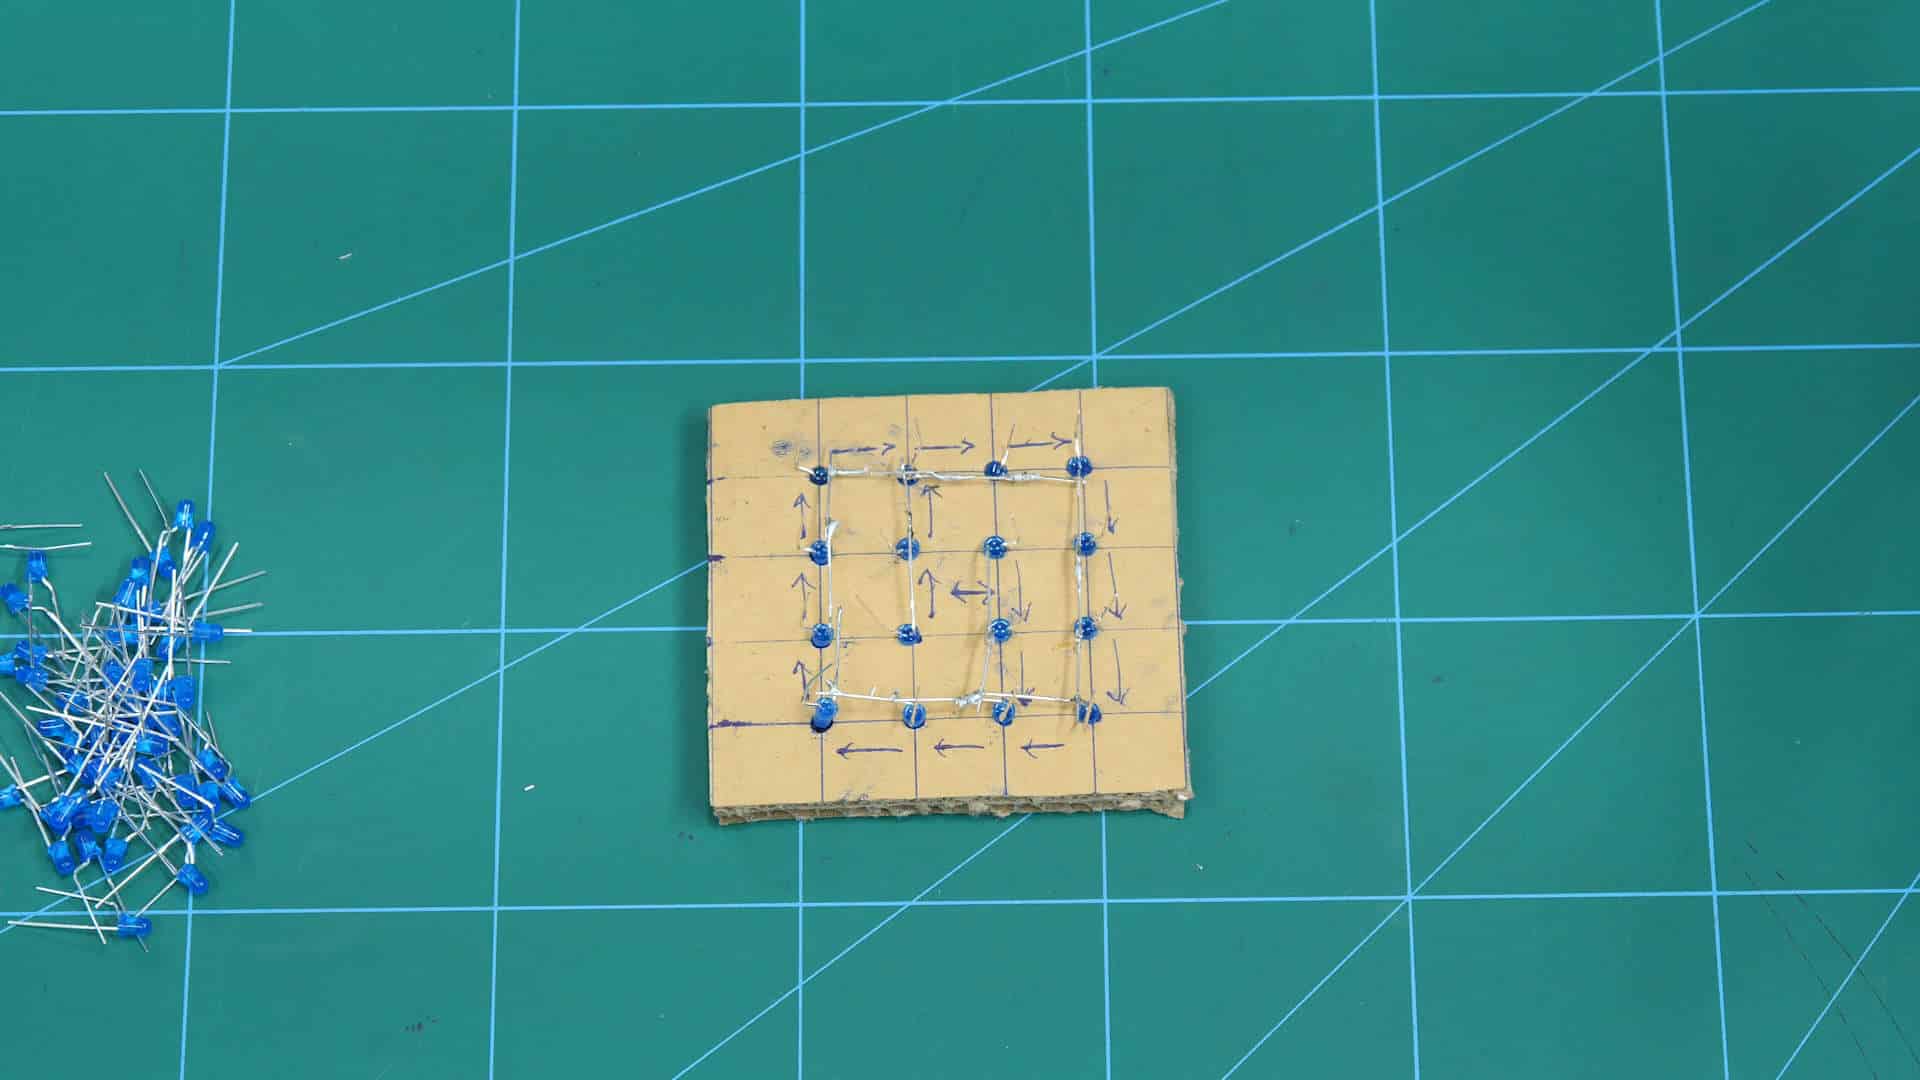
Make sure you have the anode of the LEDs bent downward.
Completing the Cube
Thus, you have successfully made a row.
It’s time to complete the cube but for that, we need to have all the 4 rows with us.
Similar to the first row complete the other rows as well.
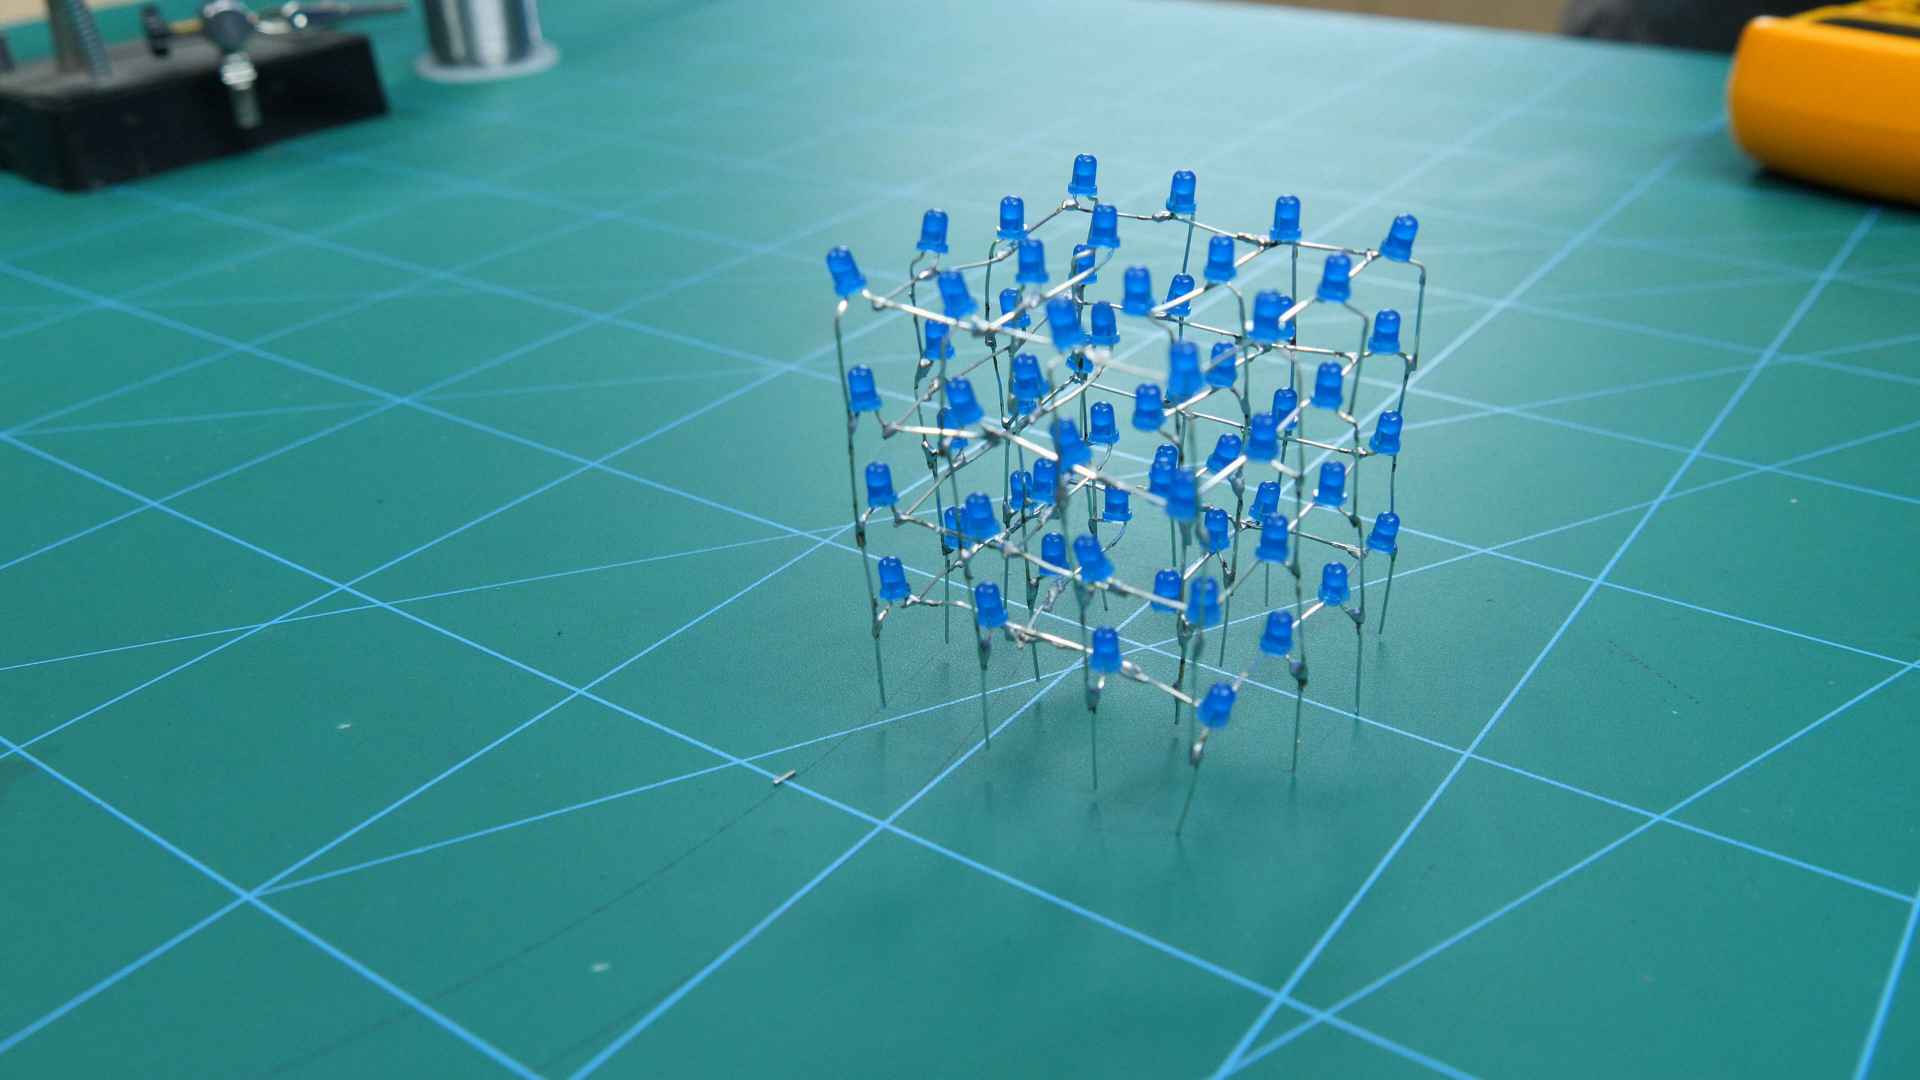
Once you have all the 4 rows in your hand, it’s time to connect them.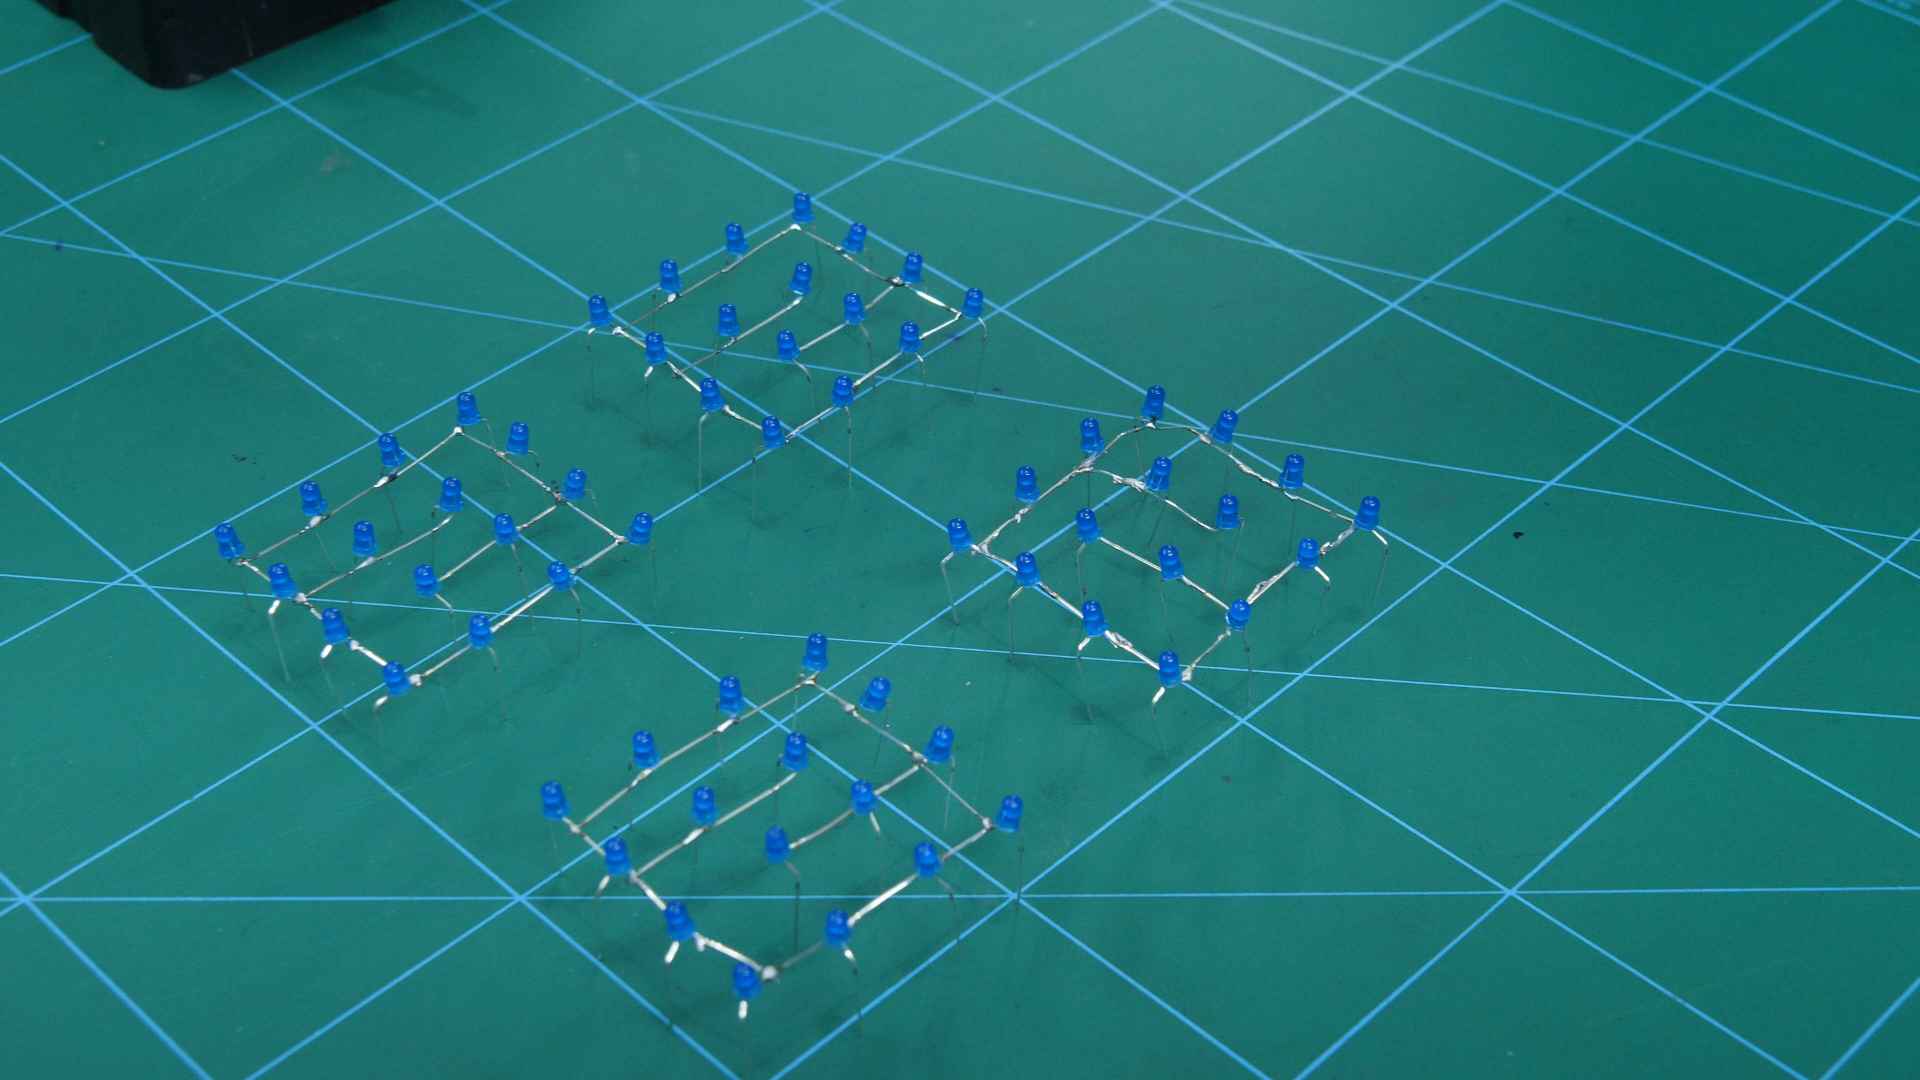
- Place one row above the other, connect the anode of the upper LED to the anode of the LED below it.
- Similarly, connect all the LEDs.
- You will see that the anodes of the LEDs of the L0 are free to connect.
We have completed the making of the cube, it’s time to connect it to evive.
- Thus, take 20 Male to Male Jumper Cables.
- Take 16 jumper cables, to the anodes of L0.
- Take the remaining 4 cables and connect each of them to the cathode channel of each layer.
- Finally, we have completed the making of the cube.
Upload the code and make the connection from the steps given below.
The Final cube looks like the one shown here.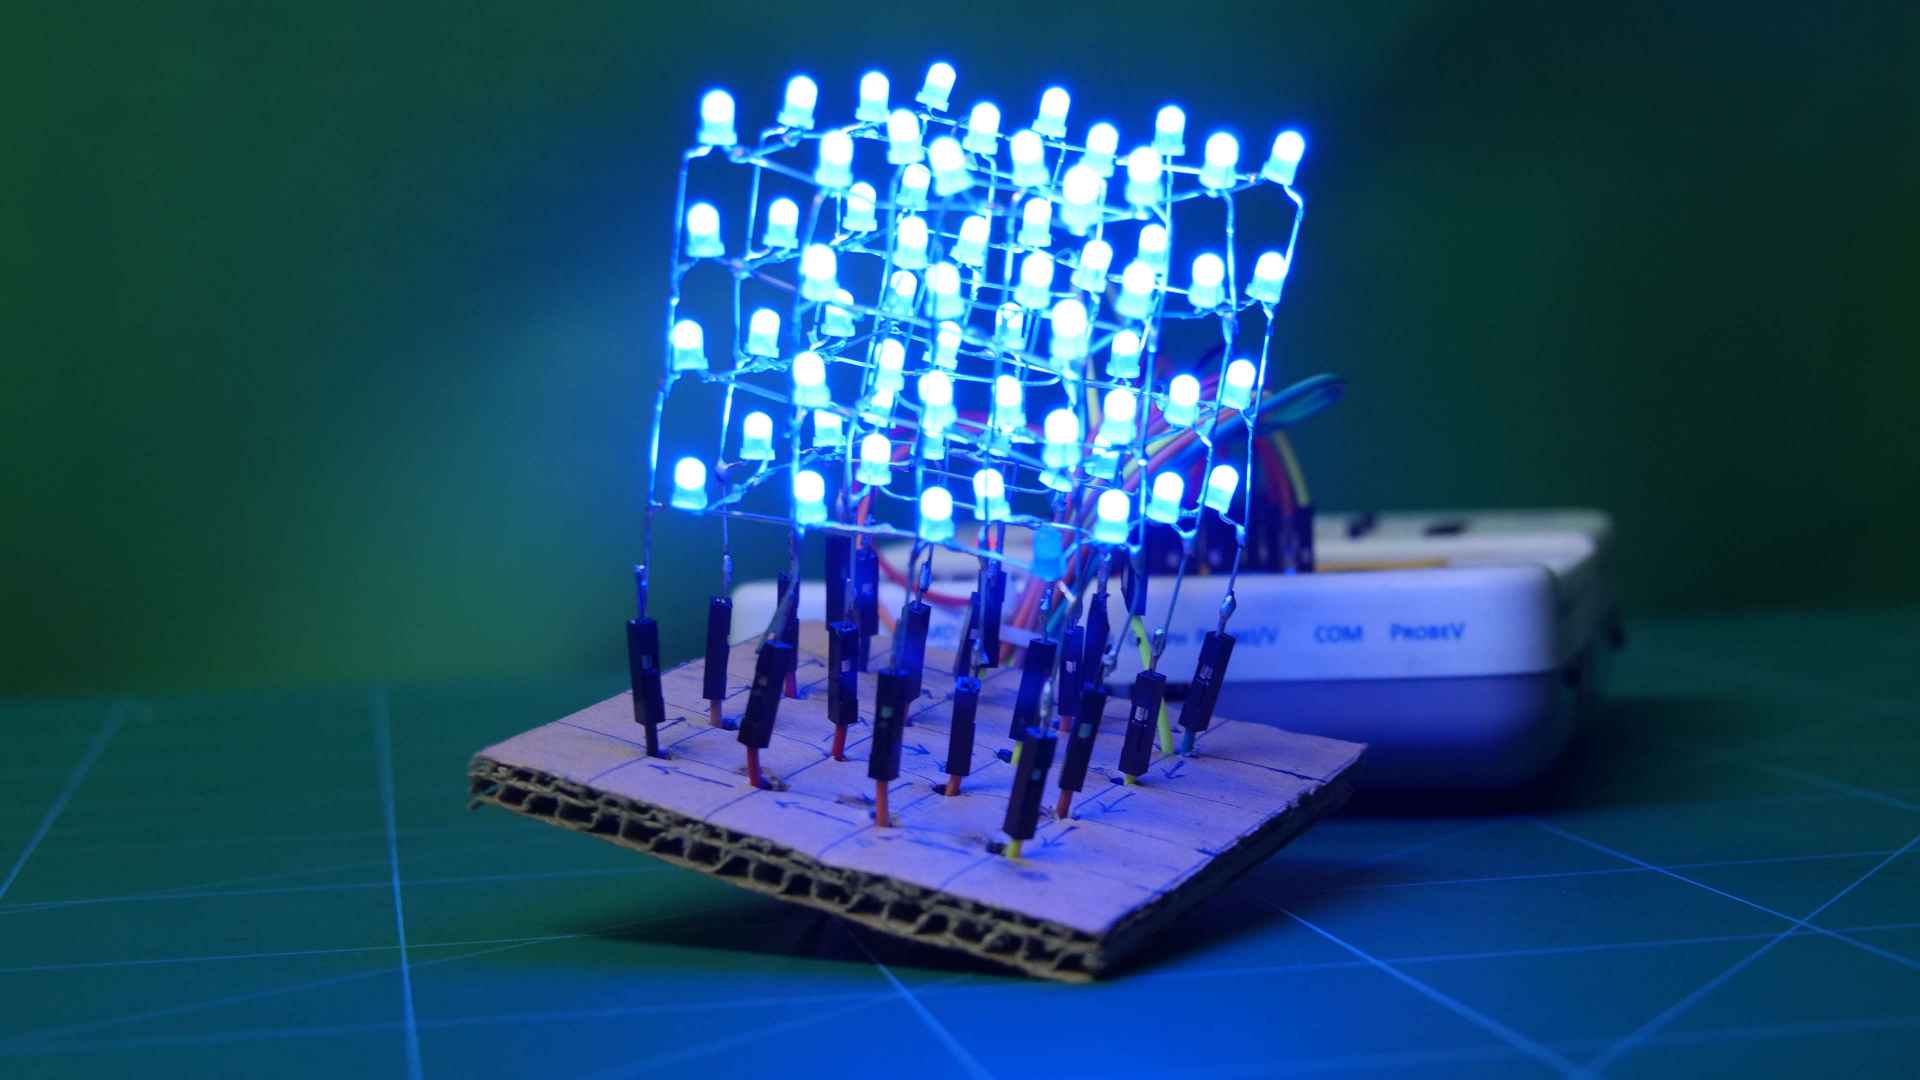
Connection with evive
The following figure shows the labeled the channels for our convenience.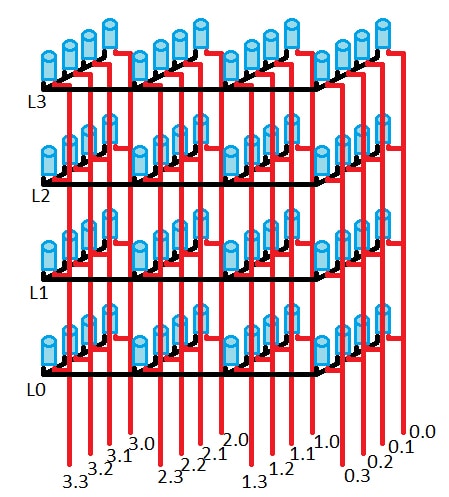
Making the connections as follows:
Rows:
- L0 = A0
- L1 = A1
- L2 = A2
- L3 = A3
Columns:
- 0.0 = D13
- 0.1 = D12
- 0.2 = D11
- 0.3 = D10
- 1.0 = D9
- 1.1 = D8
- 1.2 = D7
- 1.3 = D6
- 2.0 = D5
- 2.1 = D4
- 2.2 = D3
- 2.3 = D2
- 3.0 = D1
- 3.1 = D0
- 3.2 = A5
- 3.3 = A4
Working
The LED cube will be working according to the code that we will feed in evive.
Upload the following code for the pattern similar to us.
Whereas you can generate your own pattern too.
Conclusion
With this, your very own Flashing LED Cube is ready! Time to make your home Christmas ready with a touch of sparkling DIY!


 1-37 screenshot")


