
Introduction
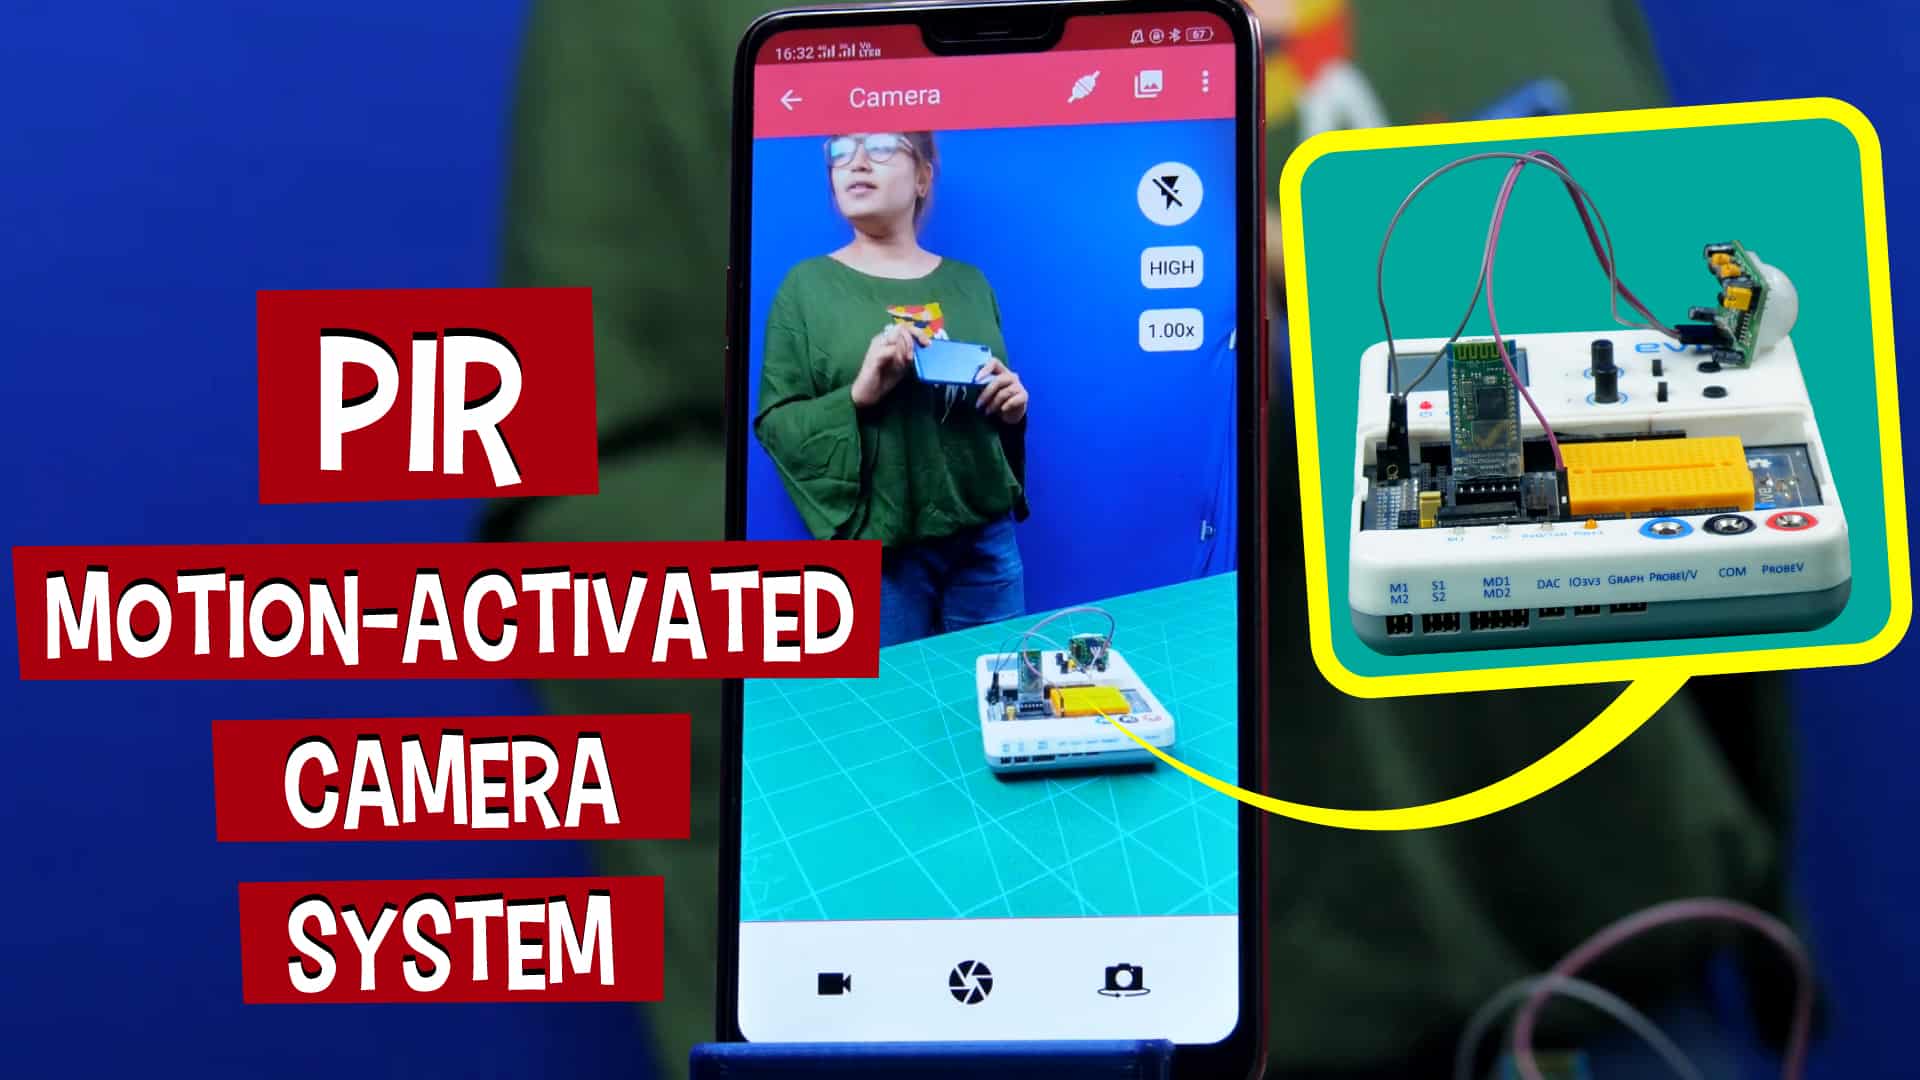
Burglars don’t have a cat in hell’s chance of nicking even a feather from your house with this PIR motion-activated camera system in place! This efficient and easy-to-make system takes a picture of whoever disturbs the calm of the PIR sensor. Dabble, our versatile project-making mobile app is the backbone of this project. Its camera module enables the Smartphone to catch the thief red-handed. And what makes it possible for all of this to work? PictoBlox, our Scratch 3.0-based graphical programming software!
You can download Dabble from Google Play and get PictoBlox HERE.
Ready to make this easy and effective monitoring system?
Hop on board!
Making the Connections
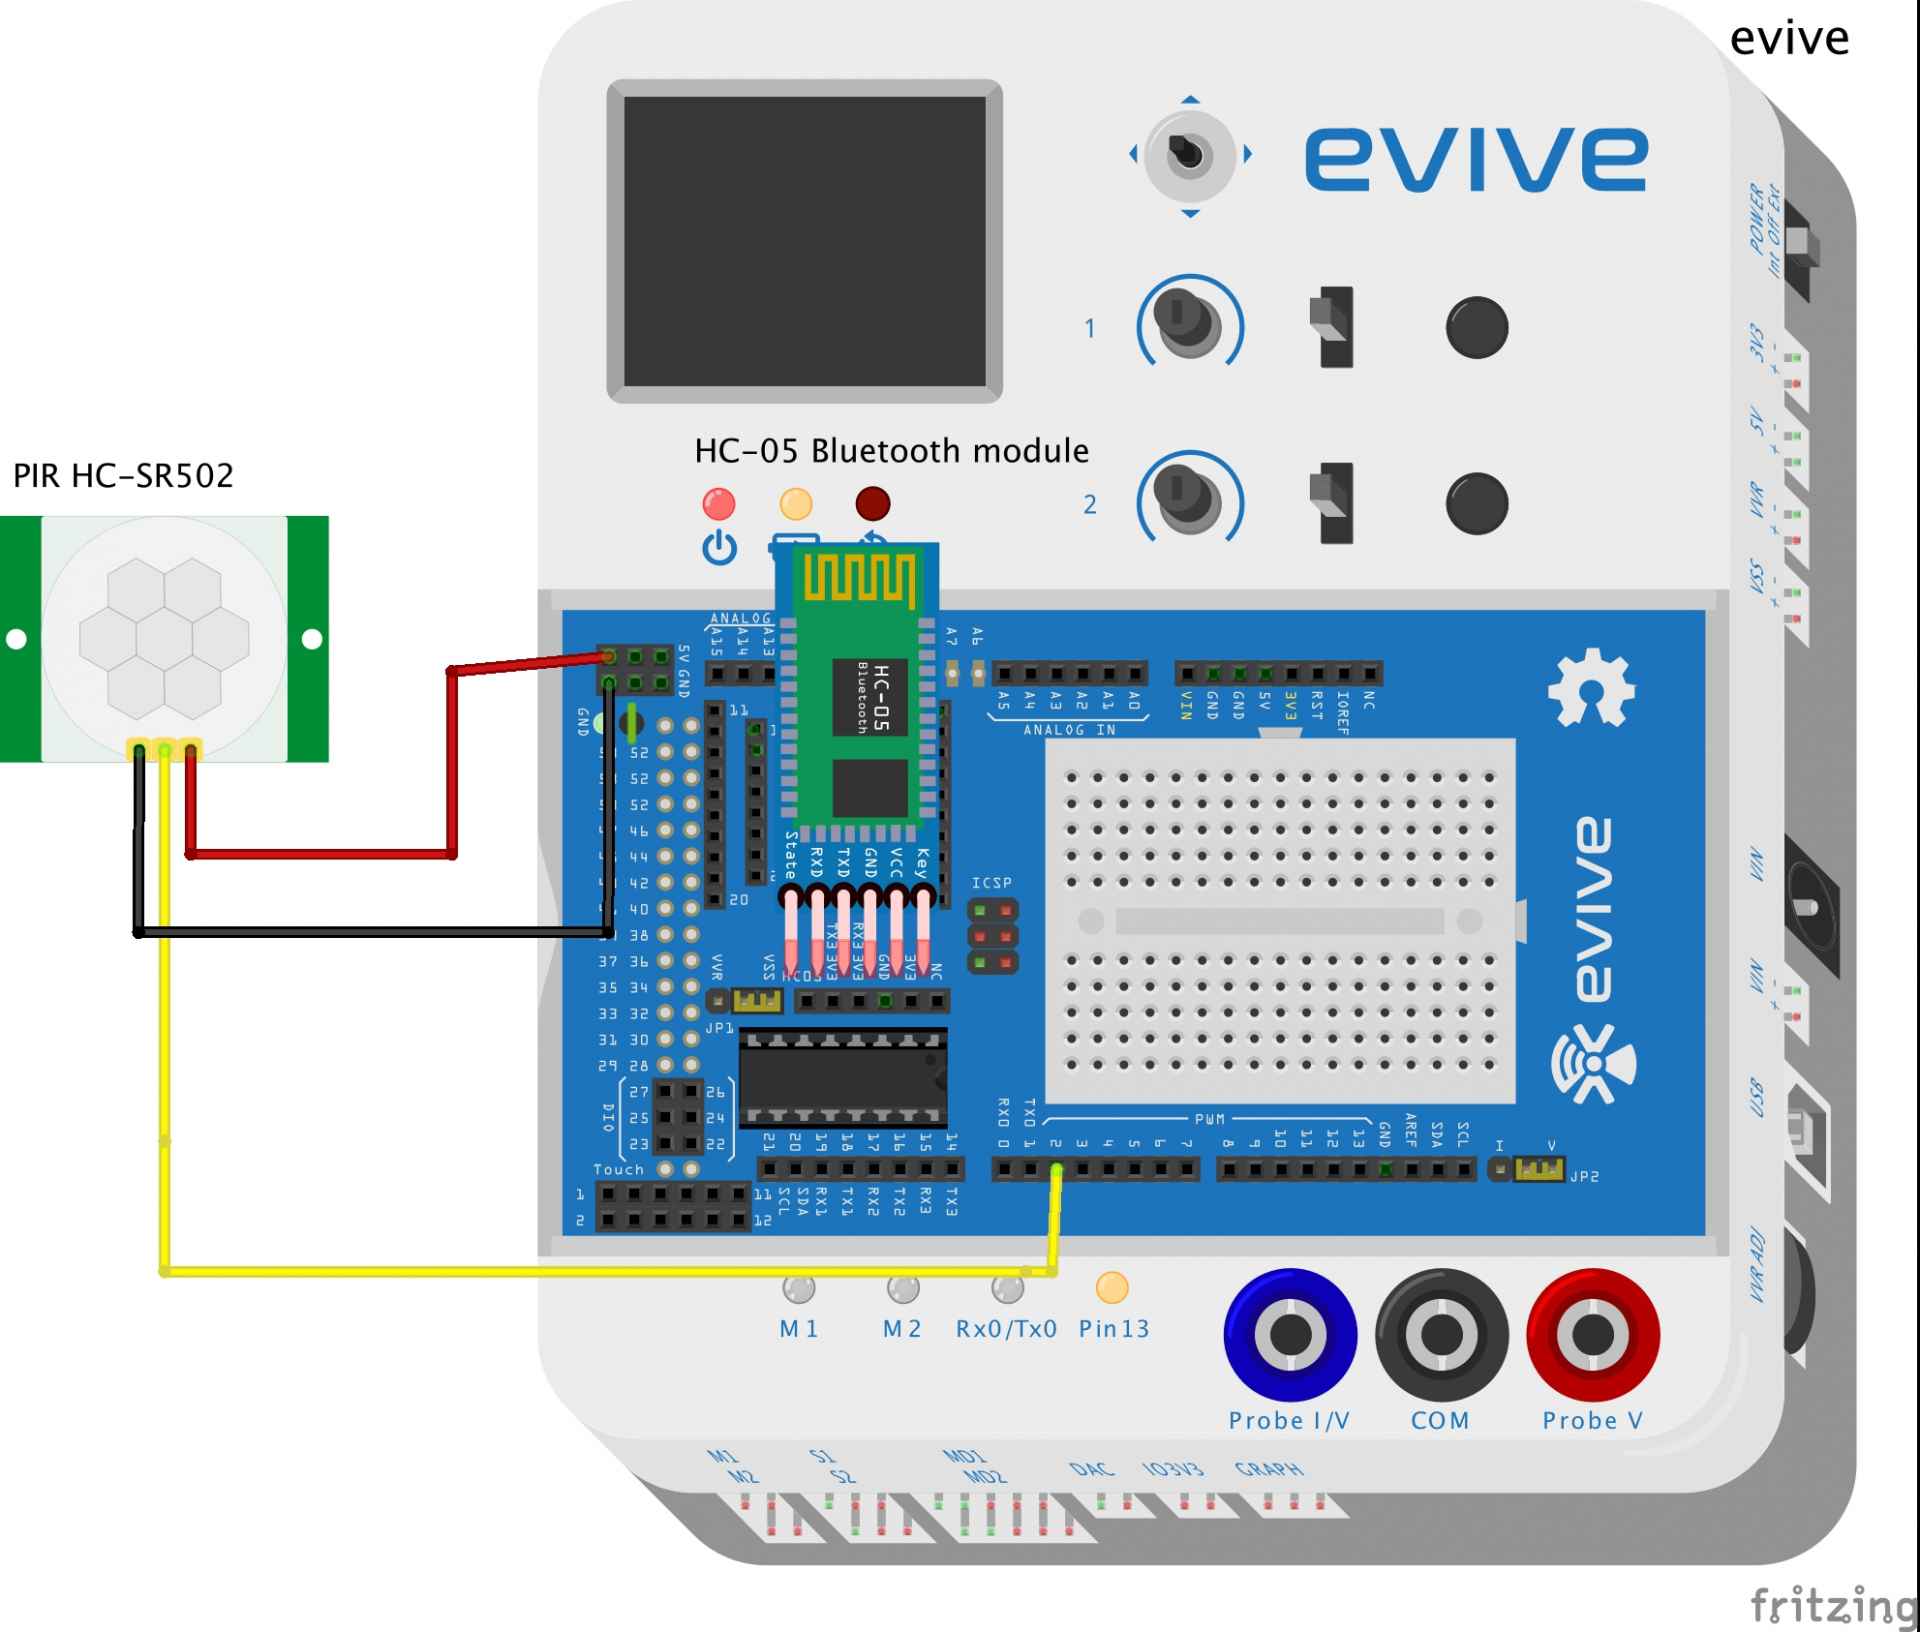
Make the connections as given:
Connect the Bluetooth Module to the Bluetooth Driver.
Connect the PIR as follows:
- VCC – +5V of evive
- GND – GND of evive
- Signal – Digital Pin 2
Logic
The PIR Sensor is used to detect the presence of a human in its proximity. In this project, we will be using it to detect the presence of the burglar. Once the sensor detects the human presence, the PIR pin is set to HIGH, and this data is sent to evive, which then sends it to Dabble.
Pair the app with the Bluetooth Module. Open the Camera module in the app and then select the Camera and Video option. Now, as soon as the pin of the PIR sensor is HIGH, the code of capturing the image runs and the camera capture it and saves it in your phone’s gallery.
Code
PictoBlox is a graphical programming software based on Scratch 3.0 that makes learning how to code easy and fun. It allows you to interface and control evive with your computer and even uploads code to it.
You can download PictoBlox from here.
- First of all, go to the Board tab and select evive as your board. Then, open the extensions library by clicking on the purple button in the bottom-left corner of the screen and add the Dabble App extension.
- Next, drag and drop the evive startup hat block into the scripting area.
- Take set camera flash to and set it to off, quality to high, and zoom to 0%.
- Drag and drop the rotate camera to block and set it to the rear side.

- Drag and drop the forever block from the Control palette.
- Next, take the refresh data block from the Dabble App extension.
- Then, drag and drop the if-else block from the Control palette.
- Now, we need to get the data from the PIR sensor attached at PIN 2. For that, drag and drop the read digital sensor block from sensors into the if condition.

- Change the sensor to PIR at pin as 2.
- Add a wait block and set the time to 1.5 seconds.
- We need to set the digital pin 13 as HIGH when the sensor detects someone’s presence.
- As soon as the sensor detects the presence, we want the system to capture the image of the culprit.
- For that, we will use the Capture image block from the Dabble App extension.
- Once the image is captured, the sensor should wait before sending the next value. Thus, add wait block and set the time to 5 seconds.
- Finally, in the else condition, set digital pin 13 to LOW.
Thus, our code is complete. Upload it to evive.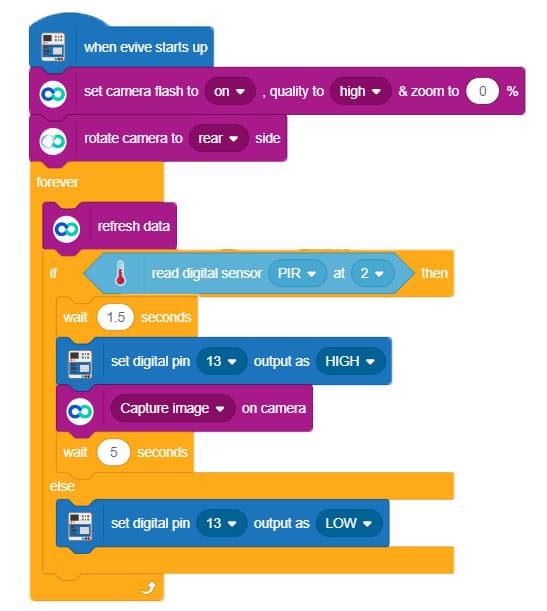
Conclusion
With this, your PIR motion-activated camera system is now ready! Nobody will be able to escape its hawk-like eyes!
Our campaign’s been going great and we’ve been receiving loads of love and support from people all over the world! Have a look at what everybody’s finding so amazing about it HERE!


