
Introduction
When your mom asks you to bring something for her, such as a pen or her mobile, you must have dreamt of making a robot or a gadget to do it. Use the components provided, and of course our dear old mBlock, et voila! You have a Pick and Place Robot which will do your work for you.
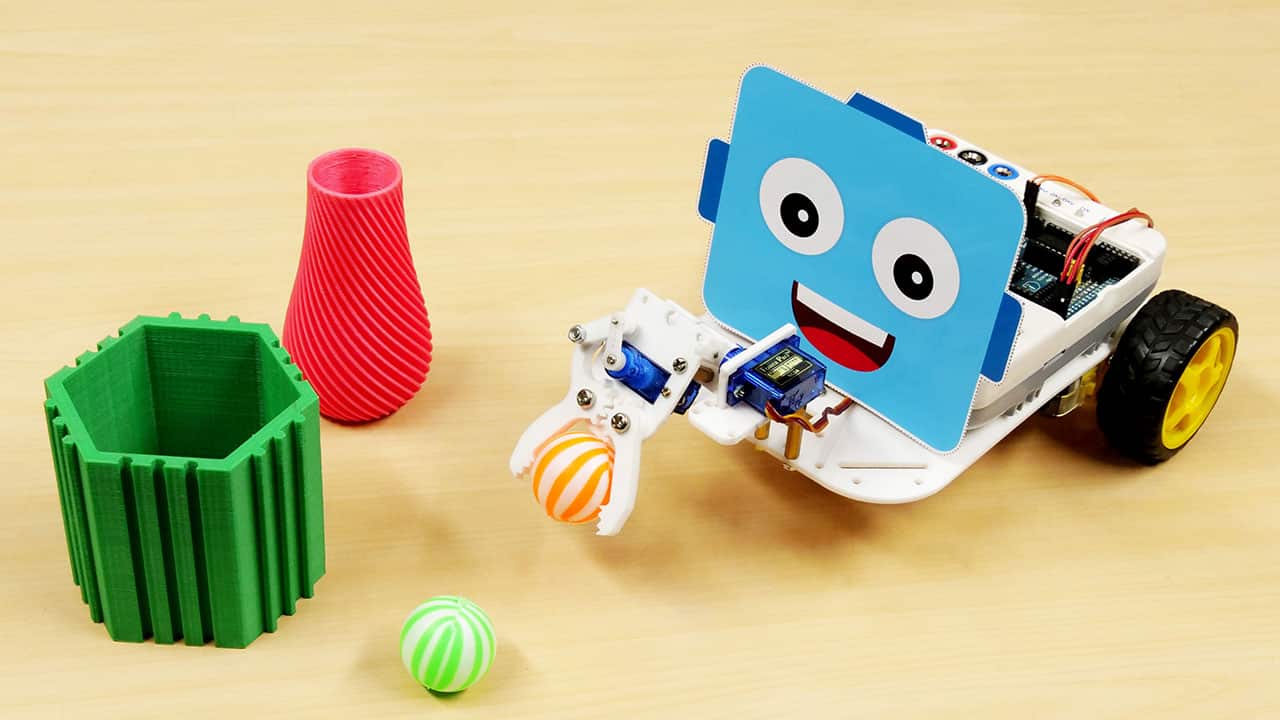
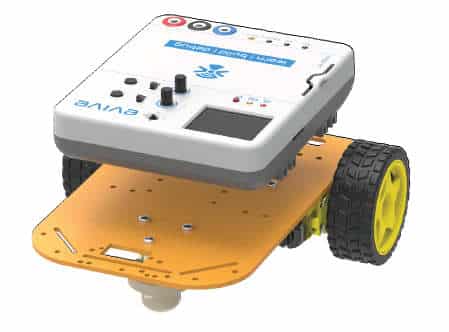
The Pick and Place Robot picks up an object from a particular location. It then places it wherever we want as it will follow the directions given by us. Given below is the final assembly of it.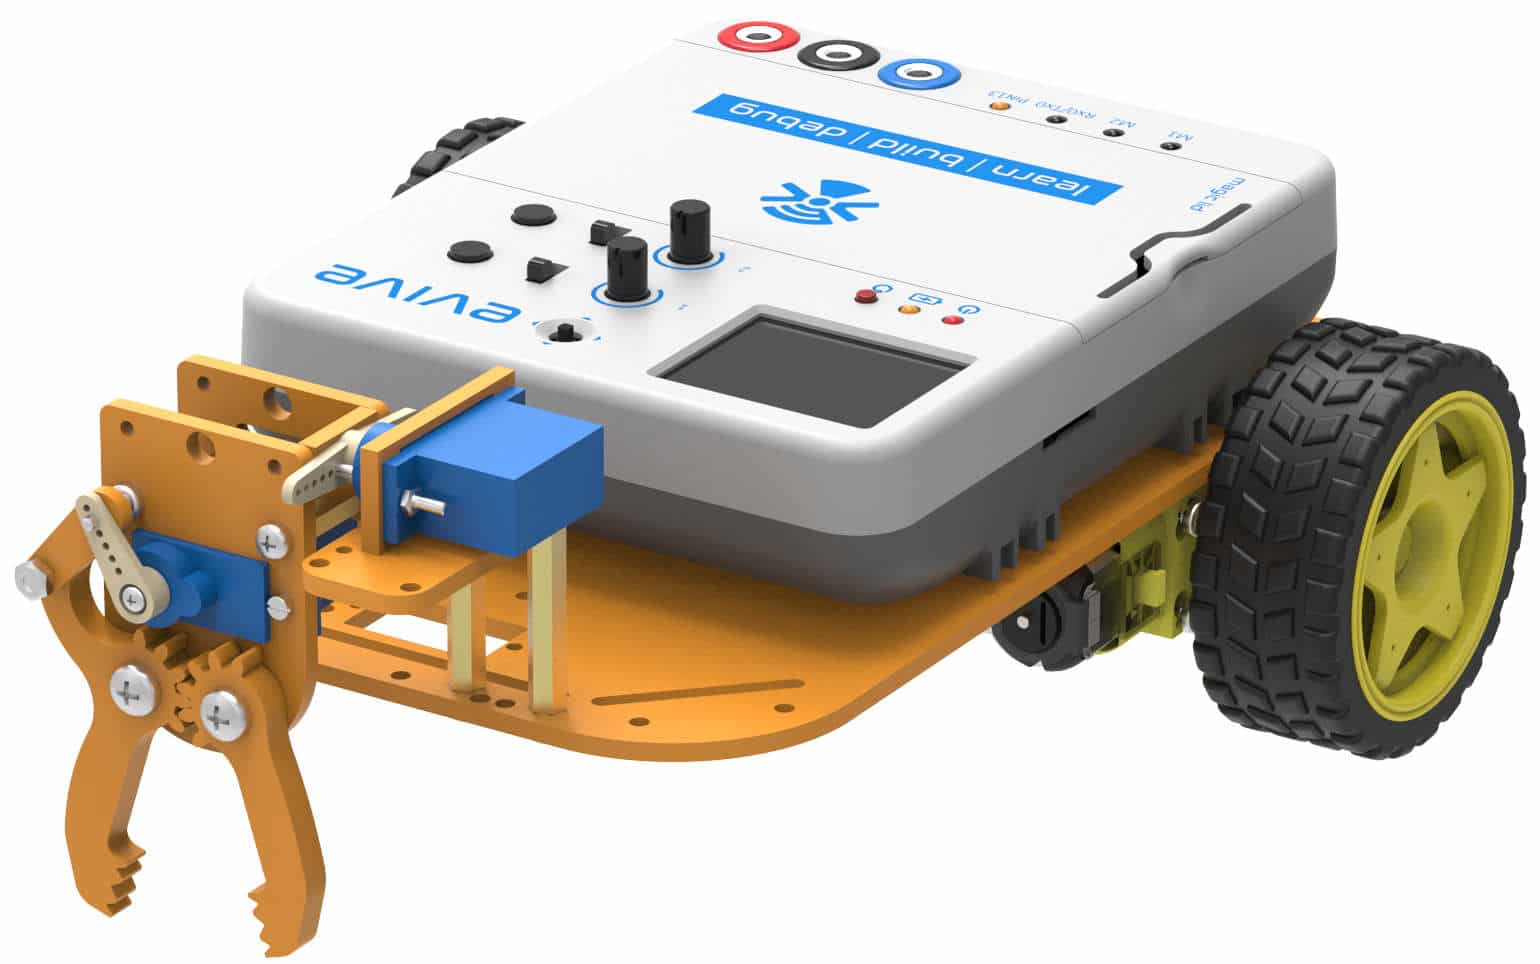
Assembly
The annotated base is shown on right. This is the bottom side. There is evive logo on the top side for your reference. So be careful while using the base.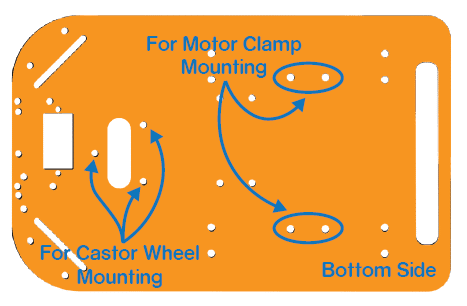
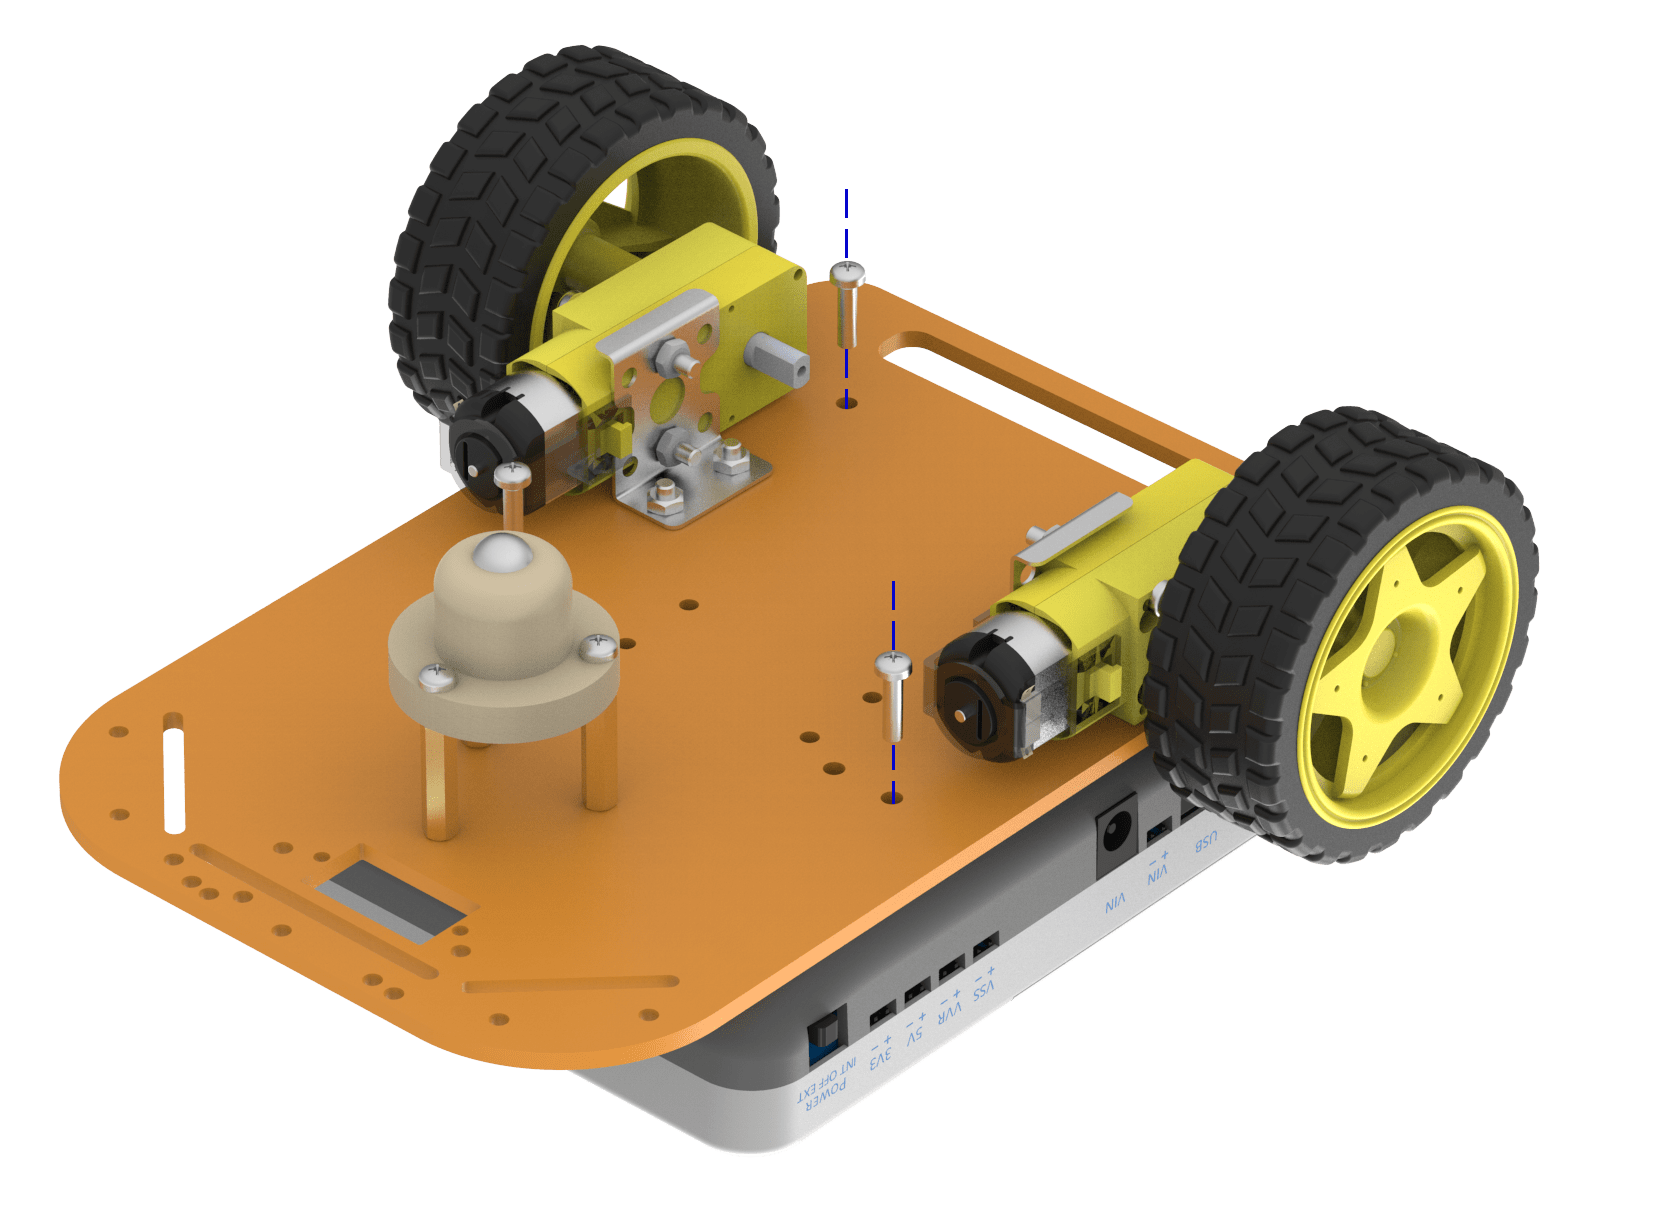
- Fix the motor mounting brackets to the chassis using M3 bolts of 8mm length and M3 nuts.
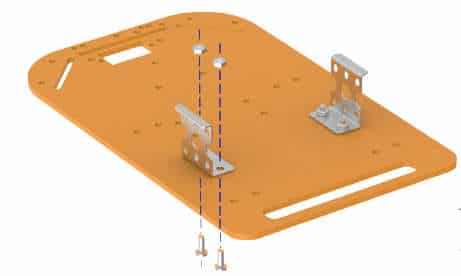

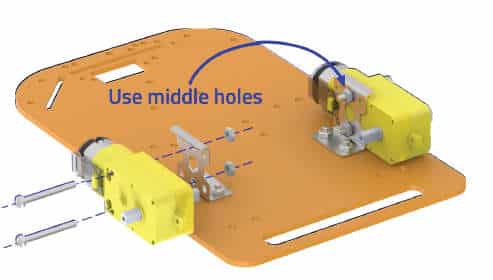
- Attach the two motors, one to each bracket, side by side and fasten using M3 bolts of 25mm length and M3 nuts.
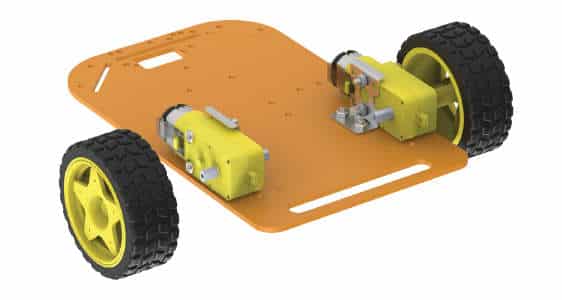
- Now, fit the wheels into the protruding motor shafts.
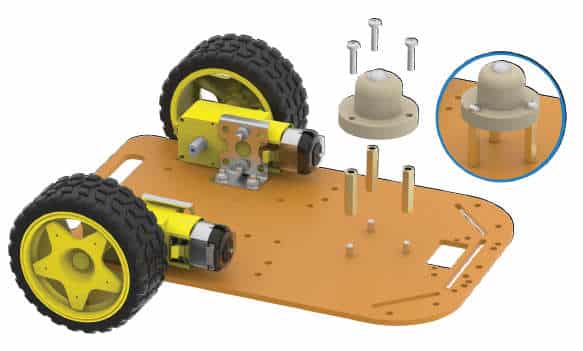
- We’ll attach the Castor wheel now. First, we will mount the M3 standoffs (20 mm) on which the Castor will be attached. Fasten the standoffs to the chassis using M3 bolts of 8mm length.
- Place the Castor on top of the standoffs in the configuration shown and fasten using M3 bolts of 12 mm length.

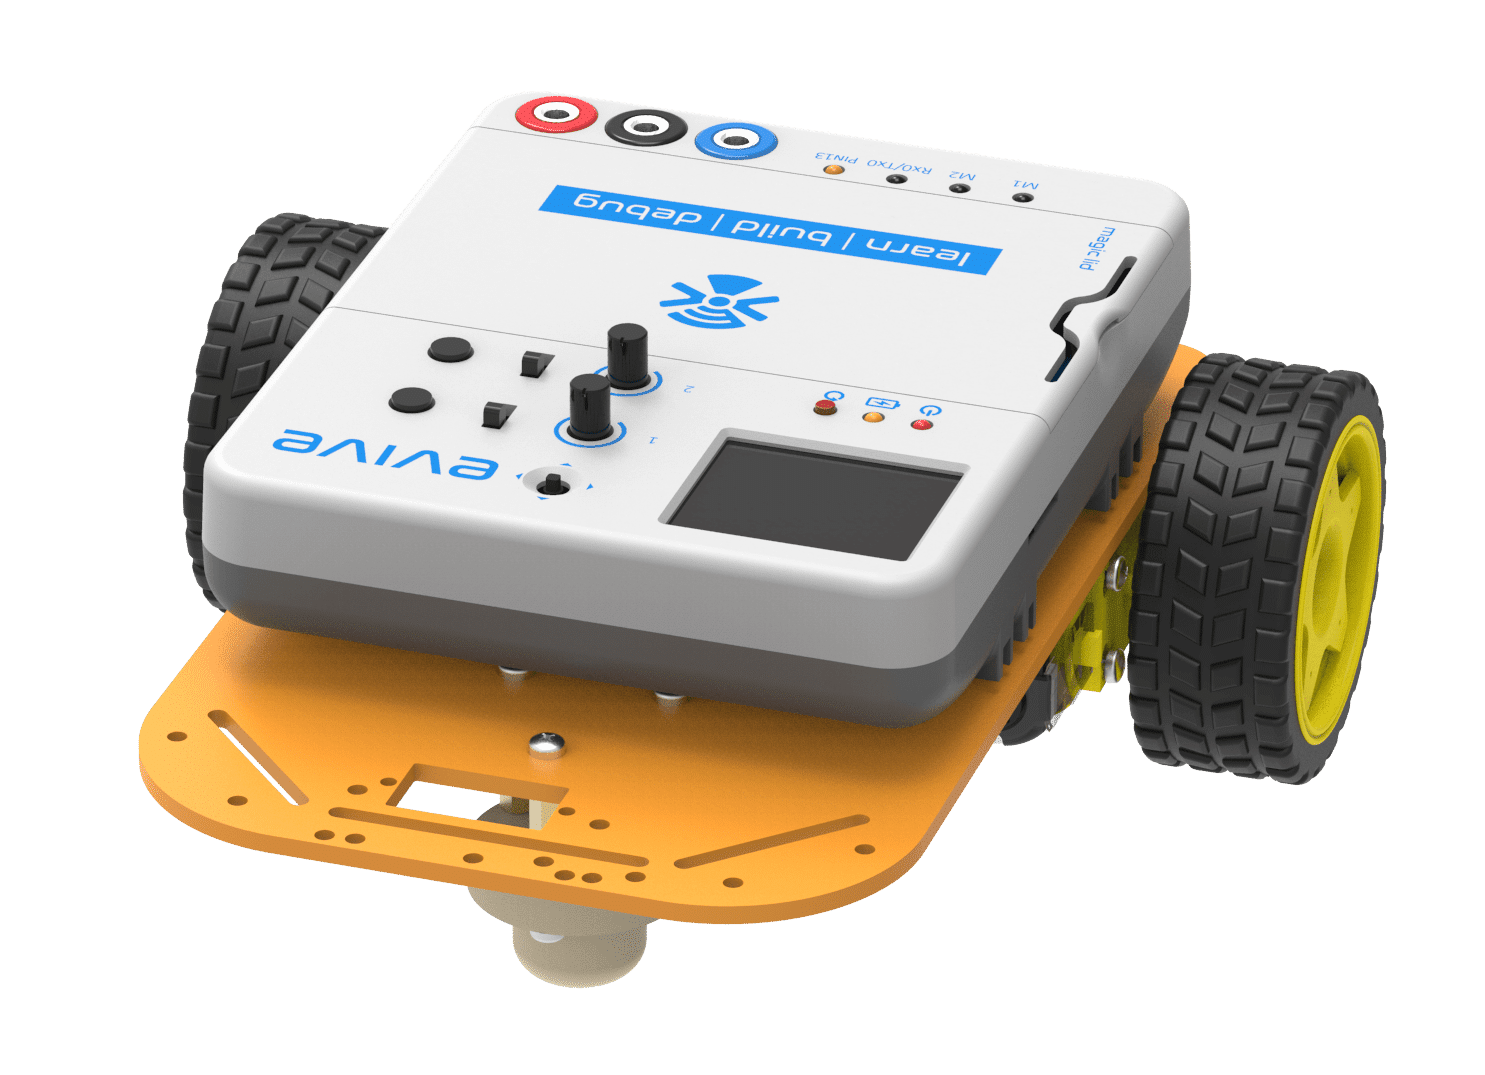
- 5Flip the assembly and place evive on the top of the chassis.
- Using the holes on the back of evive fasten it to the chassis using M3 bolts of 12mm length.
- Flip the assembly.
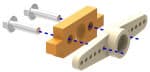
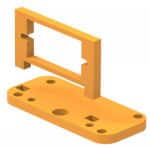
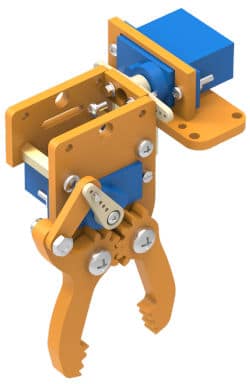
- First, we will assemble the gripper. For that, insert the servo motor into the rectangular slot of the Gripper Base Plate.
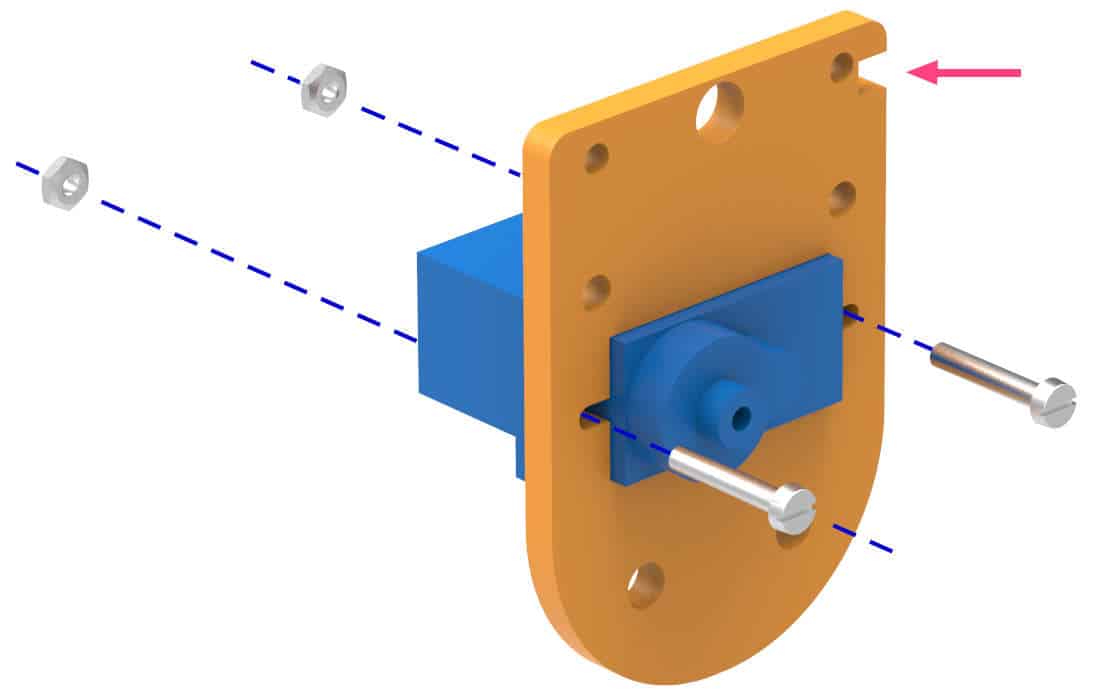
- Fasten the servo motor to the Gripper Base Plate using M2 bolts of length 12mm.

- Using evive controls menu, set the servo angle to 45° (approx) and then disconnect the servo.
Make sure that you set the servo angle to 45o (approx). If you don’t, your robot, will not work properly.
- Take the Gripper Link and attach a micro servo single-sided horn to it using self-threading screws. Keep it loose enough so that they can rotate freely.
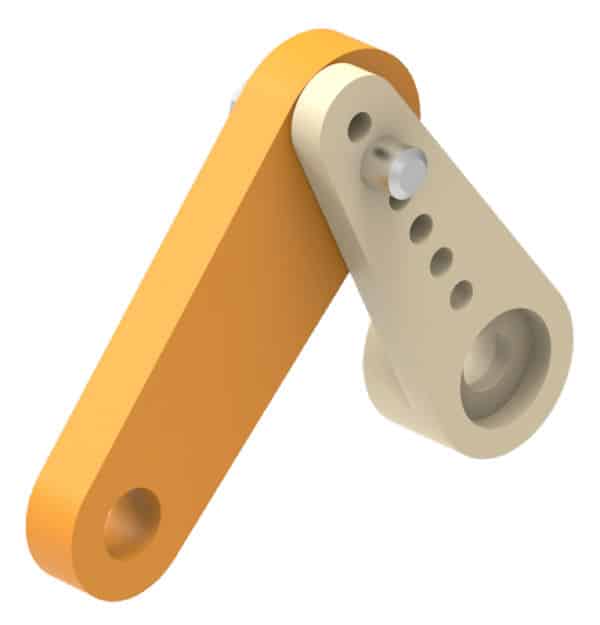
- Mount this assembly to the Gripper Claw 1 using an M3 bolt of 12mm length and M3 nut.
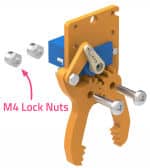
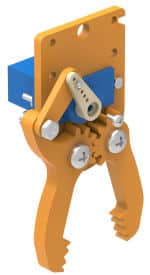
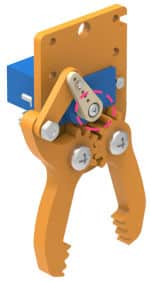
- Fasten this assembly to the Gripper Base Plate – Servo assembly such that the free Servo head locks into the motor in similar orientation as shown. Arrange both the gripper claws such that the gears mate properly. Fasten both the claws to the Gripper Base Plate with M4 bolts of 16mm length and M4 nuts.
- Lock the horn to the servo head using the M2 screw provided with the servo accessories.
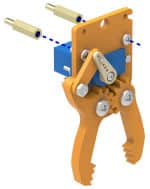
- Attach 15mm standoffs to the threaded end of the M3 bolts placed on the Gripper Base Plate as shown.
- Now attach the servo horn to the Gripper Plate 2 using the self-threading M2 screw provided with servo accessories as shown.
- Insert the assembly made in step 9 into the notches in the Gripper Base Plate and Gripper Plate 1 as shown in the corresponding image.
- Fasten M3 nuts at the threaded end of the standoffs.
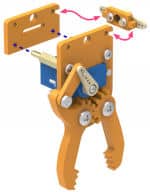
- Now, we will assemble the second part of our gripper. Insert the servo motor holder into the servo mounting plate and glue it using superglue.
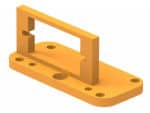
- Attach 30mm F-F standoffs as shown above using M3 bolts of 8mm length.
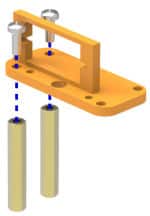
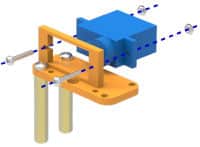
- Push the servo into the slot of servo motor holder and fasten it using M2 bolts of 12mm length and M2 nuts.
- Set the servo angle to 0° using evive controls menu as we had done earlier.
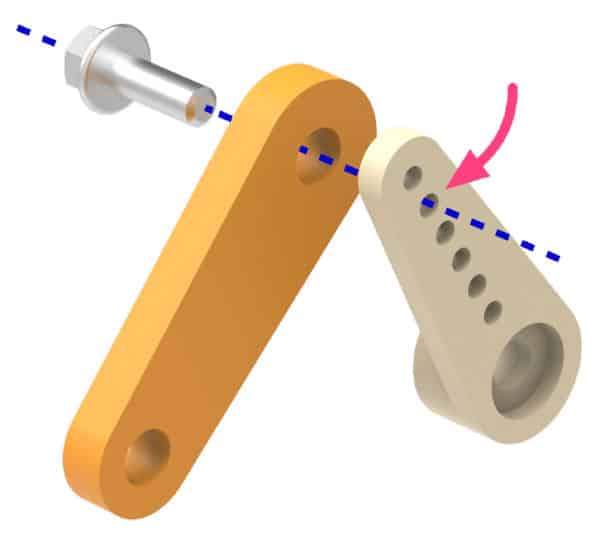
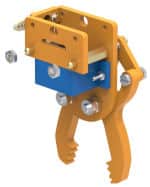
- There is a free servo horn in the assembly made in step 10 and a free servo head in the assembly made in step 14. Gently push the servo head into the servo horn in the horizontal orientation as shown and lock them together using the M2 screw available with servo accessories.
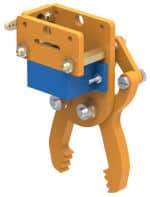
- Fasten the completed gripper assembly to the front of the base plate through the threaded ends of standoffs using M3 bolts of 8mm length.
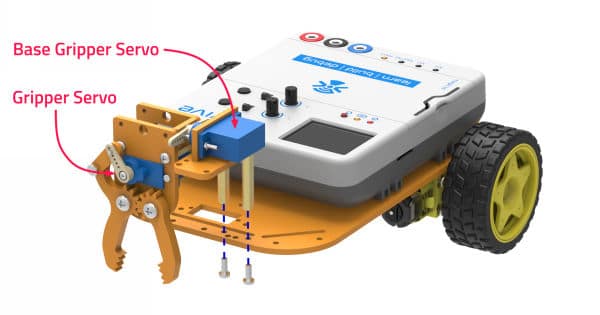
Your Pick and Place Mobile Robot is now ready. You can also decorate your robot using the cut-outs given in the kit.
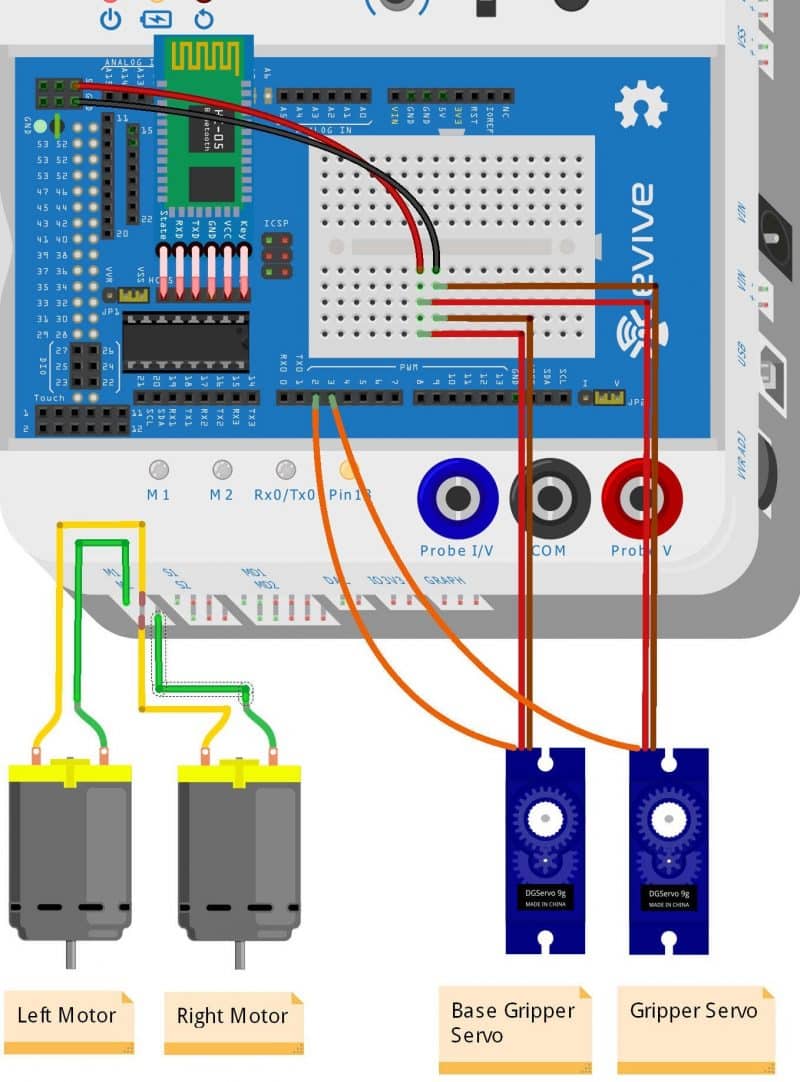
Making the Connections
Make the connections as given below:
Logic
The Pick and Place robot will be controlled using the evive smartphone app via Bluetooth. The robot can perform the following actions:
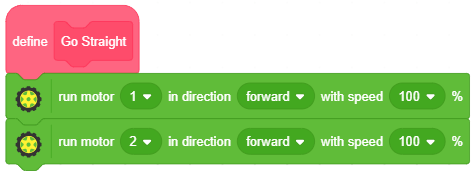
- Go Straight
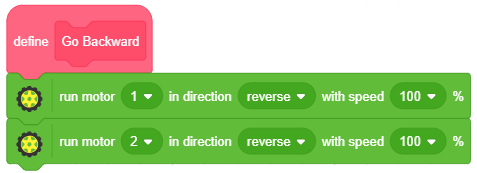
- Go Backward
- Turn Right
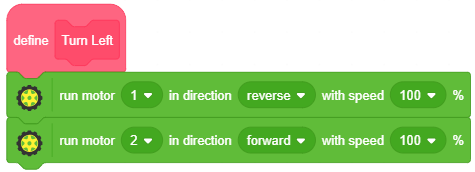
- Turn Left
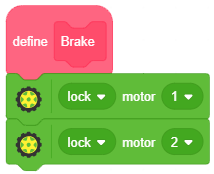
- Brake
- Gripper Up
- Gripper Down
- Gripper Open
- Gripper Close
Programming the Pick and Place Robot
Now, we are going to write the scripts for the pick and place robot.
- Open a new program. Select the board from the Menubar as evive.
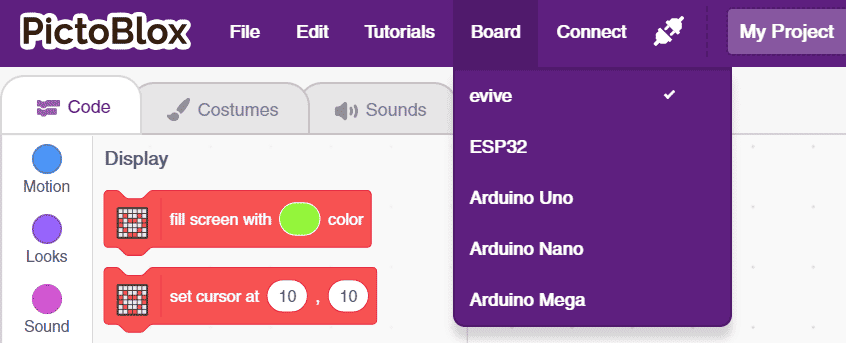 This will automatically add the evive, evive display, Actuators, and Sensors extension in the block palette.
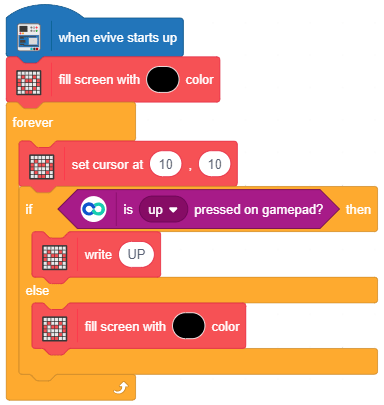
 - Drag and drop the when evive starts up hat block from evive extension into the scripting area.
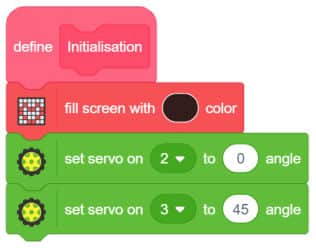
- Set the TFT background to black with fill screen with () color from evive display extension.
- Whatever comes after the fill screen with () color block must repeat forever. Hence, sanp a forever block from control palette below fill screen with () color.
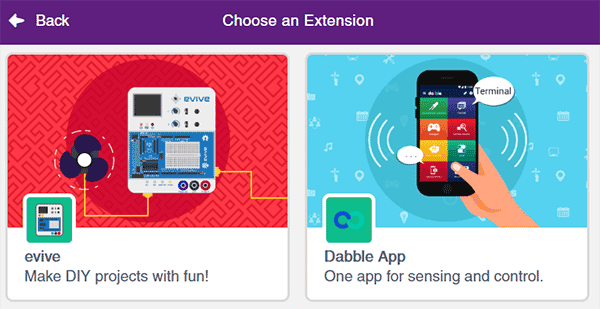
- To add Dabble extension click on add extension from the bottom left and select the Dabble app from the extension library.
- Drag and drop the if-else block. Next, drag and drop the Is () pressed on gamepad? block inside the diamond-shaped space in the if arm of the if-else block.
- Then, drag and drop the write () block below the if arm to display the result. Write UP in its space. If the button is not pressed, then the screen should remain blank. Below is the test script.
- We will now test our code. Connect your evive to the computer using USB cable, and click on connect in the Menubar. It will show the boards connected to the computer. Select the appropriate port.

- Upload the script to your evive.
-
The HC-05/HM10 Bluetooth module is used to connect our robot to Dabble.
-
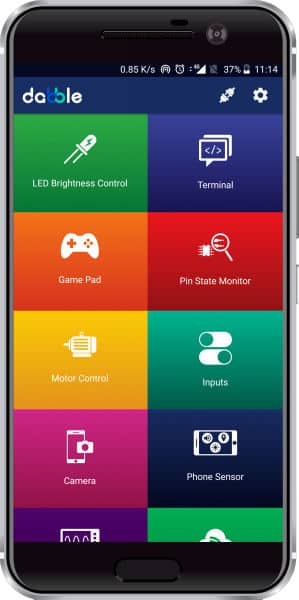
Install the app from the Play Store or App Store and open it.
-
Click on the connect icon.
-
A dialogue box will appear on the screen asking for permission to turn on Bluetooth. Click on ‘Allow’.
-
Once you do so, a list of nearby devices will appear. Select your device’s name. Passwords for pairing with the device in your Smartphone’s Bluetooth setting:
For HC-05: 000 0 or 1234 & for HM-10: 000000 or 123456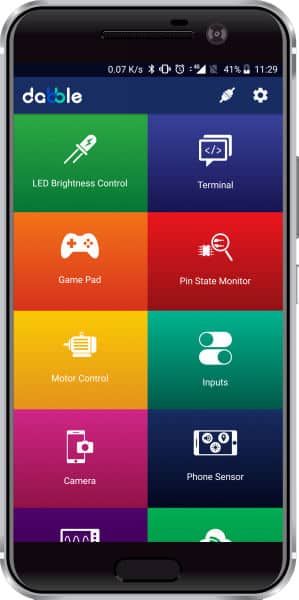
-
Open the Gamepad module. You can now control your robot using the keys of the gamepad.
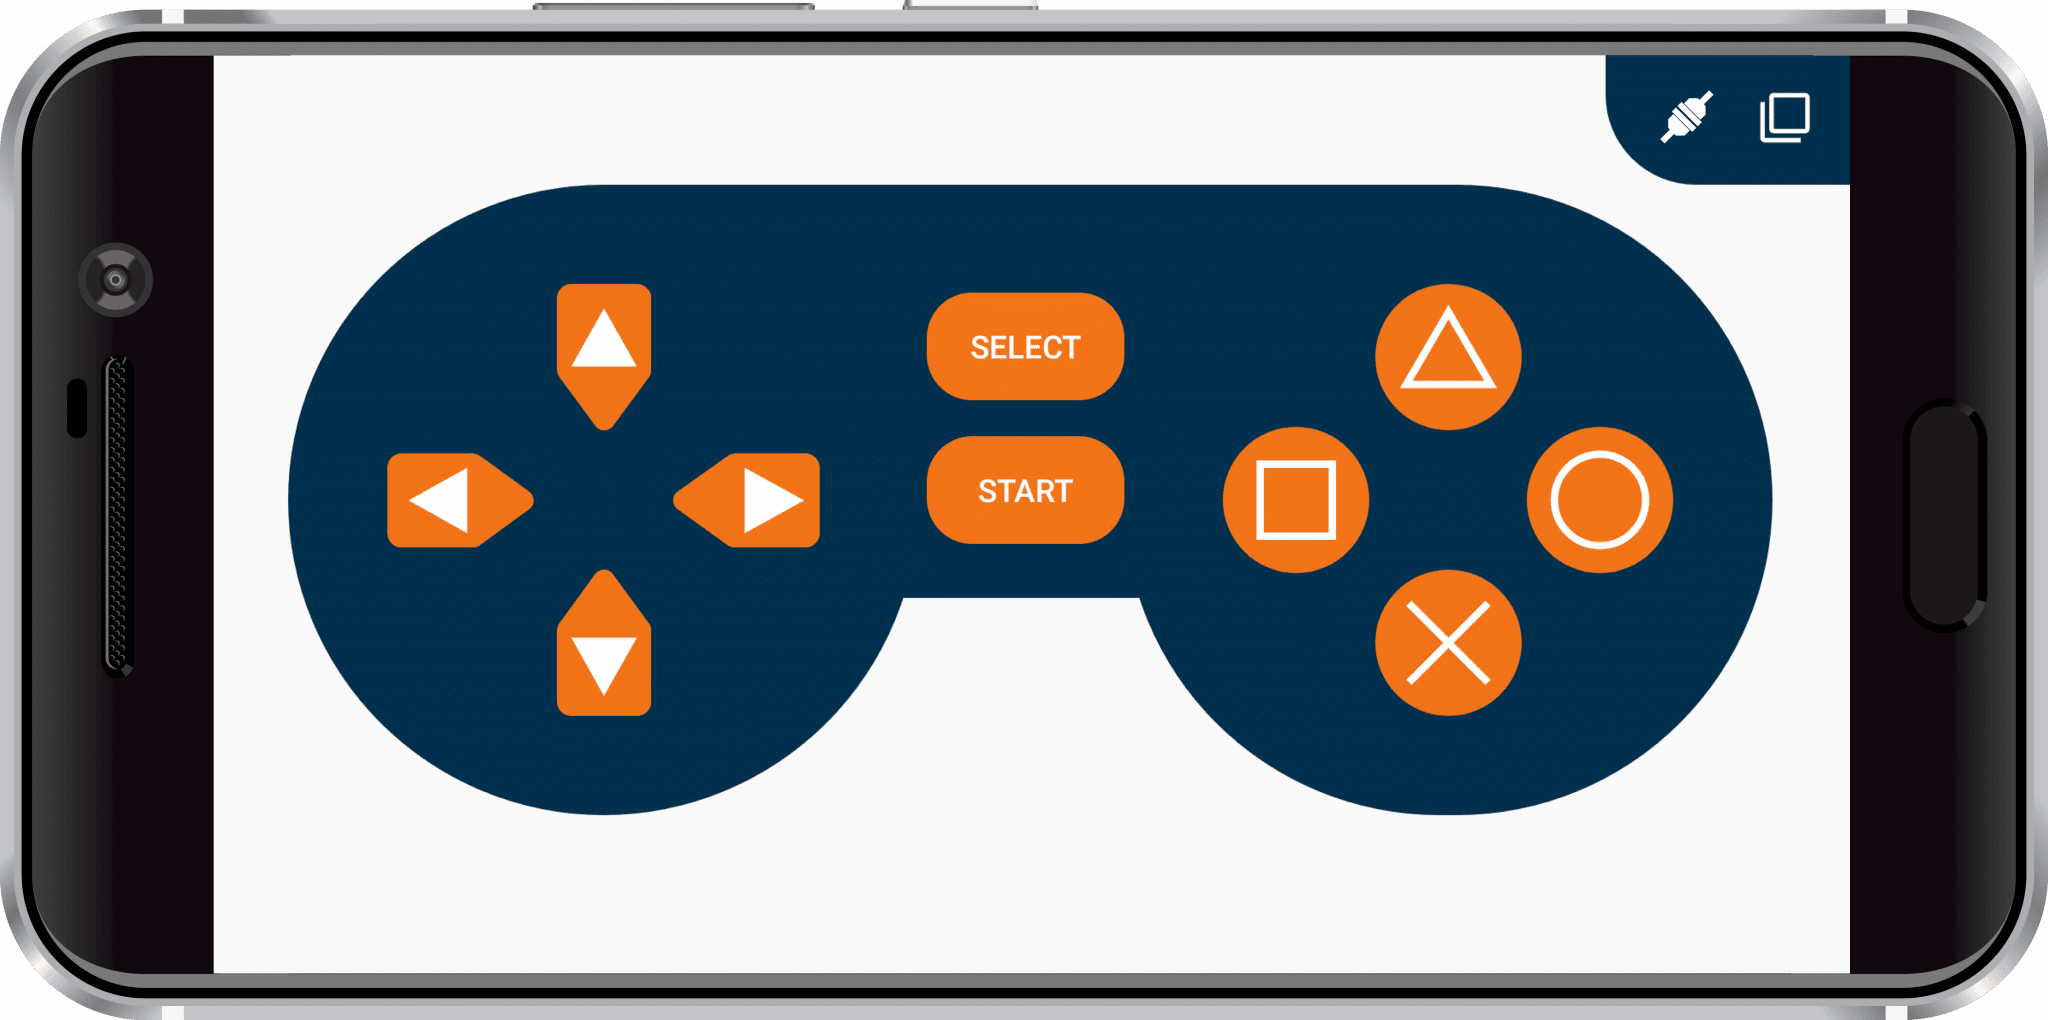
- Touch the buttons, and you will observe the corresponding values printed on the TFT Screen. This means your communication is working and we are good to go.
- Now, we have to assign action according to the button pressed.
- To make the robot move, create blocks Go Straight, Go Backward, Turn Right, Turn Left and Brake.

- Create the Initialisation block to set the servo angle to 0° and 45°.
- Create blocks for moving the gripper up and down. Remember that for the up position, the servo angle is 180° and for the down position, it is 0°. Add some delay for smooth functioning.


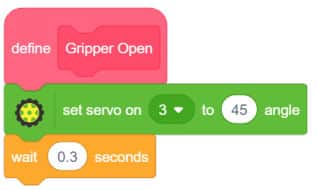
- Similarly, create blocks for opening and closing the gripper. For opening the gripper, the servo angle is 45° and for closing the gripper it is 90°.

- The complete script is shown here.

After completing the main script, upload it to evive and run the robot.
Conclusion
With this your Smartphone Controlled Pick and Place Robot! Now you can command your robot to lift different objects for you.