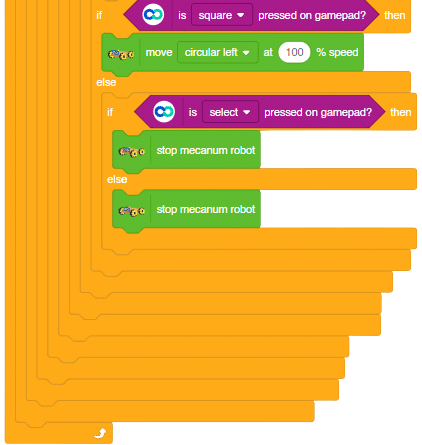
stop mecanum robot

Description

The block stops all the motors of the robot.

Example

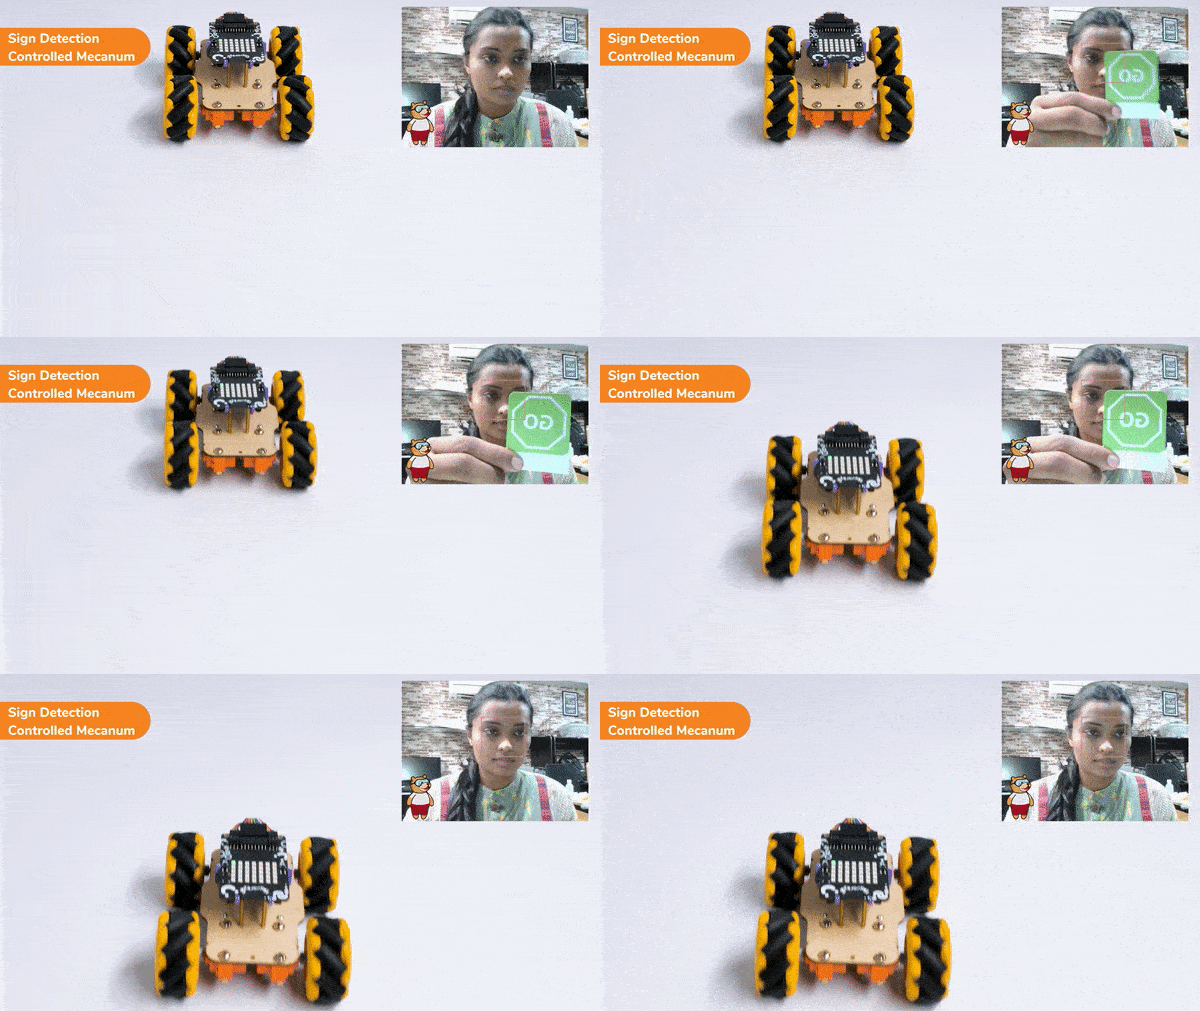
Learn how to code logic for video input detection with this example block code. You will be able to direct your own Mecanum easily by just showing signs through the camera input.

Introduction

A sign detector Mecanum robot is a robot that can recognize and interpret certain signs or signals, such as hand gestures or verbal commands, given by a human. The robot uses sensors, cameras, and machine learning algorithms to detect and understand the sign, and then performs a corresponding action based on the signal detected.

These robots are often used in manufacturing, healthcare, and customer service industries to assist with tasks that require human-like interaction and decision making.

Code

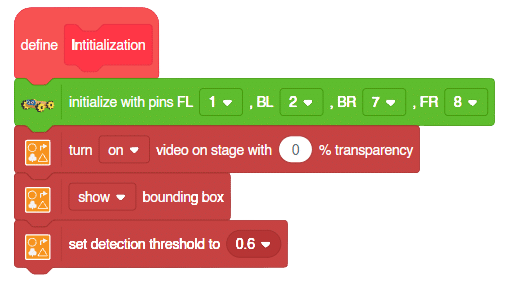
Initialization:

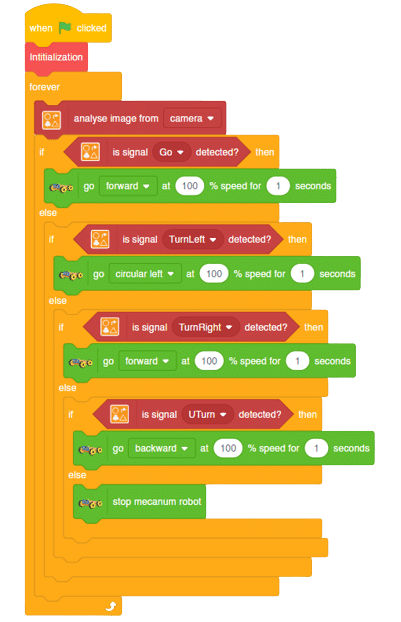
Main Code

Logic

  1. Firstly, the code sets up the stage camera to look for signs and detects and recognizes the signs showed on the camera.
  2. Next, the code starts a loop where the stage camera continuously checks for the signs.
  3. Finally, if the robot sees certain signs (like ‘Go’, ‘Turn Left’, ‘Turn Right’, or ‘U Turn’), it moves in a certain direction (forward, backward, left, or backward) based on the respective signs.
  4. This can help the Mecanum to manoeuvre through the terrain easily by just showing signs on the camera.

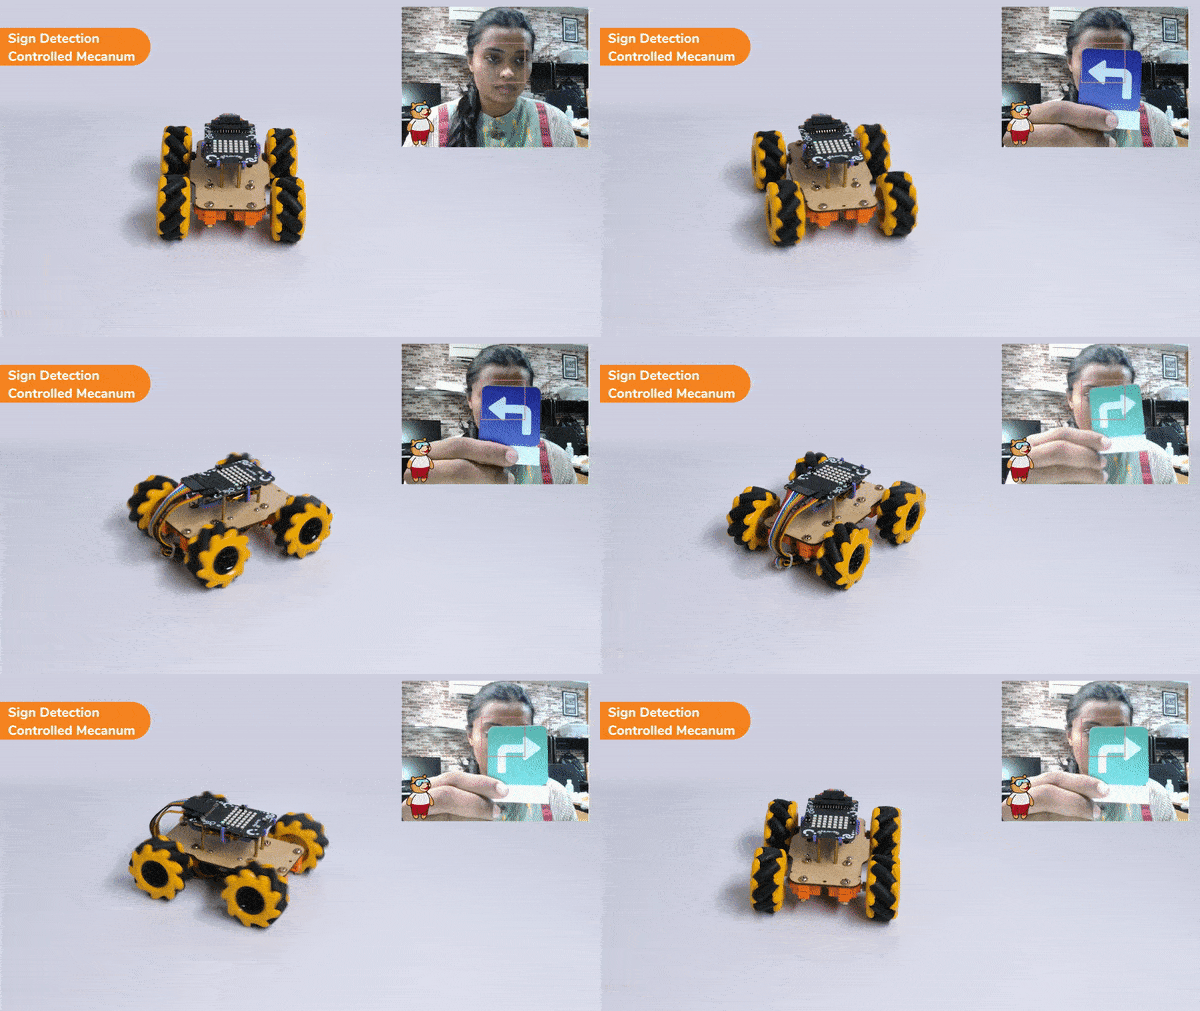
Output

Forward Motion:

Right-Left Motions:

Read More
Learn how to code logic for speech recognized control of Mecanum with this example block code. You will be able to direct your own Mecanum easily by just speaking commands.

Introduction

A speech recognized controlled Mecanum robot is a robot that can recognize and interpret our speech, verbal commands, given by a human. The code uses the speech recognition model that will be able to record and analyze your speech given and react accordingly on the Mecanum.

Speech recognition robots can be used in manufacturing and other industrial settings to control machinery, perform quality control checks, and monitor equipment.

They are also used to help patients with disabilities to communicate with their caregivers, or to provide medication reminders and other health-related information.

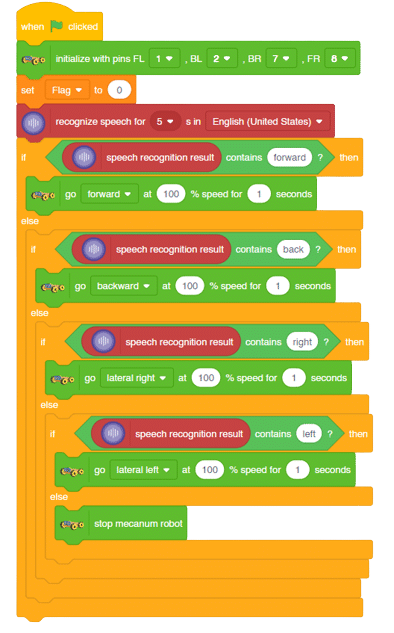
Main Code:

Logic

  1. Firstly, the code initializes the Mecanum pins and starts recording the microphone of the device to store the audio command of the user.
  2. The code then checks conditions whether the command included the word “Forward” or not. You can use customized commands and test for different conditions on your own.
  3. If the first condition stands false, the code again checks for different keywords that are included in the command.
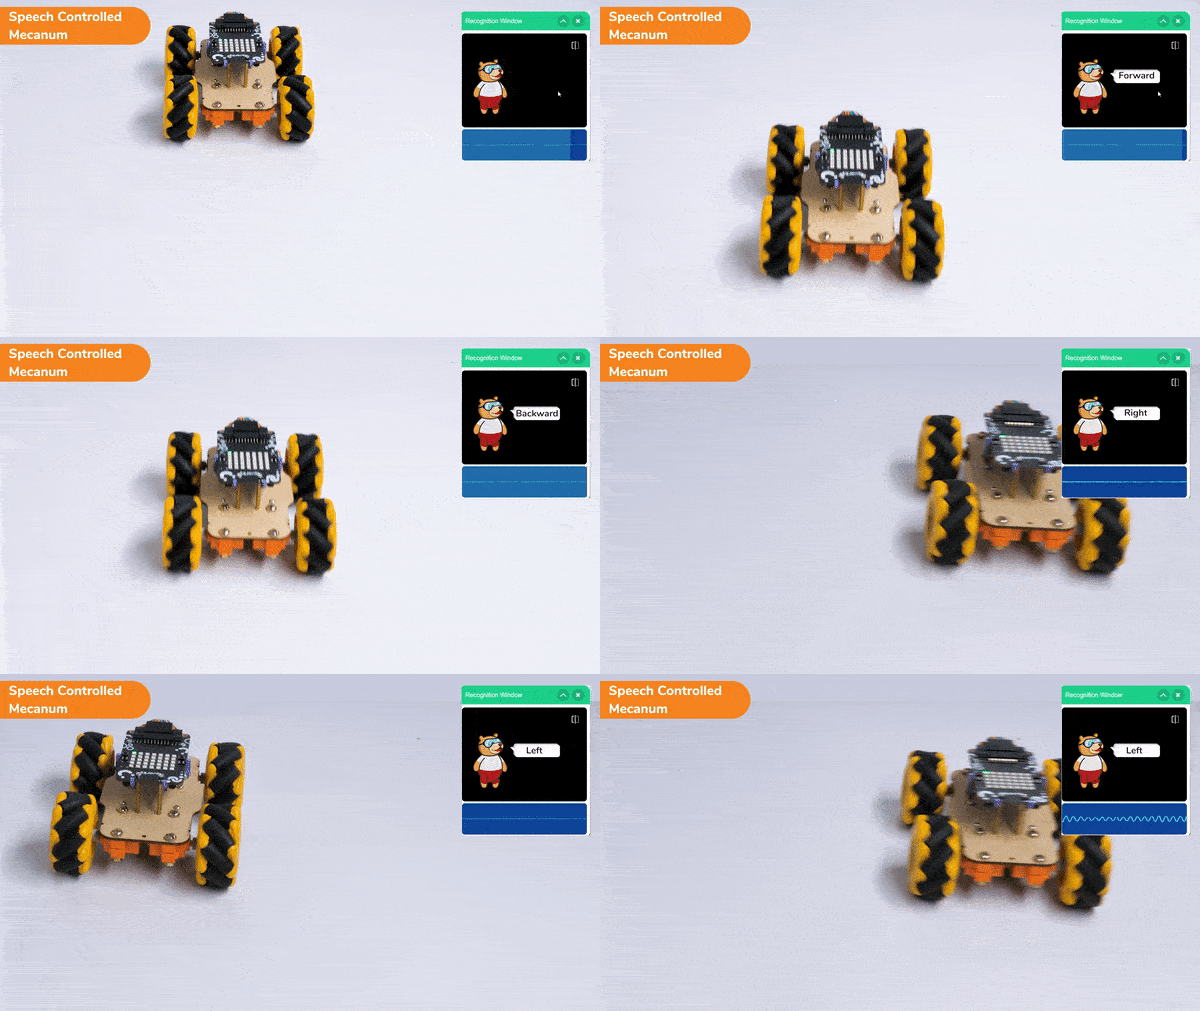
  4. When any condition stands true, the robot will align itself accordingly and move in that direction of the respective command.

Output

Read More
Learn to control Mecanum Gripper Robot using Dabble App on your device with customized functions for different motions and activities.

Introduction

In this activity, we will control the Mecanum Gripper according to our needs using the Dabble application on our own Devices.

We will first understand how to operate Dabble and how to modify our code according to the requirements. The following image is the front page of the Dabble Application.
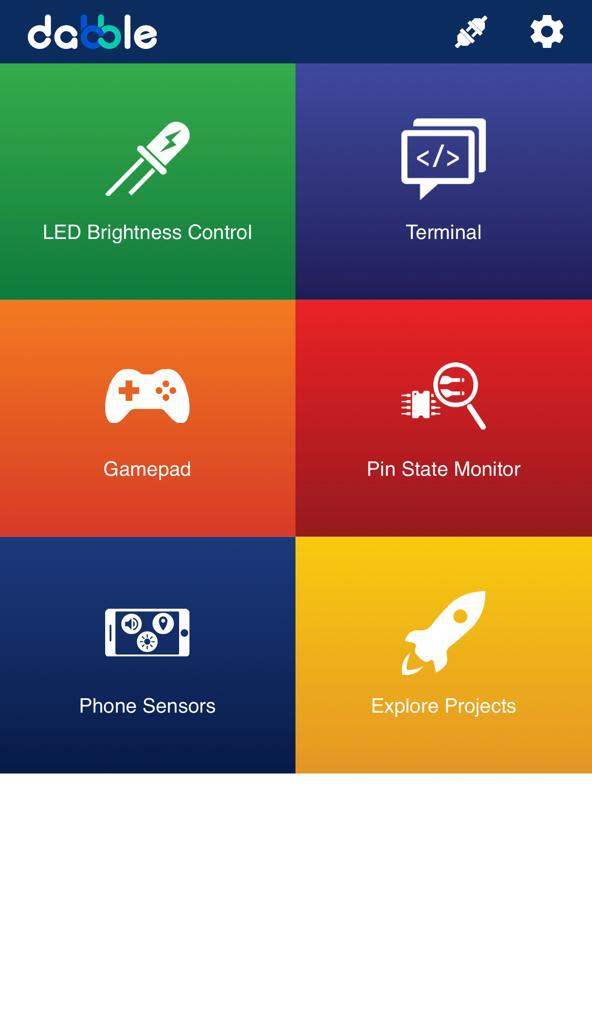
Select the Gamepad option from the Home Screen and we will then use the same gamepad to control our Mecanum Gripper.

Code

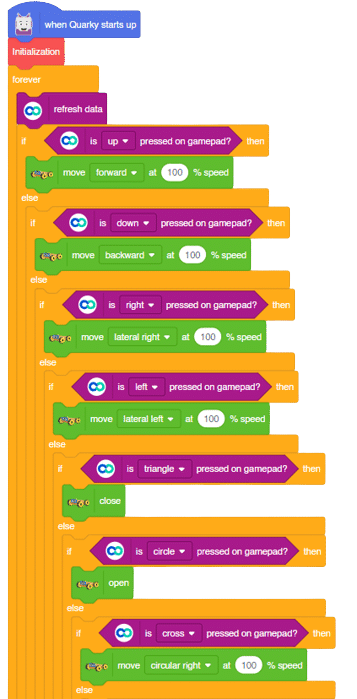
The following blocks represent the different functions that are created to control the Mecanum Gripper for different types of motions. We will use the arrow buttons to control the basic movements.( Forward, Backward, Lateral Left, Lateral Right ). We will use custom functions to control the gripper actions. We will use the Triangle button to close the gripper arms and the Circle button to open the gripper arms. We will use the Cross button to rotate to the right direction and we will use the Square button to rotate to the left direction. We can use the Select button to stop the Mecanum whenever possible.

Note: You can always customize each and every function and button, and make your own activities easily. You will have to add the extensions of Mecanum and also of Dabble to access the blocks. To access the basic extensions required, make sure to select the Board as Quarky first.

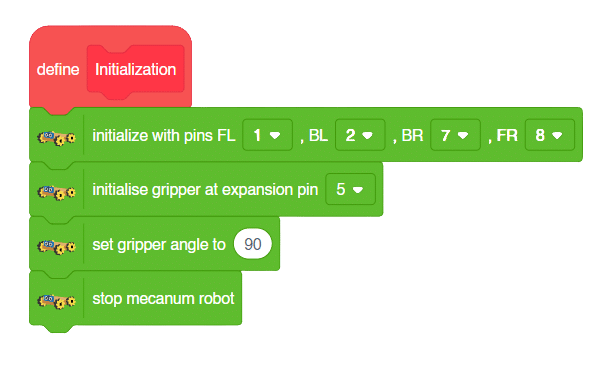
Initialization

Main Code

You will have to connect the Quarky with the Dabble Application on your device. Make sure Bluetooth is enabled on the device before connecting. Connect the Mecanum to the Dabble application after uploading the code. You will be able to connect by clicking on the plug option in the Dabble Application as seen below. Select that plug option and you will find your Quarky device. Connect by clicking on the respective Quarky.

Important Notes

  1. The code will only run by uploading the code by connecting the Mecanum with the help of a C-Type Cable to the Laptop.
  2. You will be able to upload the Python Code by selecting the Upload option beside the Stage option.
  3. There may be a case where you will have to upload the firmware first and then upload the code to the Mecanum. You will be able to upload the firmware in Quarky with the help of the following steps:
    1. Select the Quarky Palette from the Block Section.
    2. Select the Settings button on top of the palette.
    3. In the settings dialog box, scroll down, and select the Upload Firmware option. This will help you to reset the Quarky if any previous code was uploaded or not.
  4. After the Firmware is uploaded, click on the “Upload Code” option to upload the code.
  5. You will have to add the block “When Quarky Starts Up” rather than the conventional “When Green Flag is Clicked” for the code to run.

Output

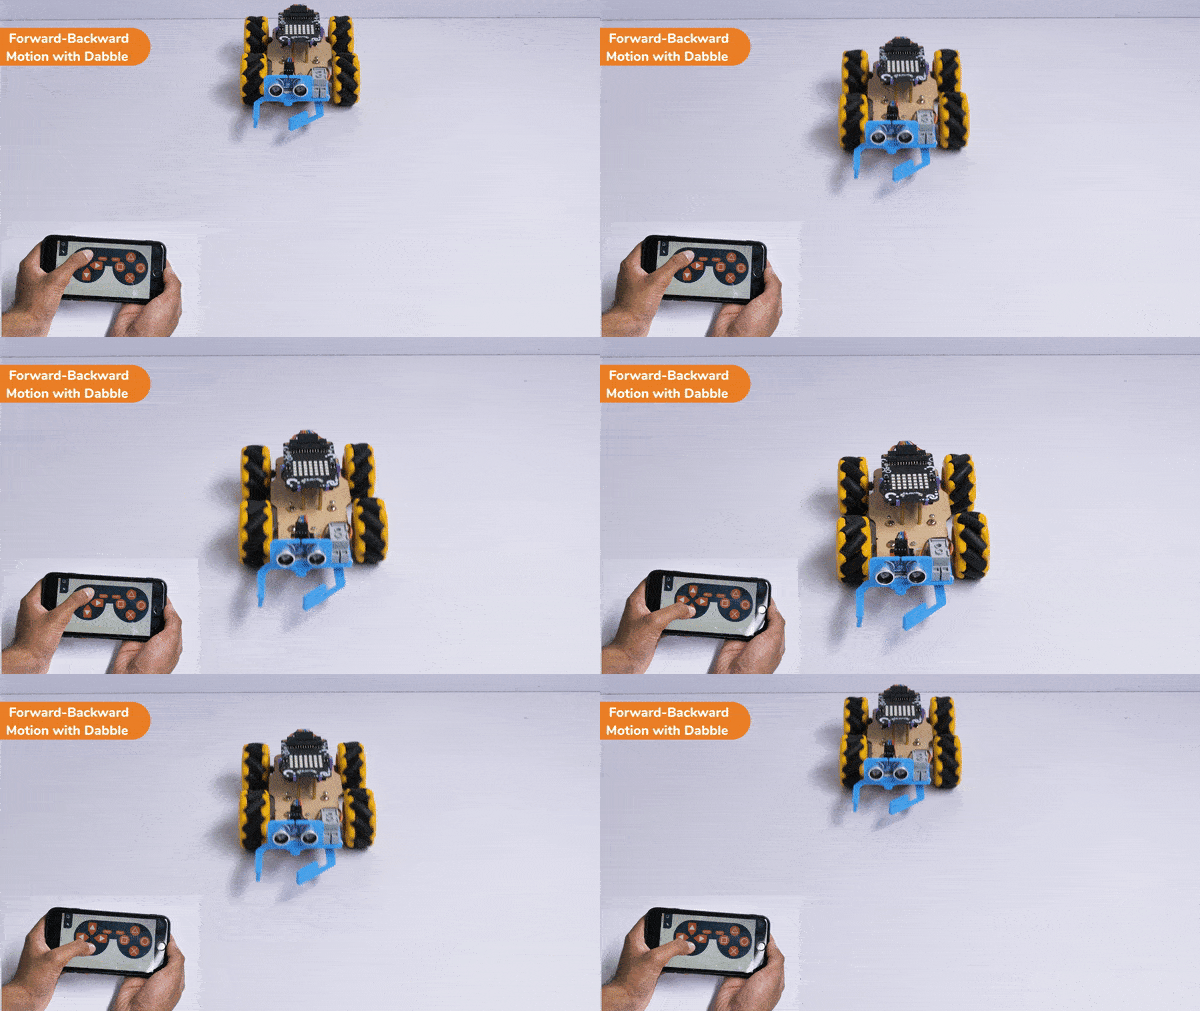
Forward-Backward Motion:

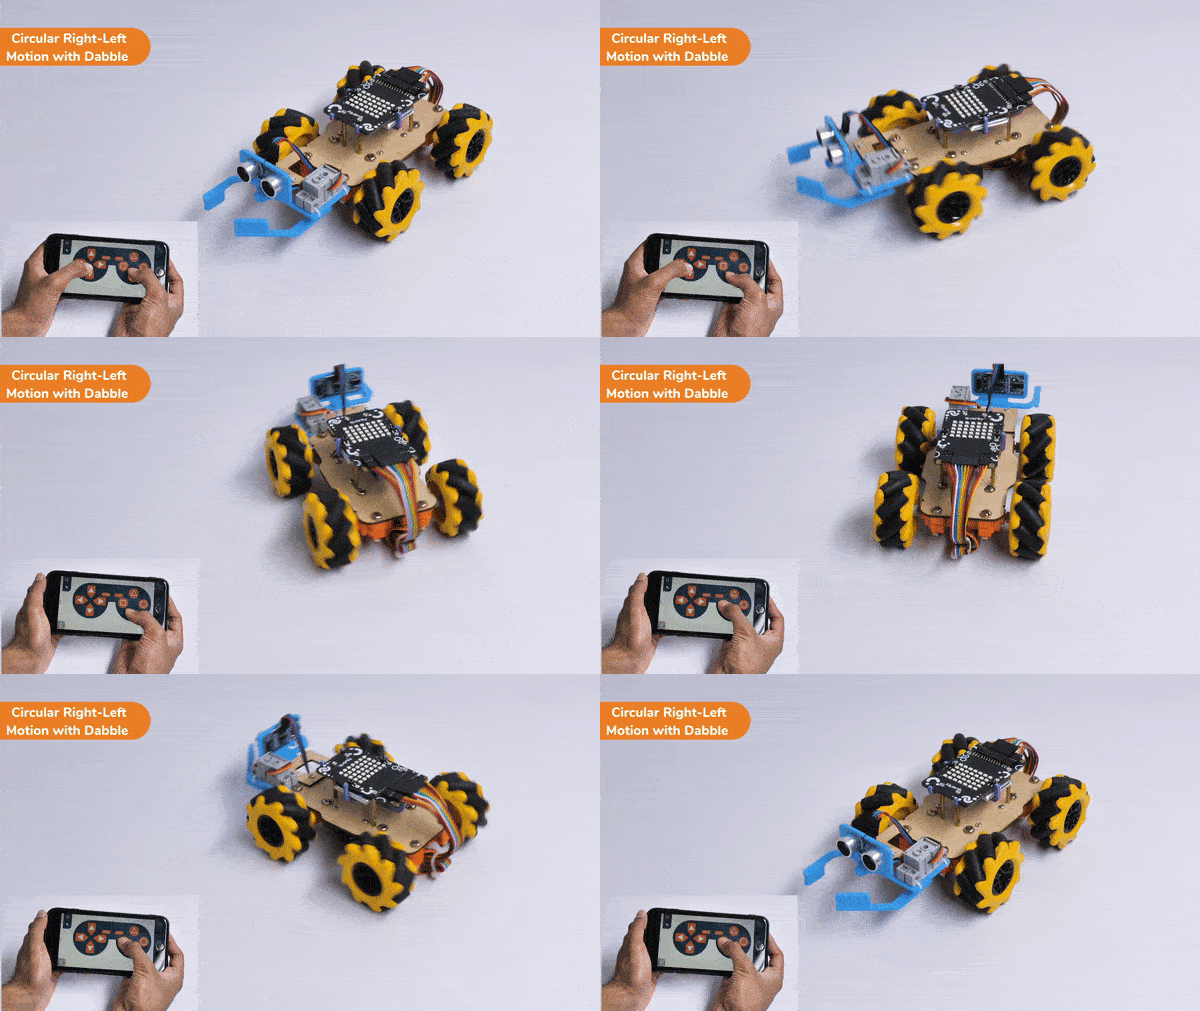
Circular Right-Left Motion:

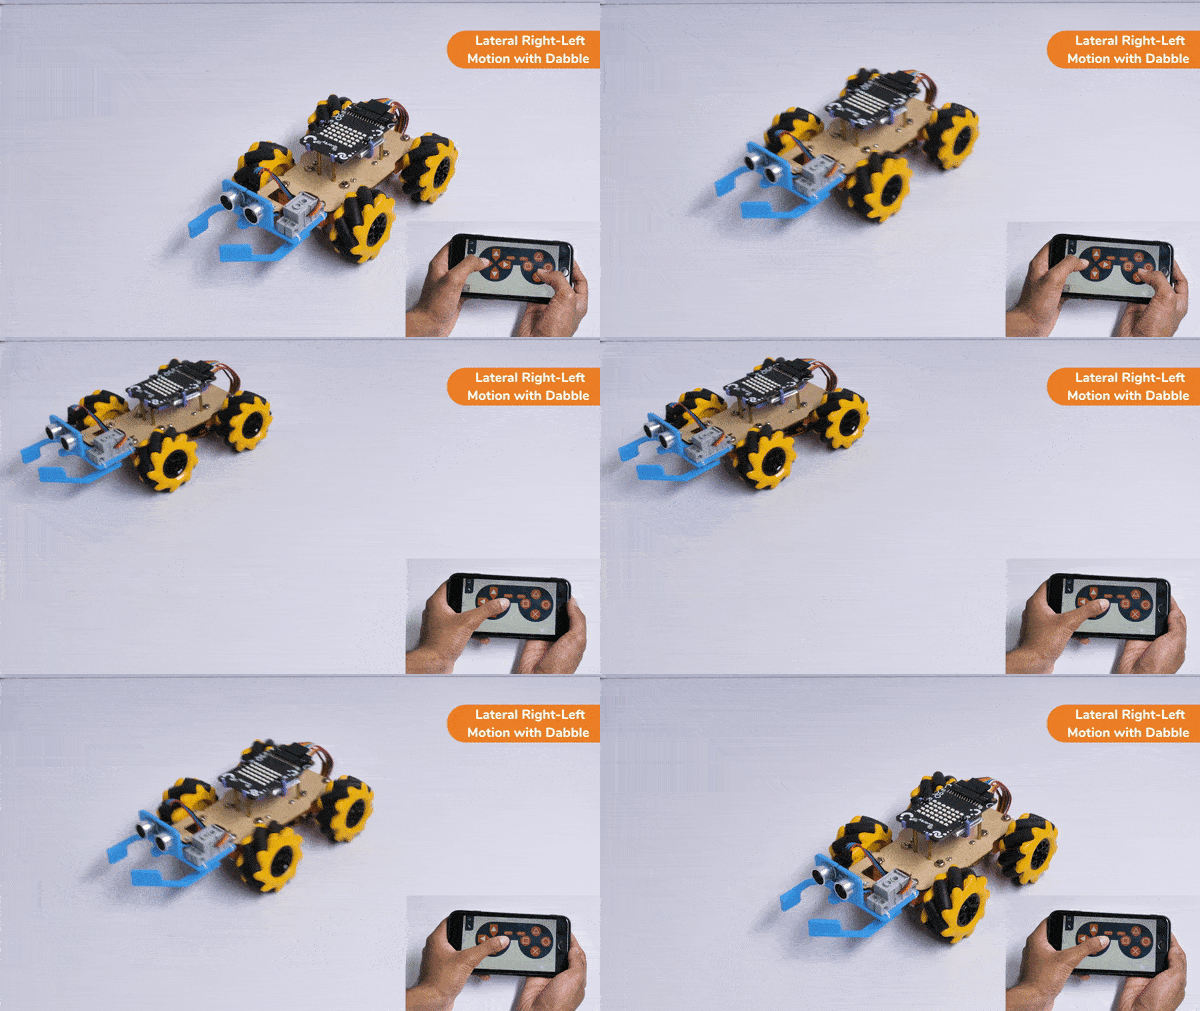
Lateral Right-Left Motion:

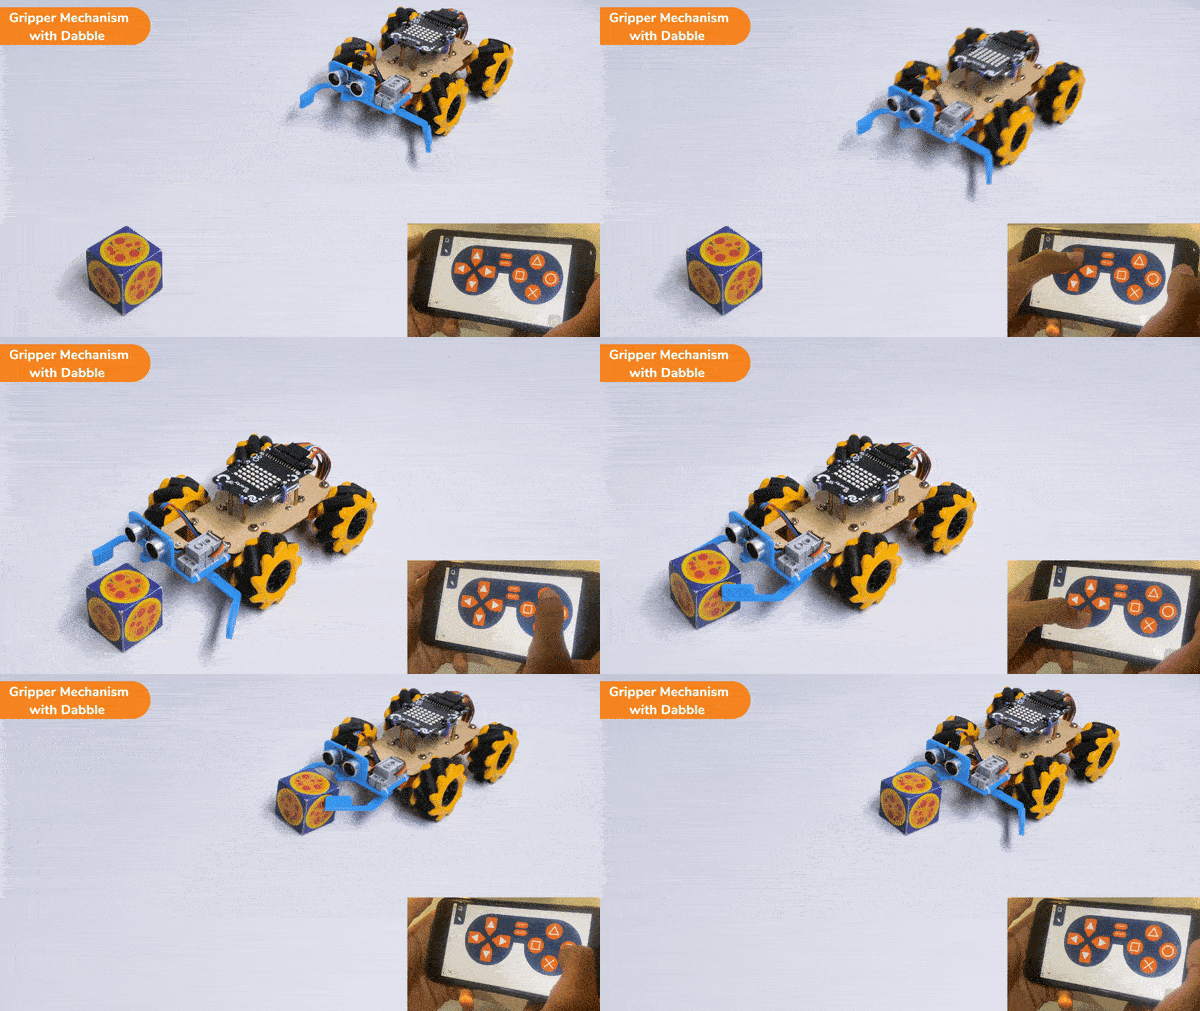
Gripper Mechanism:

Read More
Learn to control Mecanum Pick and Place Robot using Dabble App on your device with customized functions for different motions and activities.

Introduction

In this activity, we will control the Mecanum Pick and Place according to our needs using the Dabble application on our own Devices.

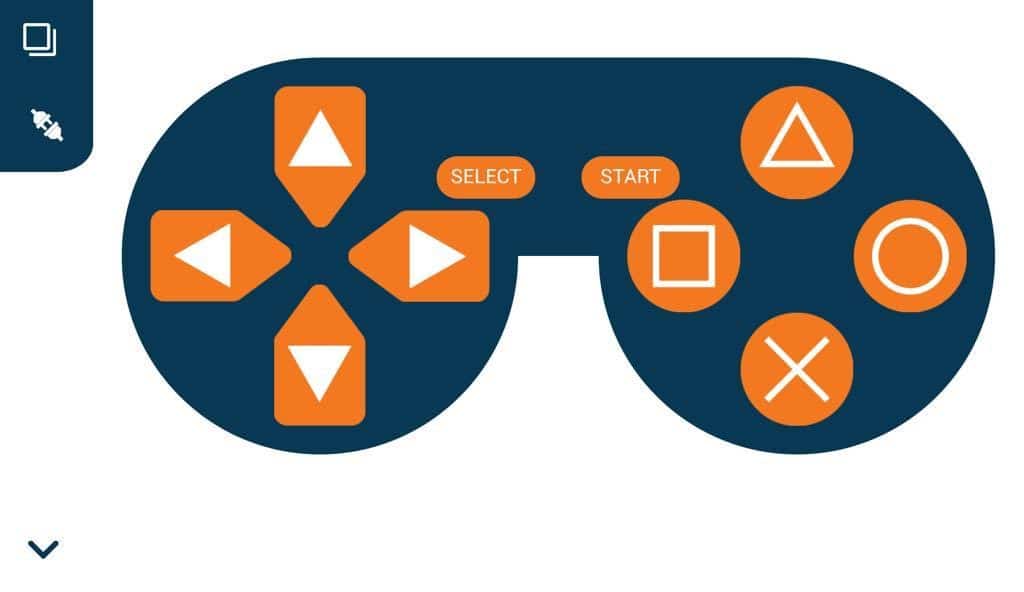
We will first understand how to operate Dabble and how to modify our code according to the requirements. The following image is the front page of the Dabble Application.

Select the Gamepad option from the Home Screen and we will then use the same gamepad to control our Mecanum Pick and Place.
Code

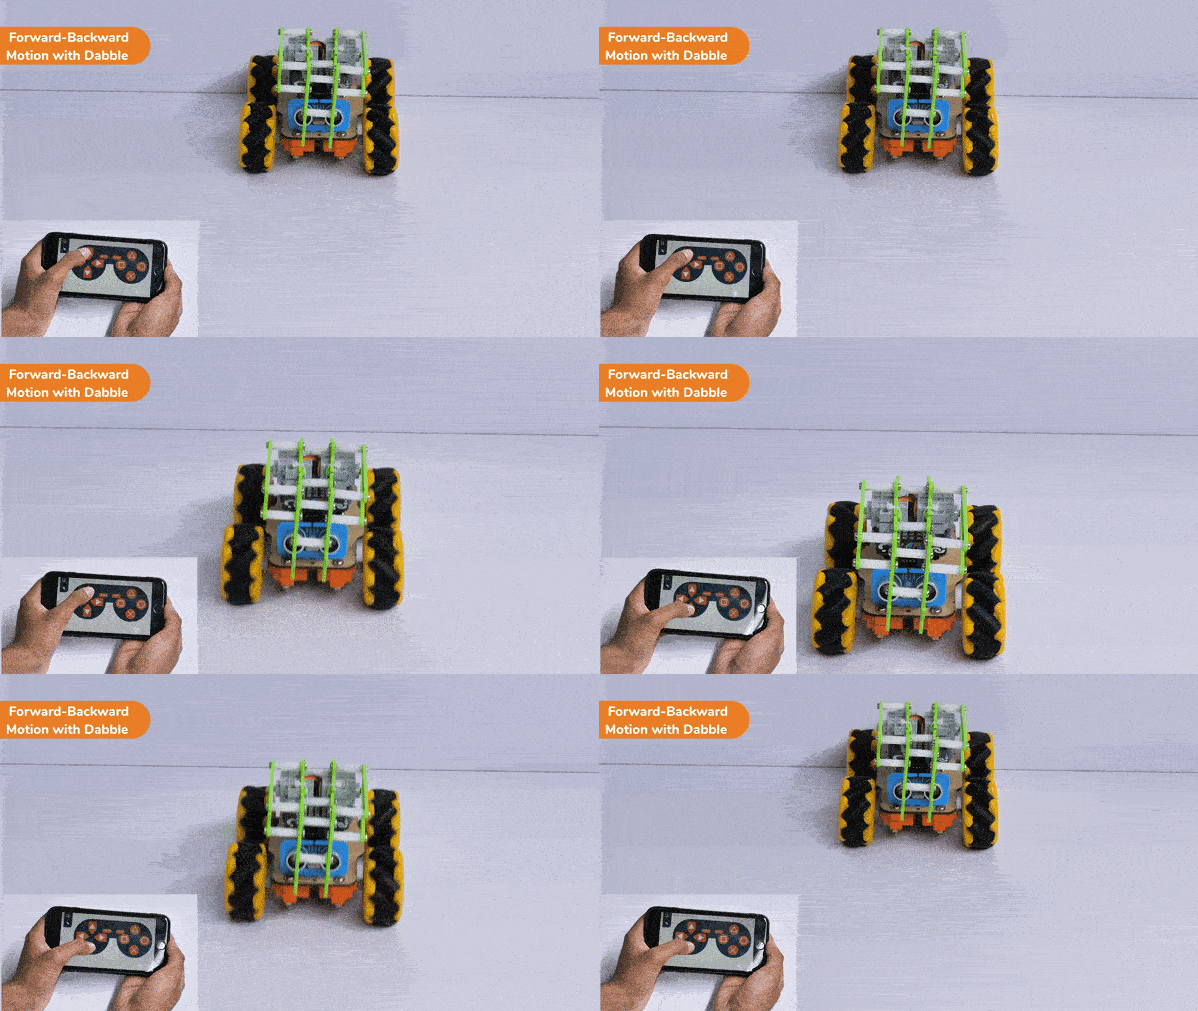
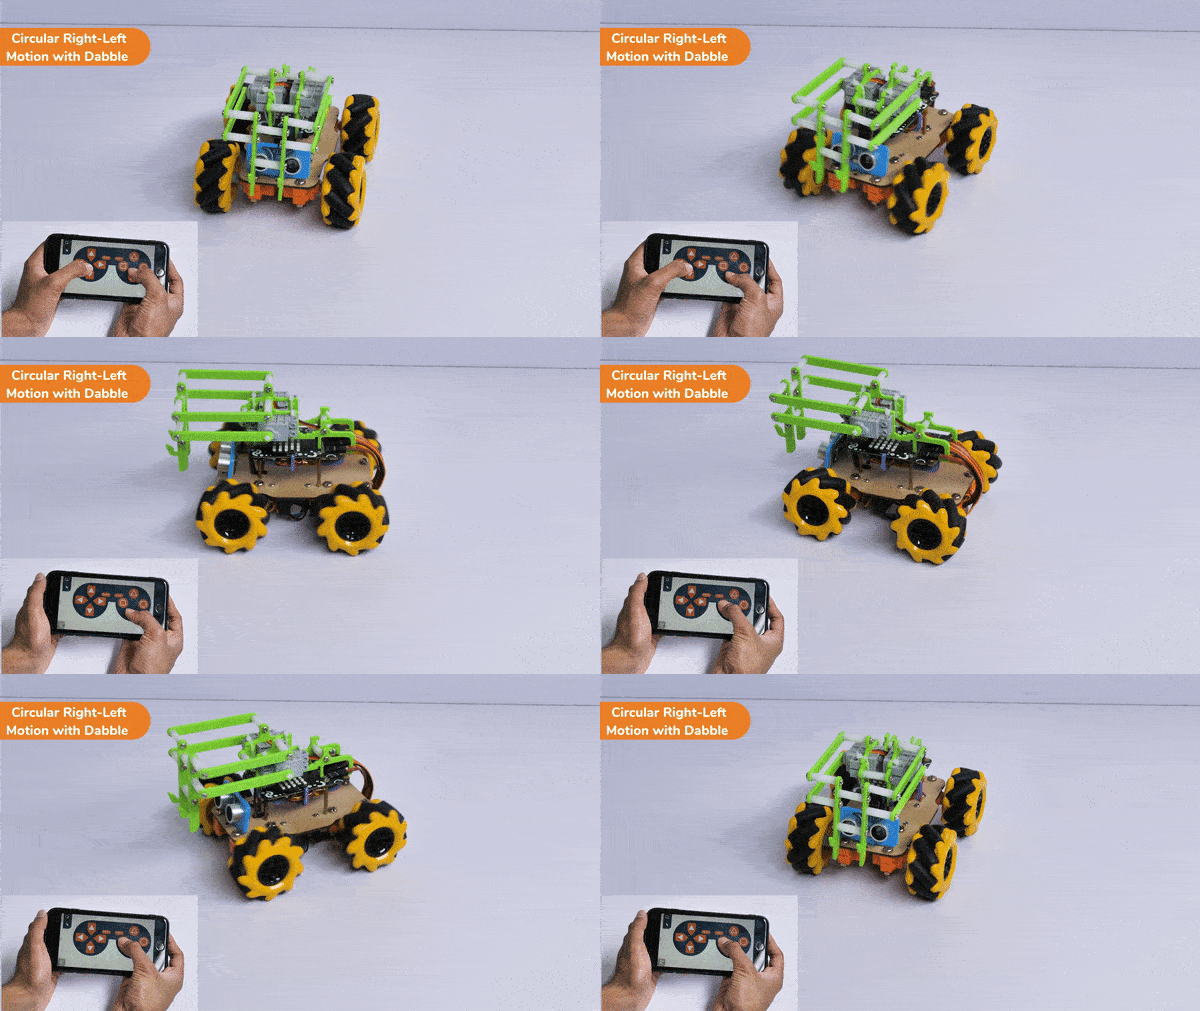
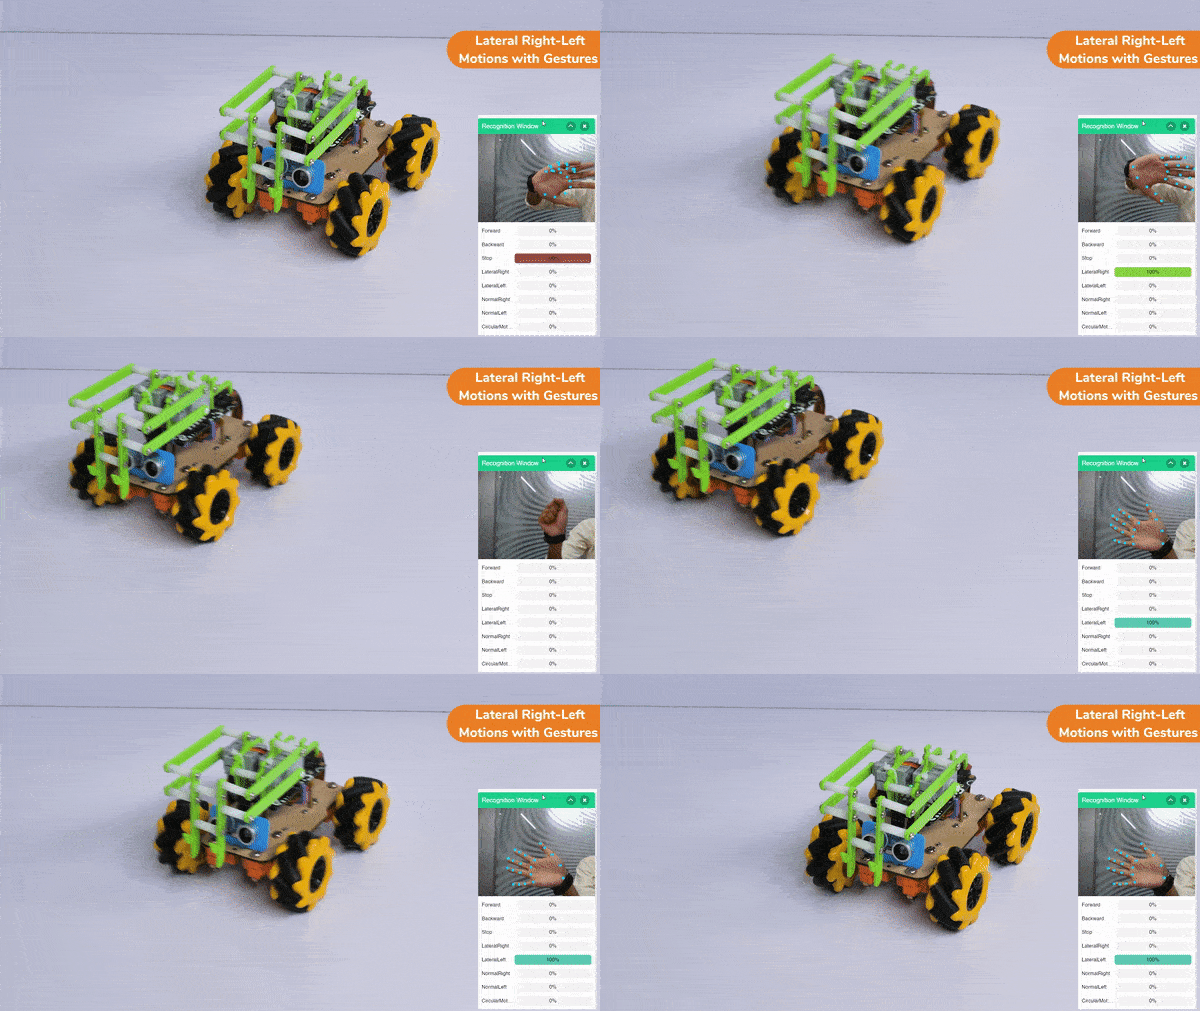
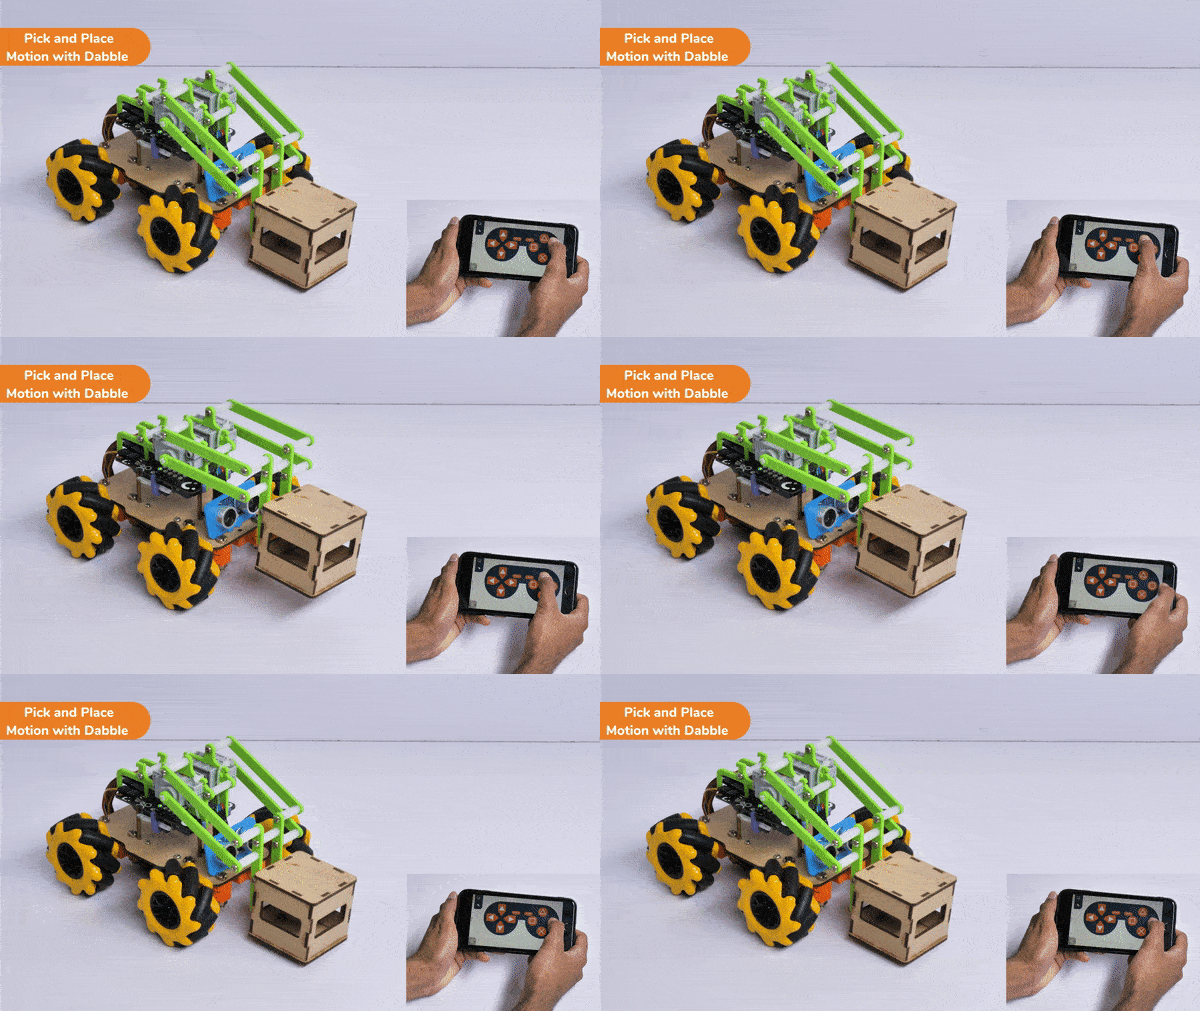
The following blocks represent the different functions that are created to control the Mecanum Pick and Place for different types of motions. We will use the arrow buttons to control the basic movements.( Forward, Backward, Lateral Left, Lateral Right ). We will use custom functions to control the Pick and Place actions. We will use the Triangle button to pick with the help of arms and the Circle button to initiate the placing action (dropping down the object). We will use the Cross button to rotate to the right direction and we will use the Square button to rotate to the left direction. We can use the Select button to stop the Mecanum whenever possible.

Note: You can always customize each and every function and button, and make your own activities easily. You will have to add the extensions of Mecanum and also of Dabble to access the blocks. To access the basic extensions required, make sure to select the Board as Quarky first.

Initialization

Main Code

You will have to connect the Quarky with the Dabble Application on your device. Make sure Bluetooth is enabled on the device before connecting. Connect the Mecanum to the Dabble application after uploading the code. You will be able to connect by clicking on the plug option in the Dabble Application as seen below. Select that plug option and you will find your Quarky device. Connect by clicking on the respective Quarky.
Important Notes

  1. The code will only run by uploading the code by connecting the Mecanum with the help of a C-Type Cable to the Laptop.
  2. You will be able to upload the Python Code by selecting the Upload option beside the Stage option.
  3. There may be a case where you will have to upload the firmware first and then upload the code to the Mecanum. You will be able to upload the firmware in Quarky with the help of the following steps:
    1. Select the Quarky Palette from the Block Section.
    2. Select the Settings button on top of the palette.
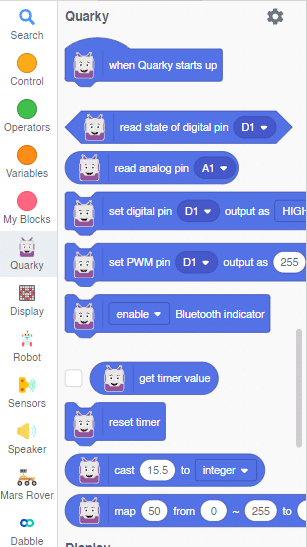
    3. In the settings dialog box, scroll down, and select the Upload Firmware option. This will help you to reset the Quarky if any previous code was uploaded or not.
  4. After the Firmware is uploaded, click on the “Upload Code” option to upload the code.
  5. You will have to add the block “When Quarky Starts Up” rather than the conventional “When Green Flag is Clicked” for the code to run.

Output

Forward-Backward Motion:
Circular Right-Left Motion:
Lateral Right-Left Motion:
Pick and Place Mechanism with Dabble:
Read More
All articles loaded
No more articles to load
Table of Contents