Introduction
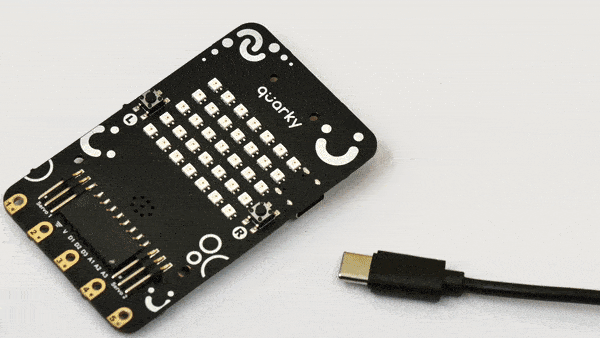
We are going to follow the steps in this lesson to assemble the basic version of the Quarky Mecanum Wheel Robot with Gripper.
Assembly Steps
We will be starting the assembly of the Basic Quarky Mecanum Wheel Robot.
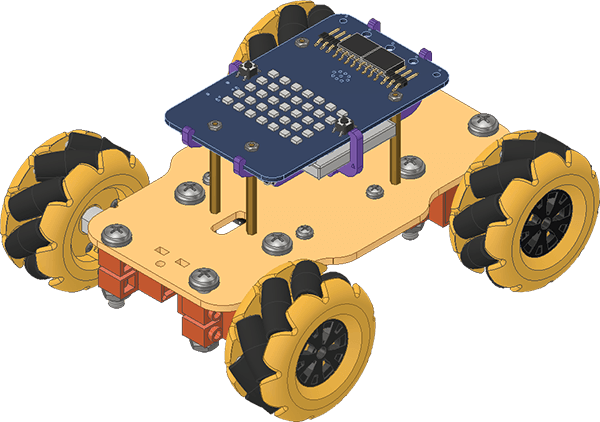
If you haven’t had your robot assembled till now, please follow this tutorial and then continue:
https://ai.thestempedia.com/docs/quarky-mechanum-documentation/assembling-basic-quarky-mecanum-wheel-robot/
Once completed, follow the steps:
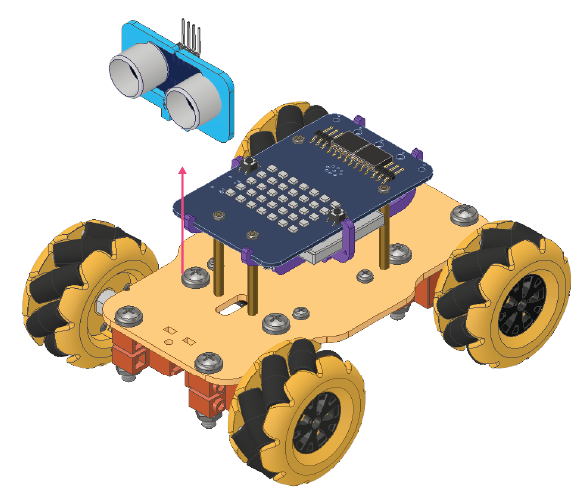
If you have an Ultrasonic Sensor attached, you need to disassemble it first for the gripper assembly.
- Calibrating the Servo Motor: Firstly we need to calibrate the servo motors, i.e., we need to first set the servo to 90 degrees. This will ensure that the angle of each servo motor is properly aligned. Follow the steps:
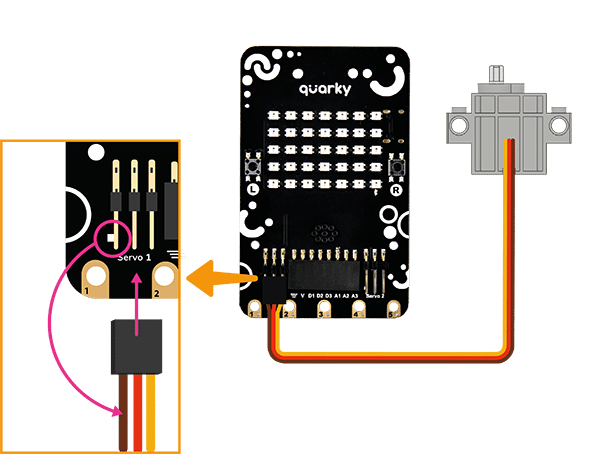
- Connect the first servo motor to the first Quarky Servo Connector, ensuring that the brown wire is on the left side.
- Connect Quarky to your laptop using a USB cable.
- Open PictoBlox on your desktop. After that, select Block Coding as your coding environment.

- Then, click the Board button in the toolbar and select board as Quarky.

- Next, select the appropriate Serial port if the Quarky is connected via USB or the Bluetooth Port if you want to connect Quarky via Bluetooth and press Connect.
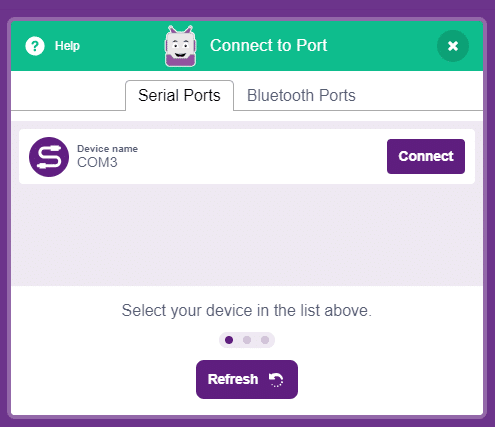
- Quarky is now connected to PictoBlox. Create the following script:

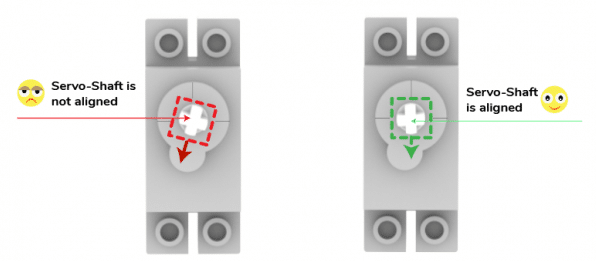
- Click on the green flag over the stage to run the script. You will find that the servo motor shaft gets perfectly aligned.
- Remove the servo motor from Quarky.
- Connect the first servo motor to the first Quarky Servo Connector, ensuring that the brown wire is on the left side.
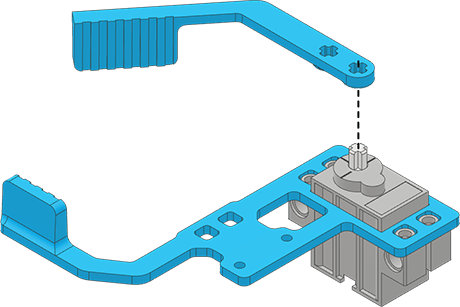
- Fix the 180° Servo Motor to B8 Blue Part.
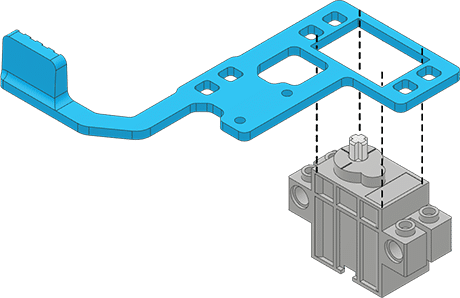
- Attach the B9 Blue Part to the 180° Servo Motor’s shaft.
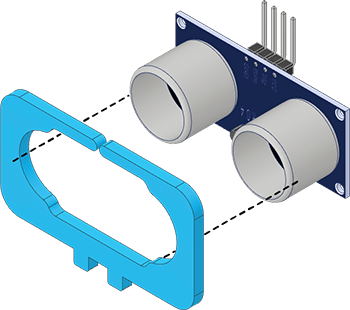
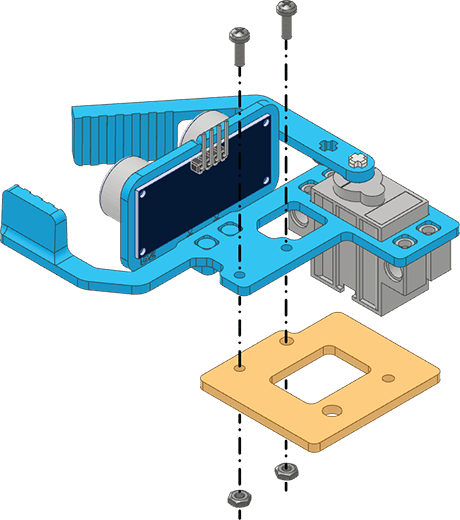
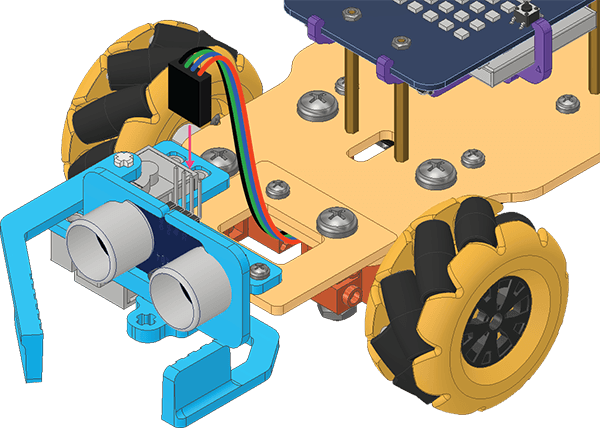
- Insert the Ultrasonic Sensor into its slot in B2 Blue Part.
- Attach B2 Blue Part to B7 Blue Part.
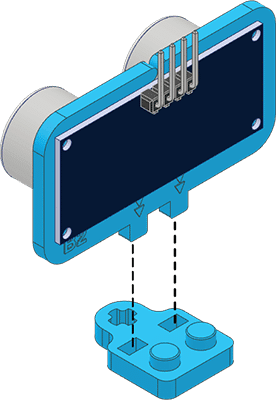
- Attach B7 Blue Part to B8 Blue Part.
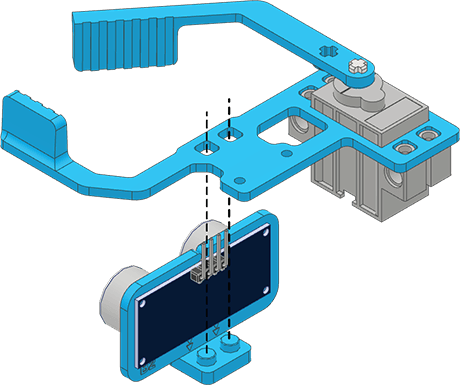
- Fix B8 Blue Part to Gripper Mount using M2.5 Bolts (8mm) and M2.5 Nuts.
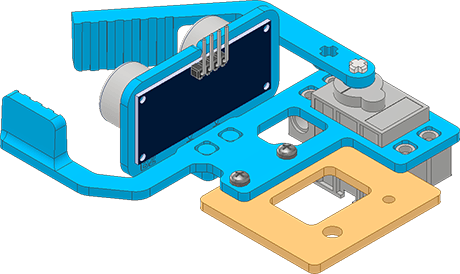
Assembled:
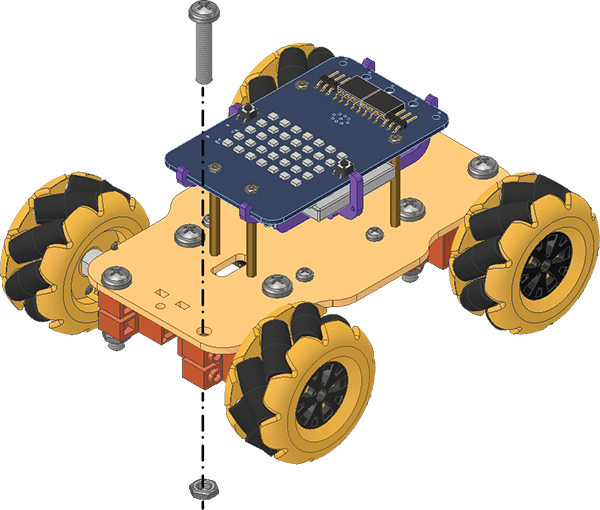
- Now unscrew the front-right Continuous Rotation Servo’s M5 Bolt (25mm) and M5 Nut of your assembled Mecanum Wheel Robot.
- Fix the Gripper Mount with the M3 Bolt (12mm) and M3 Nut, as well as the Gripper Mount and the Continuous Rotation Servo with the M5 Bolt (25mm) and M5 Nut.
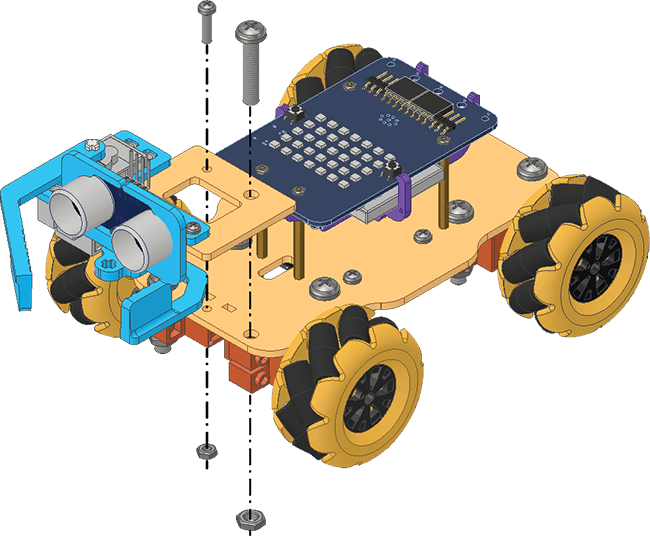
- Attach the Ultrasonic Wire to the Ultrasonic Sensor and pass it from the Gripper Mount.
- Connect the Ultrasonic Wire to the Expansion Board according to Wiring Diagram.
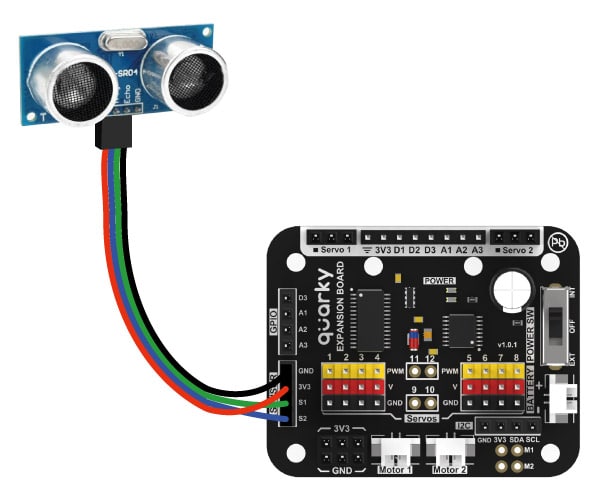
- Connect the Servo Motor to the Quarky Expansion Board Servo Port 5.
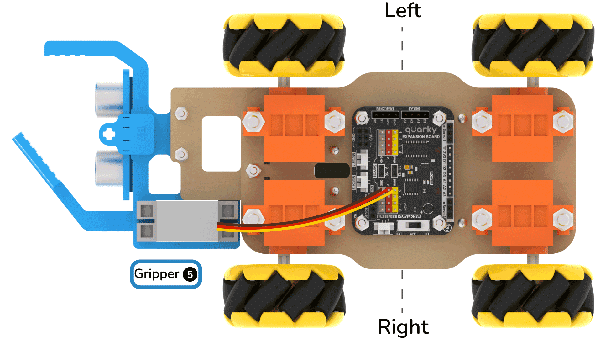
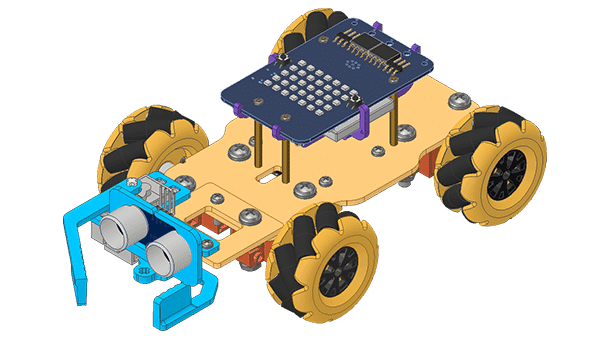
Your robot is ready:
Conclusion
In conclusion, we have successfully assembled the Quarky Mecanum Wheel Robot with Gripper. We have followed the steps outlined in this lesson to calibrate the servo motor, assemble the robot, and attach the ultrasonic sensor and servo motor. With this robot, you can now explore a variety of programming and robotics projects.