Introduction
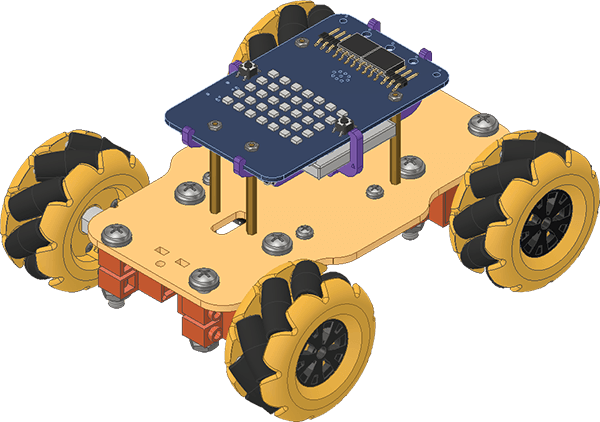
We are going to follow the steps in this lesson to assemble the basic version of the Quarky Mecanum Wheel Robot.
Assembly Steps
Follow the steps:
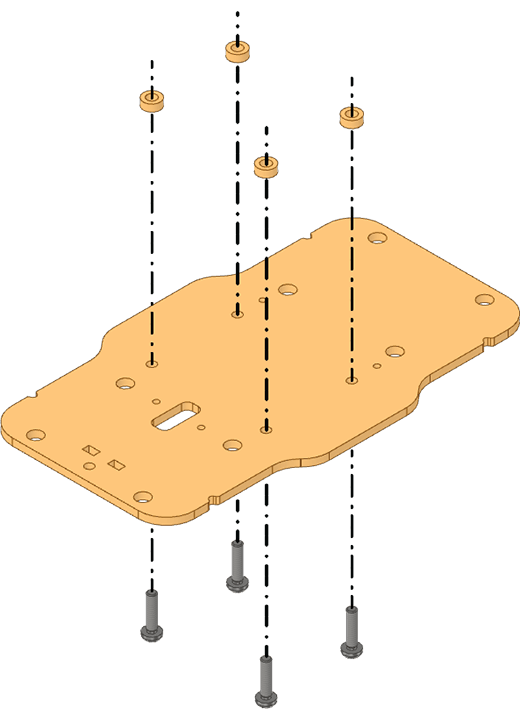
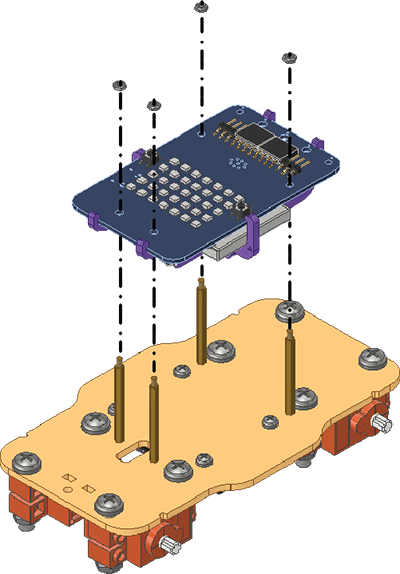
- Insert the M3 Bolts (12mm) through the Body Plate and then slide in M3 MDF Small Spacers through them.
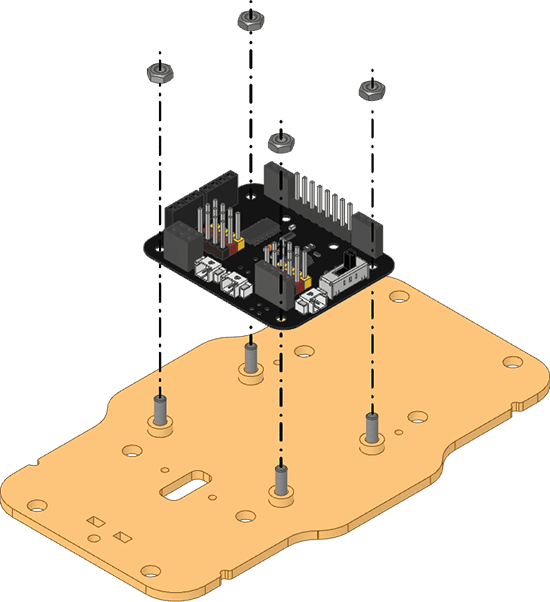
- Fix the Expansion Board to the Body Plate using M3 Nuts.
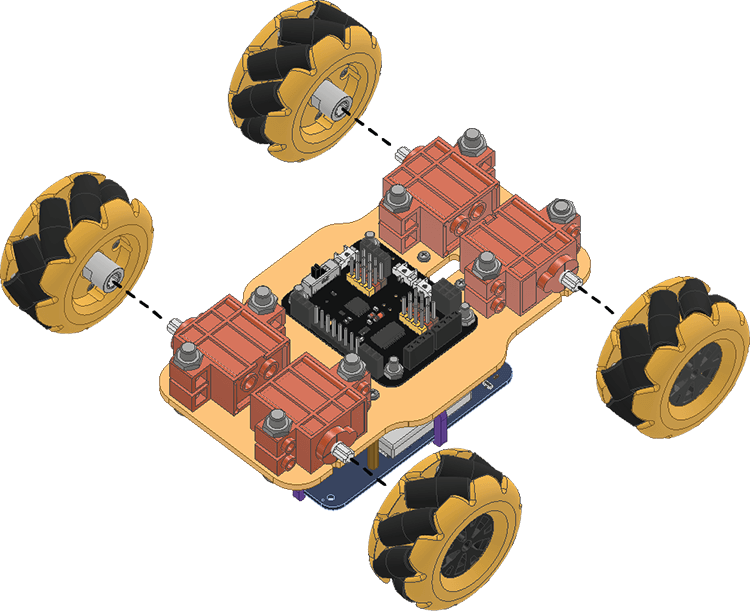
- Fix the Continuous Rotation Servos on the back side of the Base-Bottom Plate using M5 Bolts (25mm) and M5 Nuts.
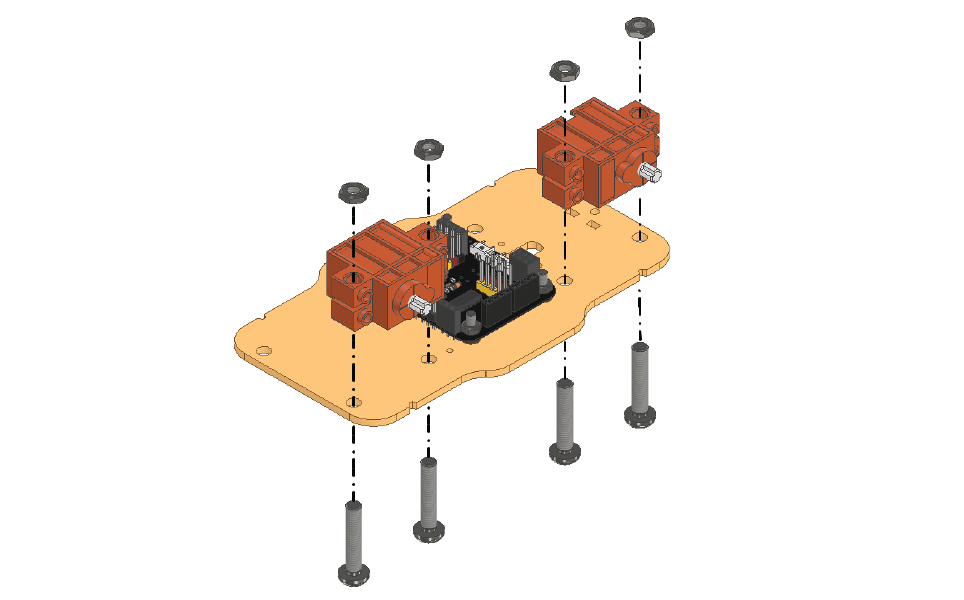
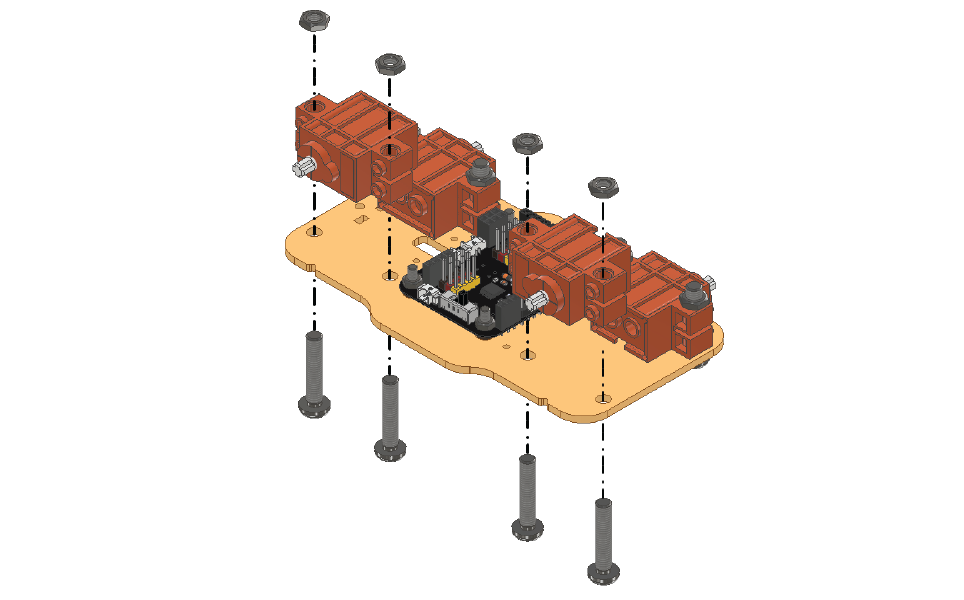
 Alert: Keep the Continuous Rotation Servo Motor’s shaft towards the notch on the Base-Bottom Plate.
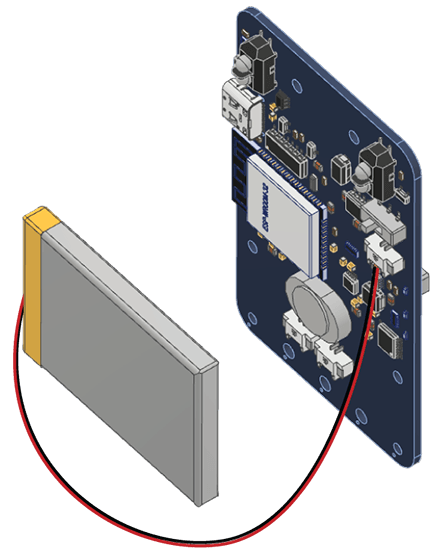
 - Connect the Battery by placing it on the backside of the Quarky. Keep the red wire towards the right side.
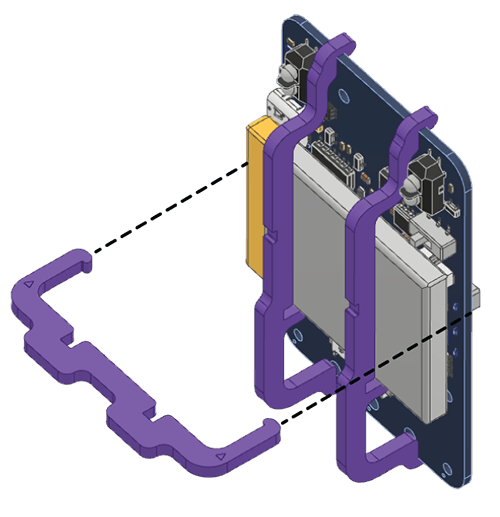
- Mount and snap the A1 Purple Parts to keep the Battery safe and secure.

- Next, lock the A1 Purple Parts with the help of an A2 Purple Part. Press the parts gently to snap them.
- Fix the M2 Metal Standoffs (30mm) to the back side of the Quarky and fix them with M2 Nuts.
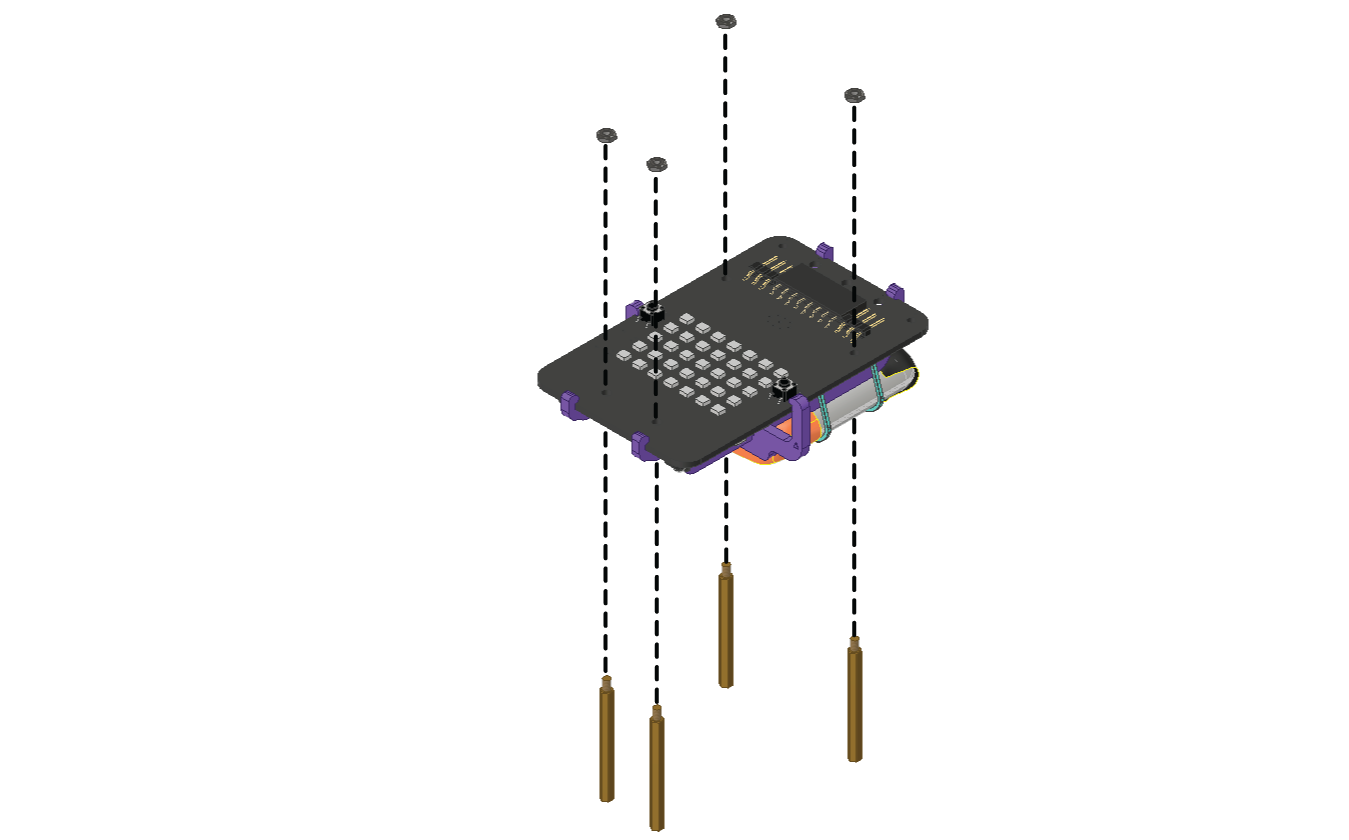
- Fix the assembled Quarky to the Body Plate on the top using M2 Bolts (6mm).
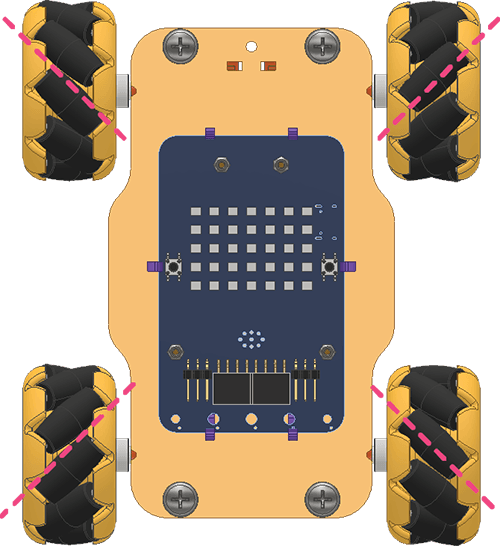
- Attach the Mecanum Wheels to the shafts of the servos such that the rollers of the wheels align diagonally.
Top View:
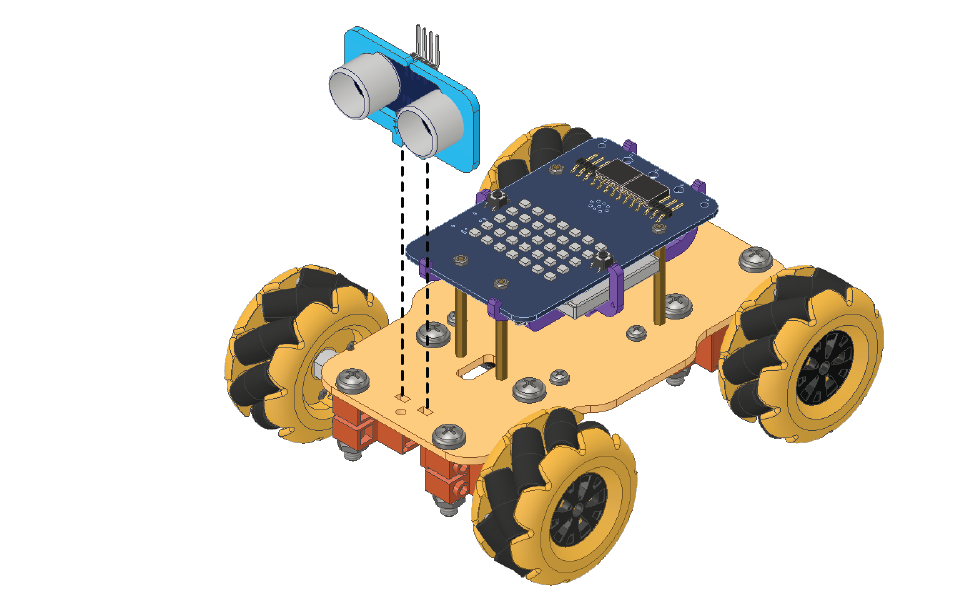
- Insert the Ultrasonic Sensor into its slot in B2 Blue Part.
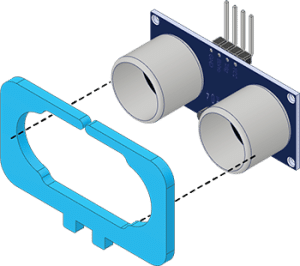
- Attach B2 Blue Part on the Body Plate.
- Attach the Ultrasonic Wire to the Ultrasonic Sensor and pass it from the Gripper Mount.
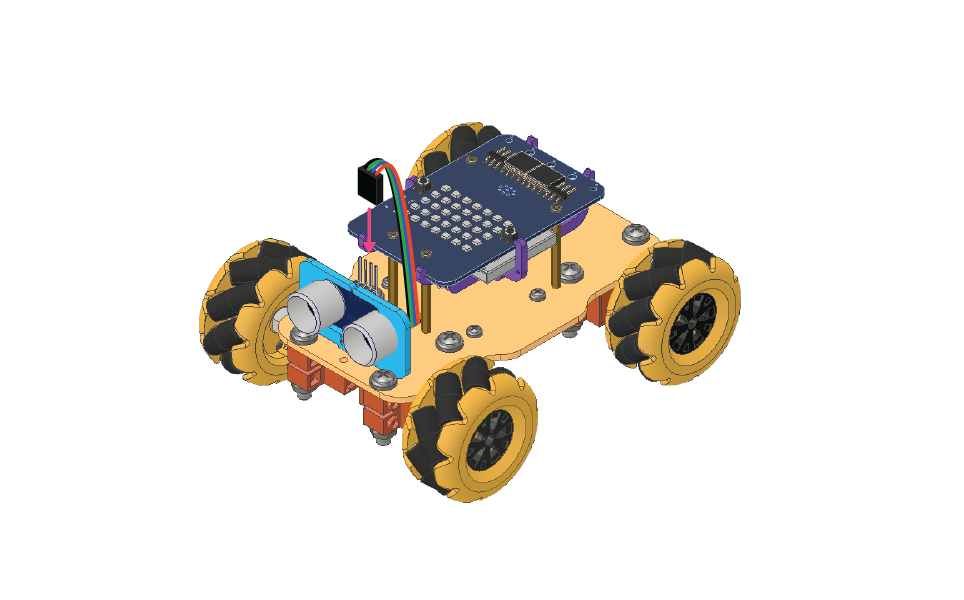
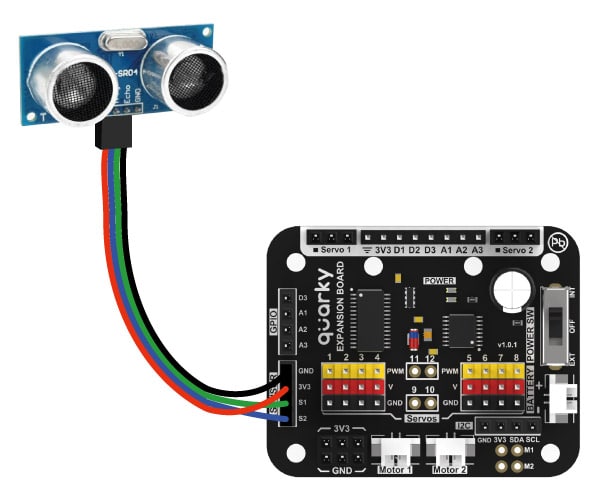
- Connect the Ultrasonic Wire to the Expansion Board according to the Wiring Diagram.
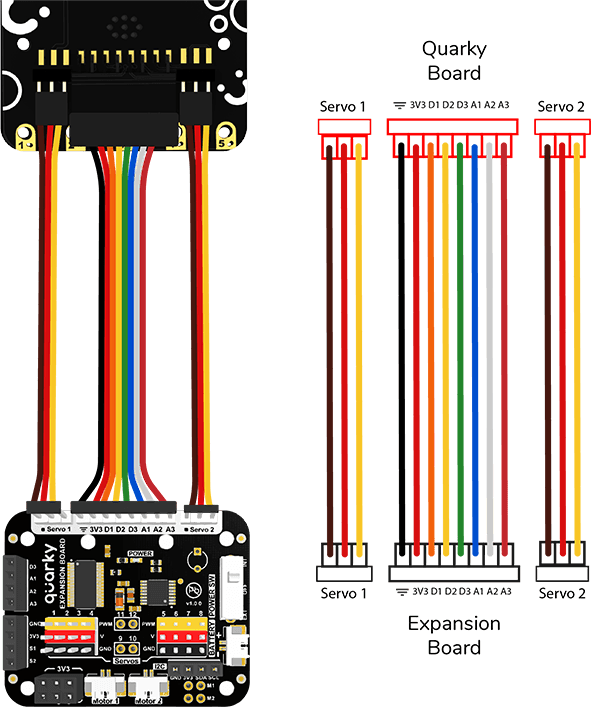
- Connect the Quarky Board to the Quarky Expansion Board using Jumper Wires as per the wiring diagram.
- Connect continuous servo motors of the Mecanum Wheel Robot to the Expansion Board as follows. There are eight ports and you have to connect them accordingly:
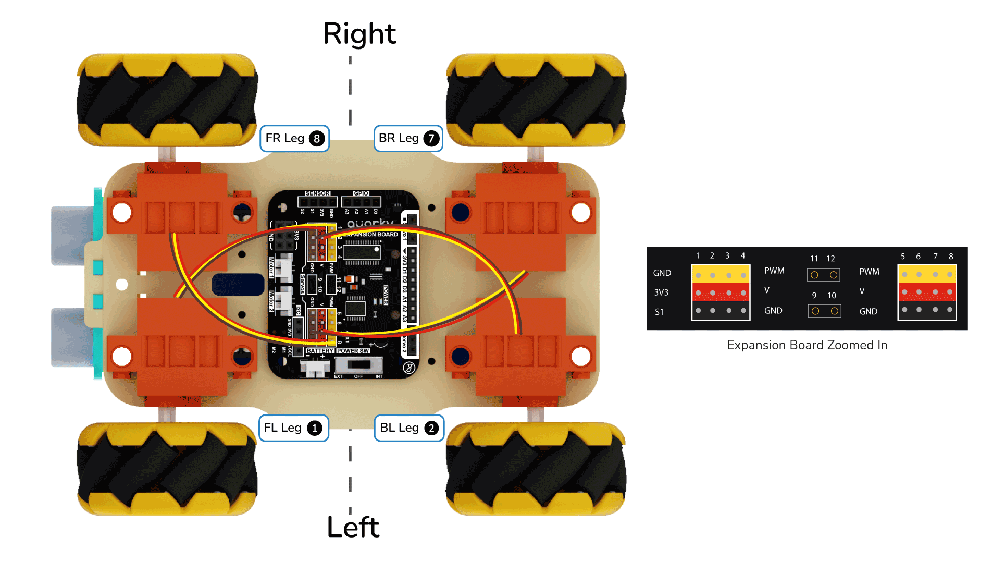
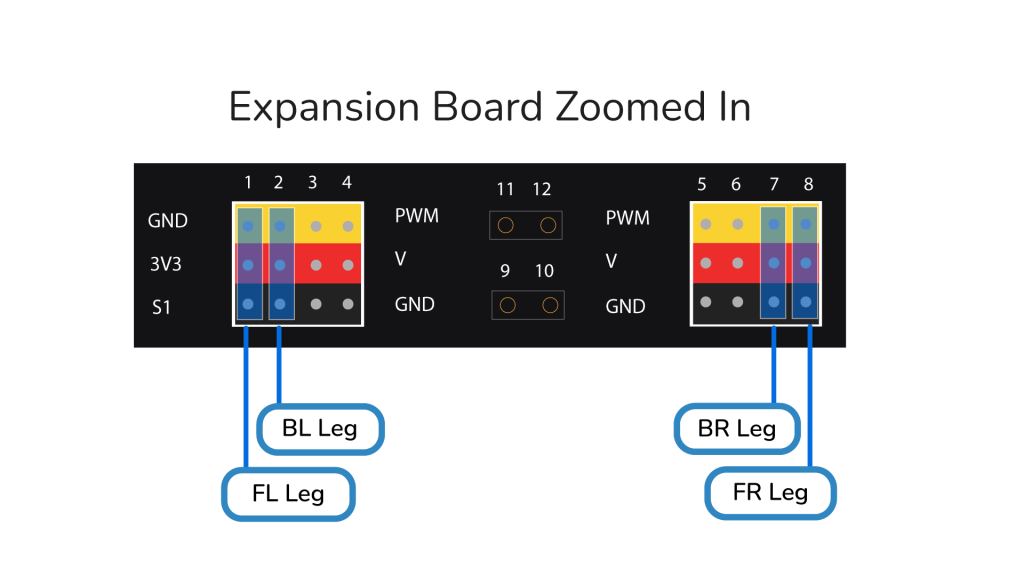
- Front-Left Continuous Servo 2 to Servo 1
- Front-Right Continuous Servo 1 to Servo 8
- Back-Left Continuous Servo 2 to Servo 2
- Back-Right Continuous Servo 2 to Servo 7

Note: Make sure you organize the wires. Wires should not touch the ground, or else the performance of the robot will become poor.
The basic version of the Quarky Mecanum Wheel Robot is ready.
Conclusion
In conclusion, we have successfully assembled the basic version of the Quarky Mecanum Wheel Robot. By following the steps and using the right tools, we were able to assemble the robot in a timely and efficient manner. We have also connected all components as per the wiring diagram and ensured that the various parts are securely in place.