Programming the Quarky Mecanum with Python in PictoBlox

Description
In this lesson, learn how to program the Quarky Mecanum robot with PictoBlox and Python in both Stage and Upload modes. Understand the functions provided in the Quarky Mecanum library, and see how to control the robot’s motors, pick-and-place robot, and gripper robot.

PictoBlox also provides the ability to program the Quarky Mecanum using Python in Desktop / Laptop versions. Let’s see how you can do it in this lesson.
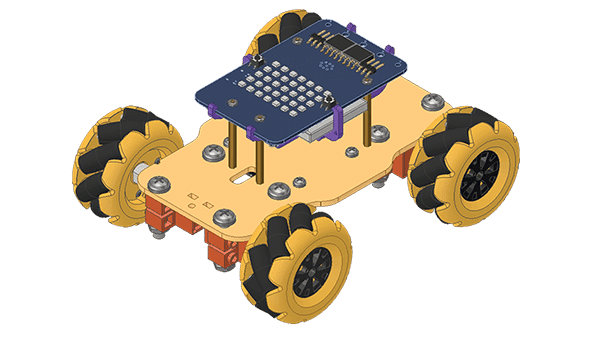
PictoBlox

With PictoBlox, you can program the Quarky Mecanum!

If you haven’t installed PictoBlox, please follow the instructions:

The Quarky Mecanum Robot Drive Motors are initialized by the function, which assigns each motor to a specific port. This allows the robot to be programmed to move the motors in the desired direction.
Syntax: Mecanum(Front Left = 1, Back Left = 2, Back Right = 7, Front Right = 8)
The function allows the robot to move in the specified direction at a given speed.
Syntax: runrobot(direction = “forward”, speed = 100)
The function causes the robot to move in a specified direction with a specified speed for a given amount of time before stopping automatically.
Syntax: runtimedrobot(direction = “forward”, speed = 100, time = 1000)
The function allows the robot to cease all activity by stopping all its motors.
Syntax: stoprobot()
The function sets the motors of a device to a specified speed. It uses a scale of -100 to 100, where -100 is the motor running in reverse at full speed, 100 is the motor running in the forward direction at full speed, and 0 is when the wheel is stopped.
Syntax: runallmotors(FL speed = 50, BL speed = 50, BR speed = 50, FR speed = 50)
The function controls the speed of a selected motor, allowing it to run at a specified speed.
Syntax: runmotor(motor = “fl”, speed = 100)
The function sets the ports for the left and right servo motors of a pick-and-place robot.
Syntax: initialisepickplace(left servo = 5, right servo = 4)
The function sets the angles of the pick action of the pick and place robot to a specified value.
Syntax: setpickangle(angle = 40)
The function sets the angles of the place action of the pick and place robot to a specified value.
Syntax: setplaceangle(angle = 90)
The function takes the desired angle values and sets the pick and place arm to those angles.
Syntax: setarmangle(angle = 90)
This function moves the servo motors of a pick and place robot to the angle specified by the user, allowing the robot to pick up an object.
Syntax: pick()
This function moves the servo motors of a pick and place robot to the angle specified by the user, allowing the robot to place down an object.
Syntax: place()
The function sets the port of the servo motor for the gripper robot in the code, making it easier to control.
Syntax: initialisegripper(servo port = 4)
The function sets the angle of a robot’s gripper servo motor to a specified value.
Syntax: setgripperangle(angle = 90)
This function sets the angle of the Gripper Robot’s gripper servo motor to a particular value when it is in the closed position.
Syntax: setcloseangle(angle = 40)
This function sets the angle of the Gripper Robot’s gripper servo motor to a particular value when it is in the open position.
Syntax: setopenangle(angle = 90)
This function allows the Gripper Robot to close its gripper.
Syntax: closearm()
This function allows the Gripper Robot to open its gripper.
Syntax: openarm()
All articles loaded
No more articles to load

Connecting Quarky with PictoBlox

Let’s begin by first connecting Quarky to PictoBlox. Follow the steps below for connecting Quarky to PictoBlox:

    1. First, connect Quarky to your laptop using a USB cable.
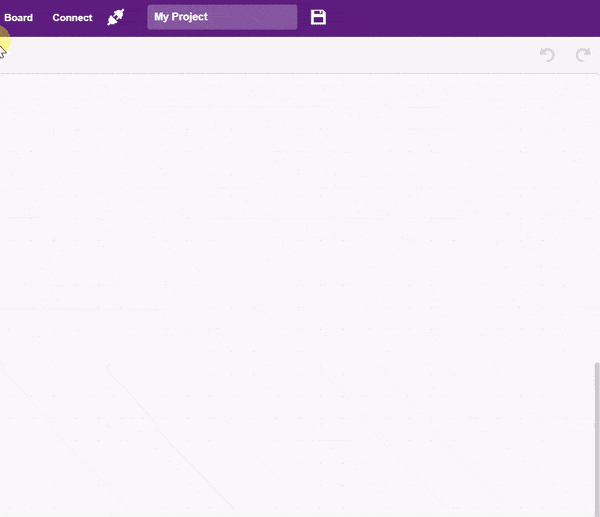
    2. Next, open PictoBlox on your desktop.
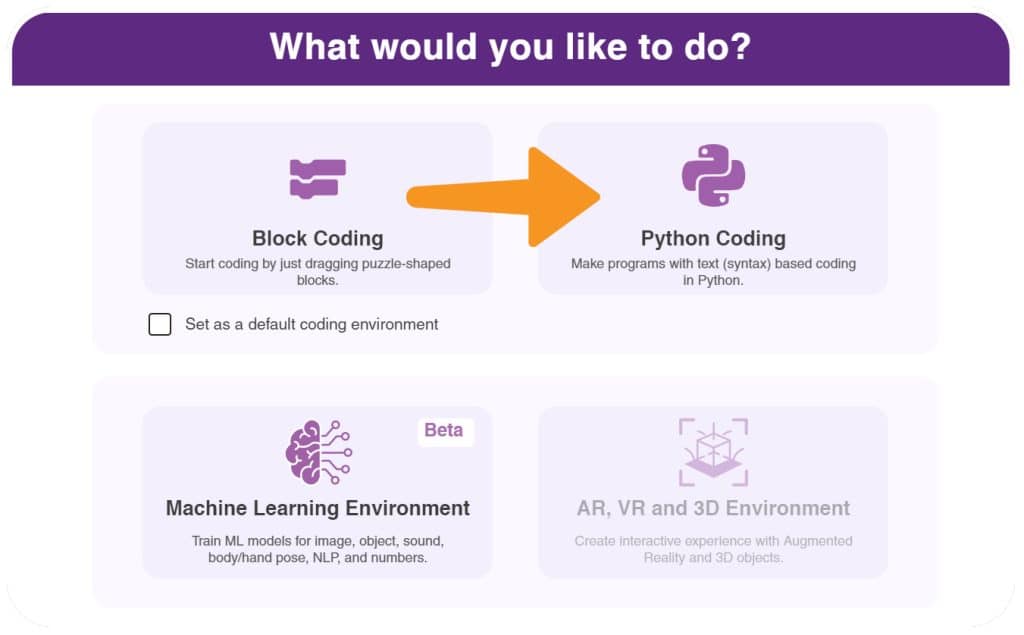
    3. After that, select Python Coding as your coding environment.
    4. Then, click the Board button in the toolbar and select Board as Quarky.
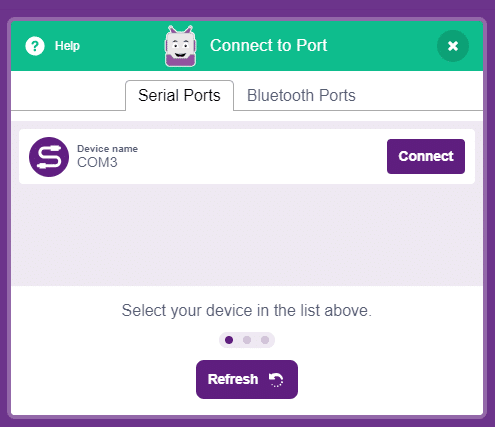
    5. Next, select the appropriate Serial port if the Quarky is connected via USB or the Bluetooth Port if you want to connect Quarky via Bluetooth and press Connect.
      COM Port
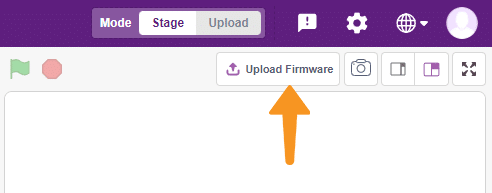
    6. Click on the Upload Firmware button. This will upload the latest firmware in Quarky.
      Note: If your device already has the latest firmware, then PictoBlox will show the message – Firmware is already updated. For learning more you can refer to this tutorial: https://ai.thestempedia.com/docs/quarky/quarky-toubleshooting/updating-quarky-firmaware-with-pictoblox/
    7. Once the firmware is uploaded, Quarky starts the Getting Started program. This runs only for the first time. Run through it.

And voila! Quarky is now connected to PictoBlox.

Quarky Mecanum Python Library for Stage Mode

Stage mode is one of the two modes you can write your programs in PictoBlox. In this mode, you can write scripts for the sprite and boards to interact with sprites in real-time. If you disconnect the board with PictoBlox, you cannot interact with the board anymore.

You can toggle between the upload mode and stage mode using the button on the top right side of PictoBlox.

In Python, use the following object declaration to use Python functions in Stage Mode:

meca = Mecanum(1, 2, 7, 8)

Quarky Mecanum Python Library for Upload Mode

Upload mode allows you to write scripts and upload them to the board so that you can use them even when it is not connected to your computer, for example, you need to upload a script for making moving robots. In this case, Quarky will run offline according to the program and it cannot interact with the stage.

In Python, use the following object declaration to use Python functions in Upload Mode:

from quarky import *
from expansion_addon import Mecanum
meca = Mecanum(1, 2, 7, 8)

Python Functions

The following functions are available for use in the Quarky Mecanum library:

The Quarky Mecanum Robot Drive Motors are initialized by the function, which assigns each motor to a specific port. This allows the robot to be programmed to move the motors in the desired direction.
Syntax: Mecanum(Front Left = 1, Back Left = 2, Back Right = 7, Front Right = 8)
The function allows the robot to move in the specified direction at a given speed.
Syntax: runrobot(direction = “forward”, speed = 100)
The function causes the robot to move in a specified direction with a specified speed for a given amount of time before stopping automatically.
Syntax: runtimedrobot(direction = “forward”, speed = 100, time = 1000)
The function allows the robot to cease all activity by stopping all its motors.
Syntax: stoprobot()
The function sets the motors of a device to a specified speed. It uses a scale of -100 to 100, where -100 is the motor running in reverse at full speed, 100 is the motor running in the forward direction at full speed, and 0 is when the wheel is stopped.
Syntax: runallmotors(FL speed = 50, BL speed = 50, BR speed = 50, FR speed = 50)
The function controls the speed of a selected motor, allowing it to run at a specified speed.
Syntax: runmotor(motor = “fl”, speed = 100)
The function sets the ports for the left and right servo motors of a pick-and-place robot.
Syntax: initialisepickplace(left servo = 5, right servo = 4)
The function sets the angles of the pick action of the pick and place robot to a specified value.
Syntax: setpickangle(angle = 40)
The function sets the angles of the place action of the pick and place robot to a specified value.
Syntax: setplaceangle(angle = 90)
The function takes the desired angle values and sets the pick and place arm to those angles.
Syntax: setarmangle(angle = 90)
This function moves the servo motors of a pick and place robot to the angle specified by the user, allowing the robot to pick up an object.
Syntax: pick()
This function moves the servo motors of a pick and place robot to the angle specified by the user, allowing the robot to place down an object.
Syntax: place()
The function sets the port of the servo motor for the gripper robot in the code, making it easier to control.
Syntax: initialisegripper(servo port = 4)
The function sets the angle of a robot’s gripper servo motor to a specified value.
Syntax: setgripperangle(angle = 90)
This function sets the angle of the Gripper Robot’s gripper servo motor to a particular value when it is in the closed position.
Syntax: setcloseangle(angle = 40)
This function sets the angle of the Gripper Robot’s gripper servo motor to a particular value when it is in the open position.
Syntax: setopenangle(angle = 90)
This function allows the Gripper Robot to close its gripper.
Syntax: closearm()
This function allows the Gripper Robot to open its gripper.
Syntax: openarm()
All articles loaded
No more articles to load

Conclusion

In conclusion, PictoBlox is a powerful coding environment that allows you to program the Quarky Mecanum Robot with Python in both Stage and Upload modes. The Quarky Mecanum library provides several functions that can be used to control the robots motors, pickandplace robot, and gripper robot. With the help of PictoBlox, you can easily program and control the Quarky Mecanum robot!

Table of Contents