The block makes the robot move in the specified direction with the specified speed for the specified time and then stop automatically.
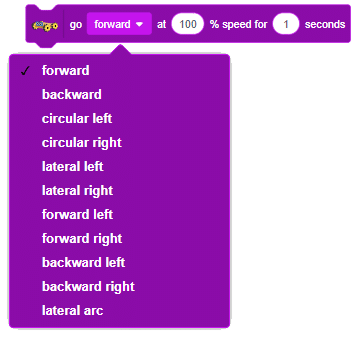

The block makes the robot move in the specified direction with the specified speed for the specified time and then stop automatically.
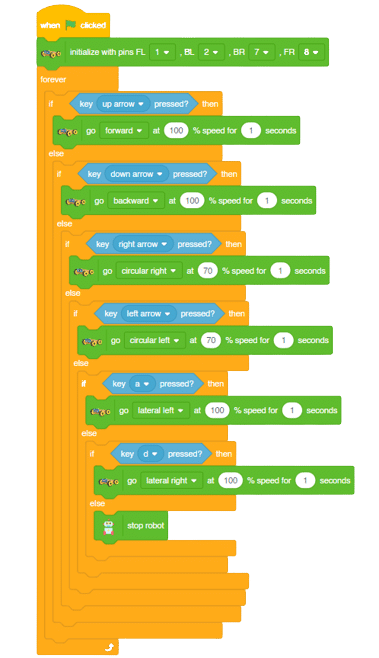
In this activity, we will make the computer program that controls the Mecanum Robot. It’s like a remote-control car. You can press different keys on the keyboard to make the Mecanum move forward, backward, left and right.
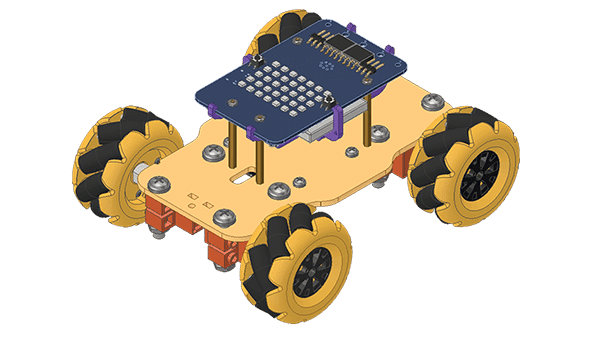
The Quarky Mecanum Wheel Robot is a type of robot that uses a special type of wheel to move. The wheel is made of four rollers mounted at 45-degree angles to the wheel‘s hub. Each roller has its own motor and can spin in either direction. This allows the wheel to move in any direction, making it an ideal choice for navigating around obstacles and tight spaces. The mecanum wheel robot can also turn on the spot, allowing it to make sharp turns without having to reverse direction.
Follow the steps:
Forward-Backward Motion:
Lateral Right-Left Motion:
Circular Right-Left Motion:
In this activity, we will create a custom activity where you will be able to move the Mecanum robot in a square effortlessly along with making an Axe type figure.
The Quarky Mecanum Wheel Robot is a type of robot that uses a special type of wheel to move. The wheel is made of four rollers mounted at 45- degree angles to the wheel’s hub. Each roller has its own motor and can spin in either direction. This allows the wheel to move in any direction, making it an ideal choice for navigating around obstacles.
Follow the steps:
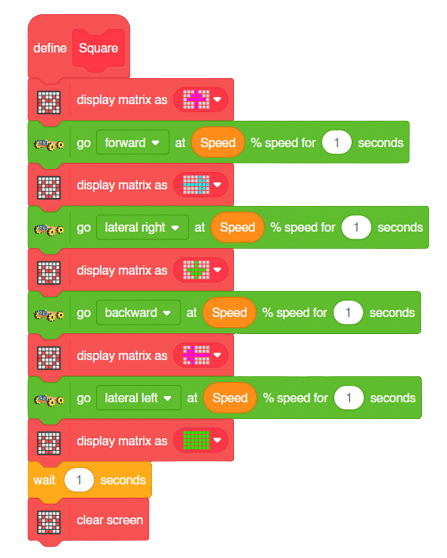
The main steps would include to display the lights in arrow forms before implementing the specific move. The moves would be implemented in the following order:
Forward -> Lateral Right -> Backward -> Lateral Left.
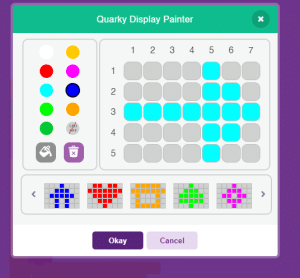
We will display the arrows with the help of Quarky LED’s and implement the code.
Example of arrow:
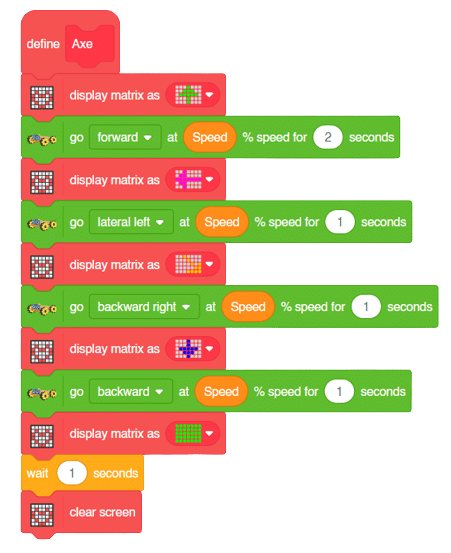
The main steps would include to display the lights in arrow forms before implementing the specific move. The moves would be implemented in the following order:
Forward ( 2 steps ) -> Lateral Left ( 1 step ) -> Backward Right ( 1 step ) -> Backward ( 1 step )
We will display the arrows with the help of Quarky LED’s and implement the code.
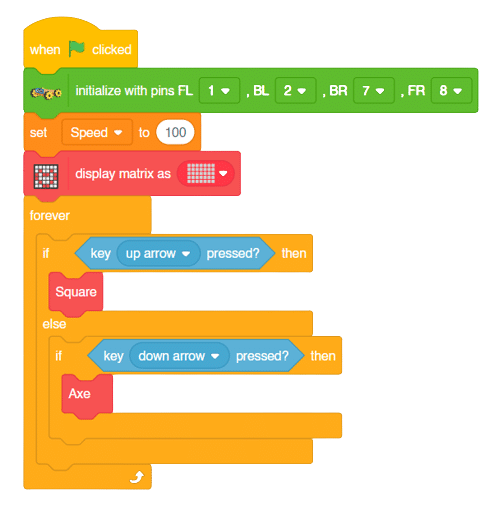
Now we will keep a specific condition on when to activate the Square Motion and when to activate the Axe Motion.
We will use the if-else conditions where on pressing the “up” arrow key, we will initiate the Square Motion and on pressing the “down” arrow key, we will initiate the Axe Motion with the help of Mecanum Robot.
Square Motion:
Axe Motion:
A sign detector Mecanum robot is a robot that can recognize and interpret certain signs or signals, such as hand gestures or verbal commands, given by a human. The robot uses sensors, cameras, and machine learning algorithms to detect and understand the sign, and then performs a corresponding action based on the signal detected.
These robots are often used in manufacturing, healthcare, and customer service industries to assist with tasks that require human-like interaction and decision making.
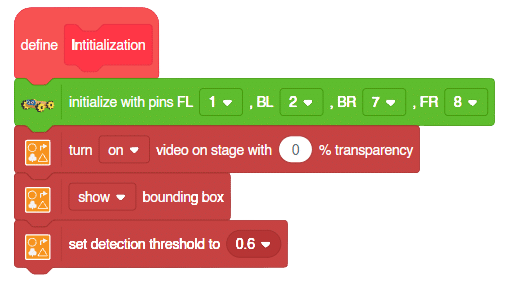
Initialization:
Main Code
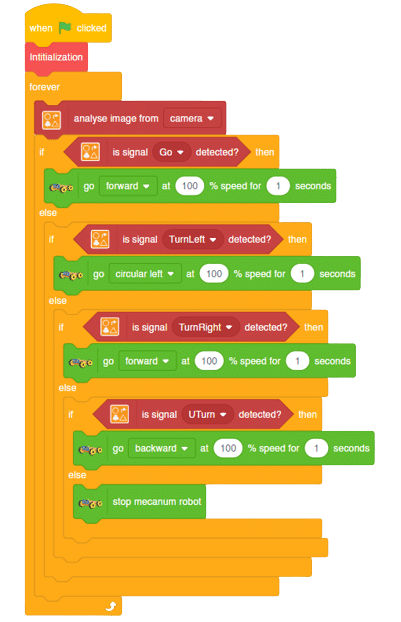
Forward Motion:
Right-Left Motions:
In this activity, we will control the Mecanum Pick and Place according to our needs using the Dabble application on our own Devices.
We will first understand how to operate Dabble and how to modify our code according to the requirements. The following image is the front page of the Dabble Application.
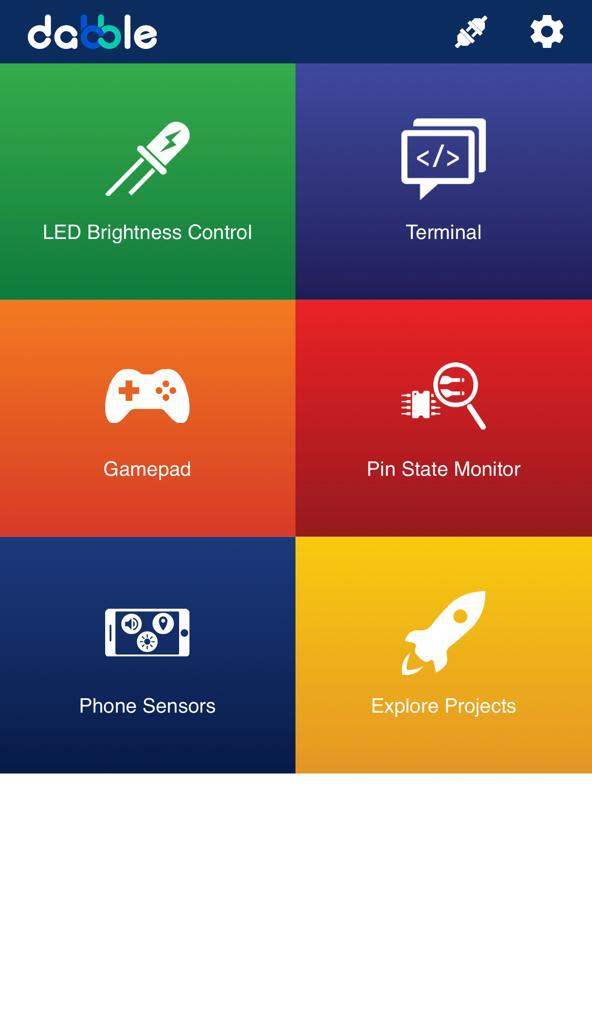
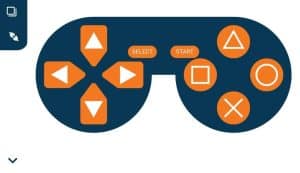
Select the Gamepad option from the Home Screen and we will then use the same gamepad to control our Mecanum Pick and Place.

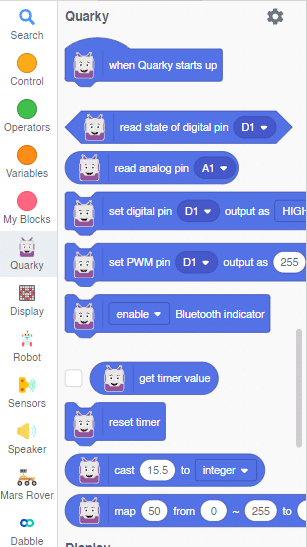
The following blocks represent the different functions that are created to control the Mecanum Pick and Place for different types of motions. We will use the arrow buttons to control the basic movements.( Forward, Backward, Lateral Left, Lateral Right ). We will use custom functions to control the Pick and Place actions. We will use the Triangle button to pick with the help of arms and the Circle button to initiate the placing action (dropping down the object). We will use the Cross button to rotate to the right direction and we will use the Square button to rotate to the left direction. We can use the Select button to stop the Mecanum whenever possible.
Note: You can always customize each and every function and button, and make your own activities easily. You will have to add the extensions of Mecanum and also of Dabble to access the blocks. To access the basic extensions required, make sure to select the Board as Quarky first.
Initialization
Main Code
You will have to connect the Quarky with the Dabble Application on your device. Make sure Bluetooth is enabled on the device before connecting. Connect the Mecanum to the Dabble application after uploading the code. You will be able to connect by clicking on the plug option in the Dabble Application as seen below. Select that plug option and you will find your Quarky device. Connect by clicking on the respective Quarky.

Forward-Backward Motion:
Circular Right-Left Motion:
Lateral Right-Left Motion:
Pick and Place Mechanism with Dabble: