
Introduction
It is an autonomous robot which will be able to avoid every obstacle in its path. It will use an ultrasonic distance sensor and a servo motor. The robot will check how far the nearest obstacle is (in every direction) and then decide upon the actions to be taken. The servo controls the direction in which the distance sensor faces and if the robot is hindered by an obstacle, the servo will rotate the sensor in different directions. Once the robot is convinced that a certain direction is clear of any obstacles, it will turn the robot in that particular direction and then move in a straight line along that direction till the next obstacle is found. If there is no way to go ahead the robot executes a full 180° turn.
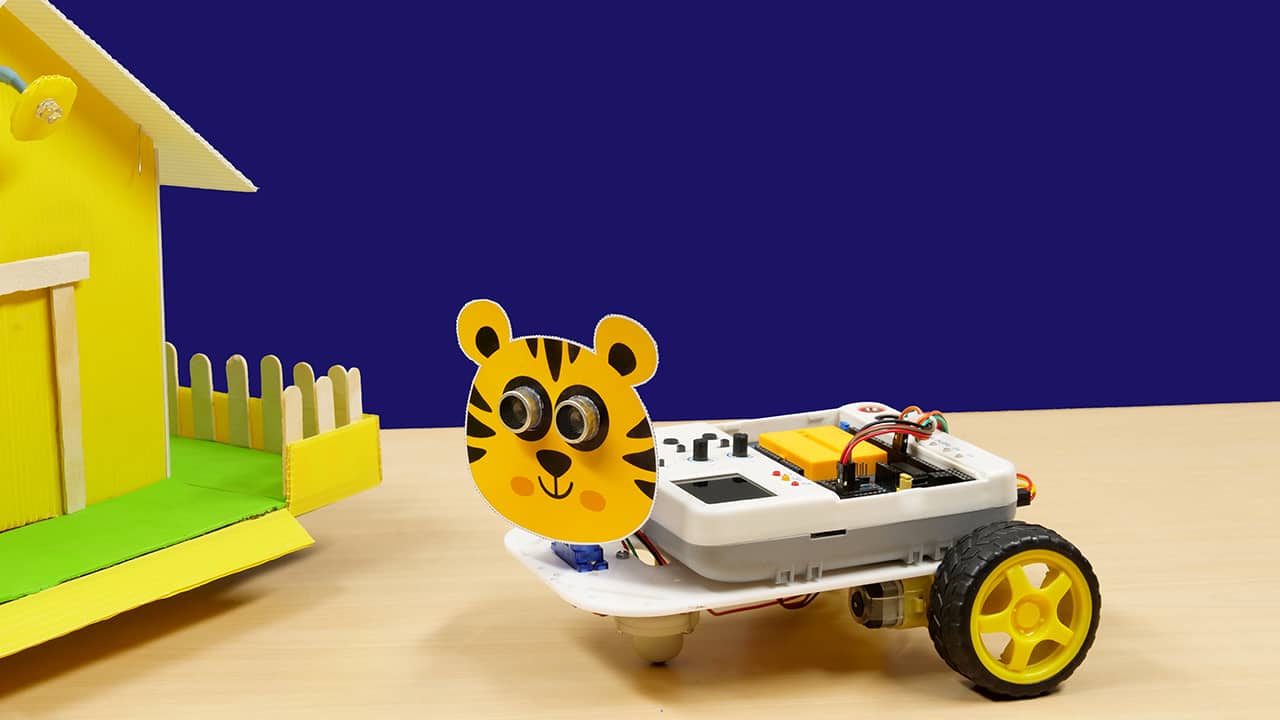
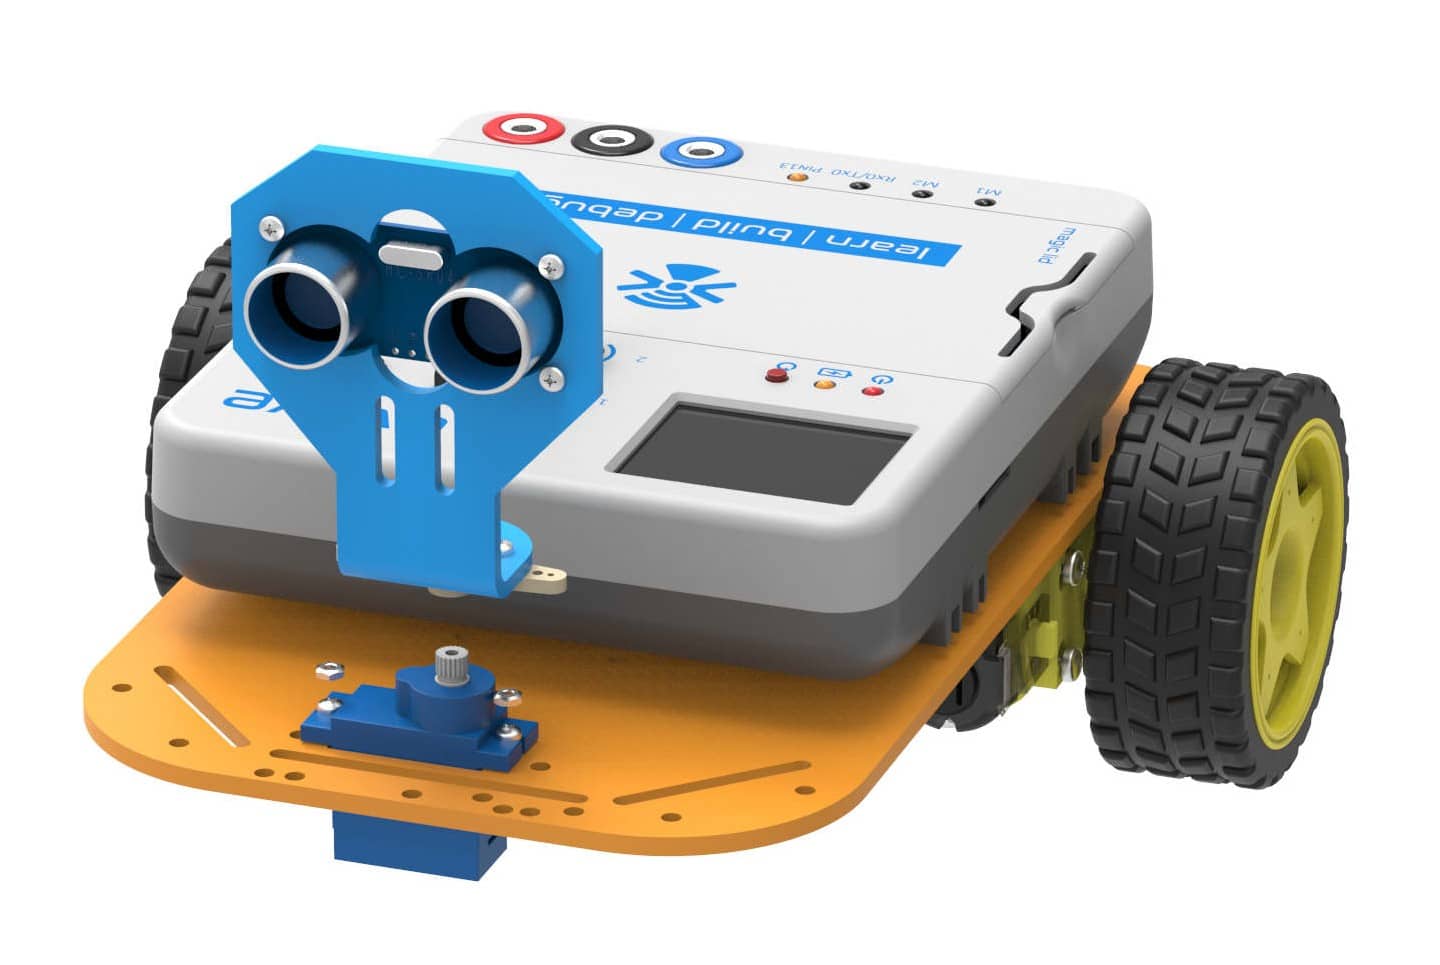
The final assembly looks like this: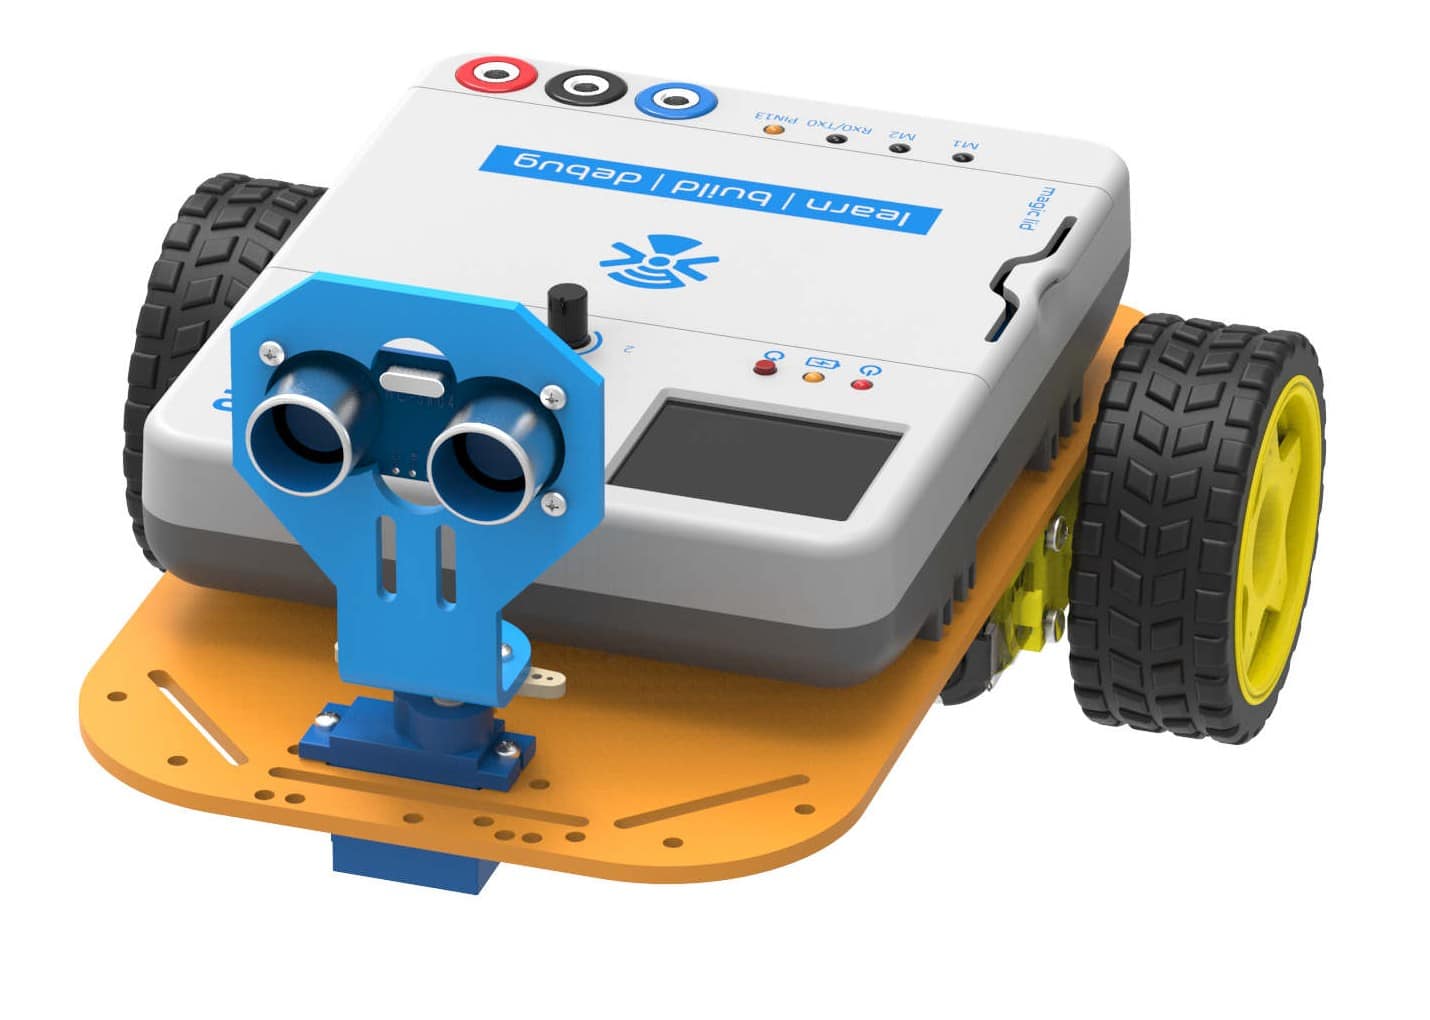
Assembly
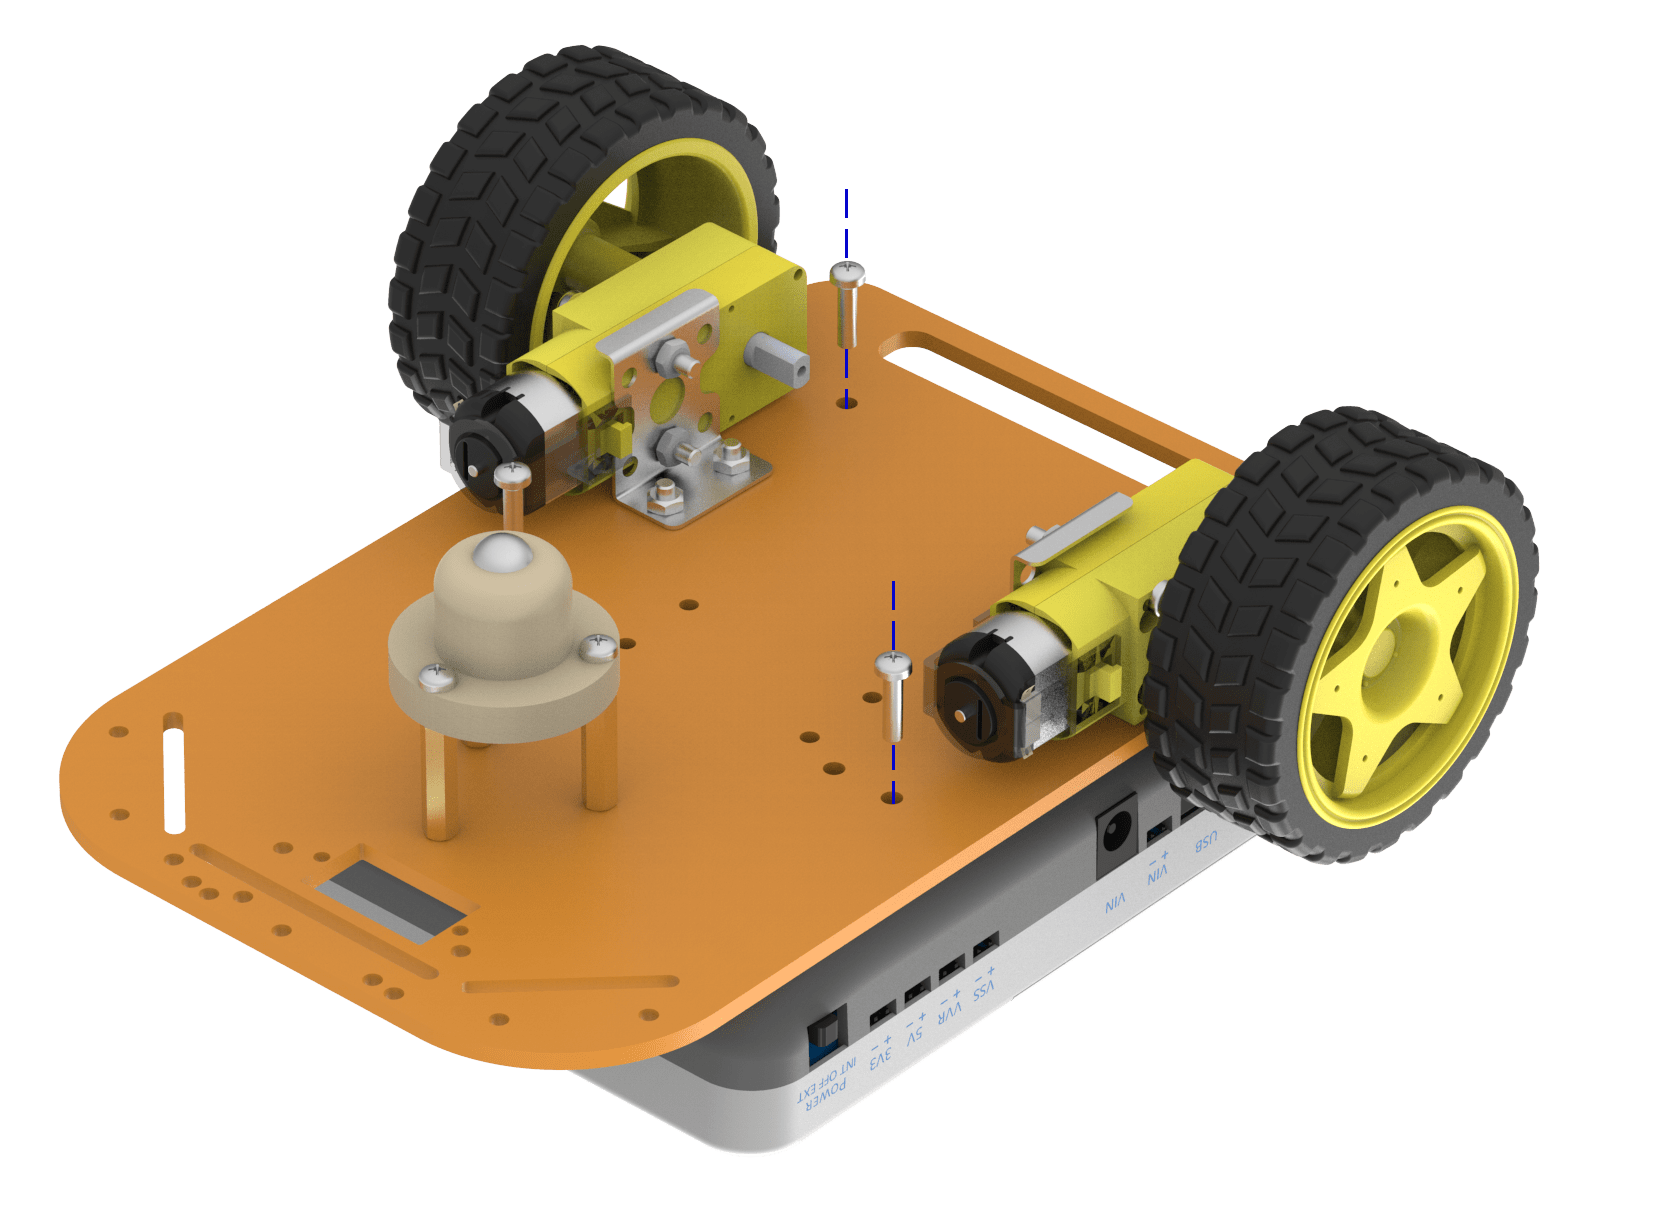
The annotated base is shown on right. This is the bottom side. There is evive logo on the top side for your reference. So be careful while using the base.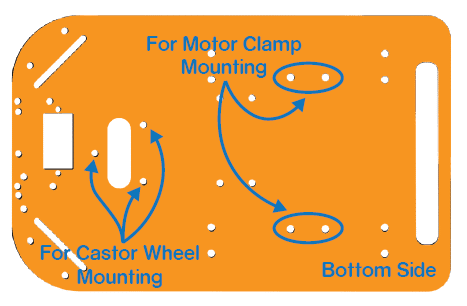
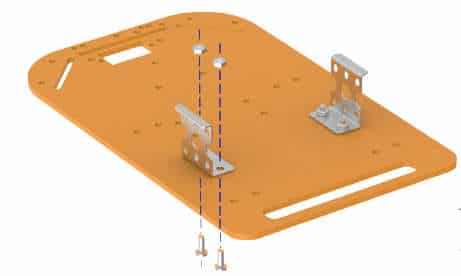
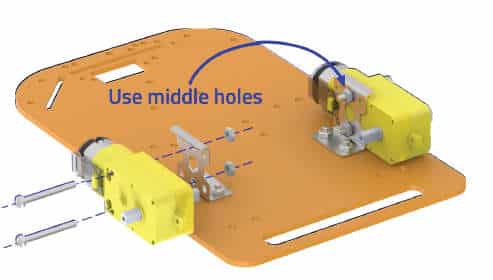
- Fix the motor mounting brackets to the chassis using M3 bolts of 8mm length and M3 nuts.

- Attach the two motors, one to each bracket, side by side and fasten using M3 bolts of 25mm length and M3 nuts.
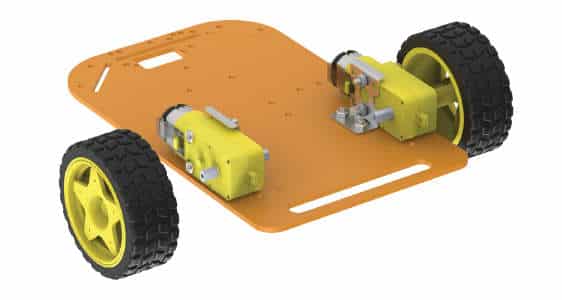
- Now, fit the wheels into the protruding motor shafts.
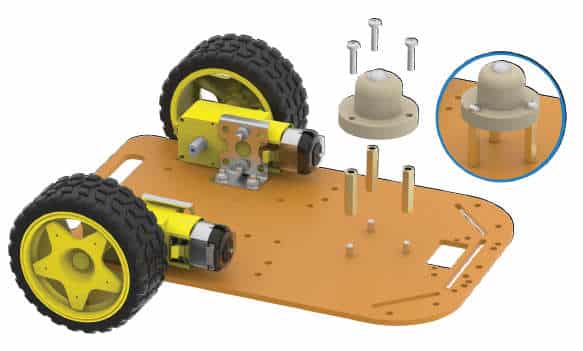
- We’ll attach the Castor wheel now. First, we will mount the M3 standoffs (20 mm) on which the Castor will be attached. Fasten the standoffs to the chassis using M3 bolts of 8mm length.
- Place the Castor on top of the standoffs in the configuration shown and fasten using M3 bolts of 12 mm length.

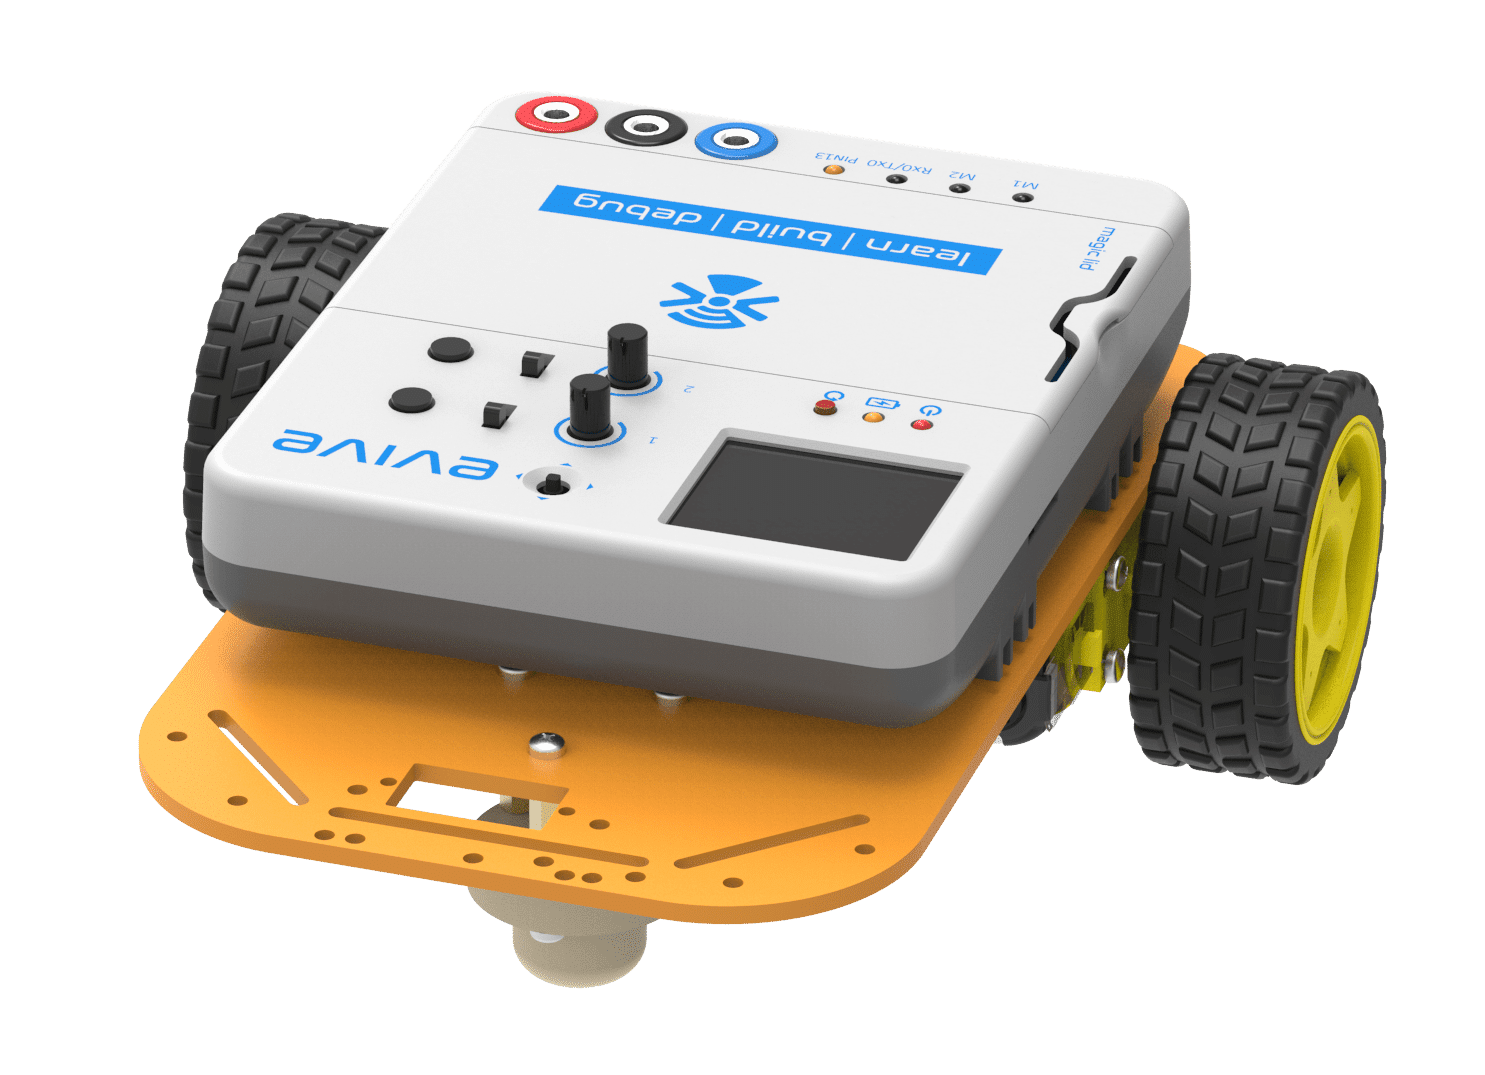
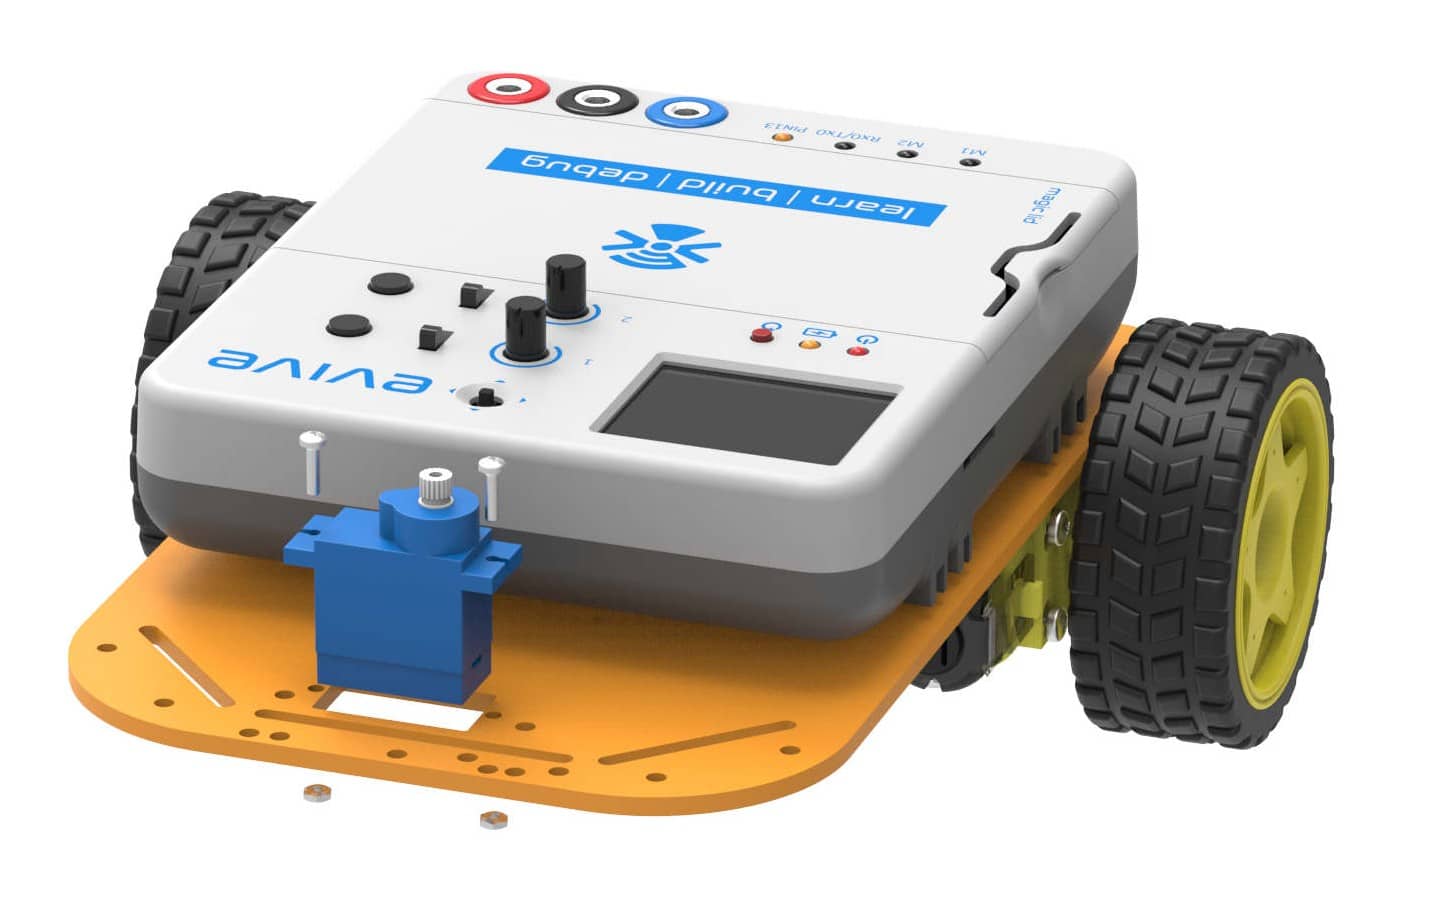
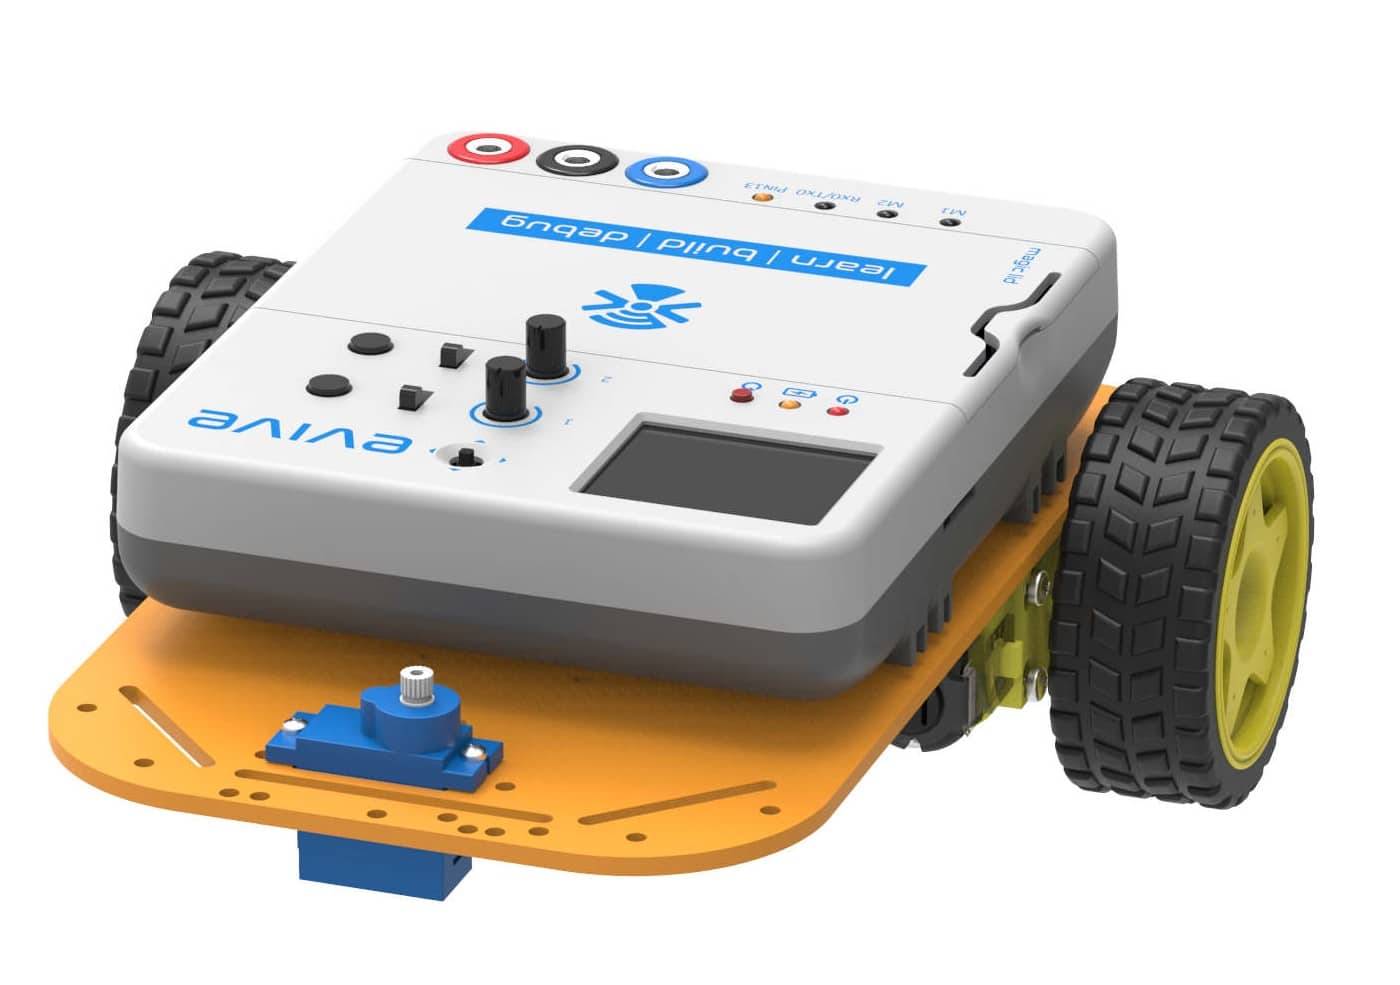
- Flip the assembly and place evive on the top of the chassis.
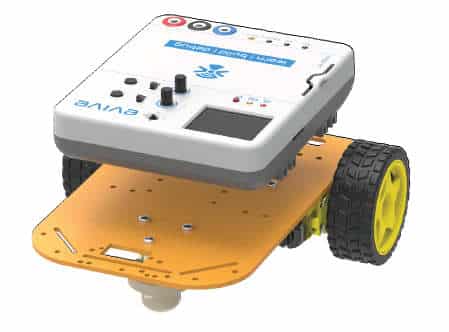
- Using the holes on the back of evive fasten it to the chassis using M3 bolts of 12mm length.
- Flip the assembly.
- Place the Ultrasonic sensor into the slot provided in the Ultrasonic sensor holder and fasten using M2 nuts and bolts.
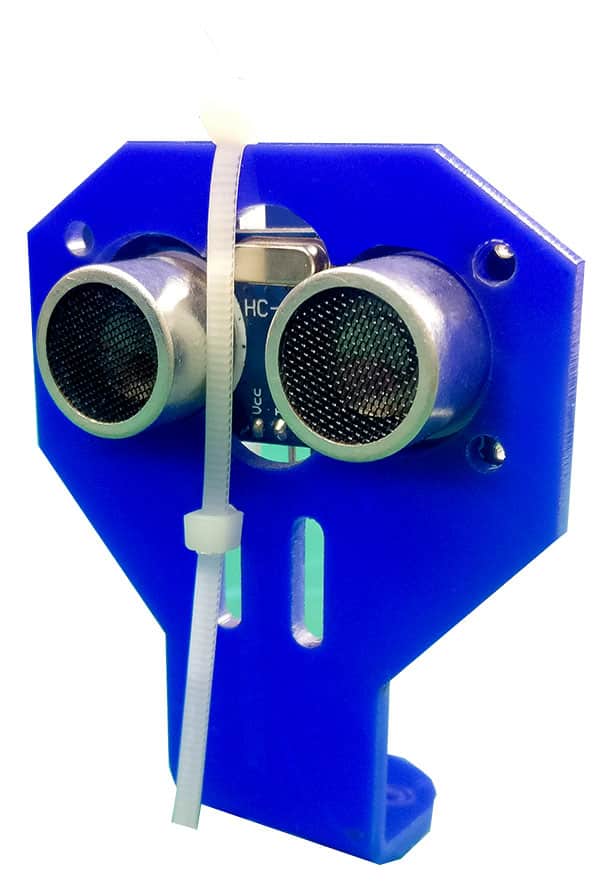
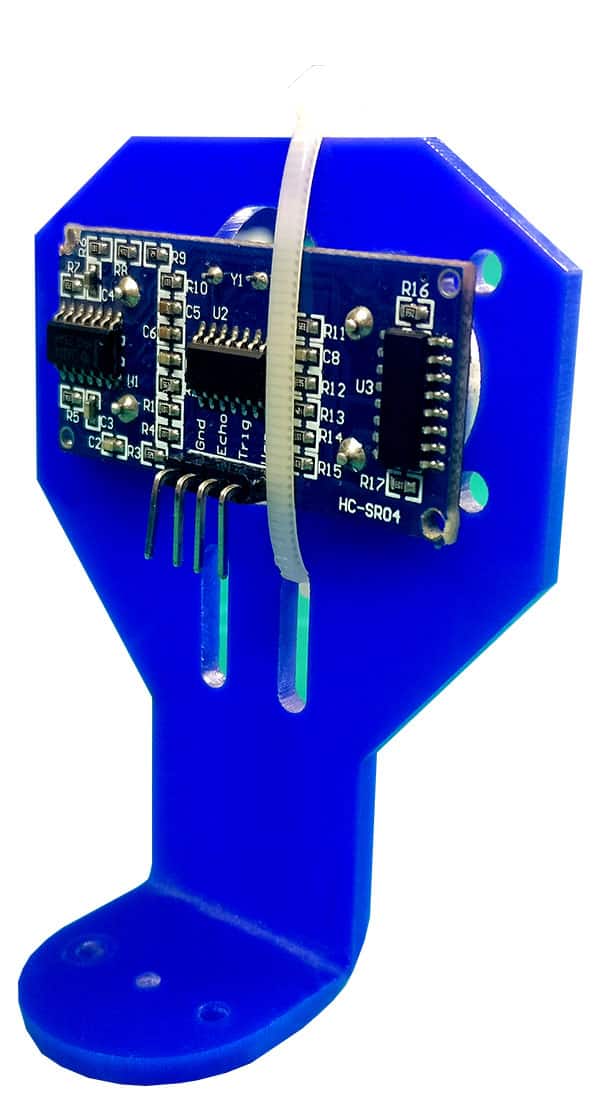
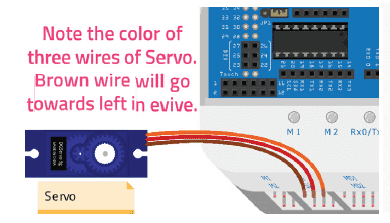
- Attach the servo horn to the base of the holder using self-threading screws. Servo horn and self-threading screws are in servo motor packet.
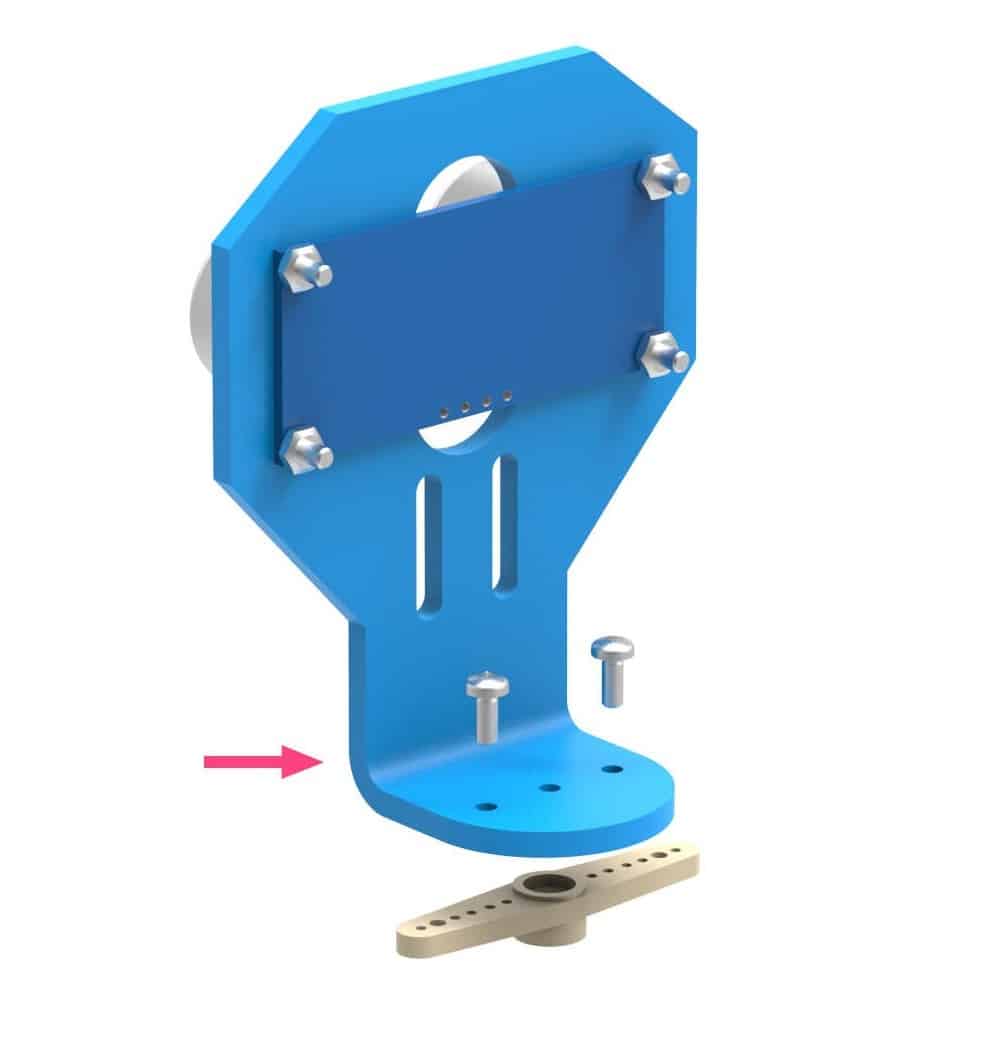
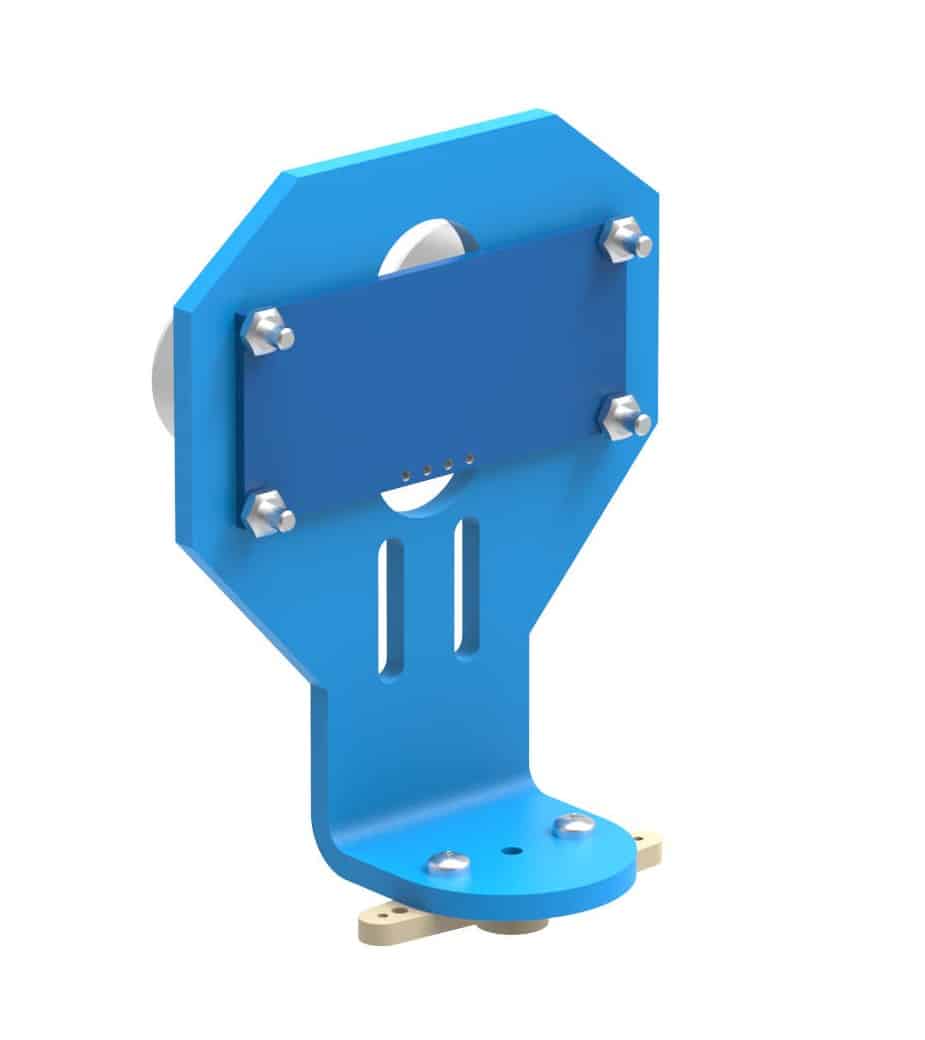
- Insert the Servo Motor into the slot provided on the chassis as shown in the figure below and fasten it using an M2 bolt of 12mm length and M2 nuts.
- Upload the evive Firmware. Switch on evive. Connect the servo motor to evive.
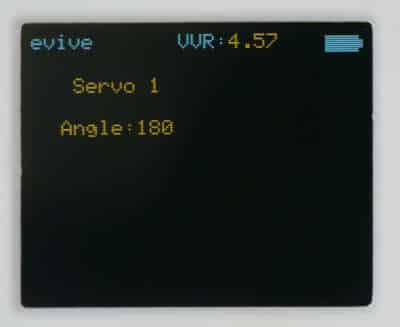
 Upload evive Firmware and navigate to Controls → Servo → Servo 1 . Using potentiometer 1, set the servo angle at 90°.
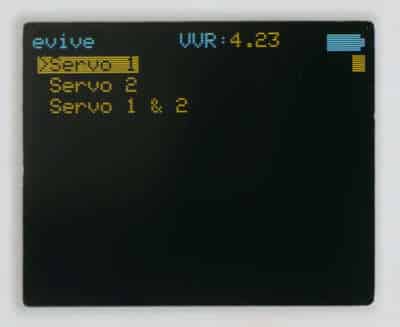
- Now place the assembled holder on the servo head such that the ultrasonic distance sensor faces forward.
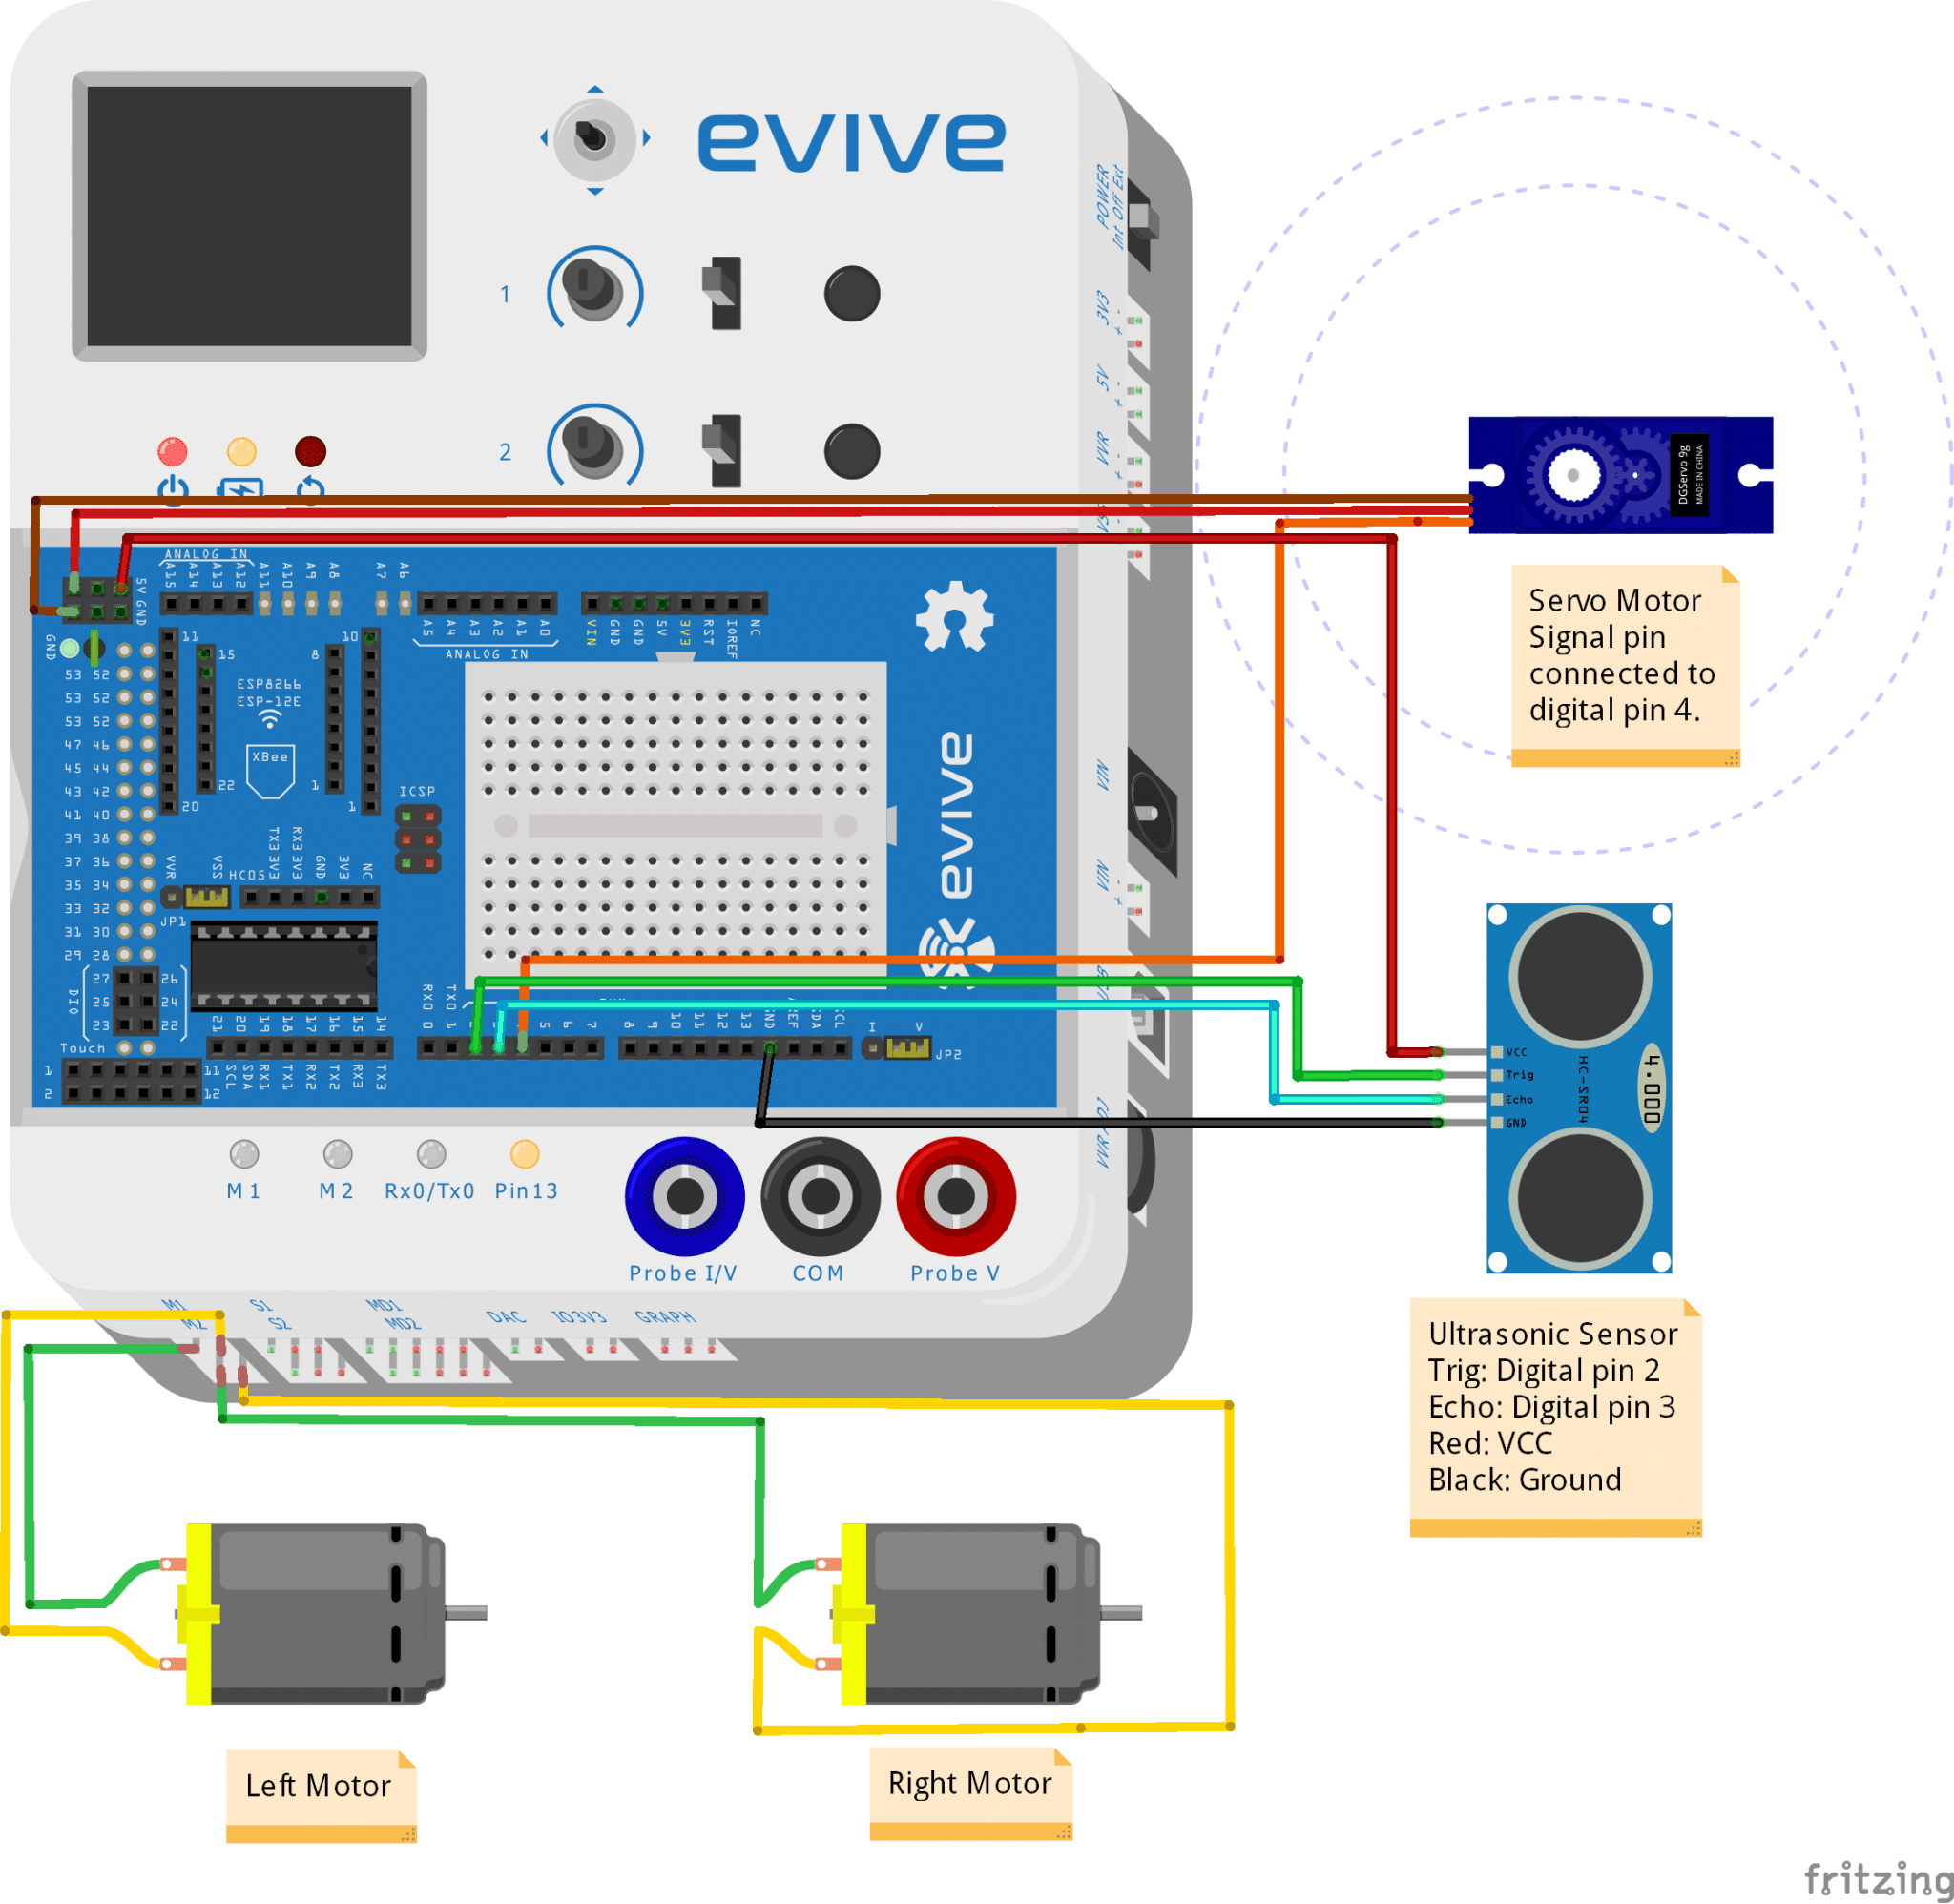
Circuitry of the Robot

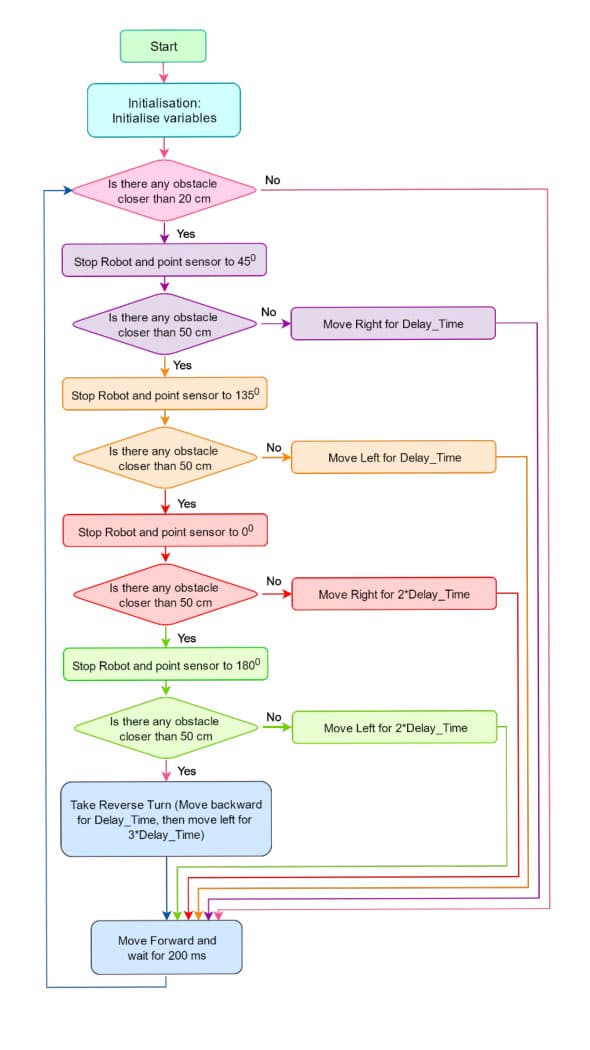
Logic and Flowchart
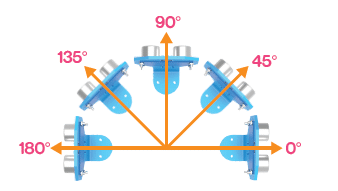
First, we will check if there is an object in the close vicinity in the front of the robot. If that is the case, we cannot proceed forward, instead, we test a new direction (45° to the right). Here is something which you will need to keep in mind: if the ultrasonic distance sensor faces straight ahead, the servo pin’s angle should be at 90°. When it rotates by 90° to the right from the center, the servo pin will be at an angle of 0°.
When the sensor rotates by 45° towards the right from the center, it checks for any obstacles in that direction and if they are sufficiently far away, we will turn the robot in that direction and move ahead, else we will check for other directions on both left (135° and 180°) and right side (45° and 0°).
Scripts
-
Now we are going to create Scripts to generate code in PictoBlox.
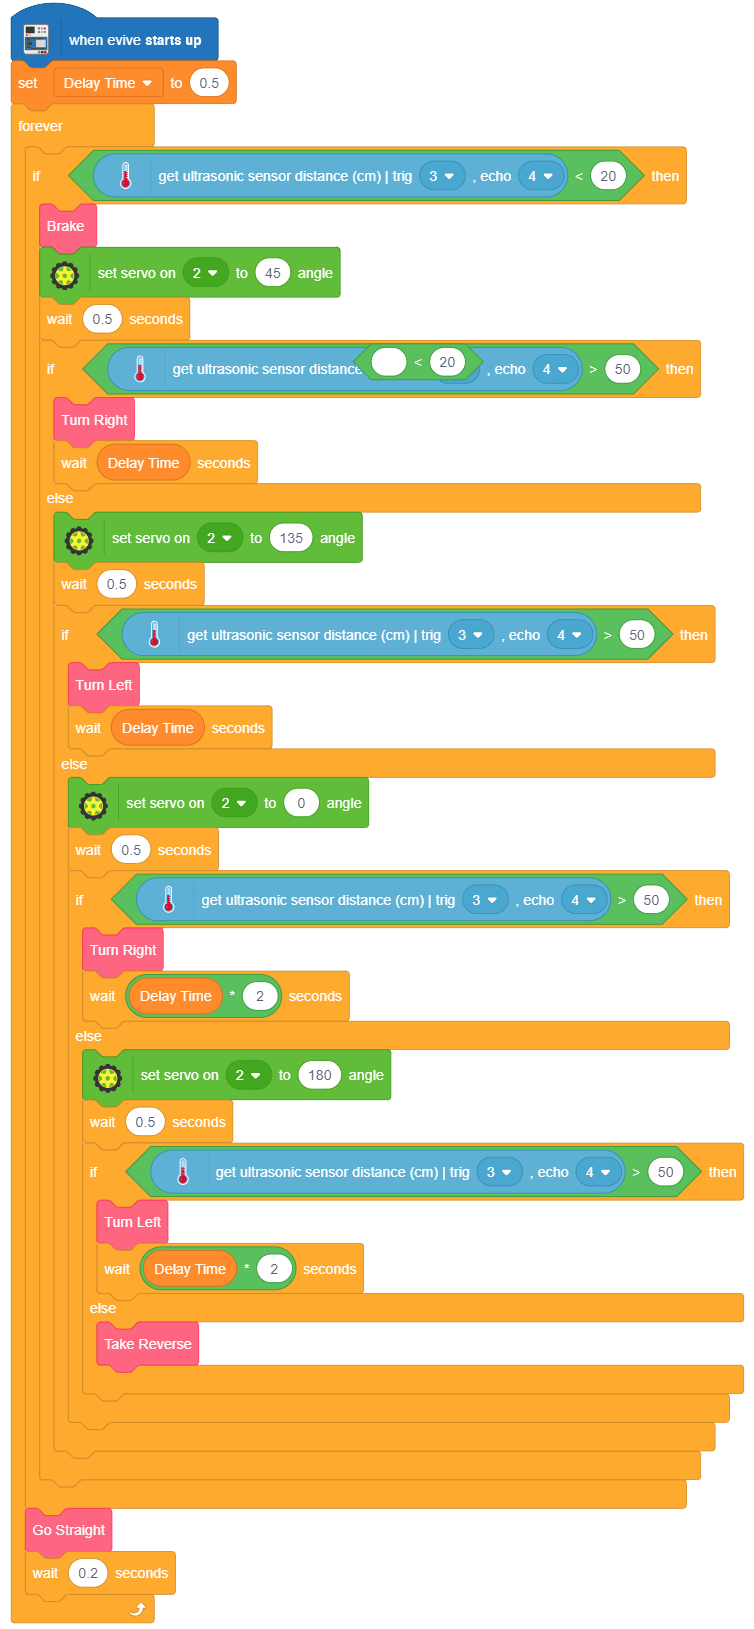
- Select the Upload mode from the menu bar. Then select evive as your Board and load the evive, Actuators, Sensors, and Display extensions. Next, drag and drop the evive starts up hat block into the scripting area.
- Here, we have to create variable Delay Time; it will be the time in which the robot will turn approximately 45°. Initialize it to 0.5.
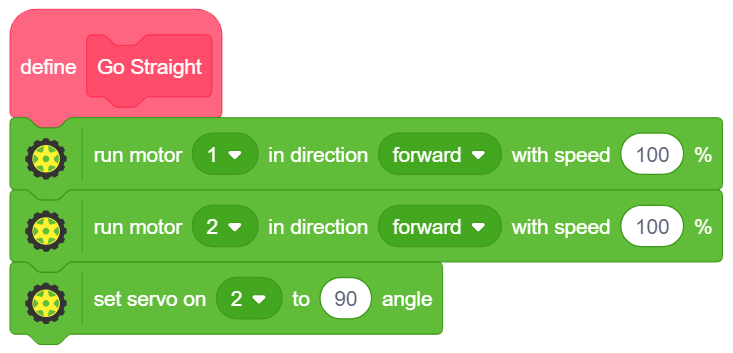
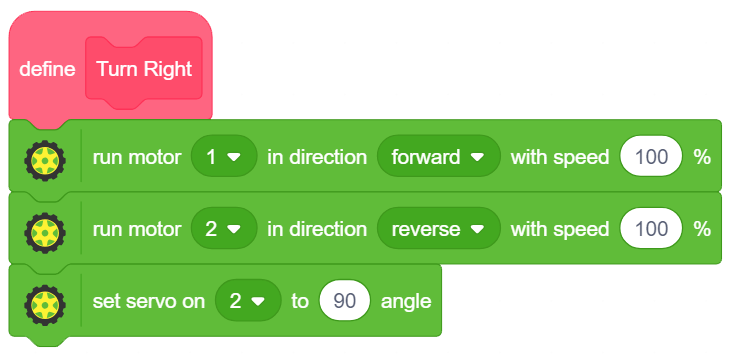
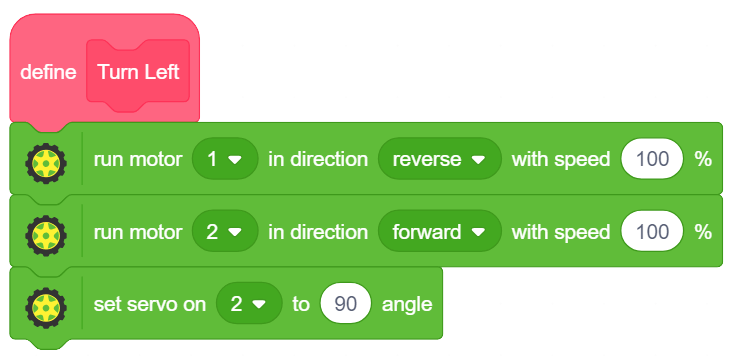
- Make GoStraight, GoBackward, TurnLeft and TurnRight blocks. Add a set servo block at the end of scripts for each block and set the servo angle to 90°.

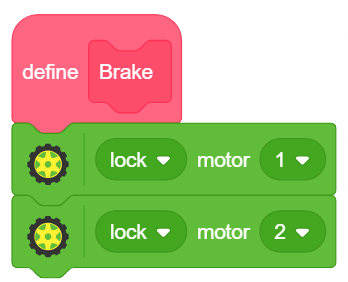
- Create a block named Brake to stop the robot.
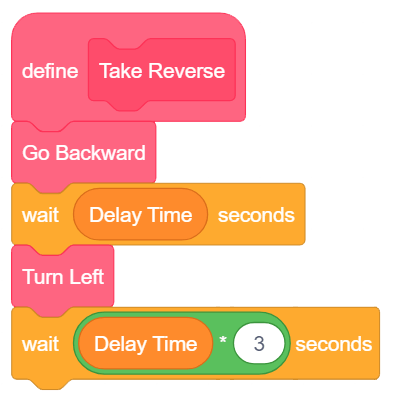
- Create another block for taking reverse, named TakeReverse. The robot will first move backward and then turn left until it moves 180°.
- Drag if-else block inside the forever block. Drag the less than operator block inside the if-else block. Drag the get ultrasonic sensor distance block as the first space of the less than block and write 20 in remaining space.
- Now, the robot is moving and it detects an object less than 20cm in front of it. But we can’t have it moving forward so we stop the robot using the Brake block.
- Now that we have stopped the robot we need to check other directions, where the robot can move. First, we turn the sensor (servo) to 45°.
- Next, we check if there is an obstacle in this direction. If the area is obstacle free, it will TurnRight.
- You will also see a wait block just below the TurnRight block. By ensuring that you wait DelayTime seconds, you ensure that the robot turns approximately 45° and no more or no less.
- In the end, after the TurnRight block is executed the nested if the block is exited and we encounter the GoStraight block.
- If an obstacle is close by, we turn servo to 135°. We perform a similar check for the presence of an object and if the way is clear, we turn left using the TurnLeft block.
- If the robot still detects an obstacle, we turn the servo to 0° angle. Again, we check and if there is no obstacle we turn the robot to the right using the TurnRight block.
- If the above checks have failed (obstacle detected) then we turn the servo angle to 180°. In case the obstacle is sufficiently far away, we execute a 90° turn using the TurnLeft block and a turning time period of twice the DelayTime.
- if there is still an obstacle that means the robot has actually faced a dead end(s). The only option (we have checked right and left) that now remains is to go into reverse gear (backwards) and turn 180°. We use the Reverse block.
- Upload the code to evive.
Conclusion
With this your Obstacle Avoiding Robot is ready!


![[CODEAVOUR 2021] project demonstration video 4-12 screenshot](https://ai.thestempedia.com/wp-content/uploads/elementor/thumbs/CODEAVOUR-2021-project-demonstration-video-4-12-screenshot-q7ynxvlwjfsgj74xjev4cqopqur232if4hglkl3itk.png "[CODEAVOUR 2021] project demonstration video 4-12 screenshot")


