
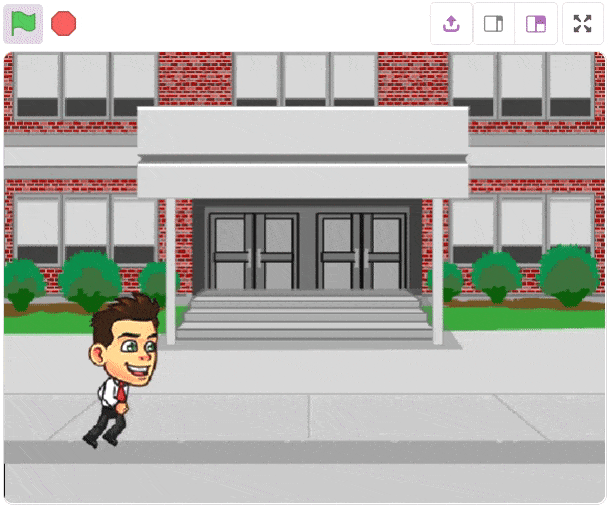
Introduction
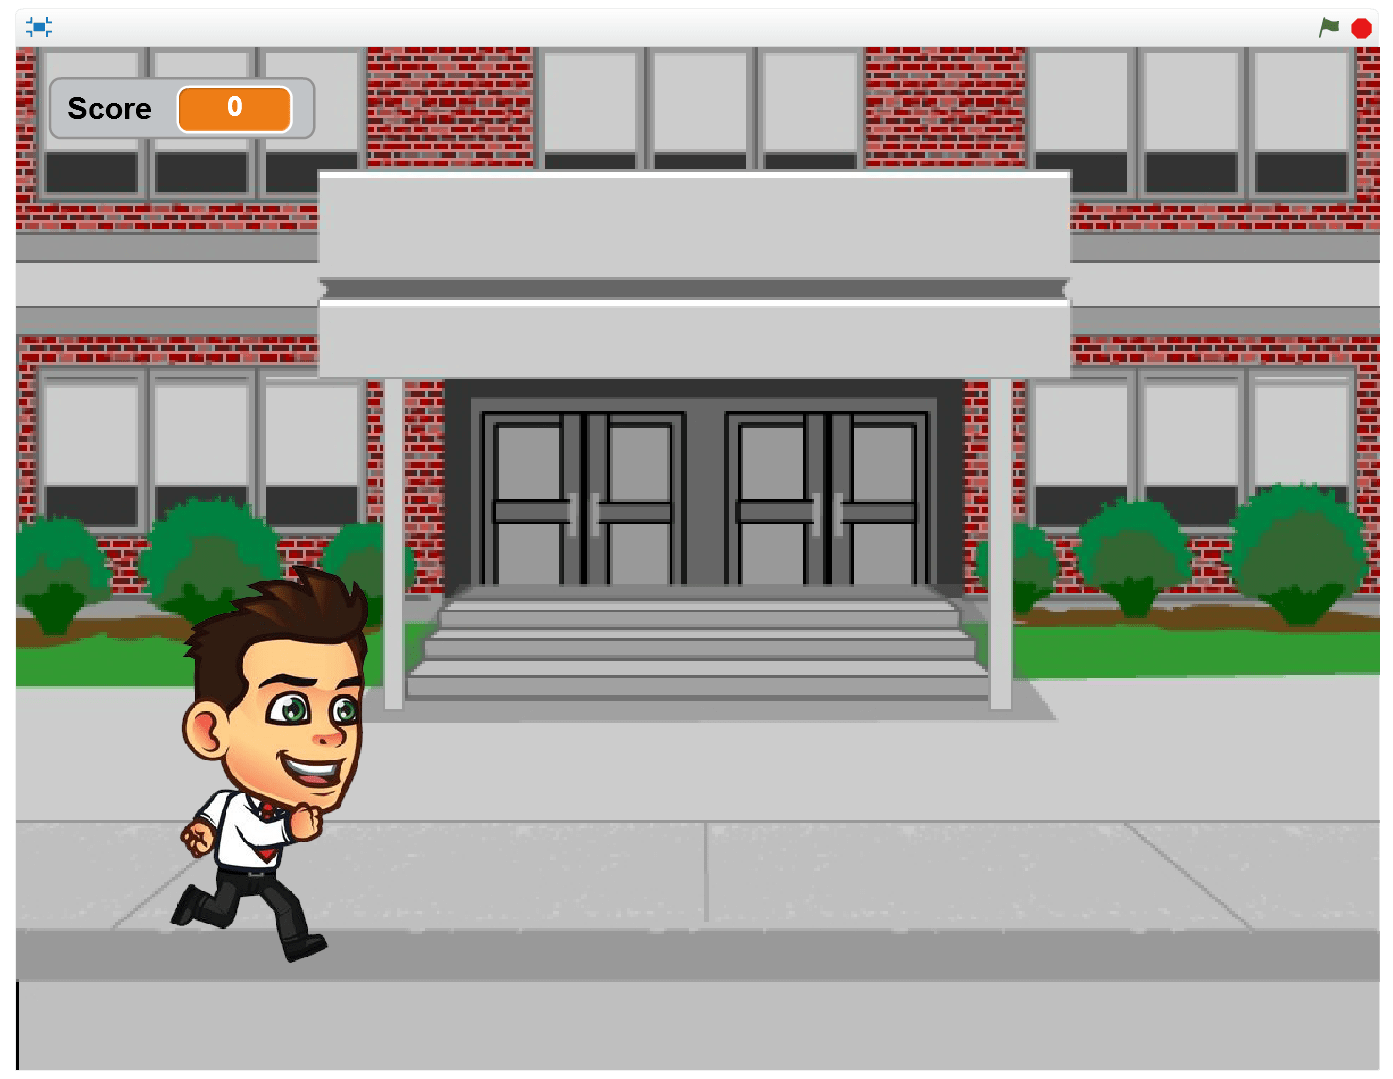
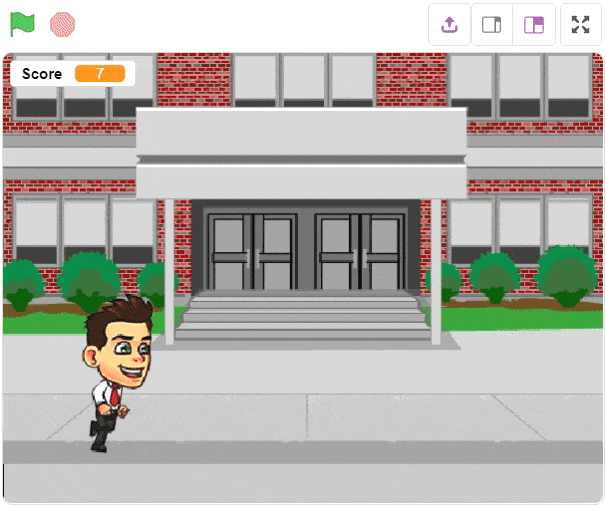
The aim of the game is to control the kid and dodge the objects coming his way for as long as possible. You can’t dodge them forever; because basically we are playing a game of survival and the challenge essentially is to stay in the game for as long as possible. Let’s begin by explaining the rules of the game through some figures.
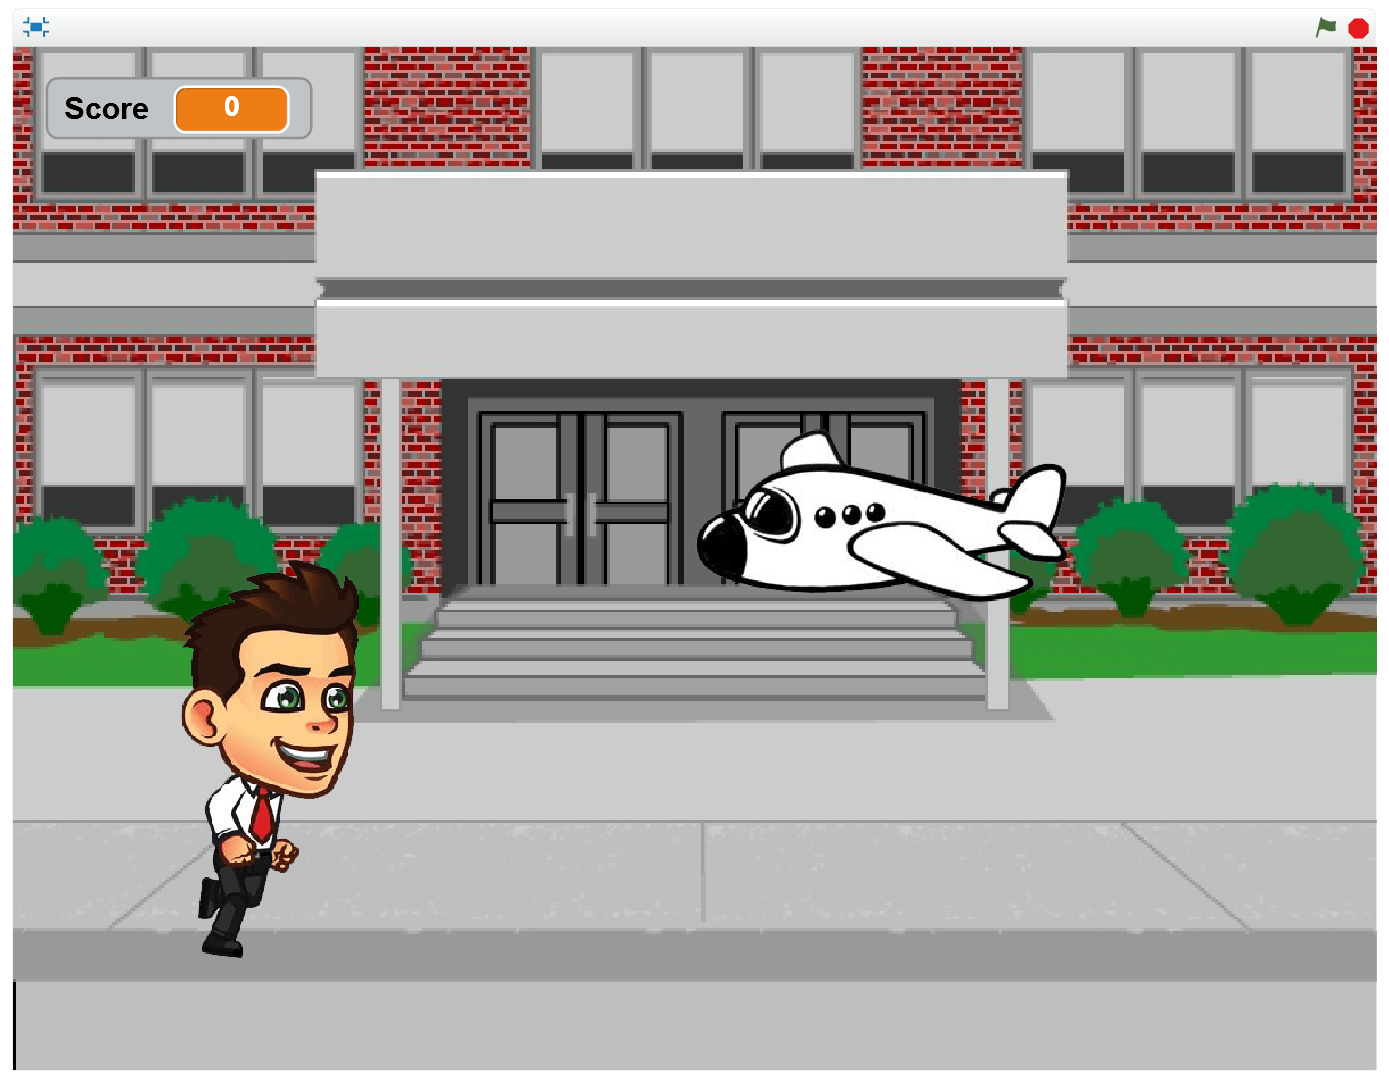
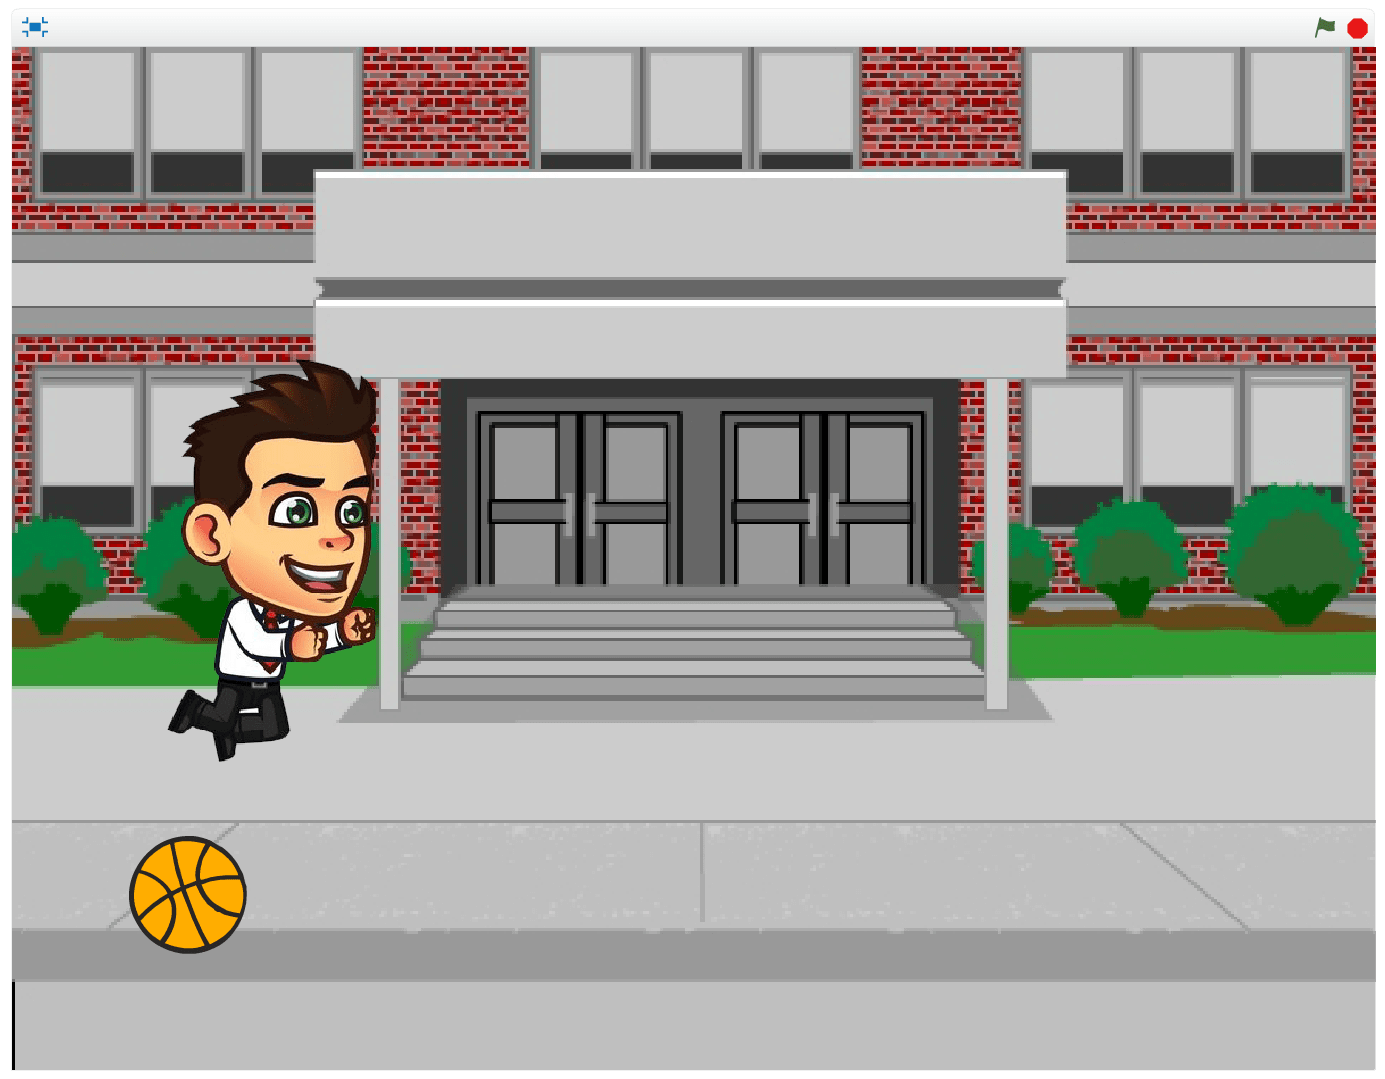
- When there are no obstacles
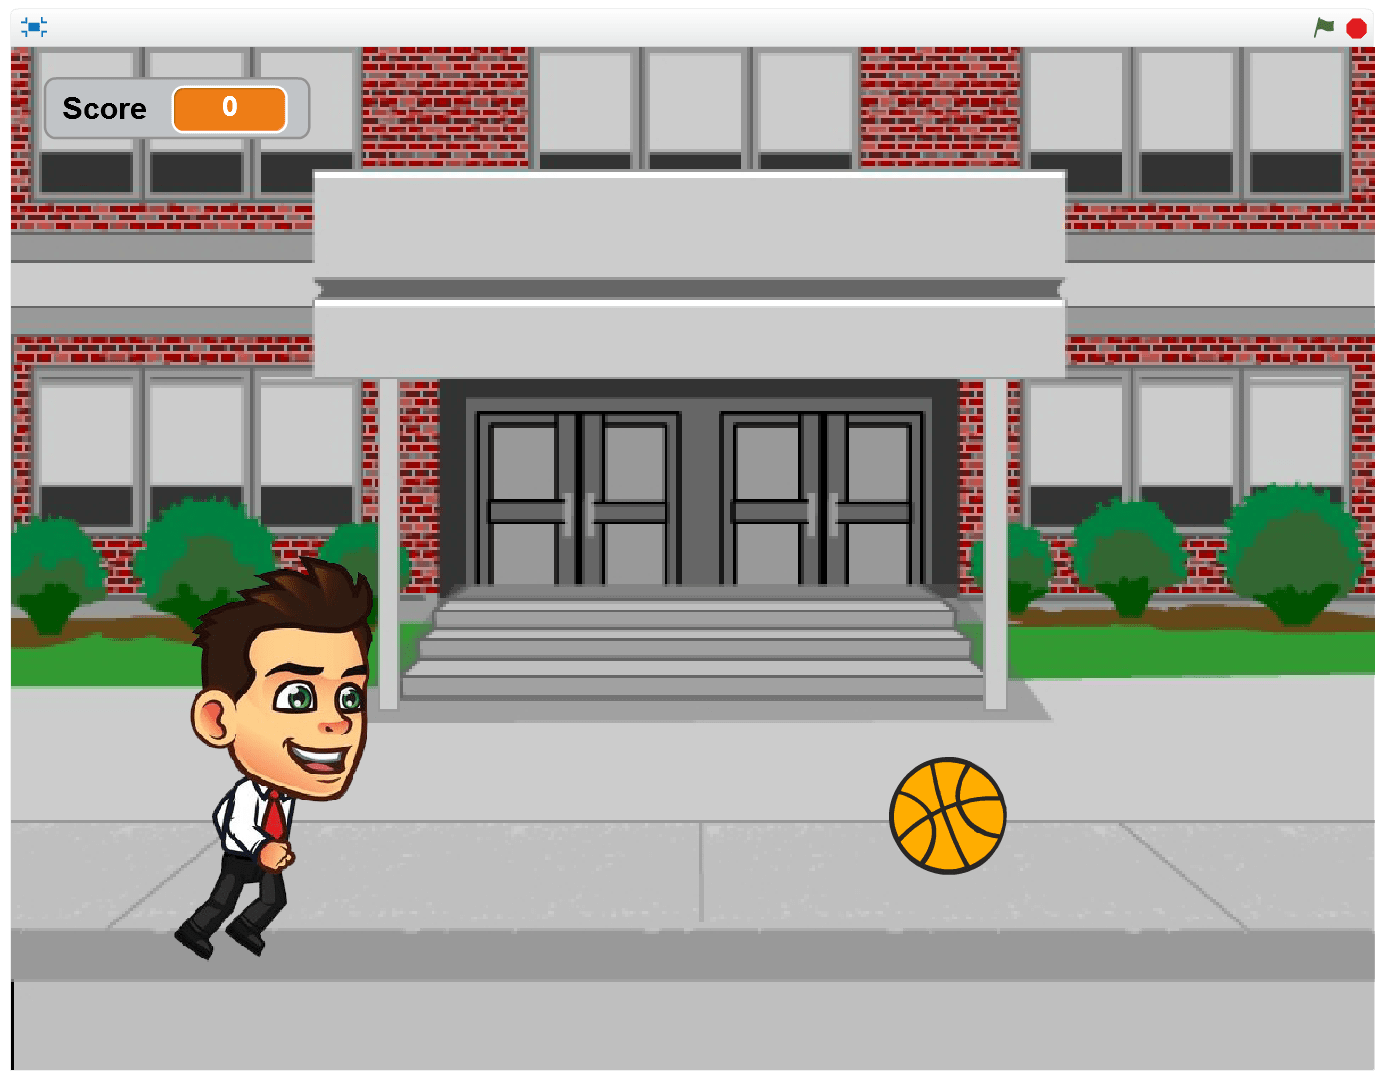
- The ball will come bouncing towards our “protagonist”
- This isn’t a real plane. And yes, we are assuming that planes can fly at such low altitudes.
- The ball will bounce and come to you but it’ll be grounded in your vicinity to give you a fair chance at dodging it. Dodge the ball by jumping.
- The plane will fly straight at you. Dodge it by sliding under it.
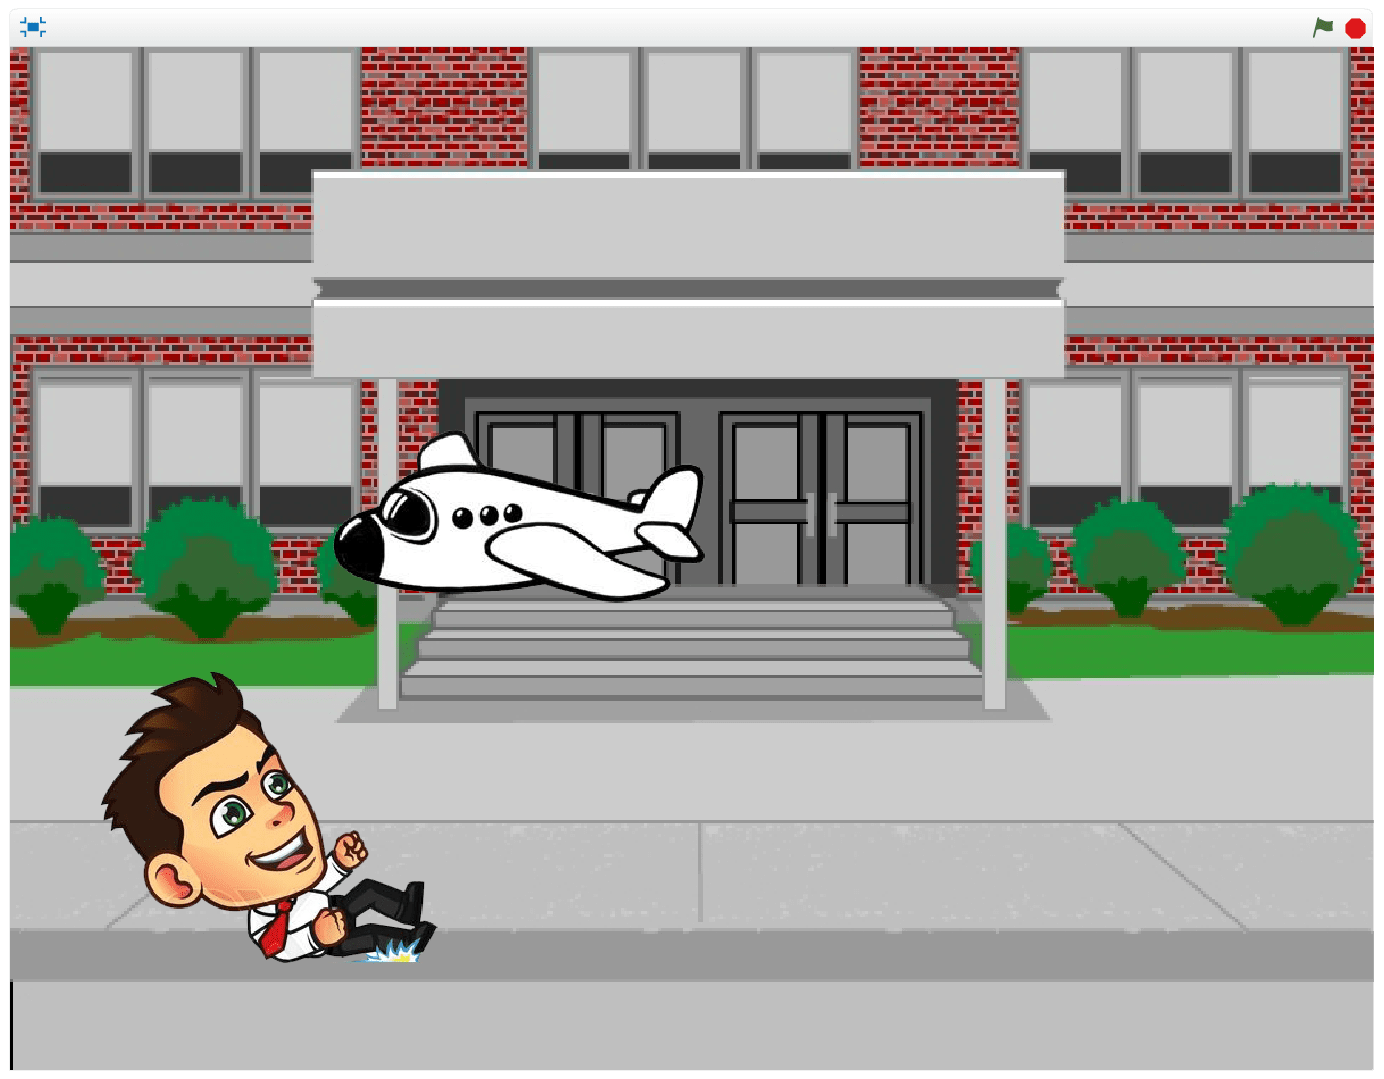
- If you fail to dodge an obstacle, our sprite returns a message confirming the same.
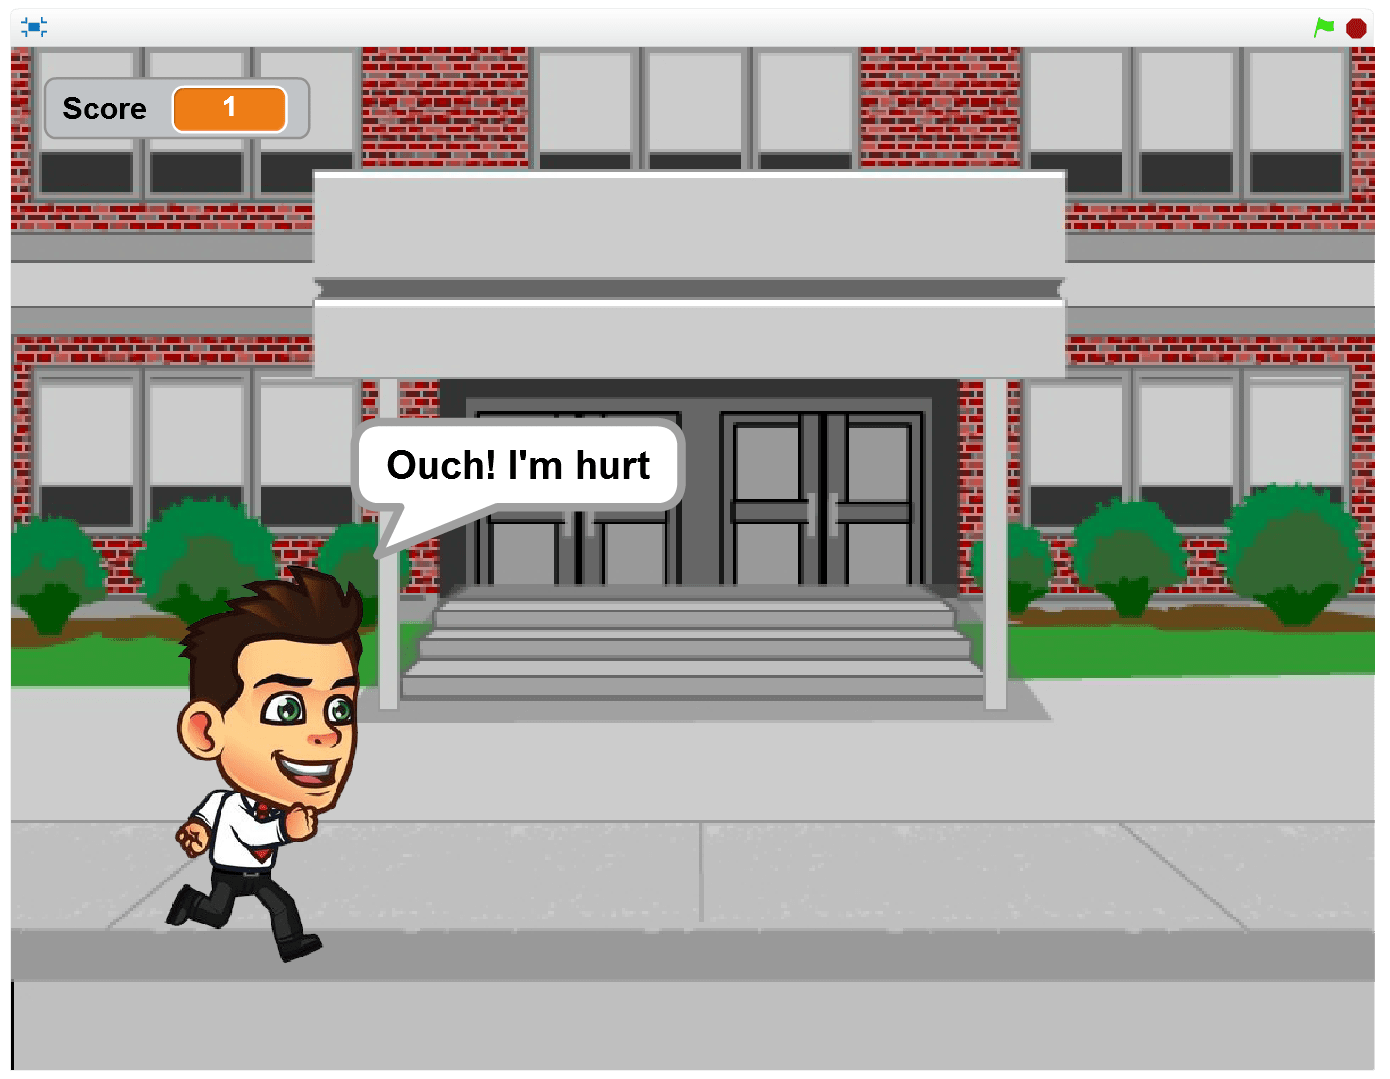
- It’s GAME OVER once an object hits you.
Lets make the game
A quick recap about Scratch
Scratch is a graphical programming language which let you interface and control your evive with laptop. If you have not installed Scratch visit here to get full instruction on installing Scratch.
To learn about the Scratch interface, visit here. There are four important things you have to know in Scratch:
We have developed these Scratch extensions containing special blocks through which you can control your evive in Scratch:
- Arduino: These blocks control the basic input, output and communication of evive like digital and analog input/output, serial communication, PWM output, etc.
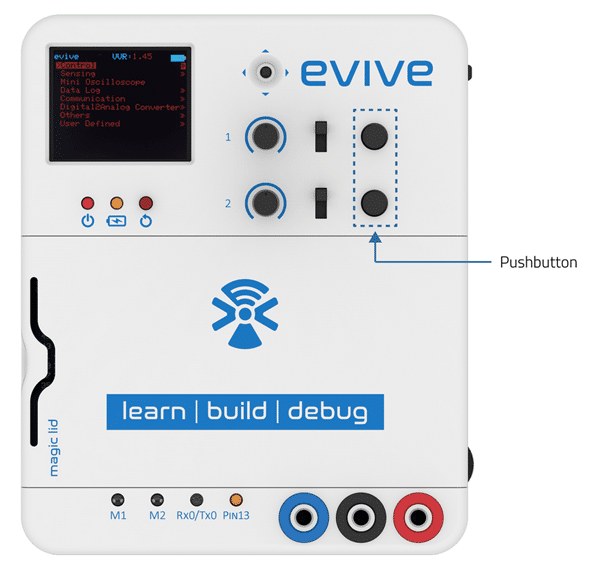
- evive Inbuilt Functions: Using this block you can control the basic functionalities of evive like tactile-switches, slide-switches, potentiometer,motors, 5-way navigation key, touch inputs and Real Time Clock.
- evive TFT Screen: Using this block you can control the TFT display of evive.
- evive App: Using this block you can communicate with the Mobile App.
- evive Tinkering: These block are used to interface various sensors and actuators.
In Scratch, there are two modes in which you can work:
- Arduino Mode: Under Arduino mode, the instruction blocks will be tranfer to Arduino C++ into Arduino IDe, and user could modify code in Arduino IDe, and then upload the code into Robot. In that case, the Robot is running offline and it can not interact with Scratch’s stage.
- Scratch Mode: Under Scratch mode which is defualt mode when mBlock start, mBlock could program robot through USB serial port, the robot is running a program could communicate with mBlock, and robot could intercate with Stage and create more insteresting projects and animations.
In this project we are using stage and sprite, hence we have to work in Scratch mode to use the block which senses the keyboard input.
The Running Animation
You should be familiar with designing and importing backdrops and sprites while making Shoot the Bat game. If not, go through the game or few tutorials like:
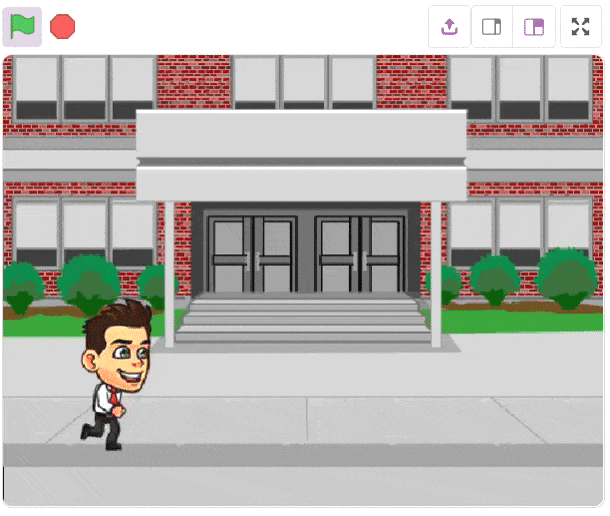
The sprite for the kid is not available in the library so import it. Download them from here. The basketball, the school backdrop and the plane sprite are present in the library. Change the school backdrop name to “School”.
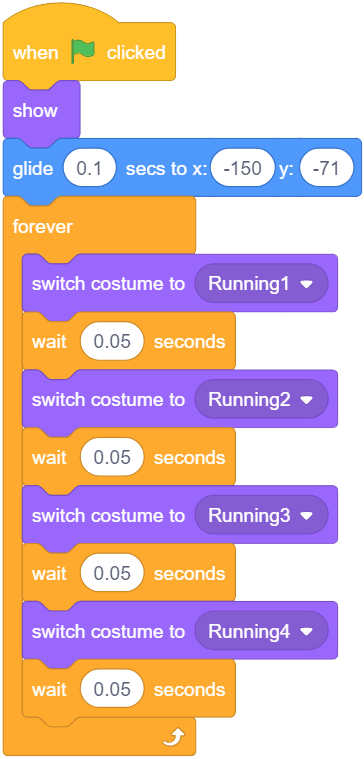
Select the sprite and scripts tab. He is running when he isn’t jumping or sliding. Also, we have created a bird flapping animation before (in the bat game). We know that all we have to do is to just switch between costumes as fast as possible. The various costumes for running are shown in sequence:

The Running script can easily be created.
Jumping Animation
Let us now write scripts which shall help the boy jump and slide. The costumes for jumping are given below. The 3 costumes in the middle represent time when the boy is in the air while the first and last represent the start and the end of the jump respectively. The 2nd and 4th costumes represent the times it is about to take off and touchdown respectively. While the 3rd costume represents the highest points of the jump.

Observe that, and this is important, the sprite should remain in air for more time than on ground because we are jumping.
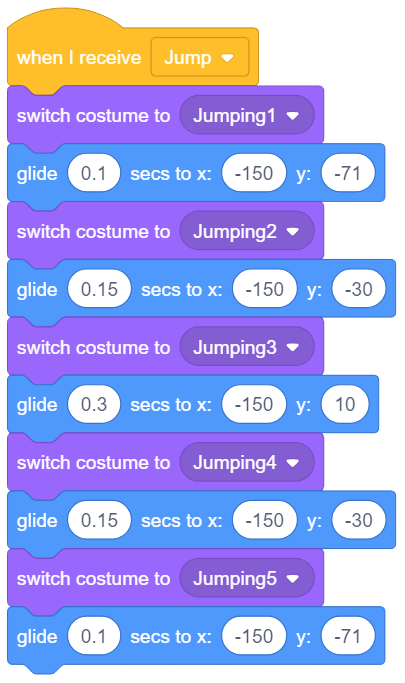
Another thing worth noting is that when you switch costumes, your Y-coordinate should increase when you switch from 1->2 and 2->3 with the Y-coordinate for the 3rd costume having the highest Y-coordinate (height). To get an idea (of the Y-coordinate), bring your ball sprite near the boy and drag around to see which height is suitable. Make sure that the height is enough so as the boy may be able to go over the ball.
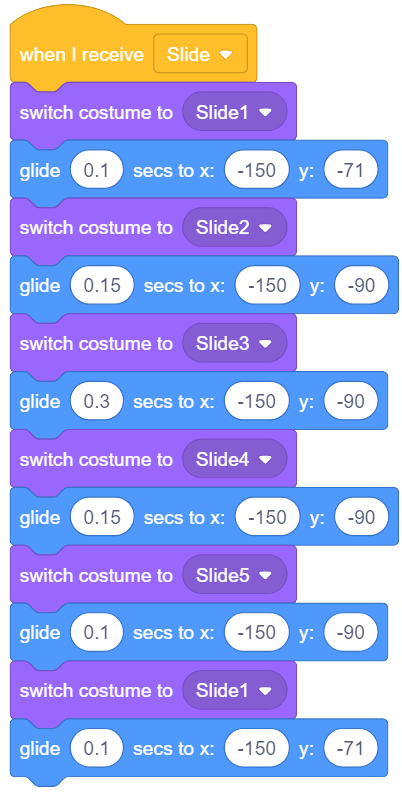
Sliding Animation
The subsequent images show the stages of sliding. Again, one has to carefully manipulate the time and height on each costume so it may be possible to slide under the plane.

Notice the increased time (in seconds) the sprite spends in costumes 3, 4 and 5, where the boy looks as if he is sliding.
Running, Jumping and Sliding simultaneously
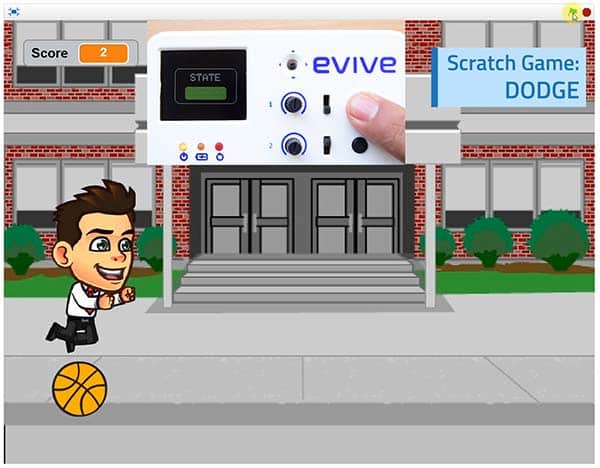
We will jump and slide to avoid obstacles and run at all other times. What we need for this purpose is for the three scripts: “Running, Jumping, And Sliding” to interact with each other. We will make changes in the Running script in such a way that the Jumping and Sliding scripts “know” when to activate. The Jumping and Sliding scripts start off with the “When I receive” block. We will check if the tactile switch 1 or the tactile switch 2 of evive is pressed and then jump or slide accordingly.

We know what to do. The question is: How to do it? Worry not, for Scratch has the required blocks.
- When our sprite is in any of the Running costumes, we can press the tactile switches to make it jump or slide respectively.
- In the Robot palette, there is the tactile switch pressed block under evive inbuilt functions extension.
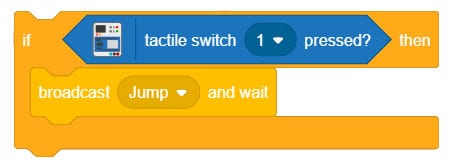
- We know we have to jump; we should activate the Jumping script now. For this use the if block and then broadcast Jump using the broadcast and wait block.
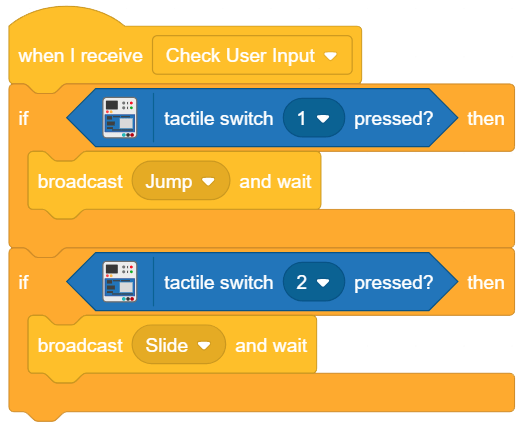
- Drag and drop the hat block When I receive in Events palette. Change the message name to “Check User Input” and snap the above code below it.
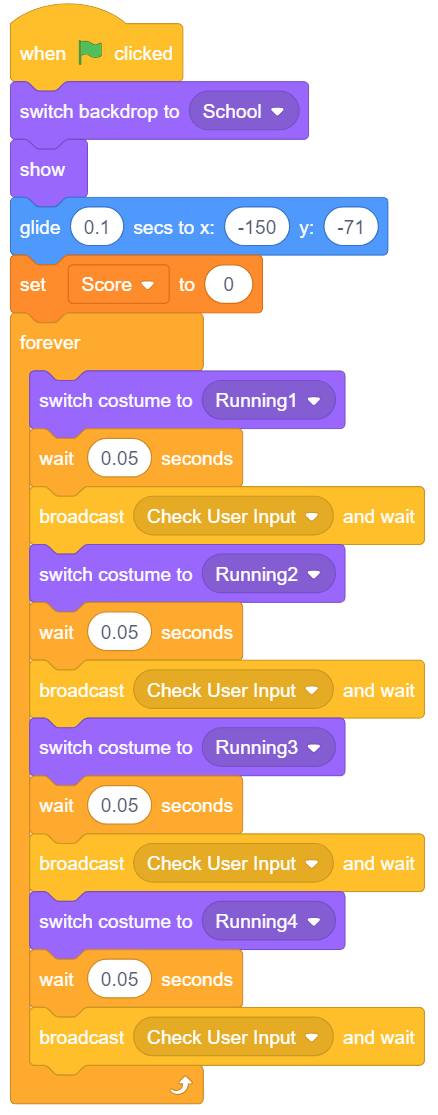
- Where to send the message to check user input? Yeah you guessed it right, as soon as you switch costumes in the Running script. The complete running script is shown below. You can observe that you are broadcasting the message after changing costumes. This is done to reduce the lag while playing. You can try the other one, and experience it yourself. Also, to keep track of your performance, create a variable “Score”. At the start of the game Score should be 0.
- Try running this and see if the sprite is jumping every time. Similarly, create blocks for sliding. The complete Check user input script is shown:
Spawning the ball and the plane randomly
It’s time for the obstacles now. We are not yet programming our plane and ball. Instead, we are just deciding at what times they will appear on stage. We will pick a random time interval at which the plane and ball appear. See the script given below:
We first wait for a random time period from 1 to 5 seconds. Then, we want any of the ball or the plane to appear so we choose randomly between the two.
Depending on what is broadcasted (chosen), the respective scripts under the ball and the plane sprite get activated. We will now write the scripts for the ball and the plane.
Plane Script
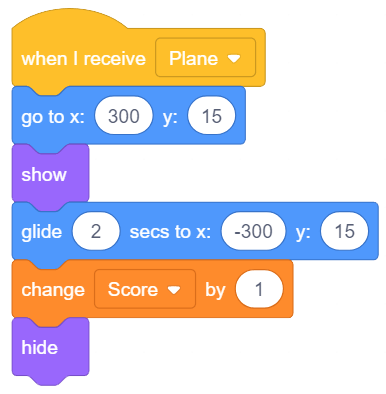
Starting from the right edge, keep the Y-coordinate constant and glide the plane to the same position at the other end. Remember the plane has to disappear at the end. Hence we hide it at the end of the script. Also after going to the initial position, we show the plane. Every time the plane successfully passes the boy, Score should increase by 1. We are executing this using Change block in the variable palette.
Ball Script
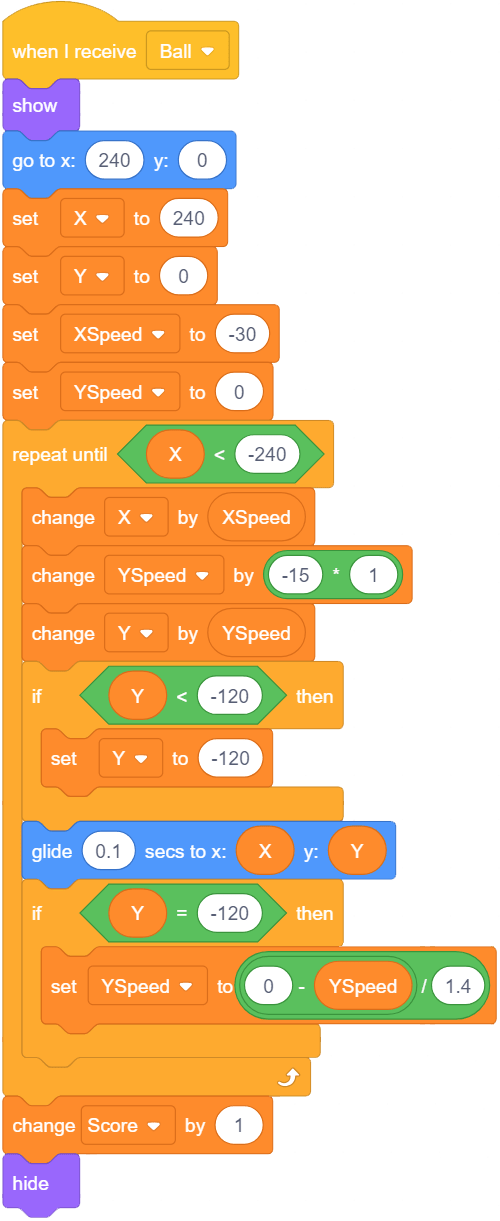
Next, we write a script for the ball. Start the ball from (240,0). Don’t get confused; ground level (where the boy’s feet are) is at -120 (Y-coordinate).
Because the ball has to bounce on its’ way before settling down, the code is a bit complicated. We create variables X, Y and XSpeed, YSpeed to keep track of position and speeds (in horizontal and vertical directions) respectively.
- We need the ball to reach the kid, so we keep a constant speed in the x-direction, say 30. Because the speed is towards left, we use a negative sign.
- The following steps will be repeated till the X-coordinate is less than -240, i.e. leftmost edge:
- By a speed of -30 we mean the ball will move 30 units to the left every second. So we change the X-coordinate by -30 every time.
- We want the ball to fall down from height initially but bounce back once it touches ground. However, we do not want it to rise to the same height, i.e. the ball’s vertical (Y) speed should decrease once it bounces.
- For the ball to fall down we should give it speed in the negative Y direction (downward) and change the Y coordinate accordingly.
- However, we do not want the same to happen once the ball touches the ground, i.e. Y= -120. We give it an upward speed lesser than the speed it fell with (hence the division by 1.4).
- Just to make sure that the ball doesn’t fall below -120, we again set its’ Y coordinate to -120 as soon as that happens.
- Every time the ball successfully passes the boy, Score should increase by 1.
- We also want to hide the ball at the end of the script and show it at the starting of the script.
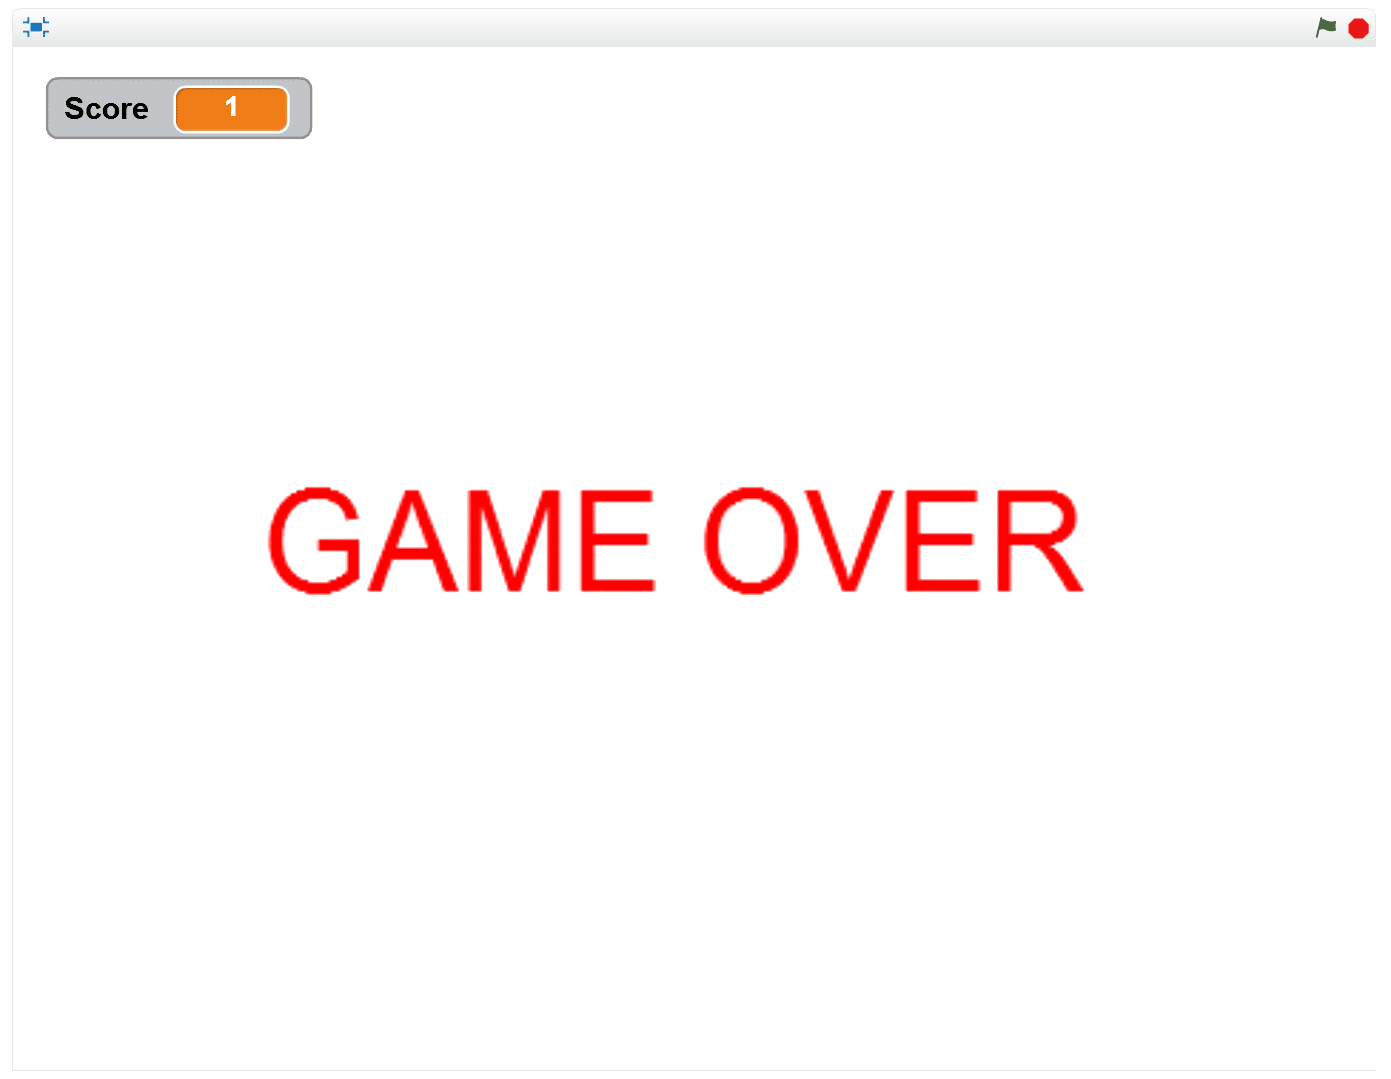
Game Over
In this section, we will control what happens when the game is over, i.e. either the plane or the ball has struck the boy. When the game ends, we want these things to happen:
- The boy displays a message saying he is hurt
- All motion on the school backdrop stops.
- The backdrop switches to GAME OVER
Script for the Boy
We will check if the boy touches the plane or the ball. After that, we will broadcast GAME OVER throughout the scripts. This will notify the other sprites in the game to execute their respective “GAME OVER” scripts. We will also make the kid say – “Ouch! I’m hurt”, hide the sprite and switch backdrops.
We use “stop other scripts in sprite” to avoid glitches. This option is available in the drop down of the stop block.
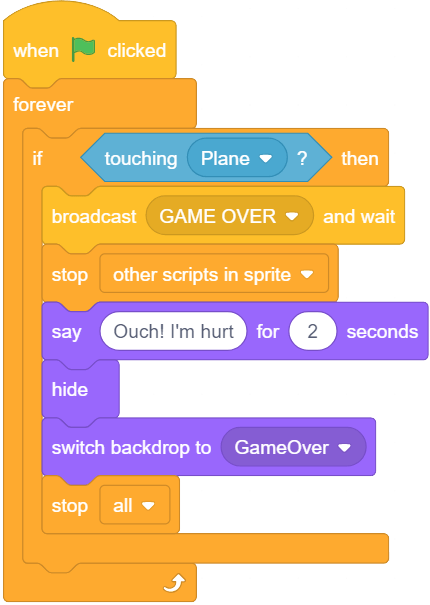
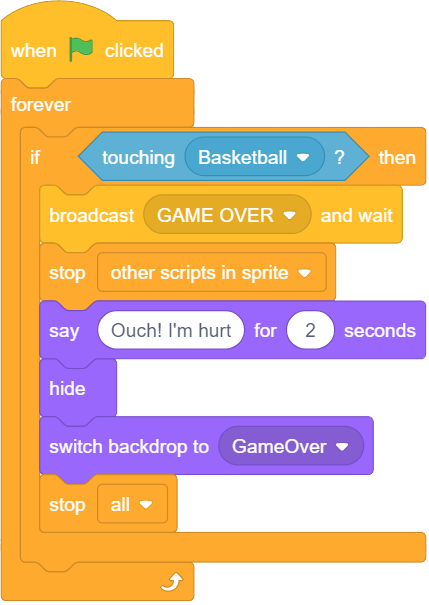
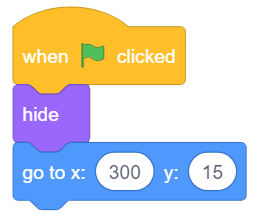
The ball and the plane
As soon as the ball receives GAME OVER, it stops other scripts, hides the ball and sends it to its’ starting point: (240, 0).
The same script is written for the plane too, except that its’ starting point is different from that of the ball.


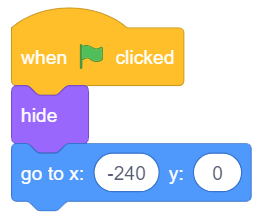
Also, when you start the game, the sprites, the ball and the plane, should go to their initial position and should be invisible. Given below is the script for the same.
And the game is complete and ready for playing. You can adjust the speed of the moving objects to make the game easy or hard.