
Introduction
Playing soccer is fun, but playing soccer with robots is awesome.
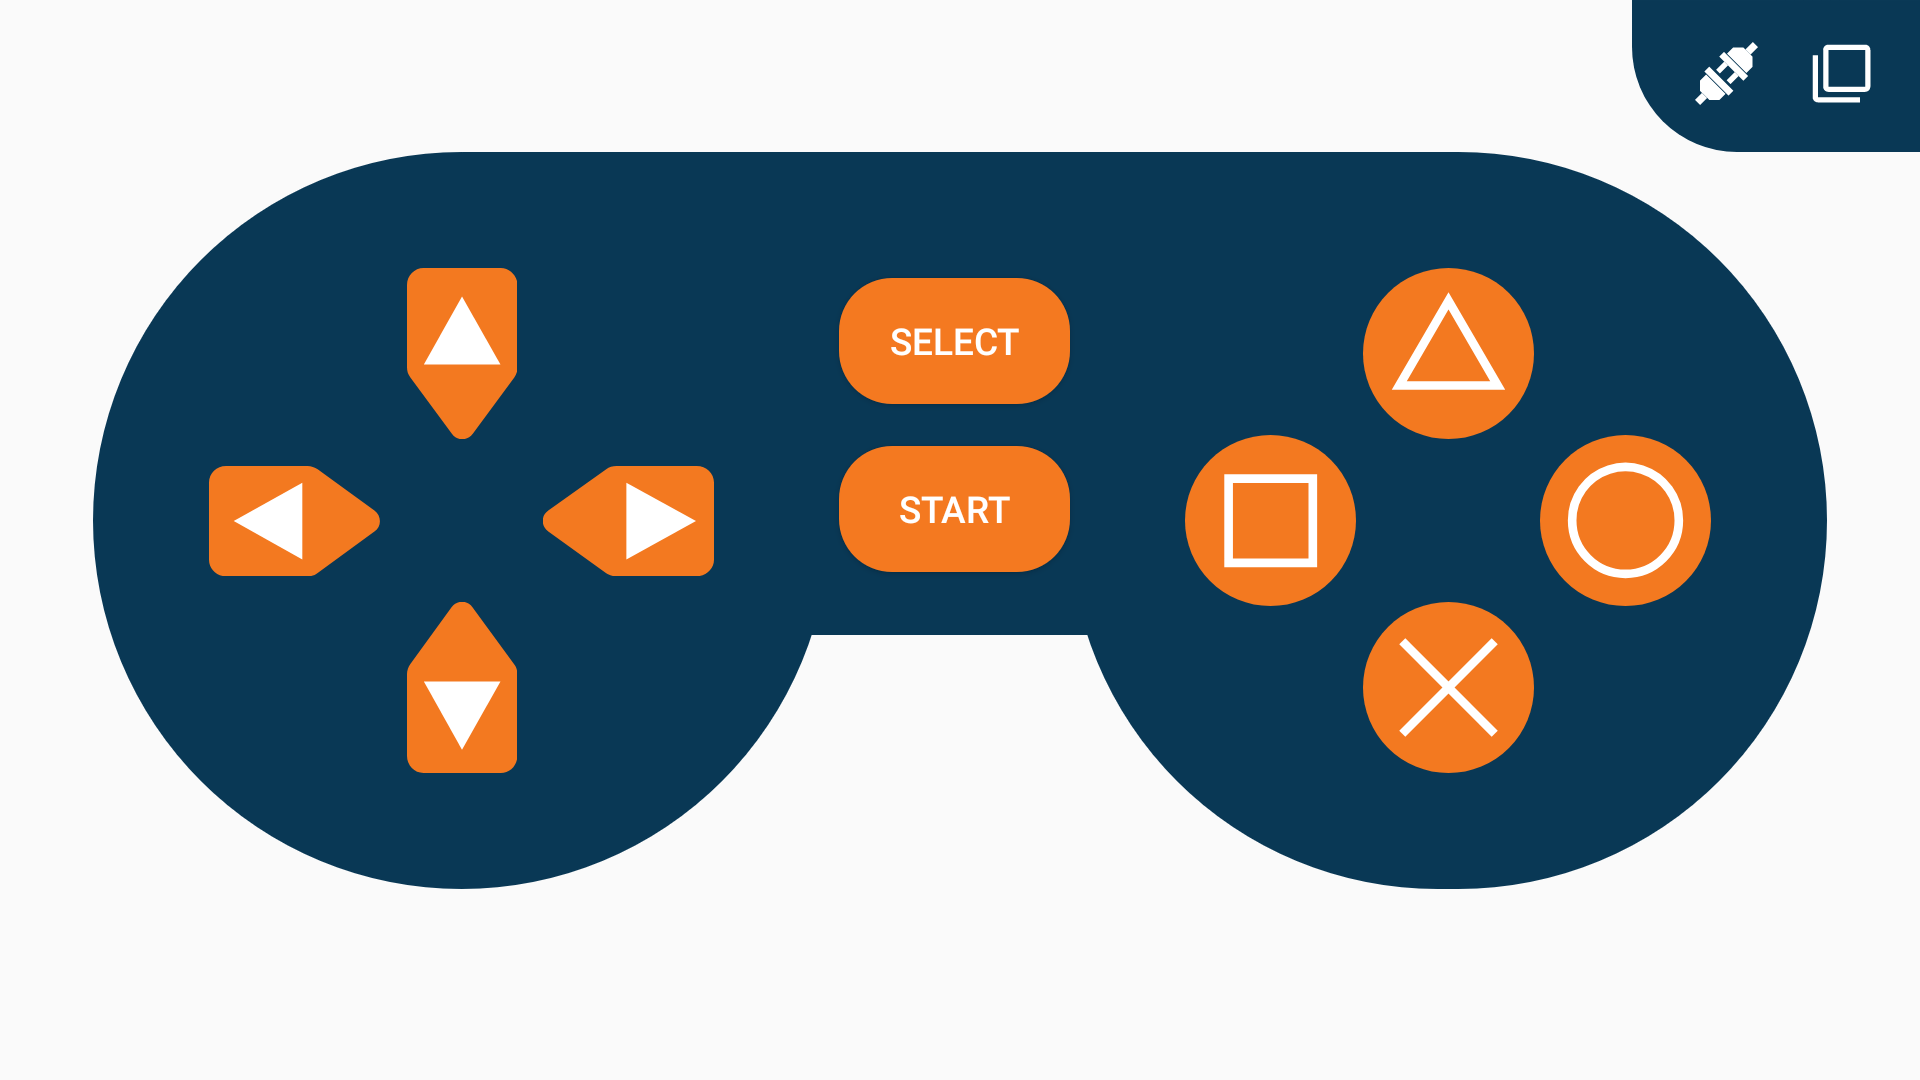
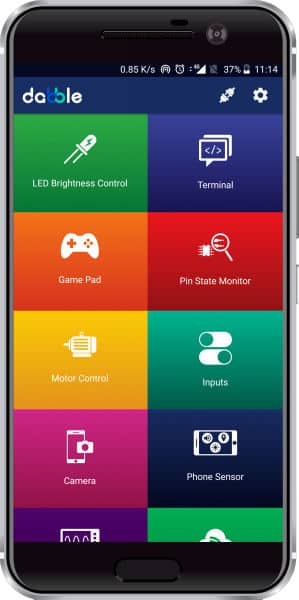
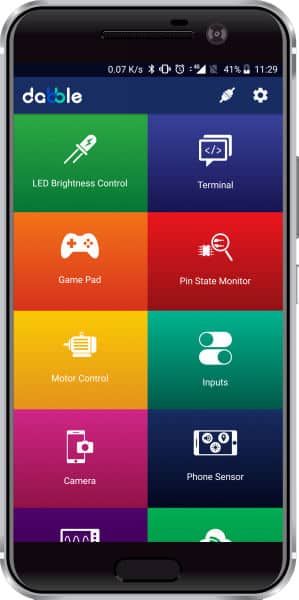
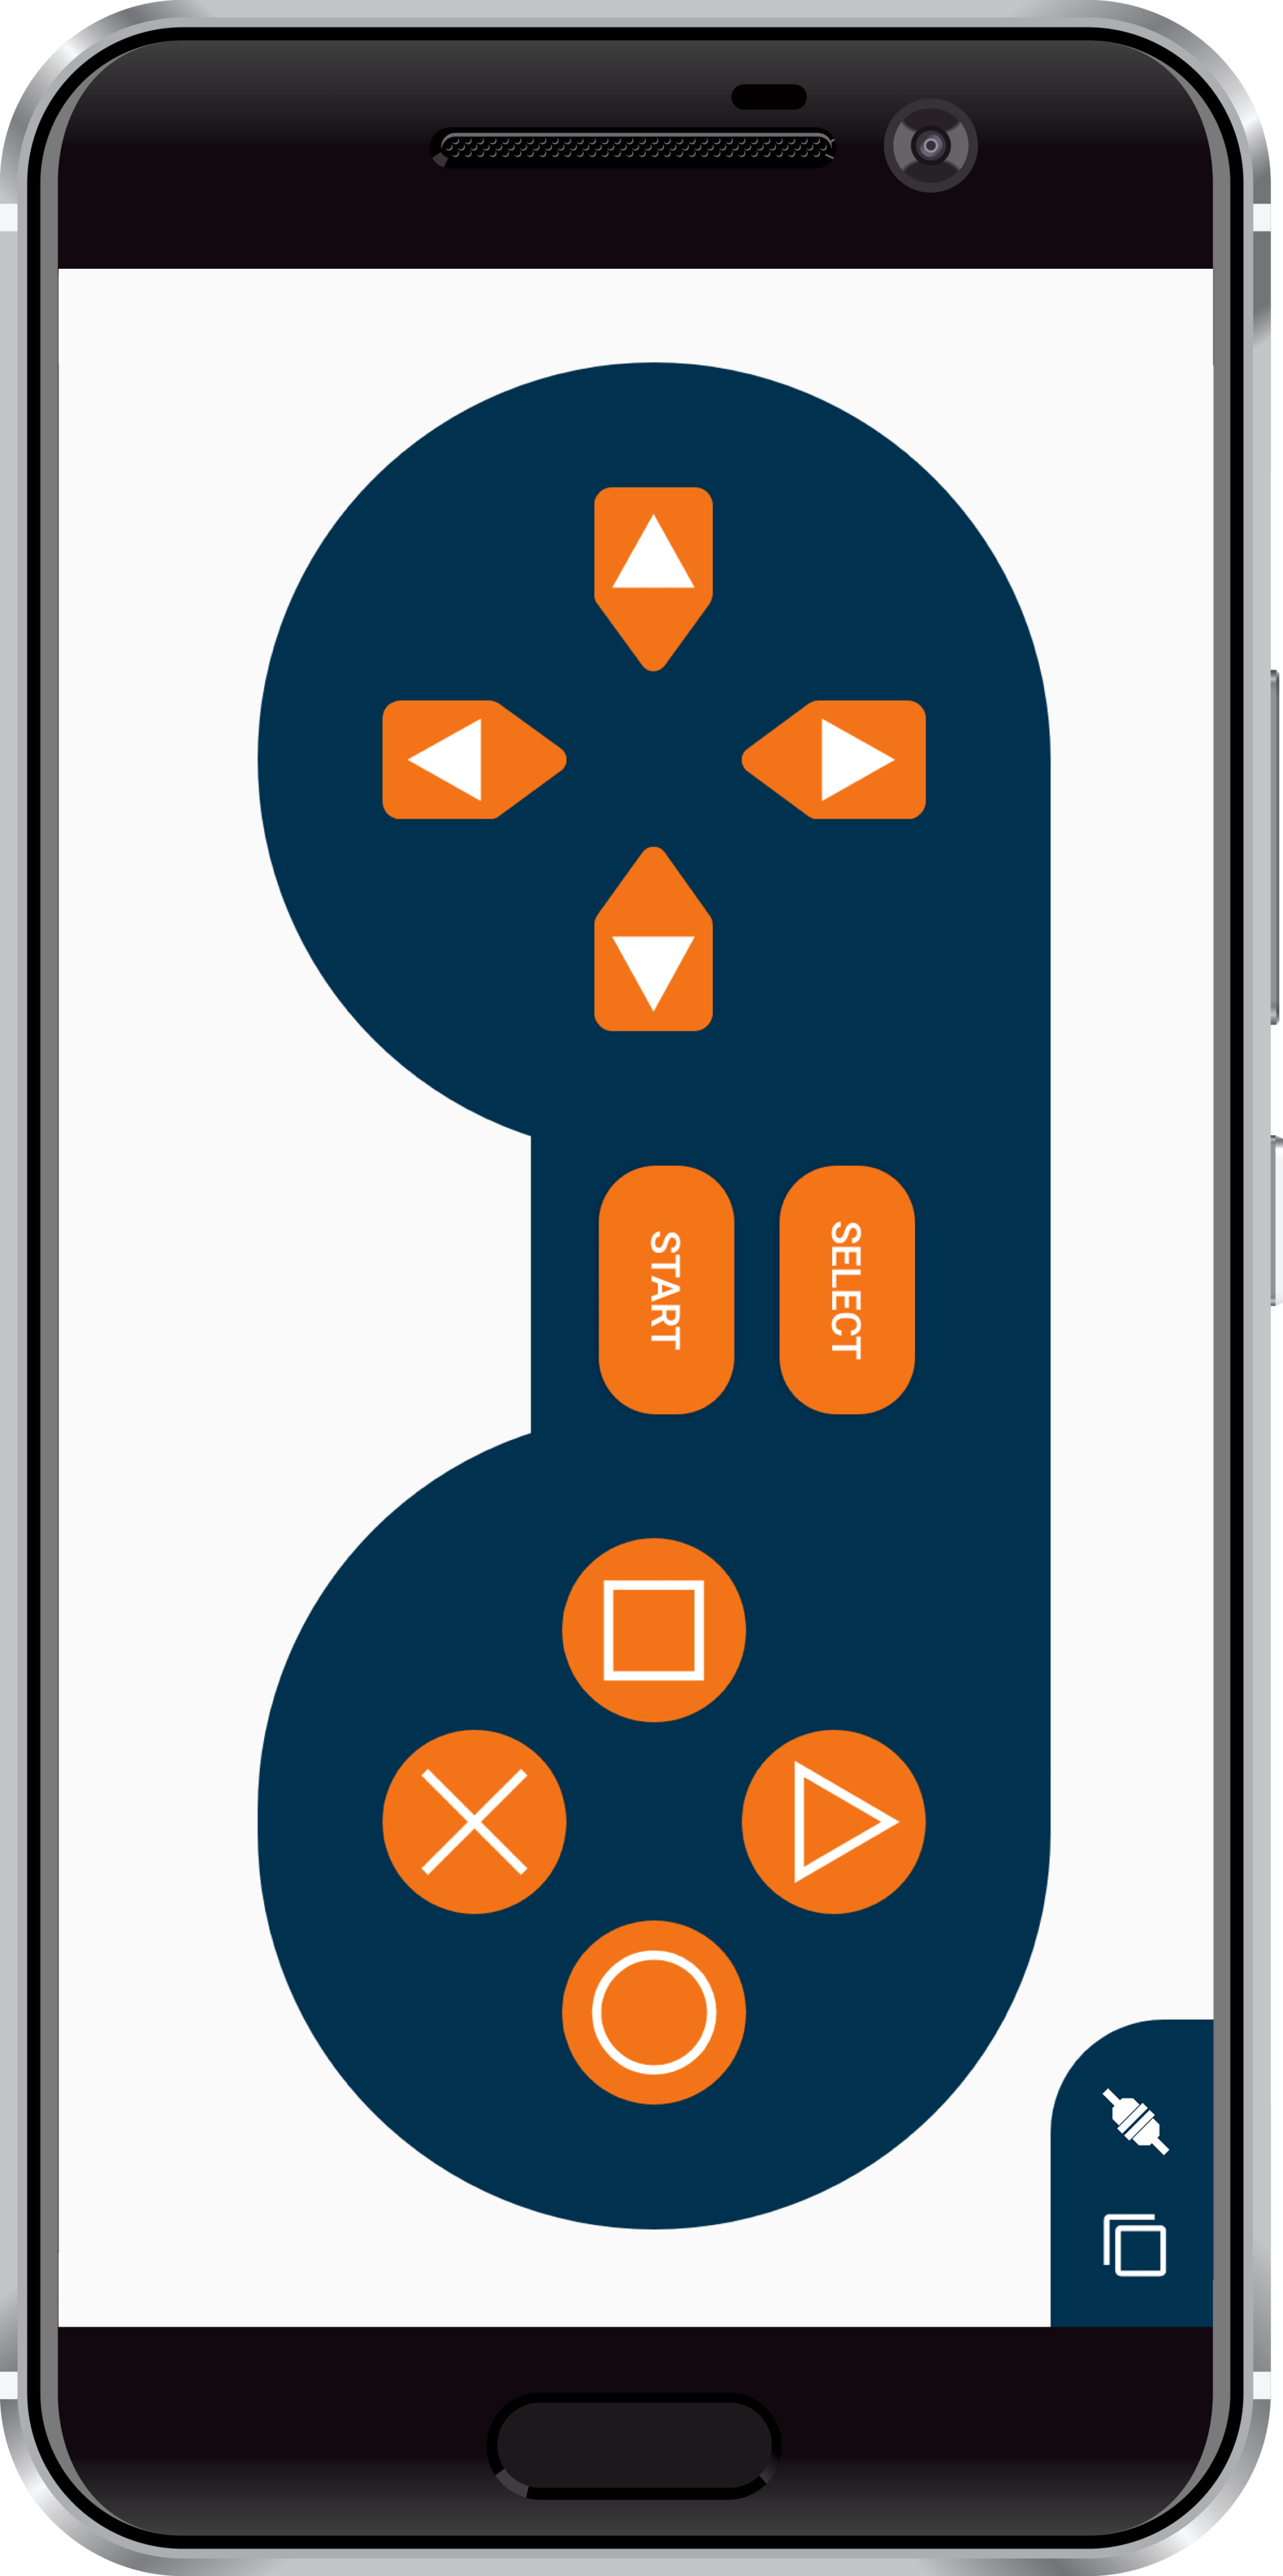
In this project, we are going to build DIY soccer playing robots which will be controlled via Bluetooth using Dabble, a project-making mobile application developed by STEMpedia. You can install it on your phone from Google Play. It feels like you are playing on a PlayStation using the app, but you are controlling robots and scoring the goals.
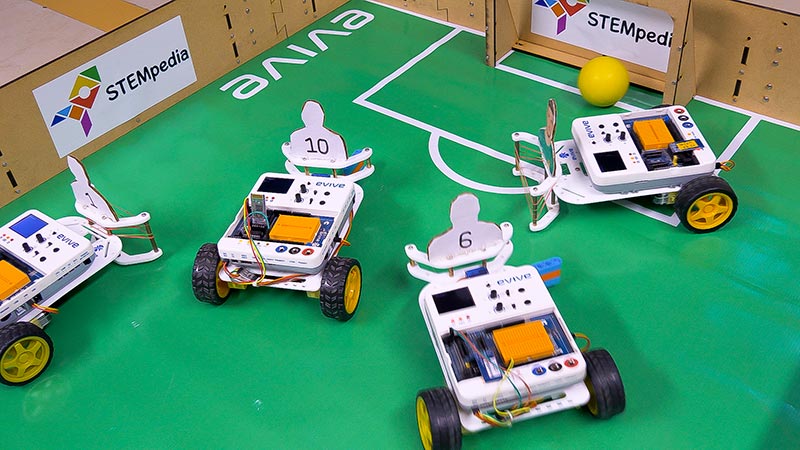
We have made 4 robots:
- 2 Strikers: Who has an extra leg type link, which helps them to attack.
- 2 Goalkeepers: Who has rubber bands on the front to save the goal.
The Arena is similar to a football ground. In this match, we have two robots from each team. Team scoring the most number of goals will win.
Basic Concepts of Mobile Robot
Wheels
Just like real cars, a robotic car also has wheels which are actuated using motors. For a moving object to be stable, you need at least 3 contact points with the surface on which it is moving. For e.g. in a car, you have four wheels, but on a bicycle, there are only two wheels. A cyclist can control the bicycle only when he is cycling, but if he stops he can’t balance the cycle without resting one of his foot on the ground.
In our mobile robot, we will have 2 wheels and one caster wheel touching the ground. A caster wheel has a small round sphere, which rolls on the ground. It is passive and can move in any direction.
Differential Drive
A differential wheeled robot is a mobile robot whose movement is based on two separately driven wheels placed on either side of the robot body. Thus, it can change its direction by varying the relative speed of its wheels and hence does not require an additional steering motion.
If both the wheels are driven in the same direction and speed, the robot will go in a straight line. If both wheels are rotated with equal speeds in opposite directions with respect to each other, the robot will rotate. Otherwise, depending on the speed of rotation and its direction, the center of rotation may fall anywhere on the line defined by the two contact points of the tires. While the robot is traveling in a straight line, the center of rotation is an infinite distance from the robot.

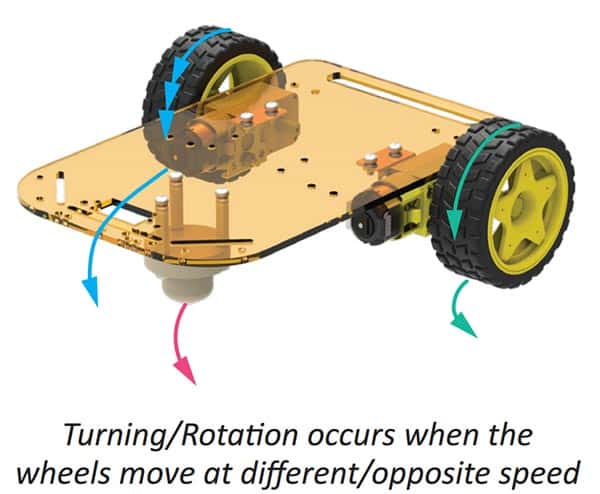
Our robot has a configuration similar to that of a three-wheeled differential drive robot.
Chassis
Chassis is the base frame of any robot, on which driving motors and caster wheels are mounted.
Assembling the Basic Mobile Robot
The annotated base is shown on right. This is the bottom side. There is an evive logo on the top side for your reference. So be careful while using the base.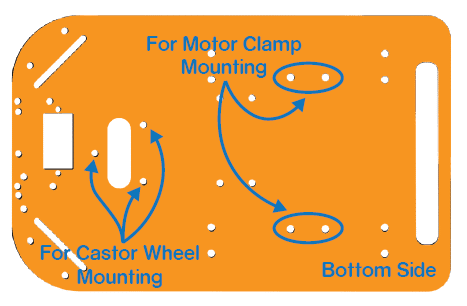
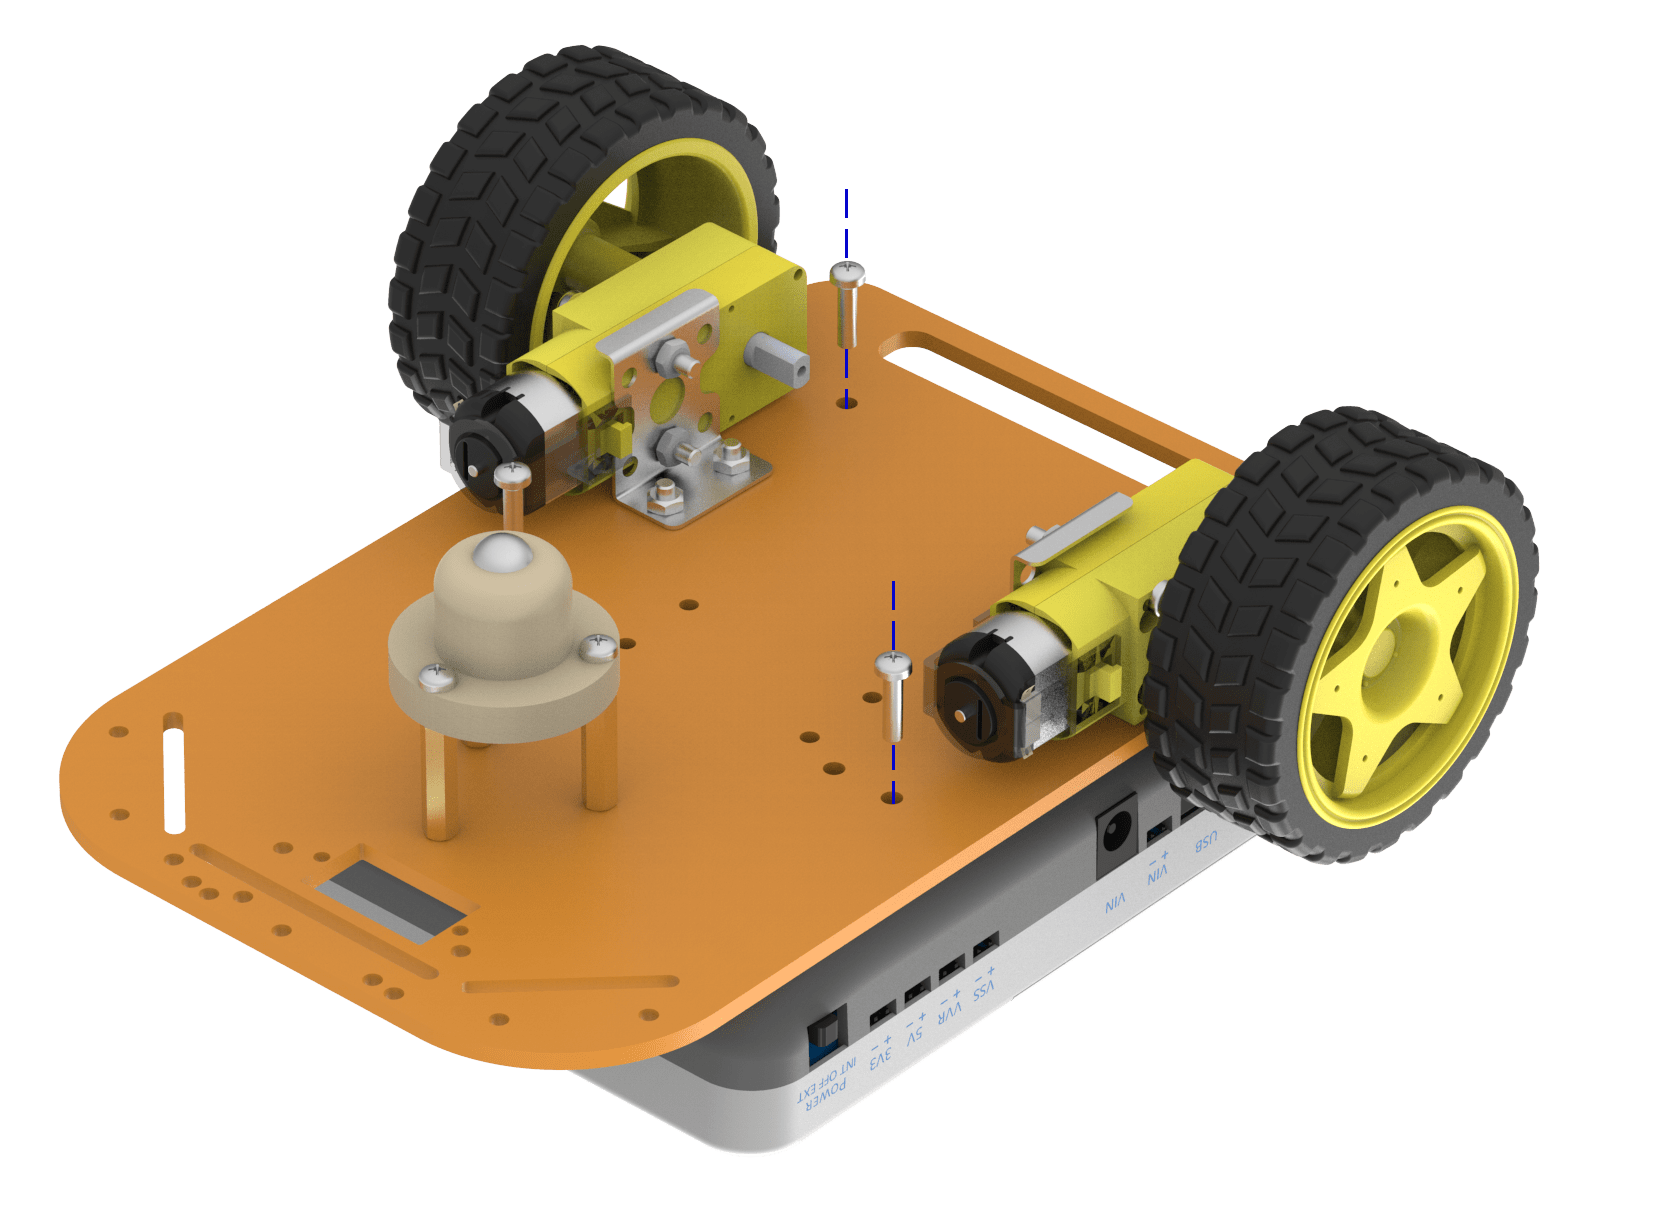
- Fix the motor mounting brackets to the chassis using M3 bolts of 8mm length and M3 nuts.
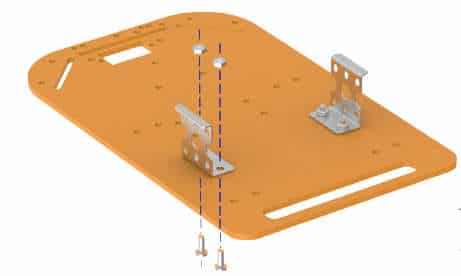

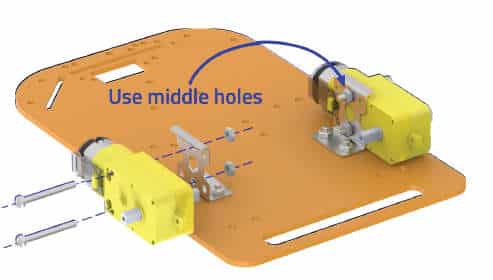
- Attach the two motors, one to each bracket, side by side and fasten using M3 bolts of 25mm length and M3 nuts.
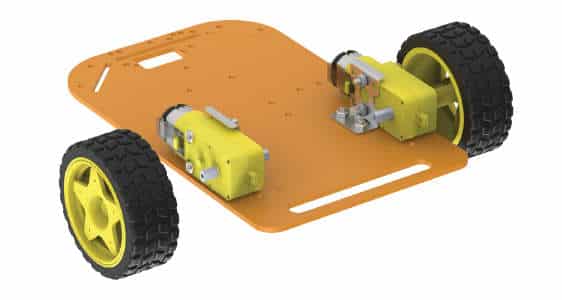
- Now, fit the wheels into the protruding motor shafts.
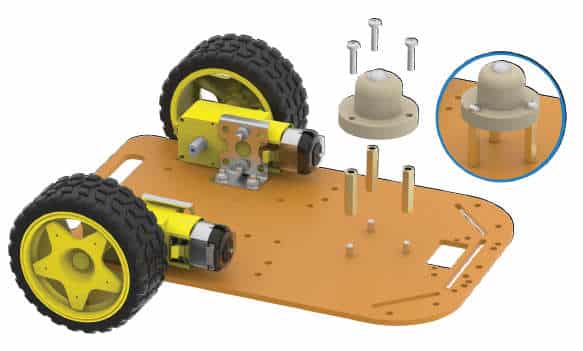
- We’ll attach the Castor wheel now. First, we will mount the M3 standoffs (20 mm) on which the Castor will be attached. Fasten the standoffs to the chassis using M3 bolts of 8mm length.
- Place the Castor on top of the standoffs in the configuration shown and fasten using M3 bolts of 12 mm length.

- Flip the assembly and place evive on the top of the chassis.
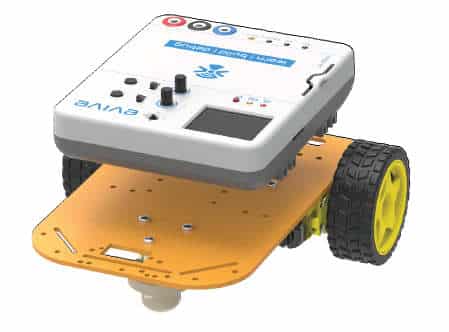
- Using the holes on the back of evive fasten it to the chassis using M3 bolts of 12mm length.
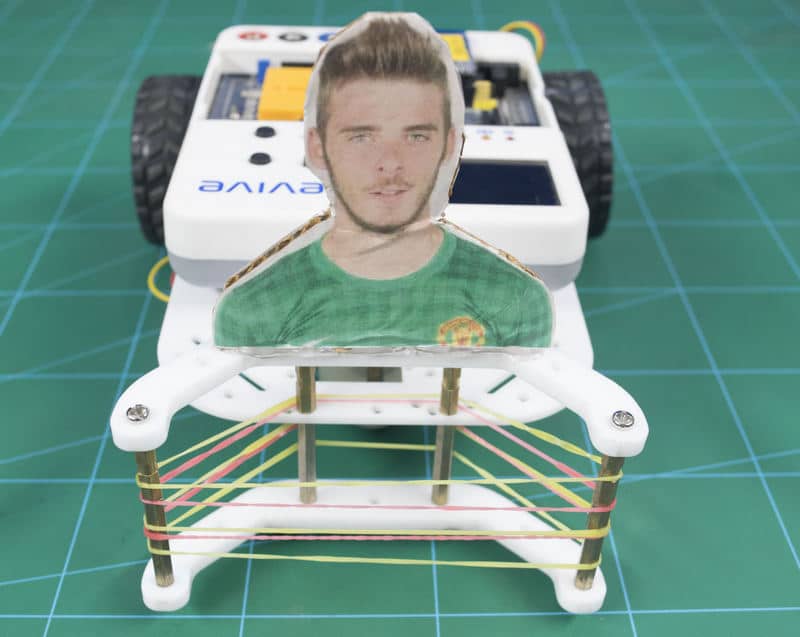
Goal Keeper Addon
Now we will make the Goal Keeper Addon now. Follow the steps:
- Flip the assembly.
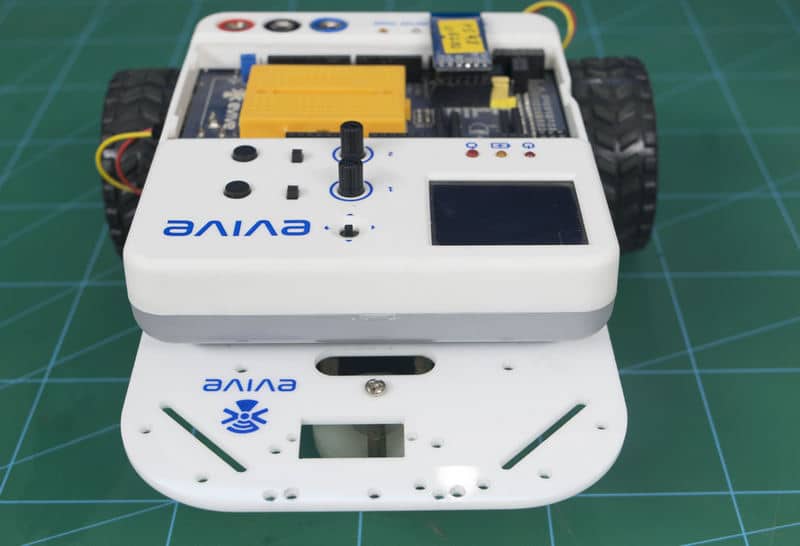
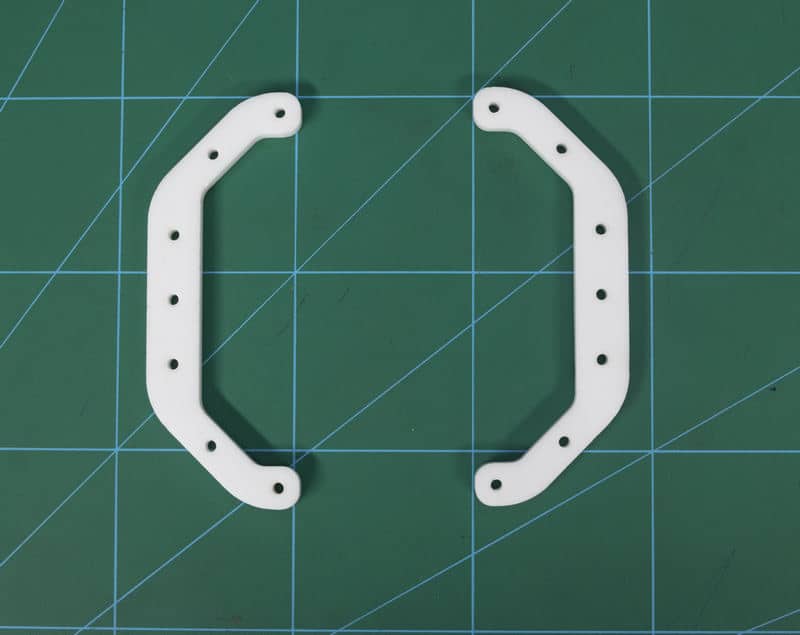
- Cut two pieces of cardboard as shown in the figure and make holes.
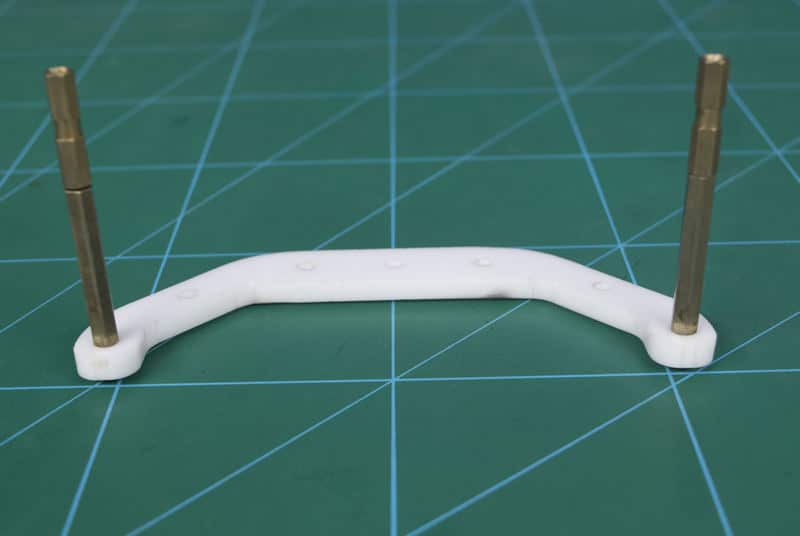
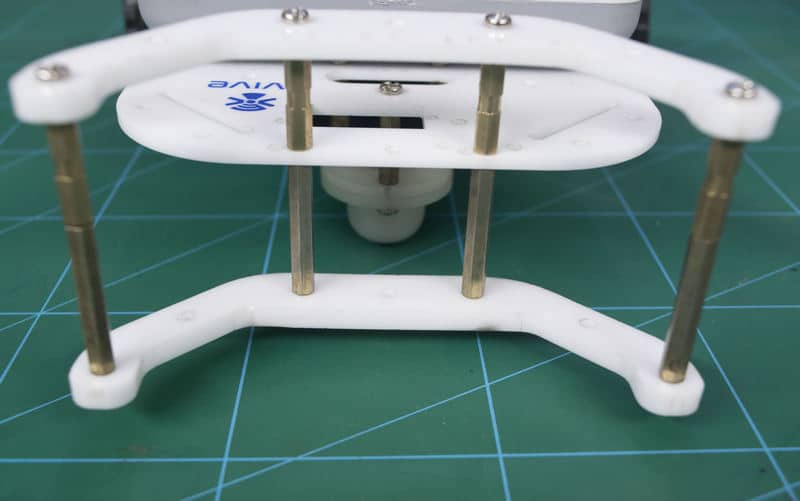
- Take one of the pieces and insert 30 mm standoffs at both the end and fix using M3 nuts.
- Take two 20 mm standoffs and attach its female end in the 30 mm standoffs.
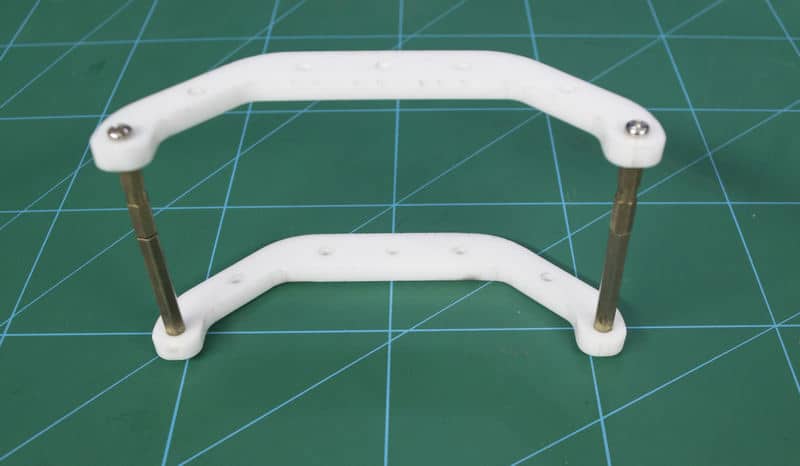
- Take the other piece and fix it over the above assembly using M3 nuts.
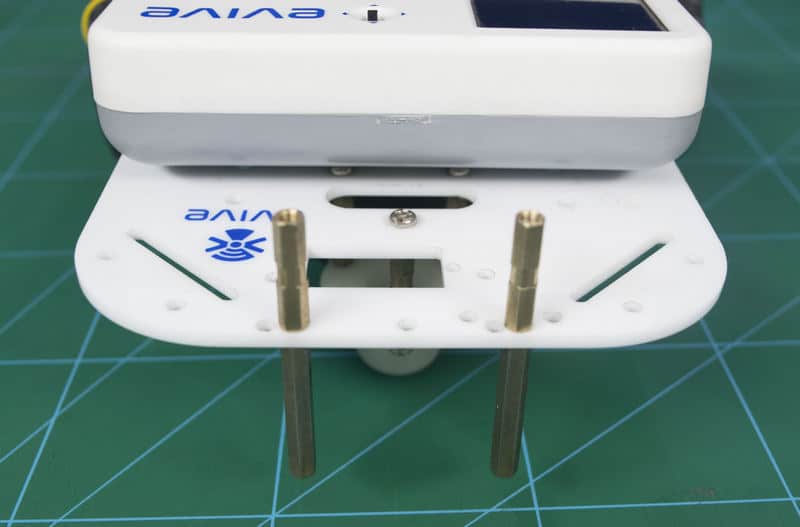
- Next, take the evive assembly and fix two 20 mm standoffs on the two holes given in the middle of the chassis.
- Now, take two 30 mm standoffs and attach it to the 20 mm standoffs, but facing downward.
- Take, the cardboard assembly and fix it on the motor assembly using M3 nuts as shown in the figure.

- You can decorate or give them faces of football players too.
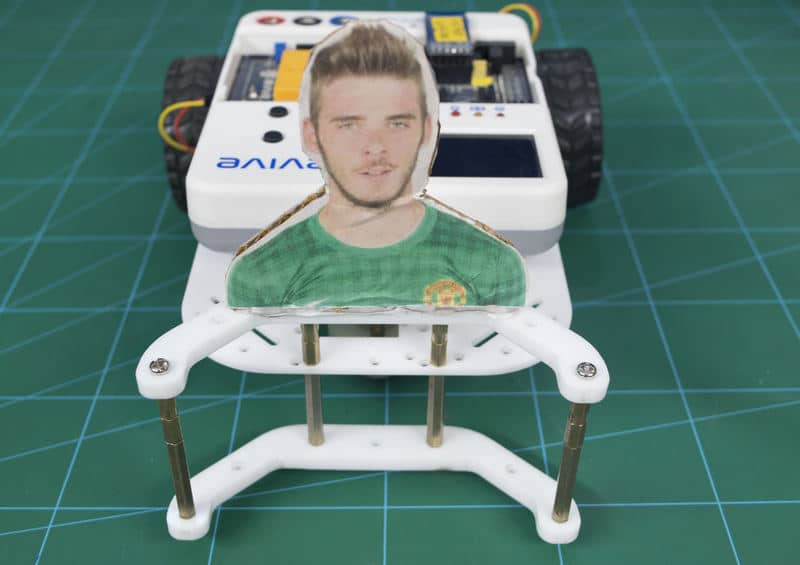
- Wrap rubber bands around the assembly, this will make the ball bounce. Thus, making this robot the goalkeeper.
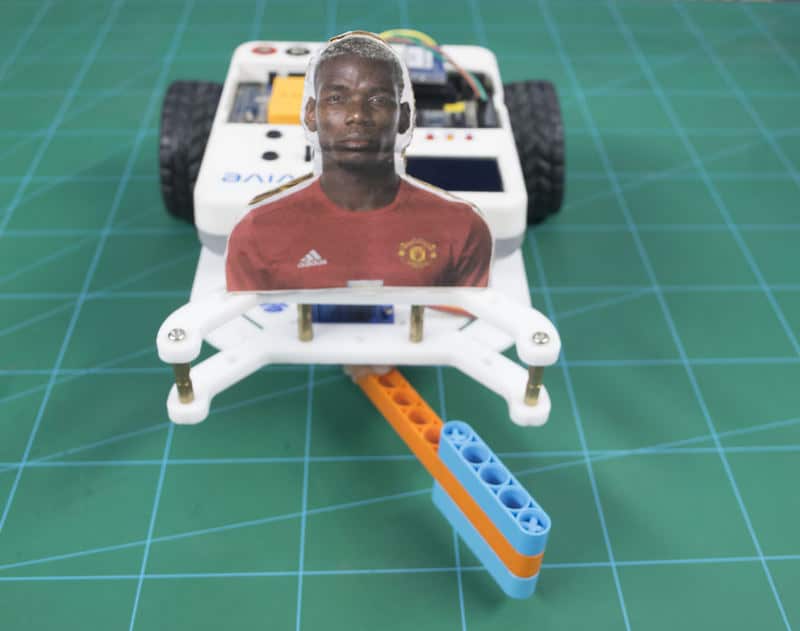
Striker Addon
You can also make a striker by simply changing a part of the assembly.
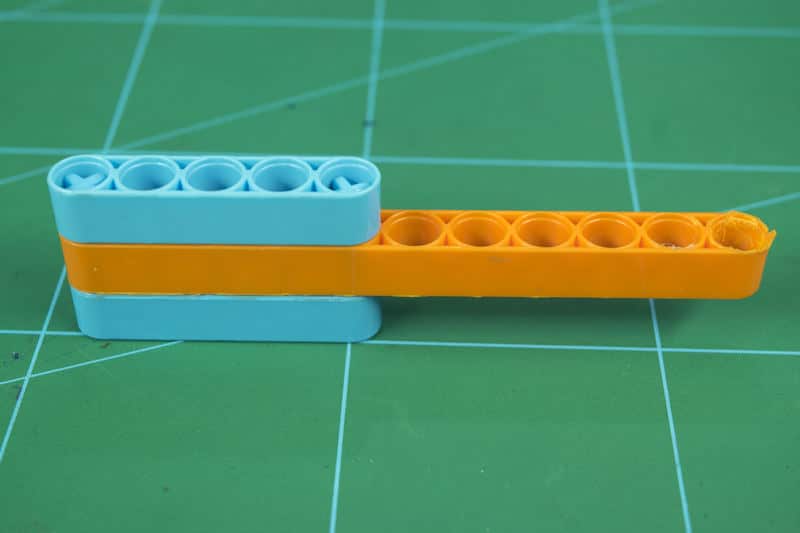
- We have made this assembly using the Blix Bricks, you can make this assembly out of the cardboard or Lego bricks too.

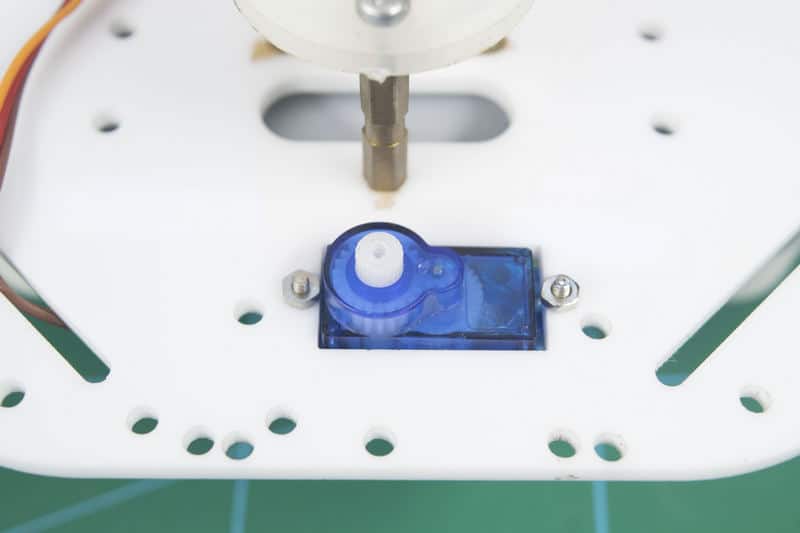
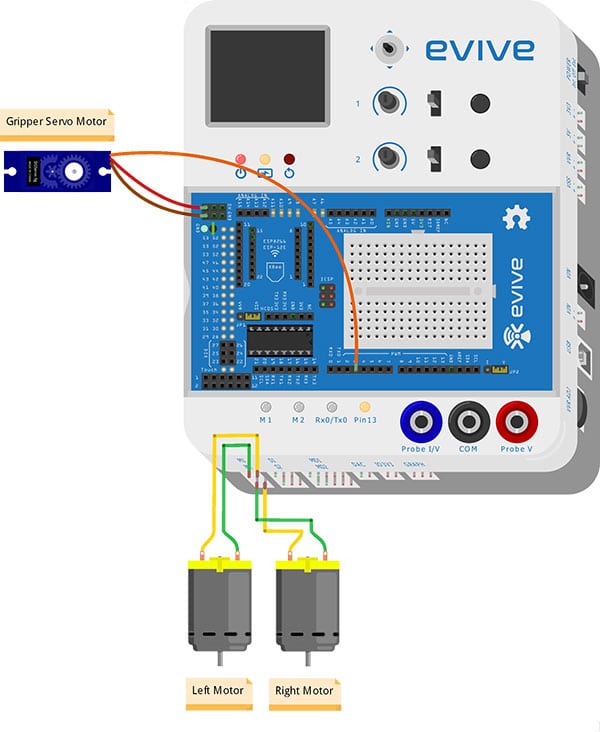
- Attach a servo in the hole of the chassis using M2 nuts and M2 bolts.
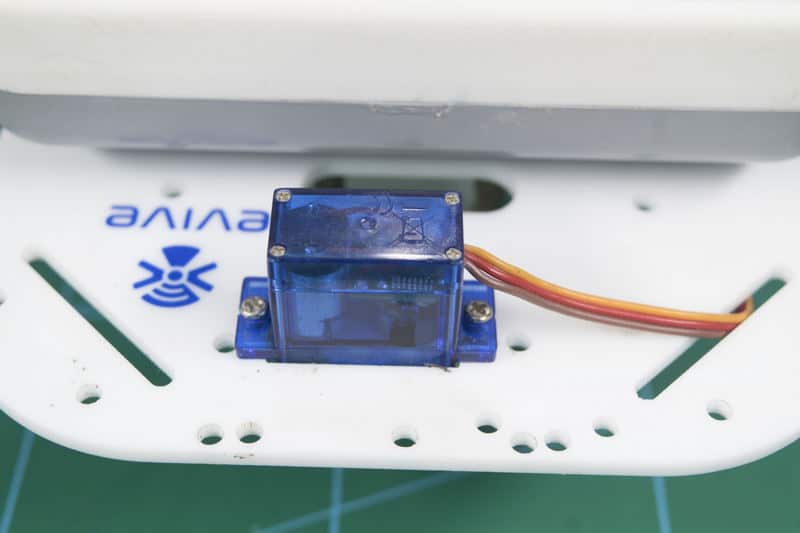
- Make sure, the servo head goes through the hole.
- Attach the servo horn on the servo head using the self-threading screw and to the cardboard piece using hot glue.
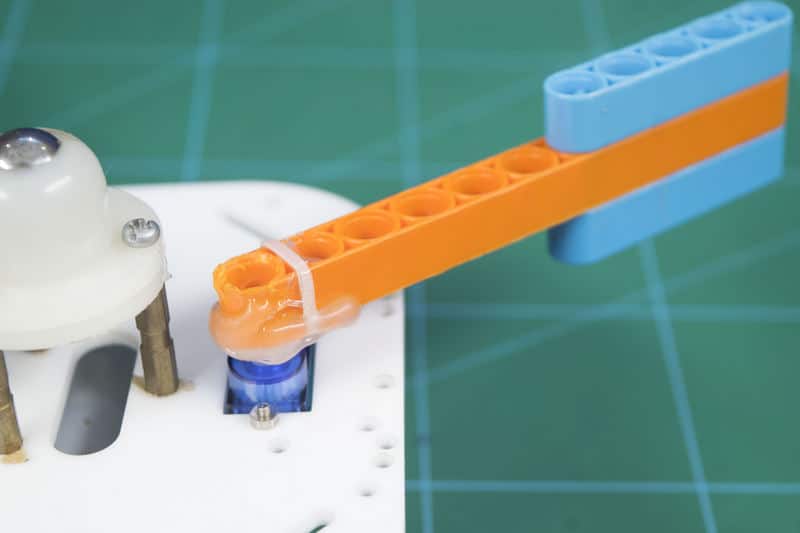
- Once you cut the piece out, attach four 20 mm standoffs using M3 bolts.
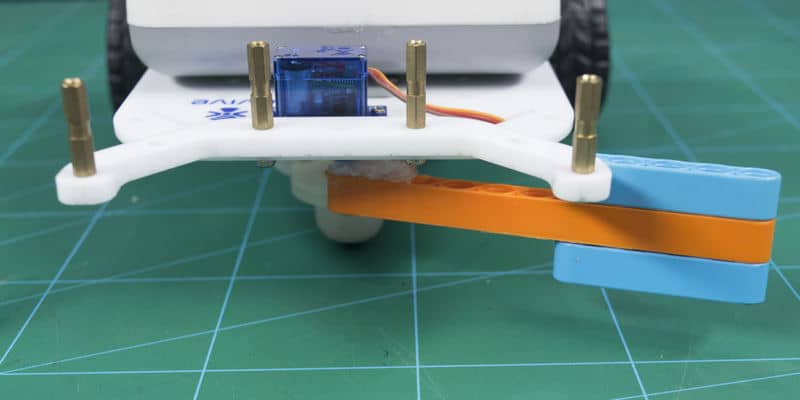
- Next, fix this assembly on the top of the chassis using the other piece of the cardboard cut off and M3 nuts.
- Thus, this makes the assembly of the striker.
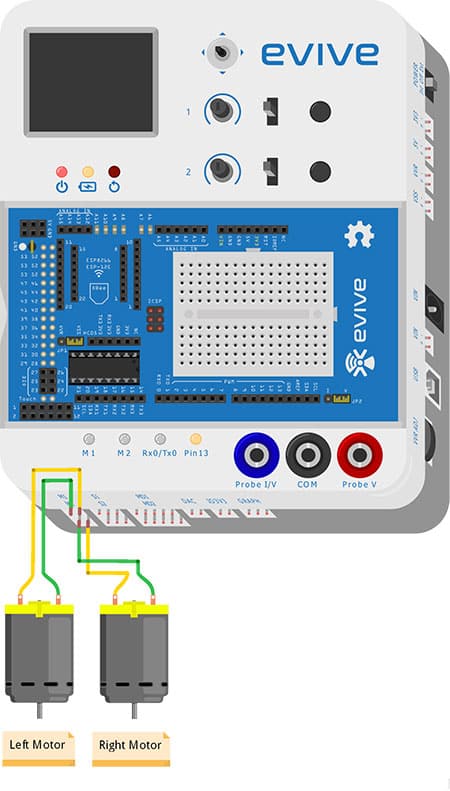
Circuitry of the Robot
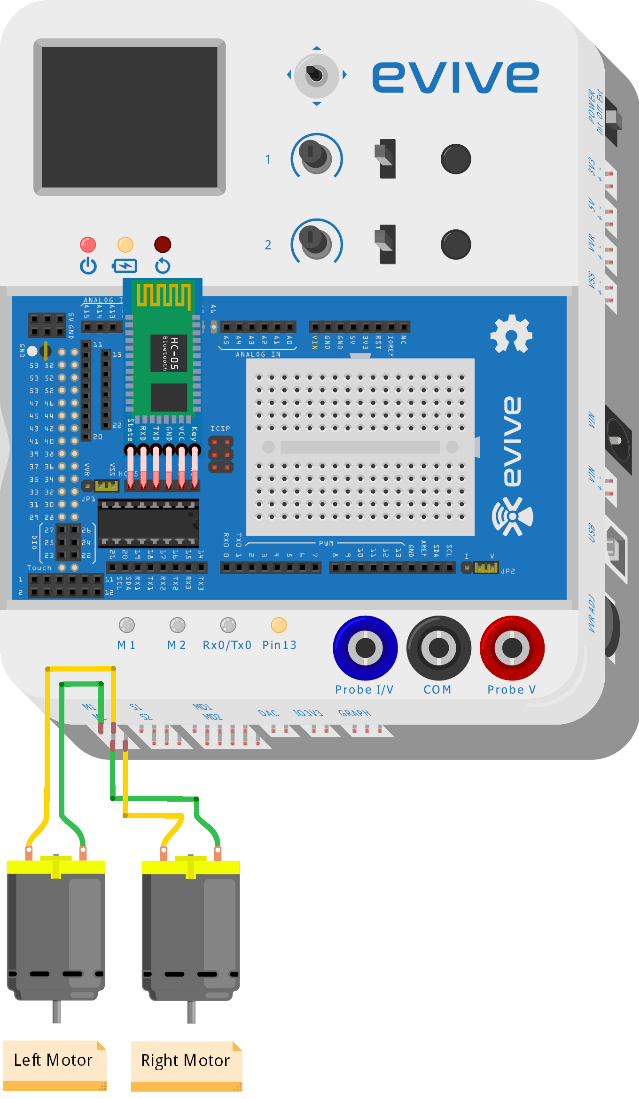
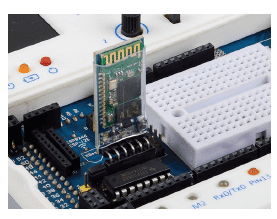
For this robot, we have to connect the Bluetooth module (HC05). In the following
figure you can observe where the Bluetooth module’s 6 pin connectors are plugged on evive.
Logic and Flowchart
In this case, we are communicating wirelessly. The user gives instructions by pressing the buttons on the gamepad in the evive app. The robot takes actions according to the button pressed. For example, if Down is pressed the robot will move backward; if none of the buttons are pressed, the robot will stop. Below is the complete flowchart: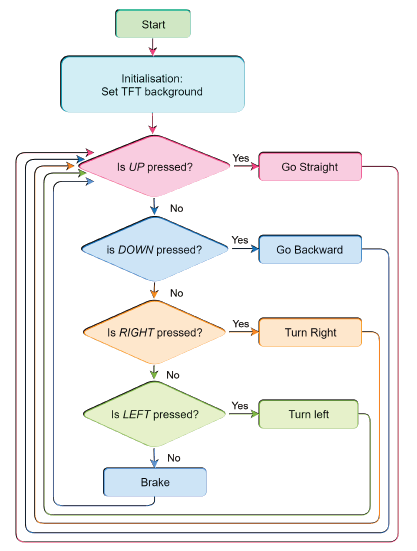
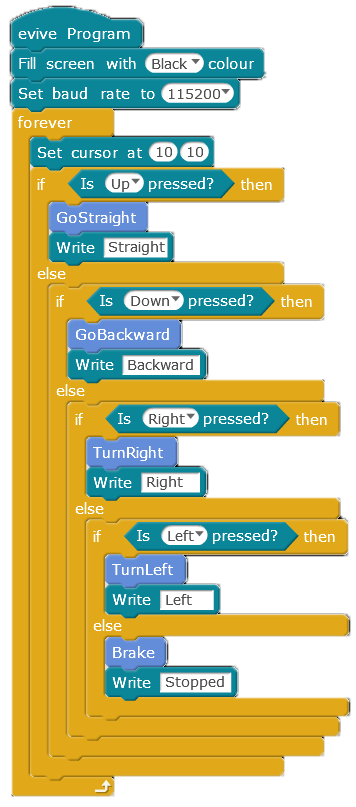
Scratch Script
Now we are going to create Scratch Scripts to generate code for the robot.
Let us follow the following steps:
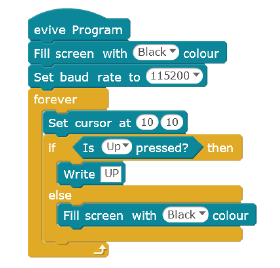
- Drag-drop evive Program hat block into the scripting area.
- Set the TFT background to Black.
- Whatever comes after the Fill screen with () color block must repeat forever.
- Drag and drop the if-else block. Next, drag and drop the Is () pressed ? block inside the diamond-shaped space in the if arm of the if-else block.
- Then, drag and drop the Write () block below the if arm to display the result.
- We will now test our code.
- Upload the script to your evive.
-
Install the app and open it.
-
Then, pair it with the HC-05 Bluetooth module.
-
Open Gamepad. You can now control your robot using the keys of the GamePad.
- Touch the buttons, and you will observe the corresponding values printed on the TFT Screen. This means your communication is working and we are good to go.
- Now, we have to assign action according to the button pressed.
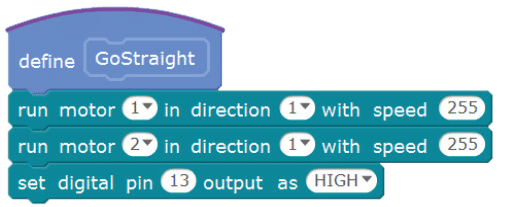
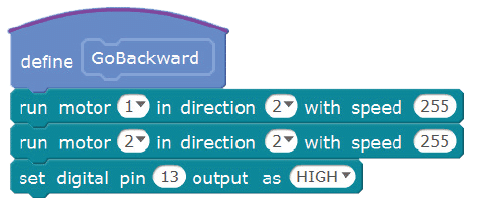
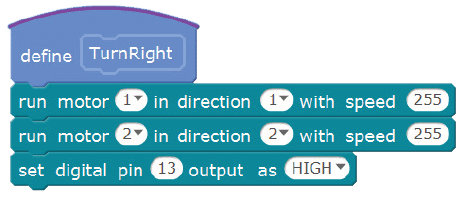
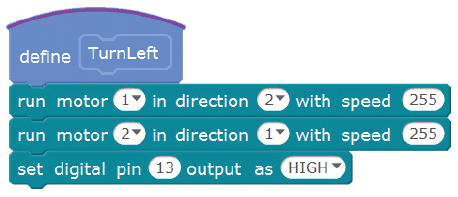
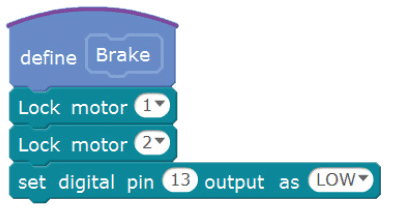
- To make the robot move, create blocks GoStraight, GoBackward, TurnRight, TurnLeft and Brake.
- Complete the remaining programme using the multiple if-else and Is () pressed ? blocks.
- After completing the main script, upload the Arduino code generated into evive and run the robot.
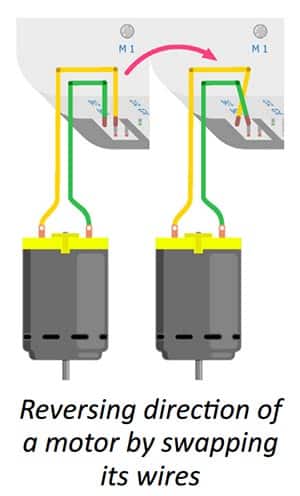
Debugging the Robot
At times, your robot will refuse to behave the way you are commanding it to. Let’s fix this. If upon pressing forward, your robot starts moving backward or starts turning, that means at least one motor is rotating in the wrong direction. You can fix this by reversing the direction of that motor.
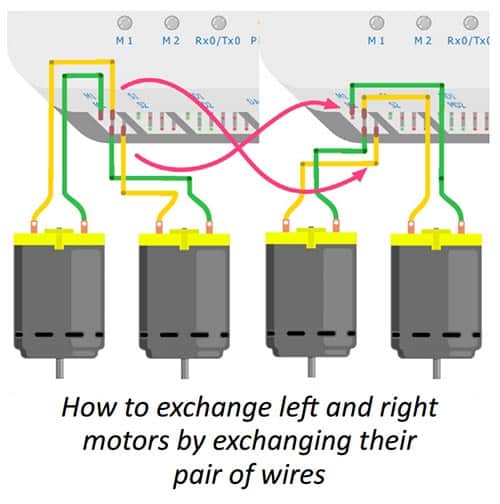
Your forward-backward controls shall now work perfectly. If the robot turns left upon pressing left and right upon pressing right, your robot is good to go. If it turns right upon pressing left, you can fix this by exchanging wires of both the motors. Ask an elder for help, if you need.
Done! You are ready.
Your robots are ready. Now set up the arena and play the match.
Explore Starter Kit Courses
-
A series of exciting online courses through the world of STEM that cover not only the ‘whys’ but also the ‘hows’. They introduce you to the wonders of electronics, programming, science, latest technologies such as robotics, the Internet of Things, 3D printing, and many more!


![[CODEAVOUR 2021] project demonstration video 4-12 screenshot](https://ai.thestempedia.com/wp-content/uploads/elementor/thumbs/CODEAVOUR-2021-project-demonstration-video-4-12-screenshot-q7ynxvlwjfsgj74xjev4cqopqur232if4hglkl3itk.png "[CODEAVOUR 2021] project demonstration video 4-12 screenshot")


