Introduction
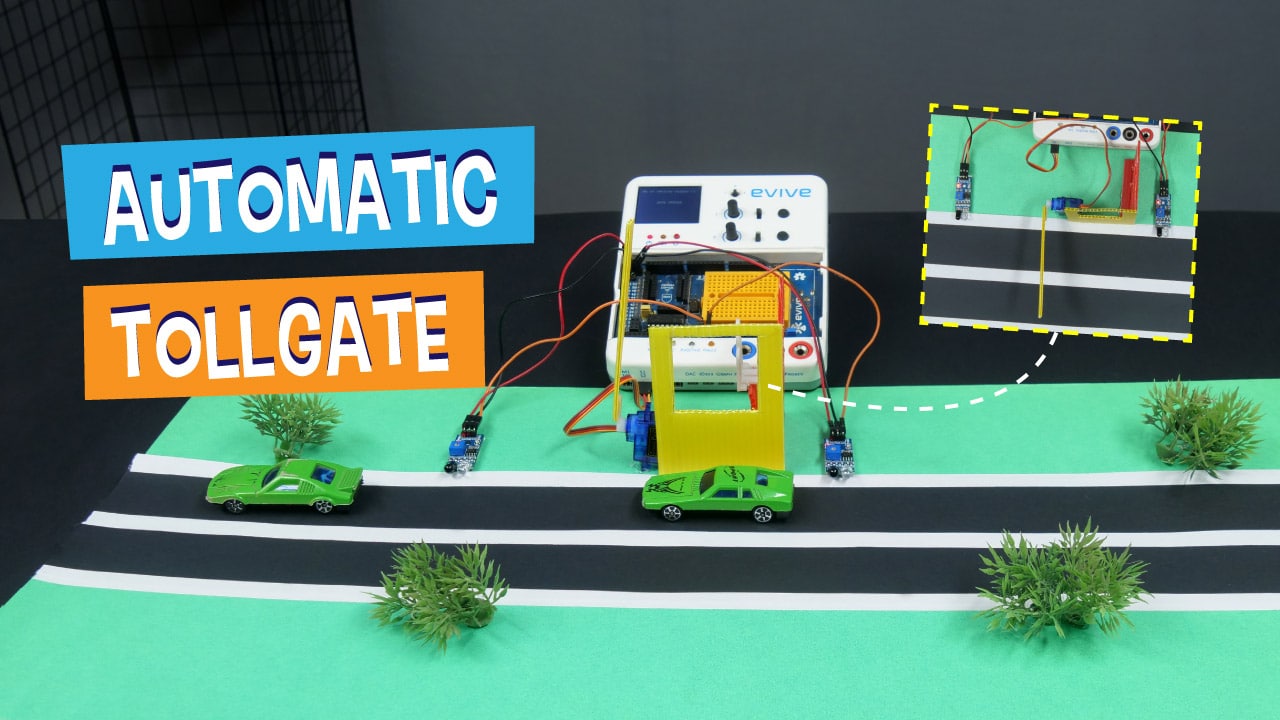
In this project, we’re going to make a mini version of an automatic electric toll booth gate opener. You must have encountered at least one when on a road trip. No matter how insignificant, the feeling you get when the toll booth barrier opens is amazing, isn’t it? In this project too we’re going to make one that has small barriers that open and close using servo motors. Everything that you need to make the toll booth is available inside the evive Starter Kit. And you can easily program in PictoBlox – our graphical programming software based on Scratch blocks – to make it automatic. You can download PictoBlox from HERE.
Ready to make your own DIY toll booth gate opener?
Let’s get started!
Making the Plot for Toll Booth
To make the miniature version of the automatic toll booth, we will first need a plot to setting up our automatic gate system.
Take a corrugated sheet of 60 cm * 30 cm.

Glue green chart paper or any chart paper of your choice onto the sheet. 
With this the base or the plot is ready. We will be assembling project on top of this plot.
Making the Road
Now, let’s make the road to make the driveway for our vehicles.
- For that mark a strip of 10 cm width along the center of the plot.
- Glue the black chart paper of size 60 cm * 10 cm inside the marked lines.
The road actually don’t look like one. What’s missing? The divider.
Making the Divider
- Mark a strip of 1 cm in the center of the road.
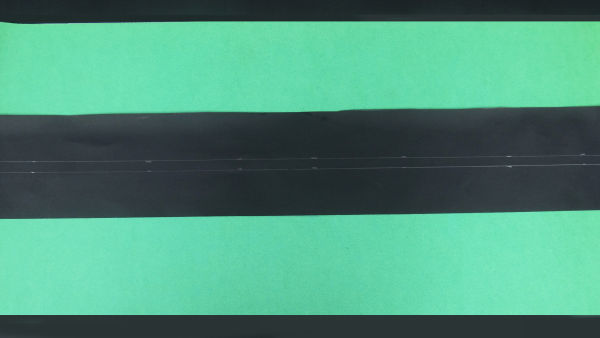
- Now, stick 1 cm thick white tape onto the markings done.
- Also, stick the white tape on both the side of the roads.

With this, our road is ready.
Making the Toll Office
Time to make the office and install it onto the road.
- To make the sidewalls of toll booth we will use two pieces of corrugated sheets of size 8 cm * 6 cm.
- Leaving 0.5 cm from the edge, mark a small window of 3.5 cm * 4 cm.
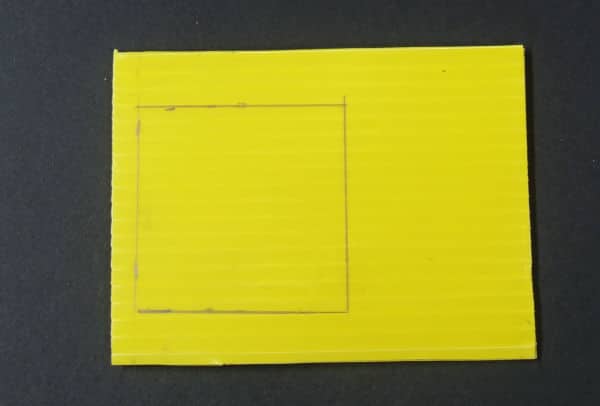
- Now, cut along the marked lines to make the window. Similarly, prepare both the walls.
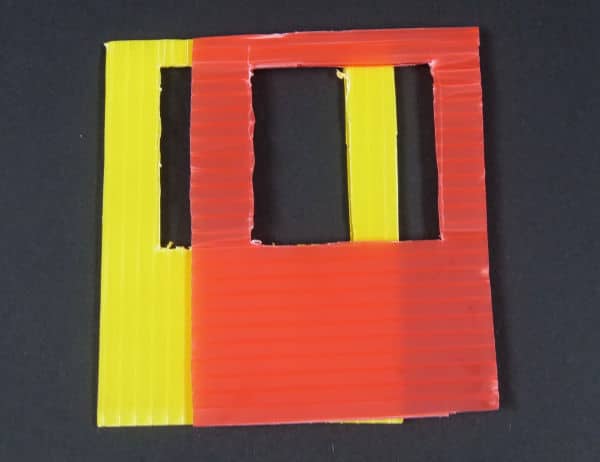
- Now for fixing them to the plot, we will need a support.
- Fix a thin strip of corrugated strip on the center of the plot.
- Now, glue the walls to the support and to the plot using hot glue.
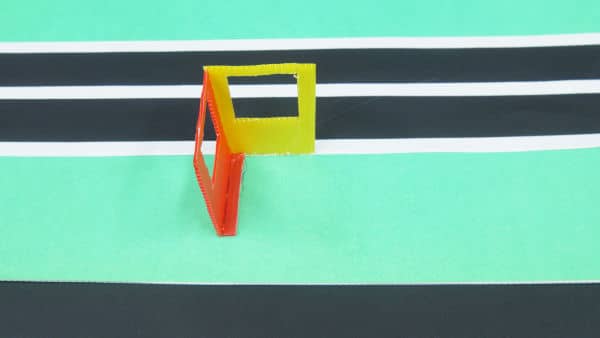
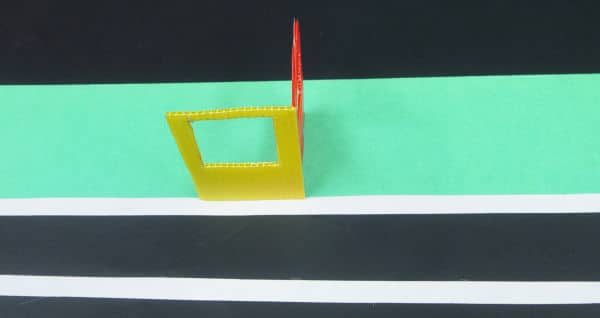
With this, our office is ready.
Making the Toll Barrier
Now, we need the electronic gate openers or the barriers that would open on the arrival of the vehicle and close when the vehicle exits. We well be using the servo motor for the same.
Fix a thin corrugated strip of size 10 cm * 1 cm to servo horn hot using some hot glue.
As we will be using servo motor, we first need to test and set the servo angle to 0 degrees.
Setting the Servo Angle to 0°
We are going to use evive for testing the servo. As evive’s plug and play interface makes it a real easy.
Connect the servo motor to evive’s servo channel 1 and from the menu, navigate to control, then servo motor, and servo channel 1.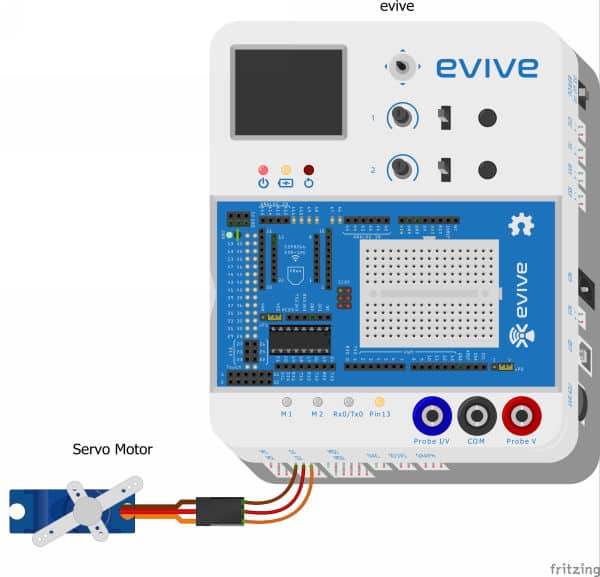
Using potentiometer 1 set the angle to 0 degrees.
Completing the Barrier Assembly
Glue the servo motor a few cm ahead of the open end of the toll booth using some hot glue.
Finally, fix the barricade i.e. the servo horn onto the servo head.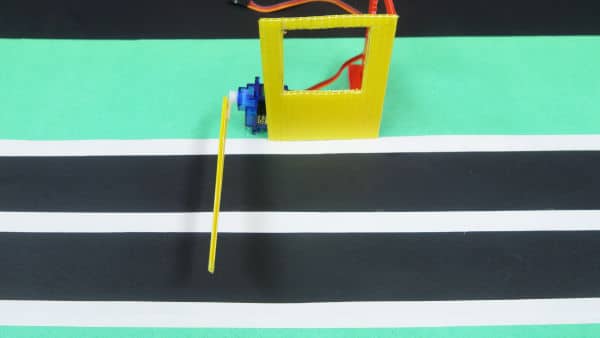
Making it the Automatic Toll
Time to add the eyes of the project that would monitor the activity of the vehicles that incoming or going out of the toll booth. They are the IR Sensor, that makes our electric gate openers automatically.
Before that let’s first test the IR Sensors.
Testing the IR Sensors.
Let’s connect the IR Sensor to evive.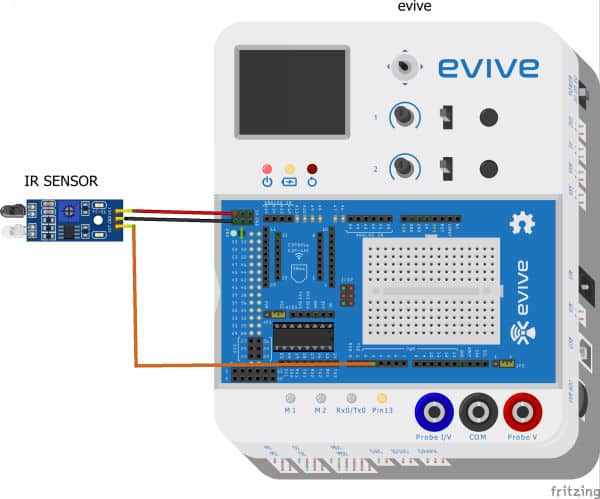
- Connect VCC of IR Sensor to +5v of evive
- Connect GND of IR Sensor to GND of evive
- Connect Signal pin to evive’s digital pin 3.
Use the pin state monitor to check the value select digital pins and monitor the value in front of the pin 3.
Similarly, test the other sensor as well.
Attaching the IR Sensor
- Glue the IR sensors along the road using some a double-sided tape.
- Place 1st sensor a few centimeters before the toll booth as that will record the entrance of the vehicle.
- And second one ahead of the toll booth to monitor the exit of the vehicle.
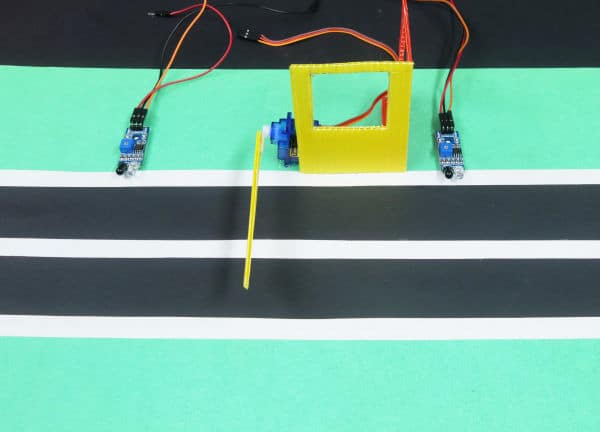
With this the build of our project is complete all we will do is make the connections and write the script in PictoBlox.
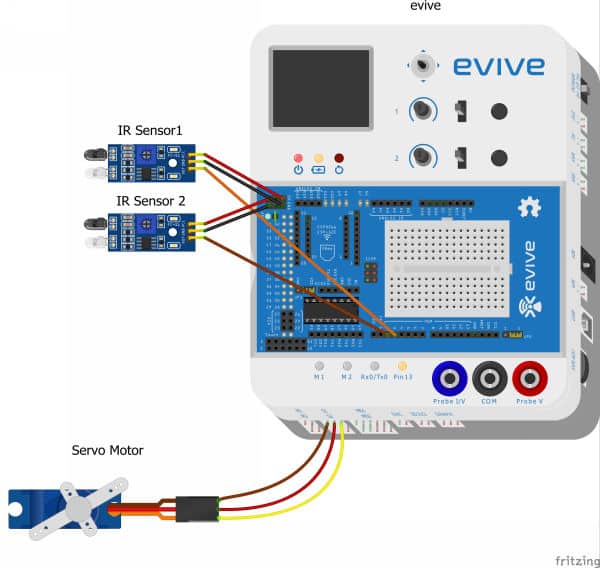
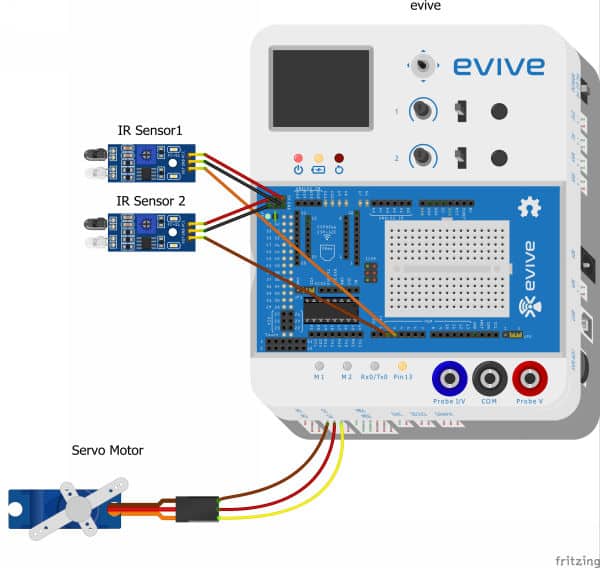
Making the Connections
IR Sensor
- Connect VCC of IR Sensors to +5V of evive
- Connect GND of IR Sensors to GND of evive
- Connect Signal Pin of IR Sensor 1 to Digital Pin 3 and of IR Sensor 2 to Digital Pin 2 of evive
Servo Motor
- Connect Servo to Servo Channel 1 of evive
Writing the PictoBlox Code
We are going to write the code in the Upload mode of PictoBlox.
The program will start executing as soon as evive starts up.
As soon as the first IR Sensor, which is connected to Digital Pin 3, senses the presence of a vehicle, the servo angle changes to 90 degrees and the barrier opens.
As soon as the vehicle crosses the barrier and goes past the second IR sensor which is connected to Digital Pin 2, the servo angle changes back to 0 degrees thus closing the barrier.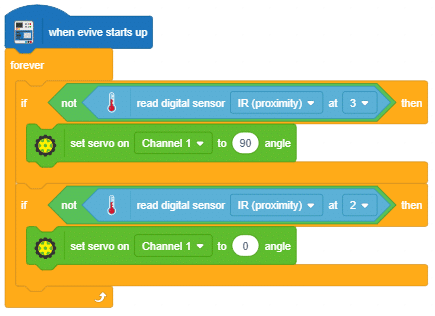
Once done, upload the code.
Taking the Automatic Toll Booth a step further
We can also display the number of cars/vehicle passed and the status of the barrier on evive’s screen by making a few changes in the code.
Make a variable for storing the numbers of the vehicle that pass by and initialize it with 0.
Using display blocks to display “No of vehicle passed” on evive’s screen.
As soon as a vehicle will approach the sensor, it will sense the vehicle, but the gate will only open when the car moves away from the sensing area. The barrier will then open up and the status “Gate opened” will be displayed on the screen.
Similarly, as soon as the vehicle will leave the sensing area of IR sensor 2, the barrier will close, the status “gate closed” will be displayed, and the count of the vehicle passing by will increase by 1.
Conclusion
With this, your automatic electric toll booth gate opener is ready!

