
Introduction
In some of our previous projects, we have used Smartphones to control our home appliances via either text commands or voice commands.
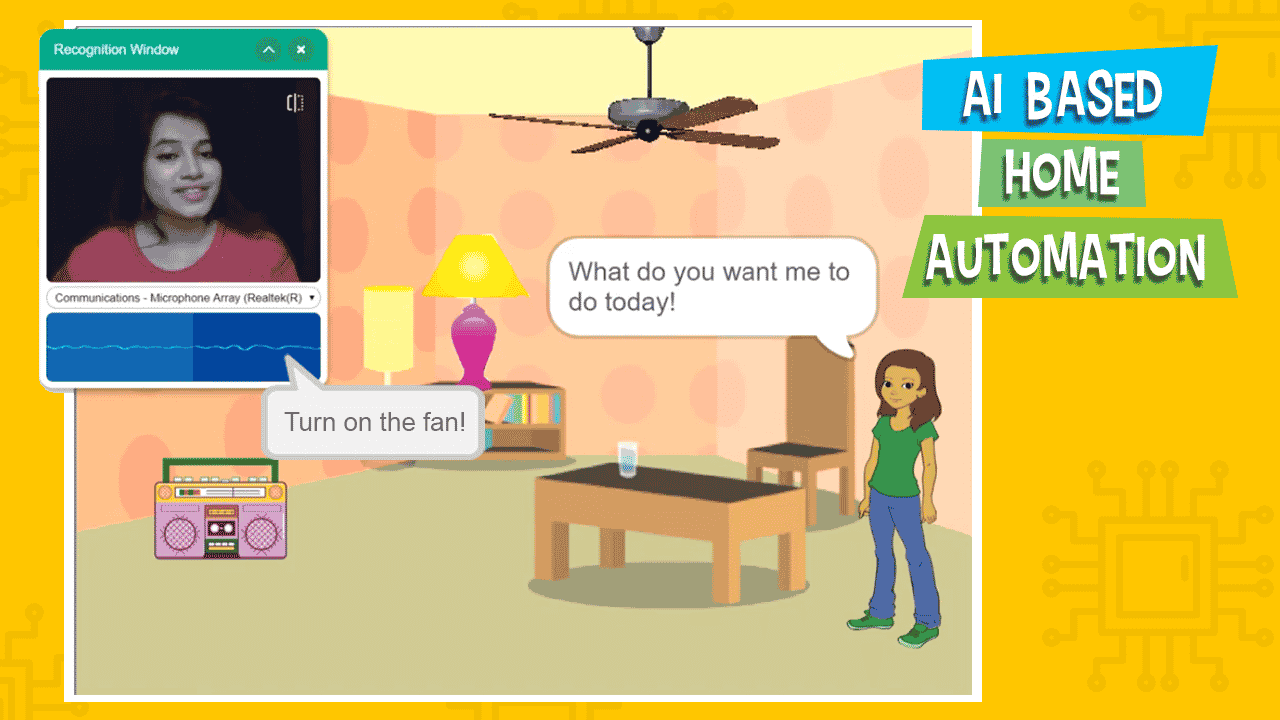
In this project, will control the appliances using the Speech Recognition technology, one of the many cool applications of Artificial Intelligence. We are going to create a small set up of a bedroom in PictoBlox and control the appliance sprites using the voice commands.
Let’s begin!
Prerequisites
You’ll need the following things to make the make your own logo quiz:
- A laptop or a computer with a camera
- The latest version of PictoBlox, which you can download from here.
- A good Internet connection
Setting Up the Project
Let’s begin by adding the Artificial Intelligence and Text to Speech extension. Follow the steps below to add the extension:
- Open PictoBlox.
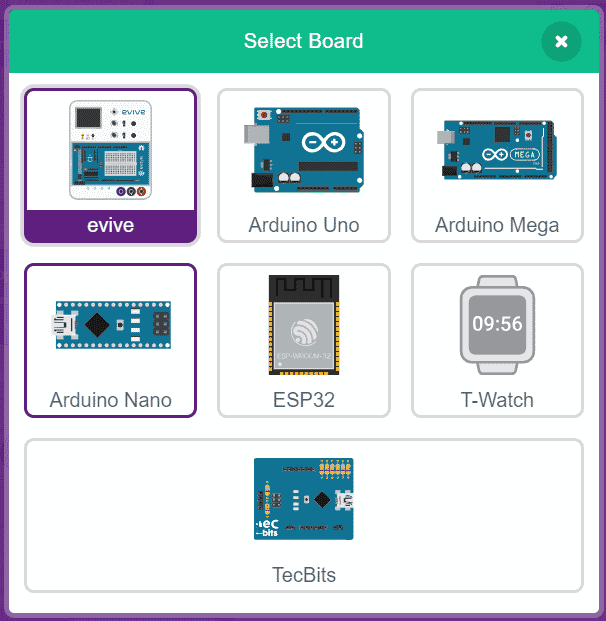
- Click on Board and select evive.
- Next, click on the Add extension button. You need to keep two things in mind while working with this extension:
- You need to log in to your PictoBlox account to use it.
- That your computer is connected to the internet.
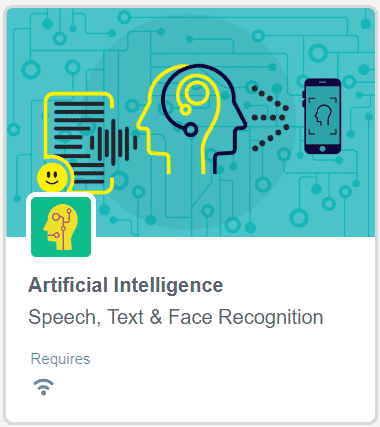
- Select the Artificial Intelligence Extension.
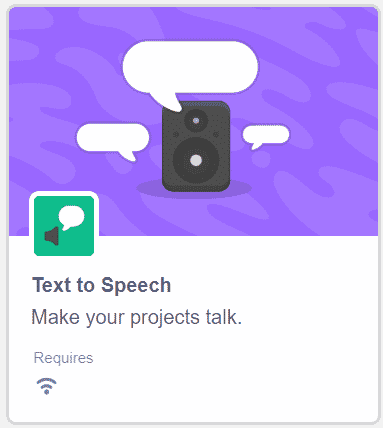
- Next, let’s add the Text-to-speech extension. This extension lets you convert the Audio into a text message. Click on the Add extension button again and scroll down till you find the text-to-speech extension.
Setting Up the Bedroom in the PictoBlox
In this video, we will mainly focus on writing the script to control the bird with the nose. We have already written the script to set up the stage and project. You can download the script from the link given here.
- Once you have downloaded the script, go to PictoBlox.
- Choose the File option to open up the downloaded script.
We will be controlling four sprites:
- Fan, which we will turn ON and OFF
- Lamp, which we will again turn ON and OFF
- The radio will play the Spiderman song on it.
- Abby will be our virtual AI assistant.
You can download all the sprites used in this project from here.
Scripts to Give Command to AI Assistant
Introducing Abby
We’ll make Abby ask the user what does want her to do and then perform the actions accordingly.
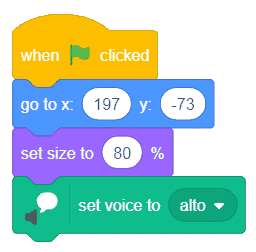
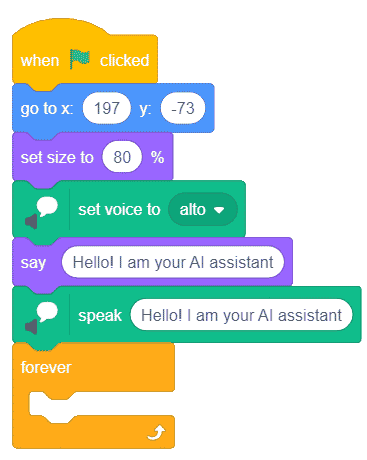
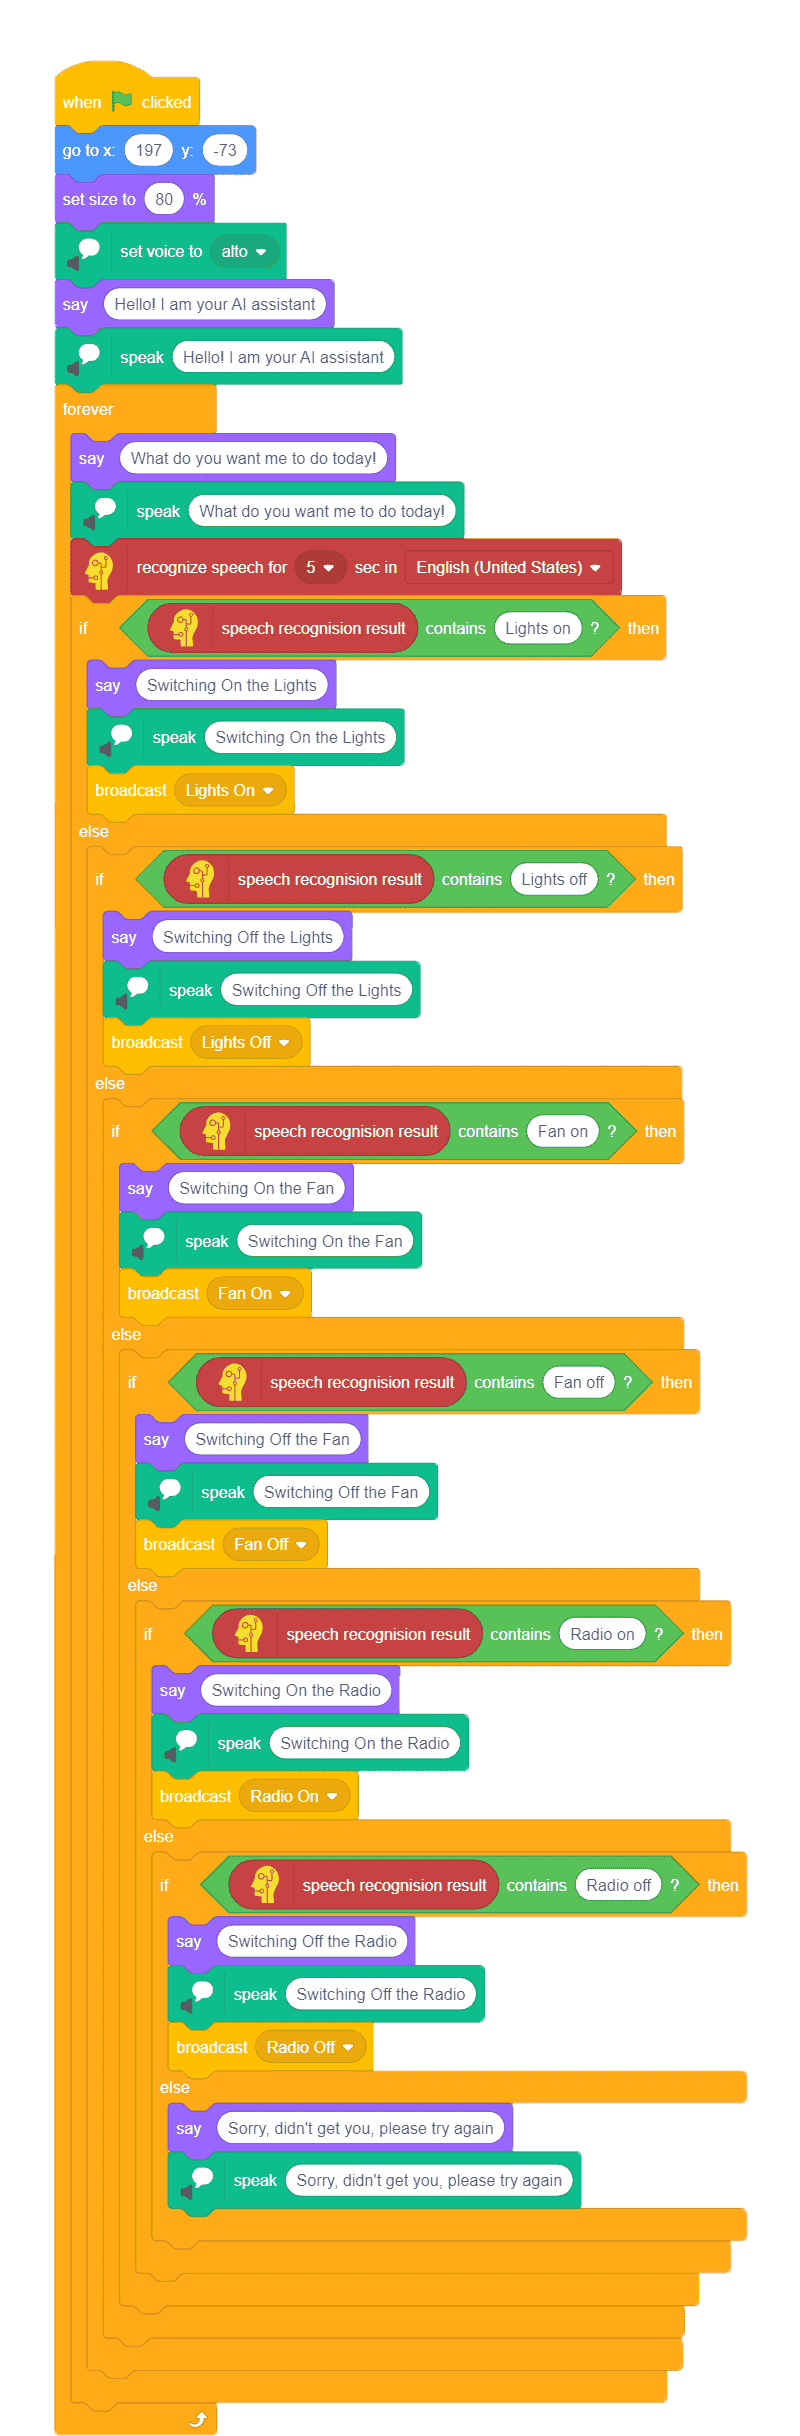
- To execute the program as soon as the green flag is clicked, place when flag clicked hat block from the Events palette.
- As you see that the Abby is standing in the center of the stage, let’s shift her to the right-hand side of the stage, thus use go to x () y () block from the Motion palette and write 197 in x and -73 in the y.
- Now, let’s set the size of her to 80% of the original, thus, use the set size to () block from the Looks palette and write 80 in the space given.
- We will make Abby speak, thus let’s give her the voice. Place set voice to () block from the Text to Speech extension and choose Alto from the drop-down.
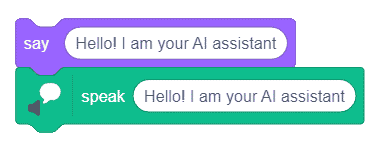
- Let’s first introduce Abby to Users, thus, drag and drop say () for () seconds block from the Looks palette and write “Hello! I am Abby, your AI assistant!”
- To make her say the text, place a speak block, and copy the above sentence into the white space given.
- Now, place a forever block to run the script continuously.
Asking for User Commands
Now, we need Abby to ask the user what do they need to do, duplicate these blocks and write “What do you want me to do today!” in both of the spaces given.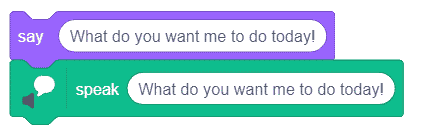
- We first, need to recognize the speech from the user, thus, from the Artificial Intelligence drag and drop the recognize speech for () sec in () block and choose 5 from the first drop-down to keep how long do we recognizing speech from the user.

- Now, the speech is recognized but is not stored in the block, it is stored in the speech recognition result block.
Now, we will match the speech from the user to the text we have added thus, place an if-else block from the Controls palette.
Now, to compare the recognized speech and the command. Place a () contains () operator block from the Operators palette. This block is used to check whether the user has spoken the phrase written in the space.
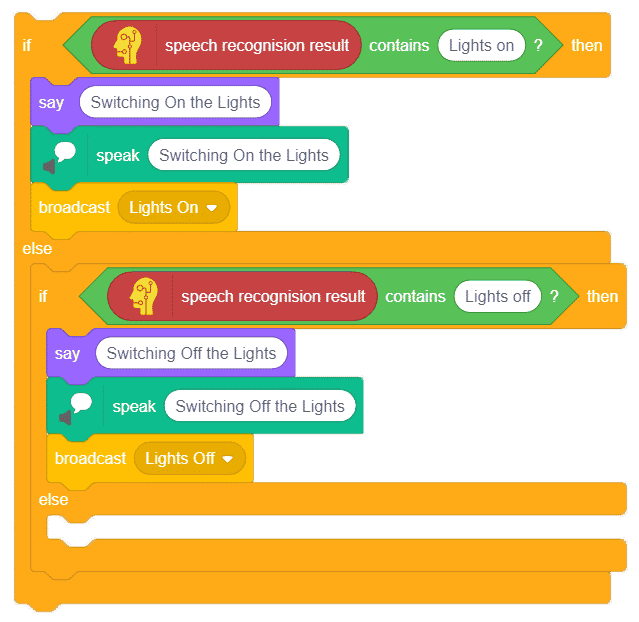
Commands For Lights
- Place the speech recognition result in the first space. We will first make turn the Lights ON thus write Lights on in the second space of the contains block.

- We will make Abby say “Switching on the Lights”, thus place the say and the speak block below into if arm. To make the Lamp turn the light ON, we will make a broadcast block and write the new message as “Lights ON”.
- Now, we want to make the Turn OFF the light, thus, duplicate the if-else block and place it into the else arm.
- Replace all the ONs with OFFs.
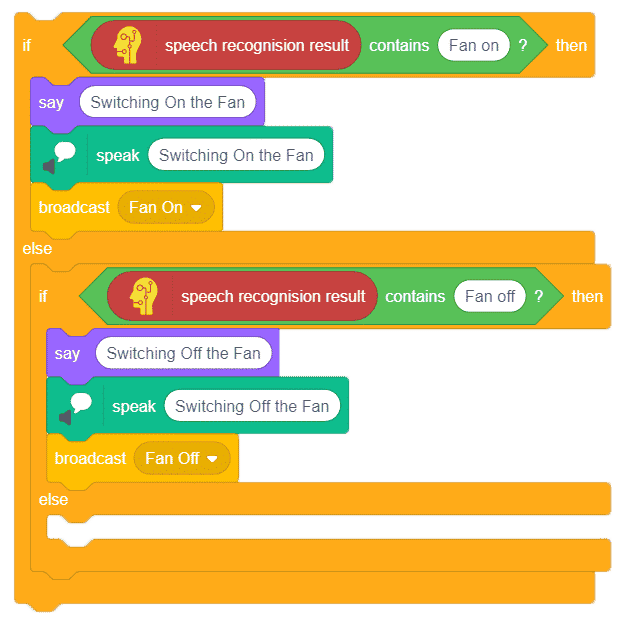
Commands For Fans
- Now, we will make our Fan turn ON and OFF, thus, replace the above nested if-else arm and place in into the else arm.
- Into the duplicated else arm, replace all the light word with Fa
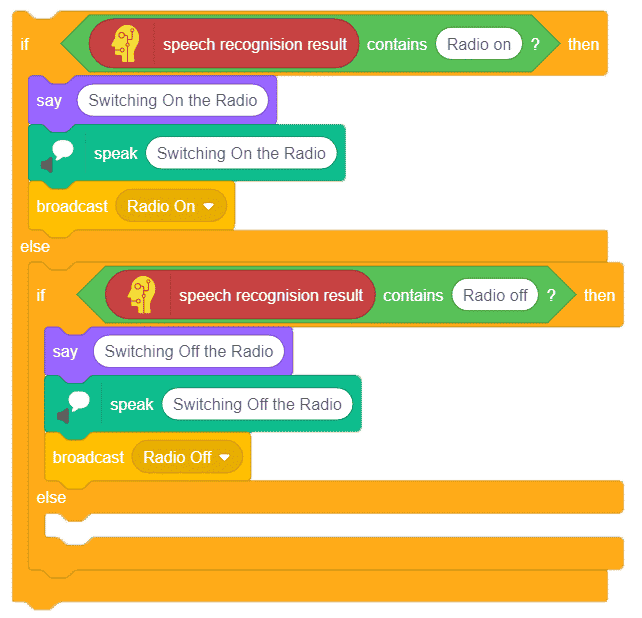
Commands for Radio
- Again, to turn the radio ON and OFF, we will duplicate the last two if-else arms and place into the else arm.
- Replace Fan with Radio.
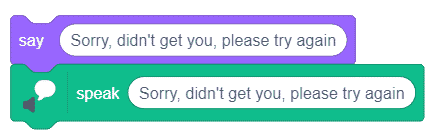
- Now, if the commands by the user does not matches any of the above commands, then we need Abby to say “Sorry, didn’t get you, please try again.”.
- Thus, place the say and the speak blocks for the same.
Now the script for Abby’s is done. Let’s write the script to make each and every appliance work as soon as the command is given.
Script for the Lights
Initializing the Lights
Let’s first see what to do with the Lamp sprite.
- Click on the lamp-light sprite.
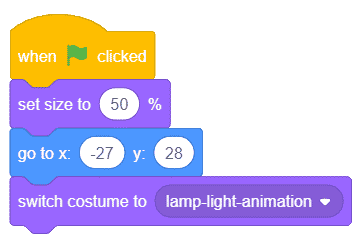
- We will first initial the looks and the position of the lamp sprite as soon as the green flag is clicked.
- Thus place a when flag clicked hat block.
- From the Looks palette, using the set size to block, set it’s size to 50%.
- And switch the costume to lamp-light-animation.
- Now, to set the initial position use go to x () y () block from the Motion palette and write -27 in x and 28 in the y.
Turning the Lights ON
Now, we need the lamp to light up as soon as we command Lights ON.
- Thus place a when I receive broadcast block and choose Lights ON from the drop-down.
- Place switch costume to block from the Looks palette and choose lamp-light-animation2.
- This will glow up the lamp shade.
- Now we even want the room to lighten up as soon as the Lights are ON.
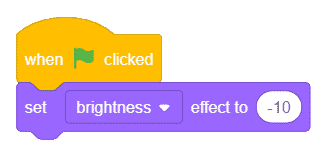
- Thus, go to the backdrop. Let’s first initially set the brightness of the room. Thus place a when flag clicked hat block.
- From the Looks palette, using the set brightness effect to block, set it to -10.
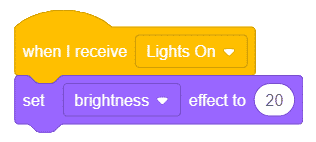
- Now to lighten up the room. Place a when I receive broadcast block and choose Lights ON from the drop-down.
- Now, using the set brightness effect to block set the brightness to 20.
- Now, let’s go back to the lamp sprite to write script for what happens whrn we turn the Lamp OFF.
Turing the Lights OFF
- Duplicate these blocks and choose Lights OFF from the first drop-down and lamp-light-animation from here to stop making the lamp shade glow.
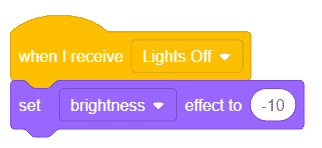
- Finally, we need to turn the room dark as soon as we command Lights OFF.
- Thus let’s go to backdrop and duplicate these blocks. Choose Lights OFF from the first drop-down and write -10 in here.
With this our script for the lamp is complete.
Script for the Fan
Let’s move on to make the fan rotate. Go to the Fan sprite.
Initializing the Fan
We will first initial the looks and the position of the fan sprite as soon as the green flag is clicked.
- Thus place a when flag clicked hat block.
- From the Looks palette, using the set size to block, set it’s size to 70%.
- And switch the costume to fan.
- Now, to set the initial position use go to x () y () block from the Motion palette and write 66 in x and 141 in the y.
Turning the Fan ON
Now, we need the lamp to light up as soon as we command Fan ON.
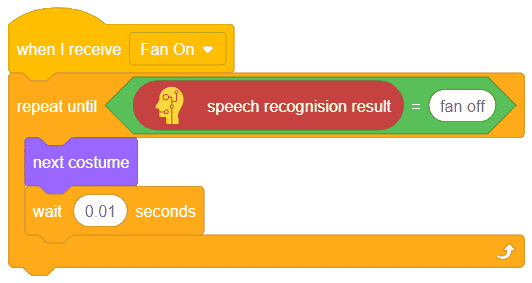
- Thus place a when I receive broadcast block and choose Fan ON from the drop-down.
- Now, we want the fan to rotate as till we command it to STOP.
- Thus, place a repeat until block from the Controls palette. Drag and drop an equal to block inside it.
- Place speech recognition result in first input and write fan off in the second.
- To make the fan look like it is rotating, we make switch it’s costumes one after another.
- Place a next costume block from Looks palette and add a wait of 0.001 seconds.
Turning the Fan OFF
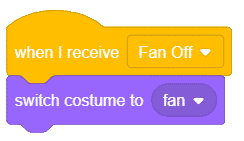
Now, let’s write script to stop the fan a.k.a. Stop the costume change.
- Duplicate the above block and choose Fan OFF from the drop-down and remove all the blocks.
- Now, place a switch costume block below the hat block to stop the rotation of the fan.
- With this, the script to control the fan is complete.
Script for the Radio
Finally, let’s write the script to turn the Radio ON and OFF.
Initializing the Radio
- Go to the Radio sprite.
- We will first initial the looks and the position of the fan sprite as soon as the green flag is clicked.
- Thus place a when flag clicked hat block.
- From the Looks palette, using the set size to block, set it’s size to 70%.
- And switch the costume to Radio-a.
- Now, to set the initial position use go to x () y () block from the Motion palette and write -163 in x and -78 in the y.

Turning the Radio ON
- We want the radio to play Spider man song or the song of your choice.
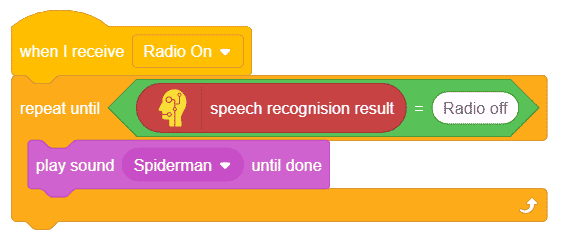
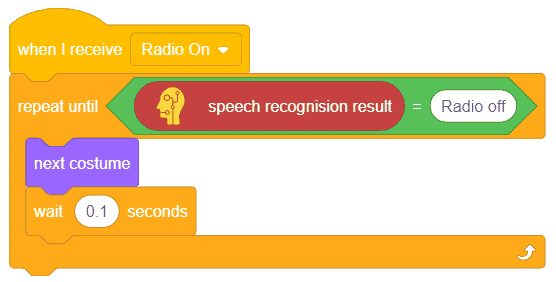
- Place a when I receive broadcast hat block and choose Radio ON from the drop-down.
- Now, we want the music to stop as till we command it to STOP.
- Thus, place a repeat until block from the Controls palette. Drag and drop an equal to block inside it.
- Place speech recognition result in first input and write Radio OFF off in the second.
- To add the Spiderman song, go to the Sound Tab. From the Sound library, choose the Spiderman song. From the Sound palette drag and drop the play sound until done and place Spiderman song.
- Now, we need to change the costume of the radio to make it look like it is playing.
- Duplicate this block and remove the play sound block.
- Place next costume block from the Looks palette, and to make it look like it is changing, place the wait block of 0.1 seconds.
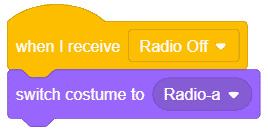
Turning the Radio OFF
Finally, to make the radio stop.
- Duplicate this block and choose Radio ON from the drop-down.
- Remove all the blocks from and place the switch costume to block from the Looks palette and choose Radio-a from the drop-down.
With this, your script is ready.
Conclusion
In this project, we created a bedroom setup in PictoBlox and used Artificial Intelligence and Text to Speech extensions to control our various appliances. We connected the AI assistant sprite to a recognize speech block in PictoBlox and created scripts to recognize user commands. We also wrote scripts to make each appliance sprite work with the command given to our AI assistant.We programmed Abby to be able to respond to ‘lights on’ and ‘lights off’ as well as ‘fan on’ and ‘fan off’, and ‘radio on’ and ‘radio off’. With this project, we were able to learn the basics of Artificial Intelligence and Text to Speech and how to program the sprites we made to respond to voice commands.


