Activity Description
In this activity, Quarky will do a fun dance when you press button L. It sets up the servo pins, goes to the home position, and then repeats a sequence of dance moves like waving, shaking, and moving up and down. Quarky also plays sounds and notes to match the actions, creating a cool dance performance!
Let’s Learn
In Stage Mode:
- The code runs on PictoBlox while Quarky is connected.
- You must keep Quarky connected with USB or Bluetooth for it to respond.
In Upload Mode:
- The code is uploaded to Quarky’s brain and runs independently.
- Once uploaded, Quarky will work without PictoBlox or your computer.

Let’s Code
Stage mode
When Quarky‘s left pushbutton is pressed, it will wait for 1 second and play a sound. After that, Quadruped will wave its right hand and move back to the “home“ position. Then Quarky will play different tones, and Quadruped will do different actions. Finally, Quadruped will move back to the “home“ position.
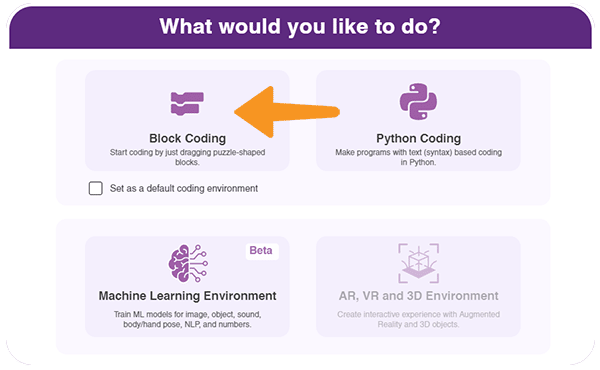
- Open the PictoBlox application from the Start Menu.
- Select the inviting realm of Blocks as your coding environment.
- Connect “Quarky” to your computer using a USB cable. Then, click the Board button in the toolbar and Select Board as Quarky.
- Next, select the appropriate Serial port if the Quarky is connected via USB or the Bluetooth Port if you want to connect Quarky via Bluetooth and press Connect.
- Click on the Add Extension button and add the Quarky Quadruped extension.
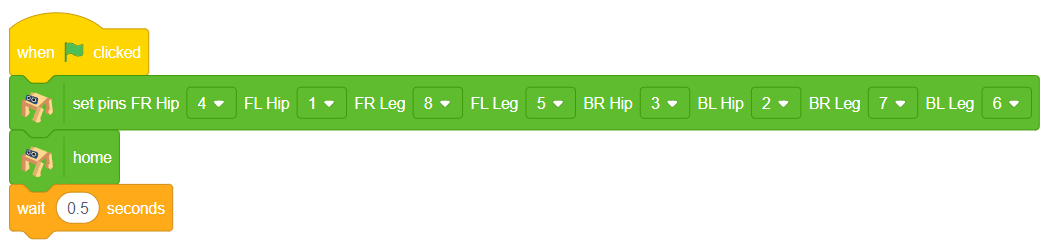
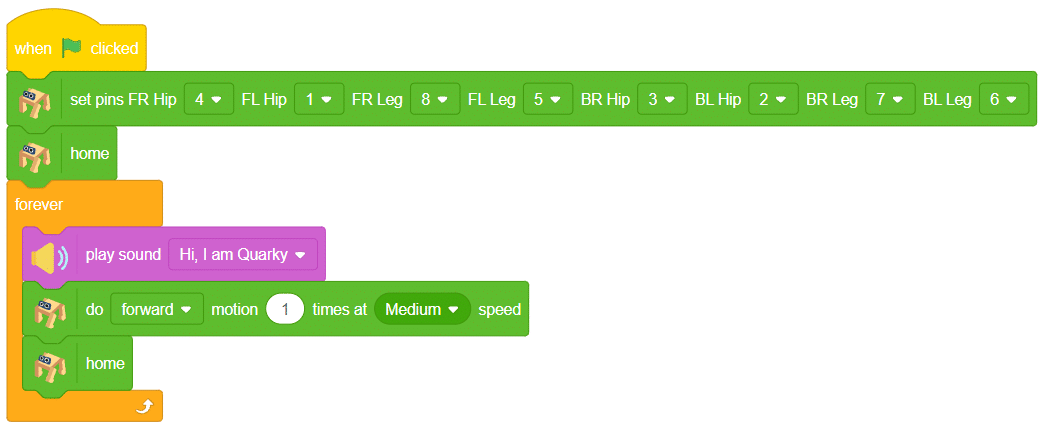
- Add when flag clicked block from the Event Palette. This block helps you to start the script.
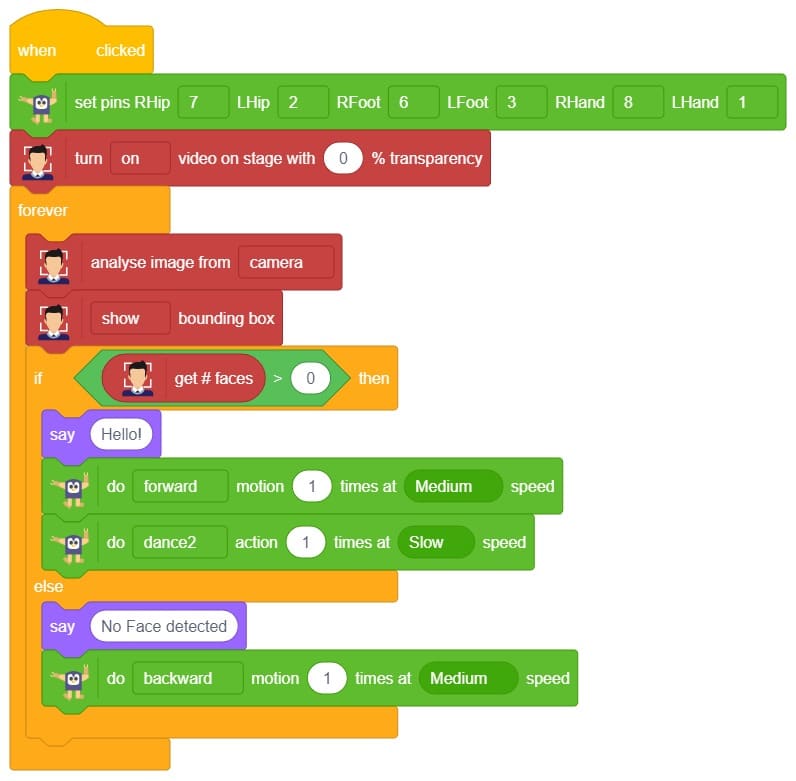
- To set up the quadruped, you can drag and drop pins for each leg and hip into the initialisation block using set pins FR Hip () FL Hip () FR Leg () FL Leg() BR Hip () BL Hip () BR Leg () BL Leg () blocks. This block sets which pins on the Quarky controller board control each servo motor for the front right (FR), front left (FL), back right (BR), and back left (BL) hips and legs. Drag this block and set each PIN as shown. FR Hip: 4, FL Hip: 1, FR Leg: 8, FL Leg: 5, BR Hip: 3, BL Hip: 2, BR Leg: 7, BL Leg: 6.

- Add the home block to move the robot to its starting position.
- Use the forever block so the instructions inside it keep repeating endlessly.
- Inside the forever loop, add the Play Sound block.
- Select the sound “Hi, I am Quarky” to make the robot speak every time the loop repeats.
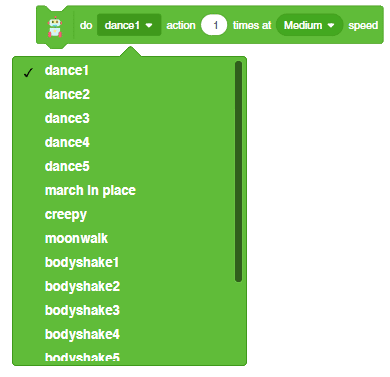
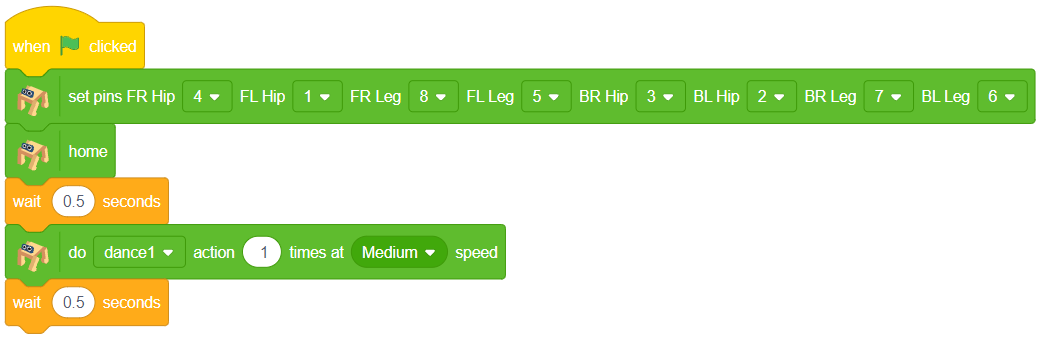
- Add the do block after the sound block.
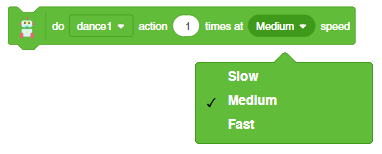
- Choose forward motion, set to 1 time, at medium speed.
- This makes the quadruped take one step forward each time the loop runs.
- Add the home block after the forward motion so the quadruped resets its legs to the home position after each step.
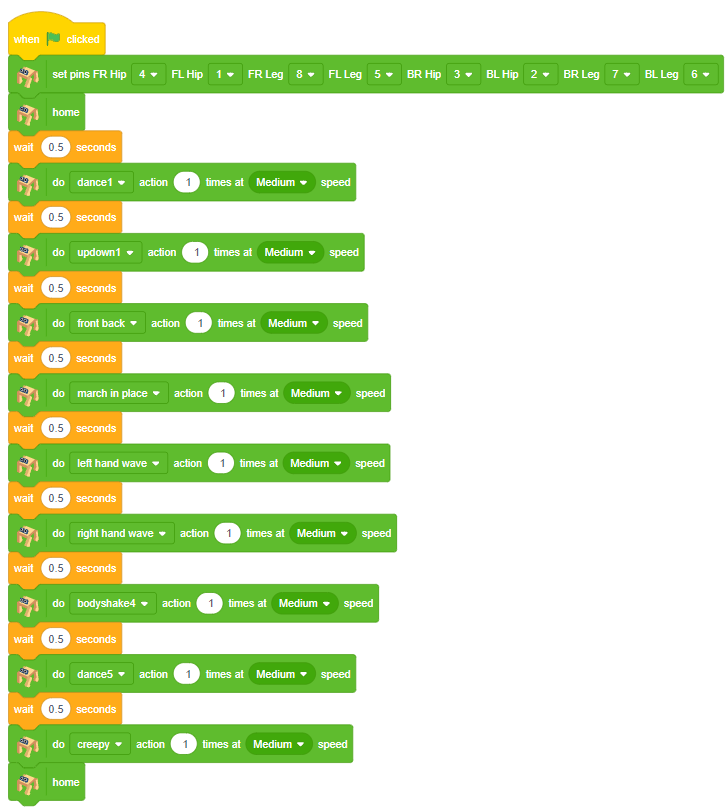
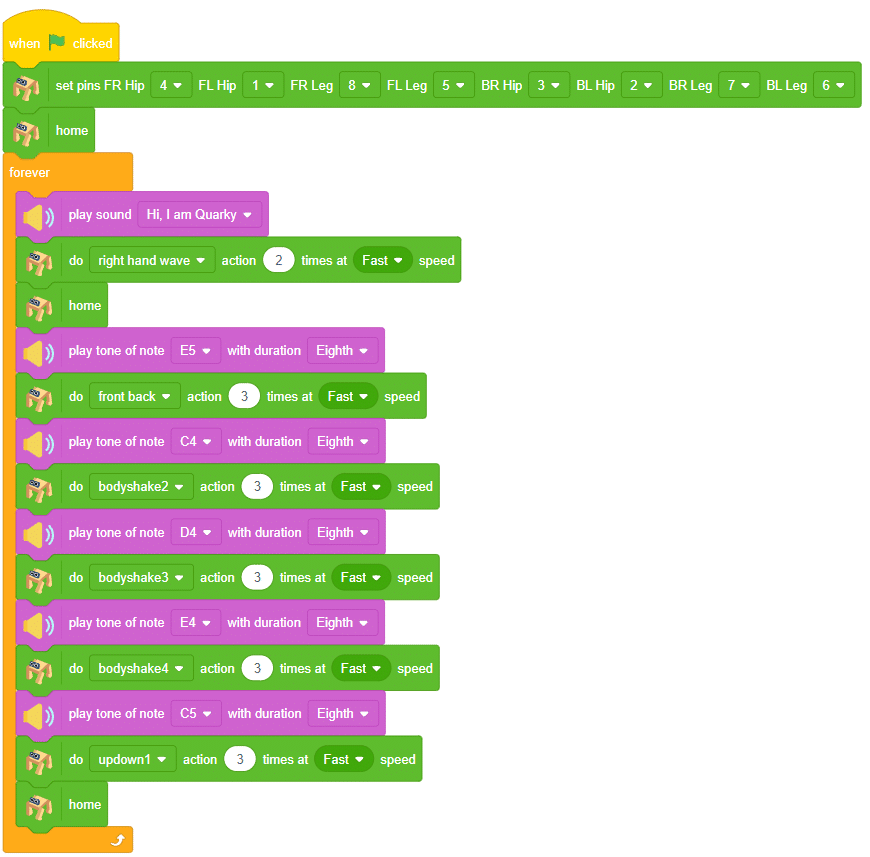
- Play note E5 for an eighth duration.
- Do the front back action 3 times at fast speed.
- Play note C4 for an eighth duration.
- Do the bodyshake2 action 3 times at fast speed.
- Play note D4 for an eighth duration.
- Do the bodyshake3 action 3 times at fast speed.
- Play note E4 for an eighth duration.
- Do the bodyshake4 action 3 times at fast speed.
- Play note C5 for an eighth duration.
- Do the updown1 action 3 times at fast speed.
- Add a final home block to bring the robot back to its default position at the end of each cycle.
- The forever loop repeats all the steps again and again, so Quarky will keep dancing and playing music!
Upload mode
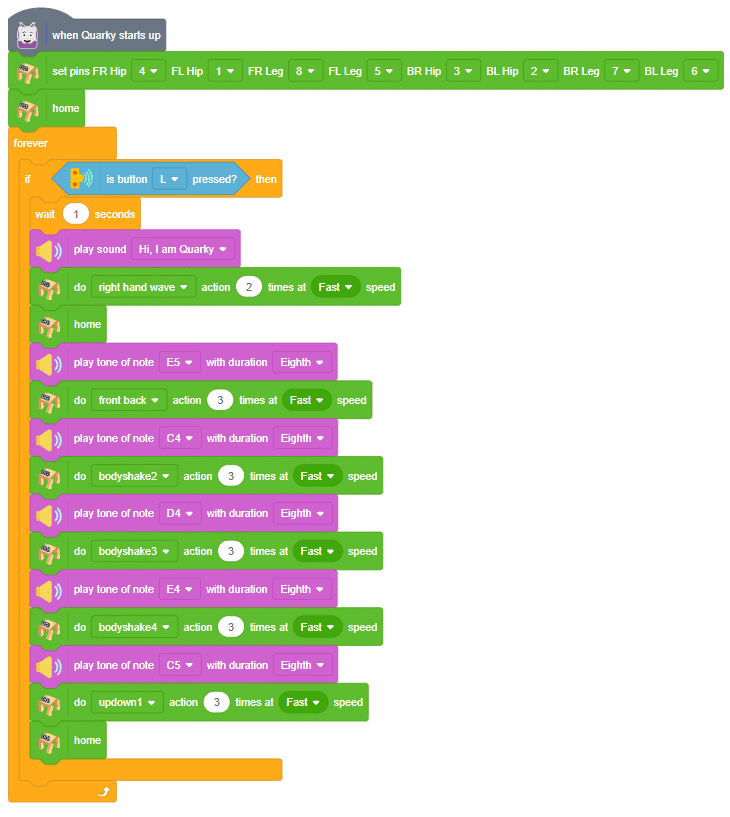
You can also make the Quadruped dance work independent of PictoBlox using the Upload Mode. For that switch to upload mode and replace the when green flag clicked block with when Quarky starts up the block.
- Use the When Quarky Start up block instead of the green flag so the code runs automatically when Quarky powers on, not when you click the green flag.
- Inside the forever loop, add an if block to check if button L is pressed. This means the dance routine only happens when you press button L.
- After the if block starts, there’s a wait 1 second block to pause for 1 second before the dance begins.
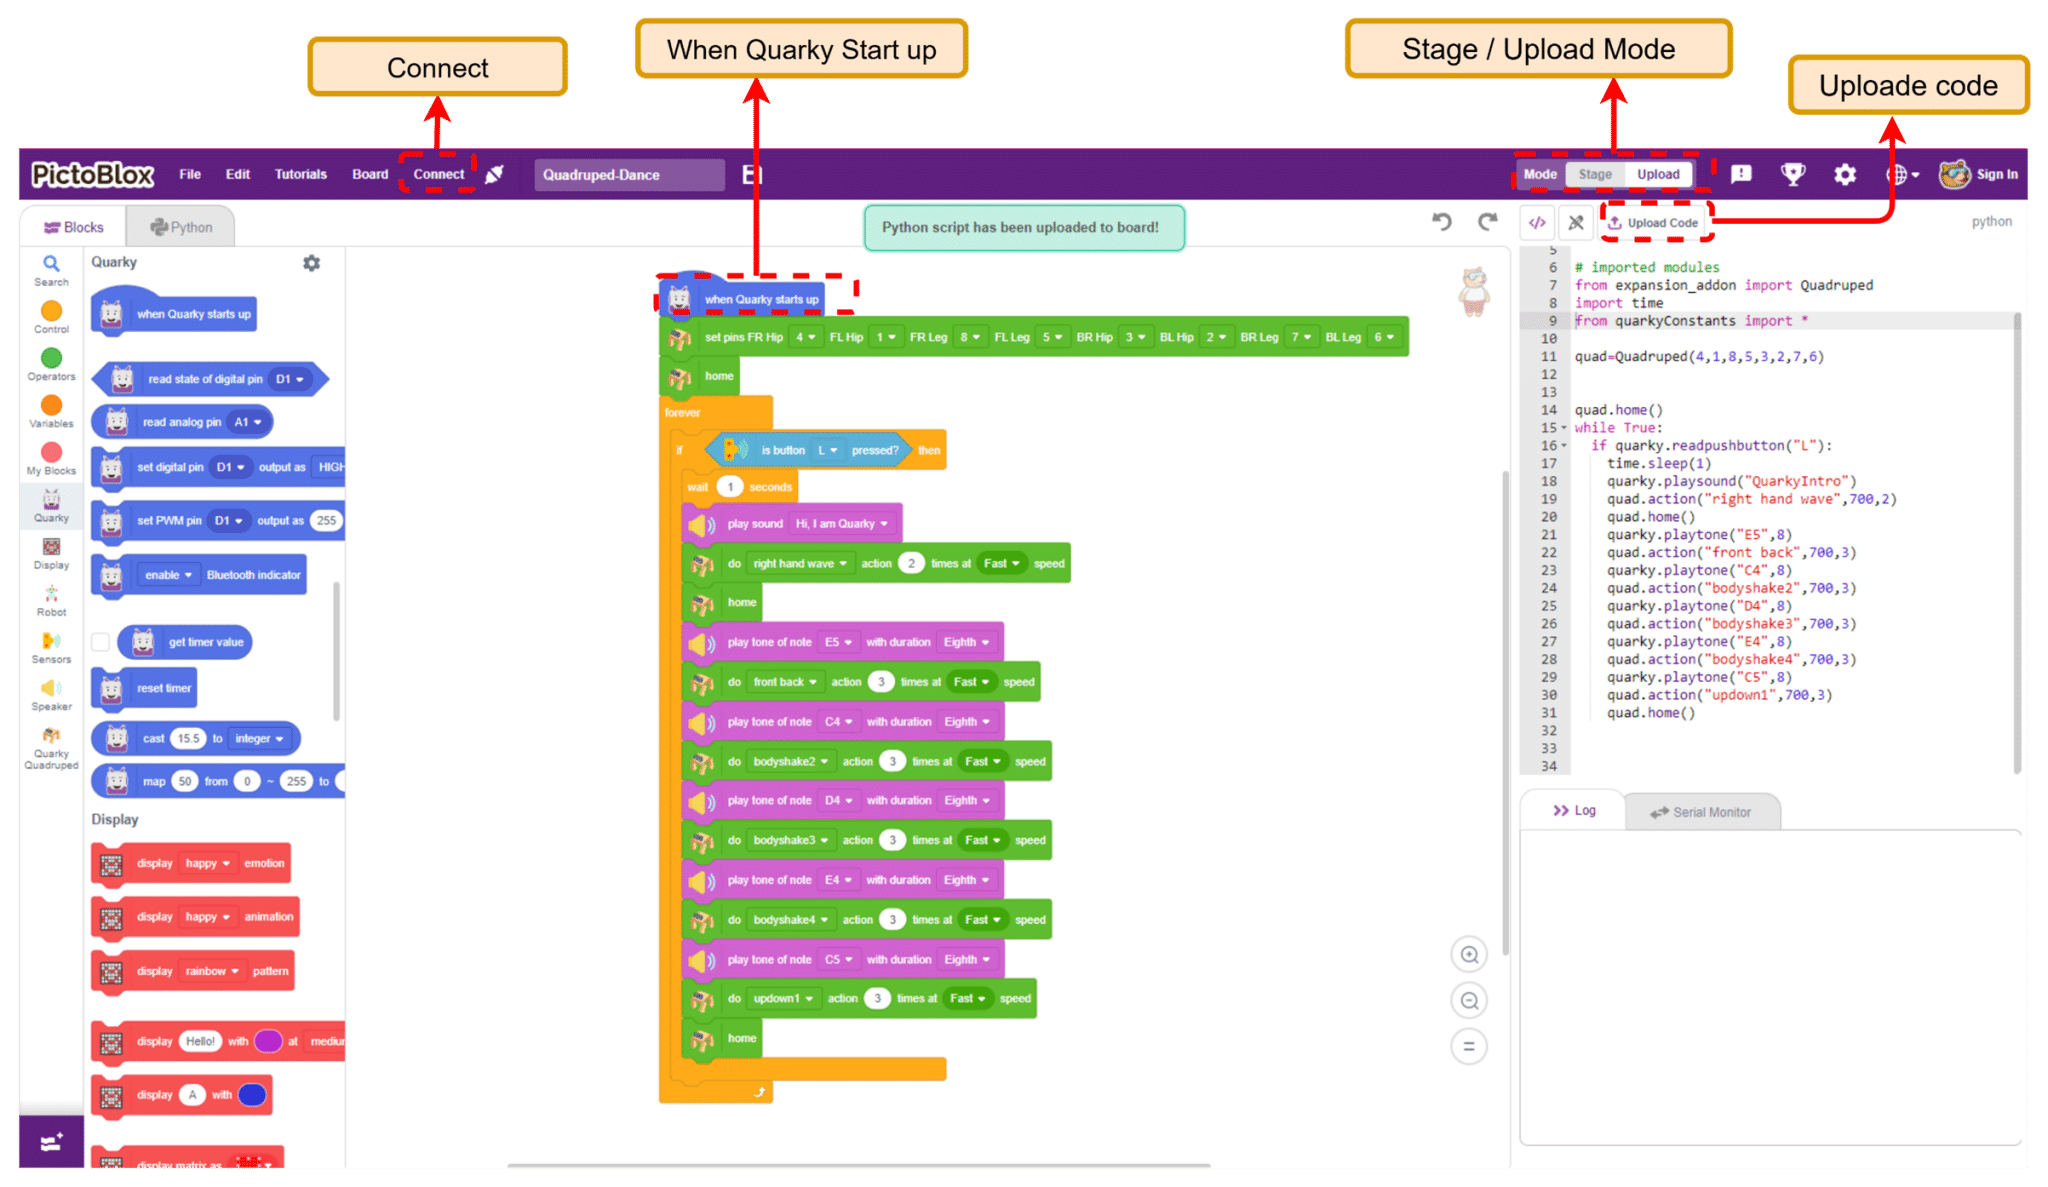
Steps to Upload the Code in Upload Mode
- Use the USB cable to connect Quarky to your laptop or PC.
- Switch to Upload Mode. Click on the “Upload” tab at the top (next to “Stage” mode).
- This changes your workspace to Upload Mode, so your code runs directly on Quarky’s board.
- Check Your Code: Make sure your blocks or Python code are ready.
- Confirm you’ve used when Quarky Start up (instead of green flag) — this is needed for Upload Mode.
- Connect to the Right Port: Click on the “Connect” button and select Quarky’s COM port (it may show as “Quarky” or “Serial Device”).
- Click ‘Upload Code’: Once connected, click the “Upload Code” button.
- Wait for the program to compile and upload — you’ll see a progress bar or message saying “Upload Successful”.
Run the Program
- After uploading, disconnect the USB if you want.
- Turn Quarky ON — it will now run the uploaded code autonomously, without PictoBlox.
Output
Explore: Try to create your dance sequence.