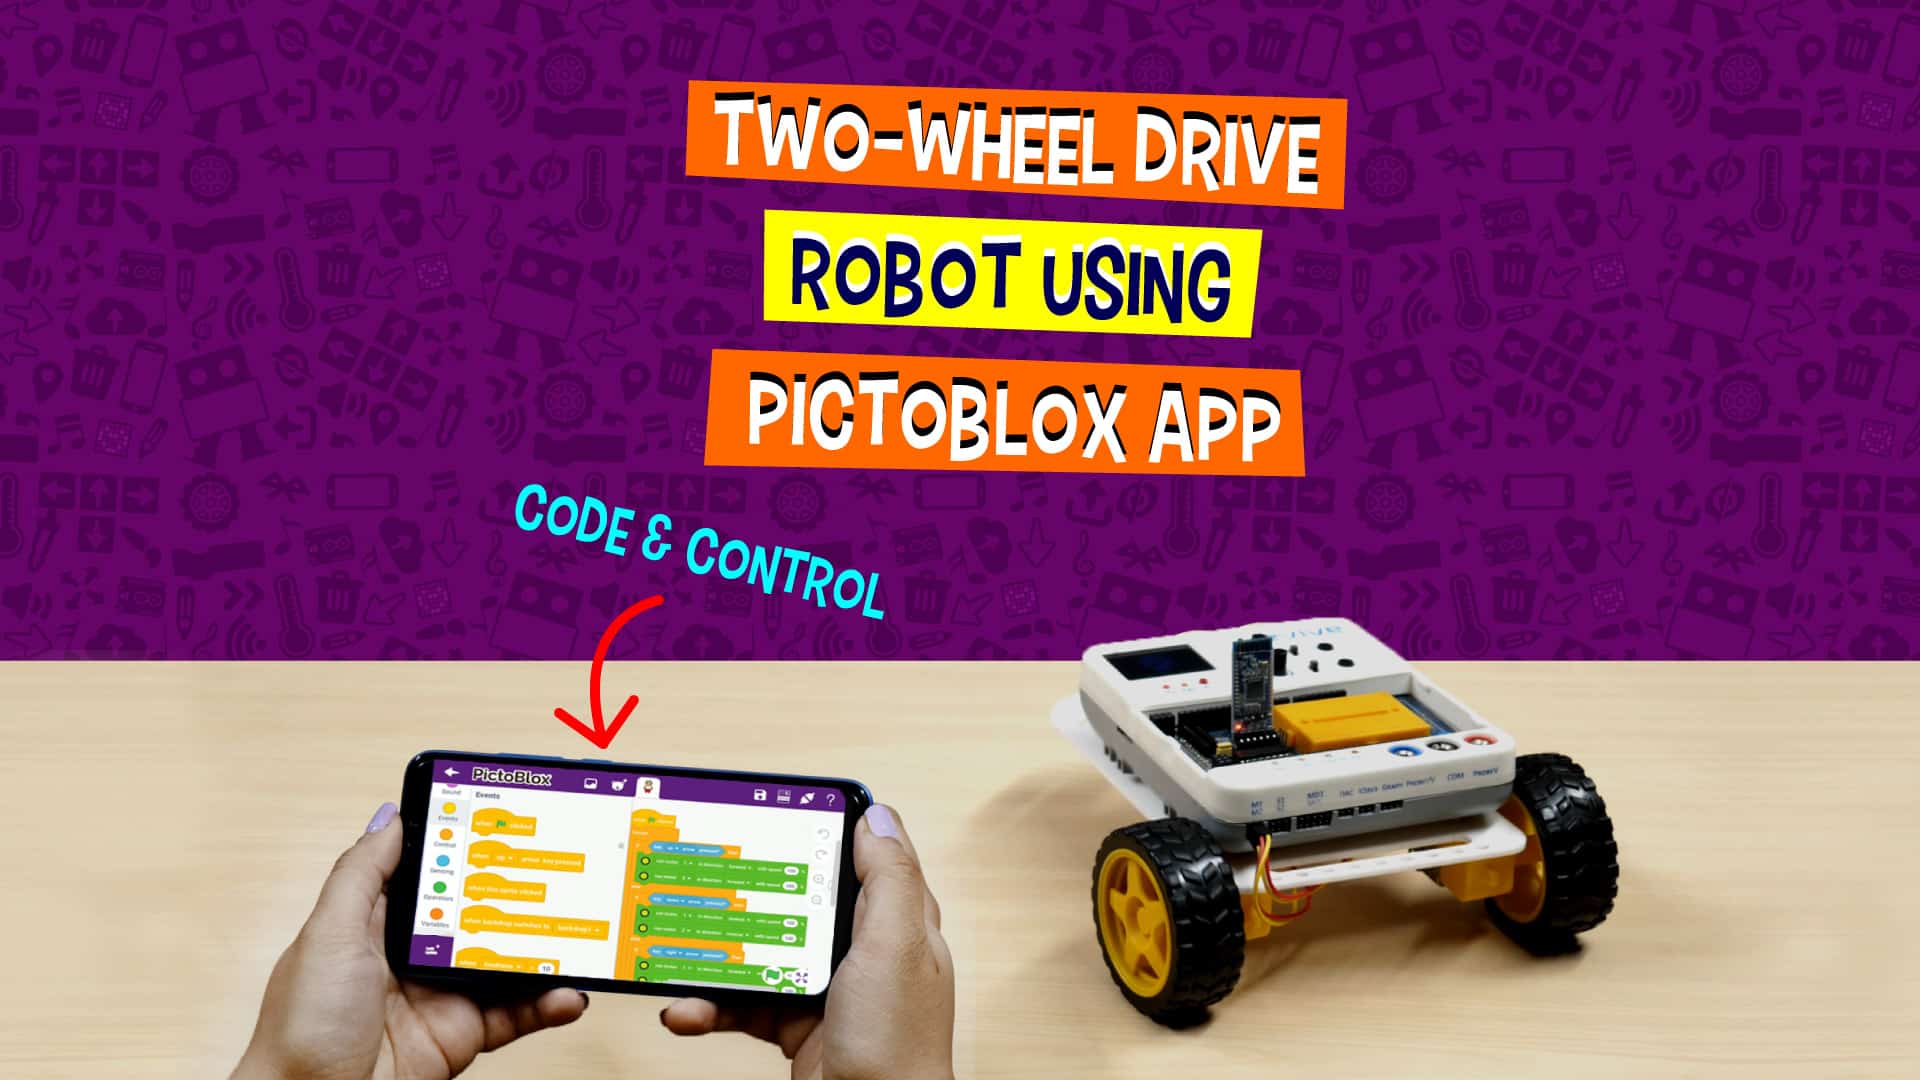

Introduction
So far, we’ve made loads of two-wheel drive robots. This time, we’re going to try something different. This project will show you how to make a two-wheel-drive robot as you learn to code on the go with *drumroll* PictoBlox’s baby brother, the PictoBlox app – your pocket graphical coding partner! Not only will it let you create its script on your Smartphone but also let you control it by running the script in real-time! Everything you need to make the two-wheel-drive robot is available in the evive Starter Kit.
You can download the beta version of the PictoBlox app from HERE.
Ready to code and control with your phone?
Let’s begin!
Making of the Two-Wheel Drive Robot
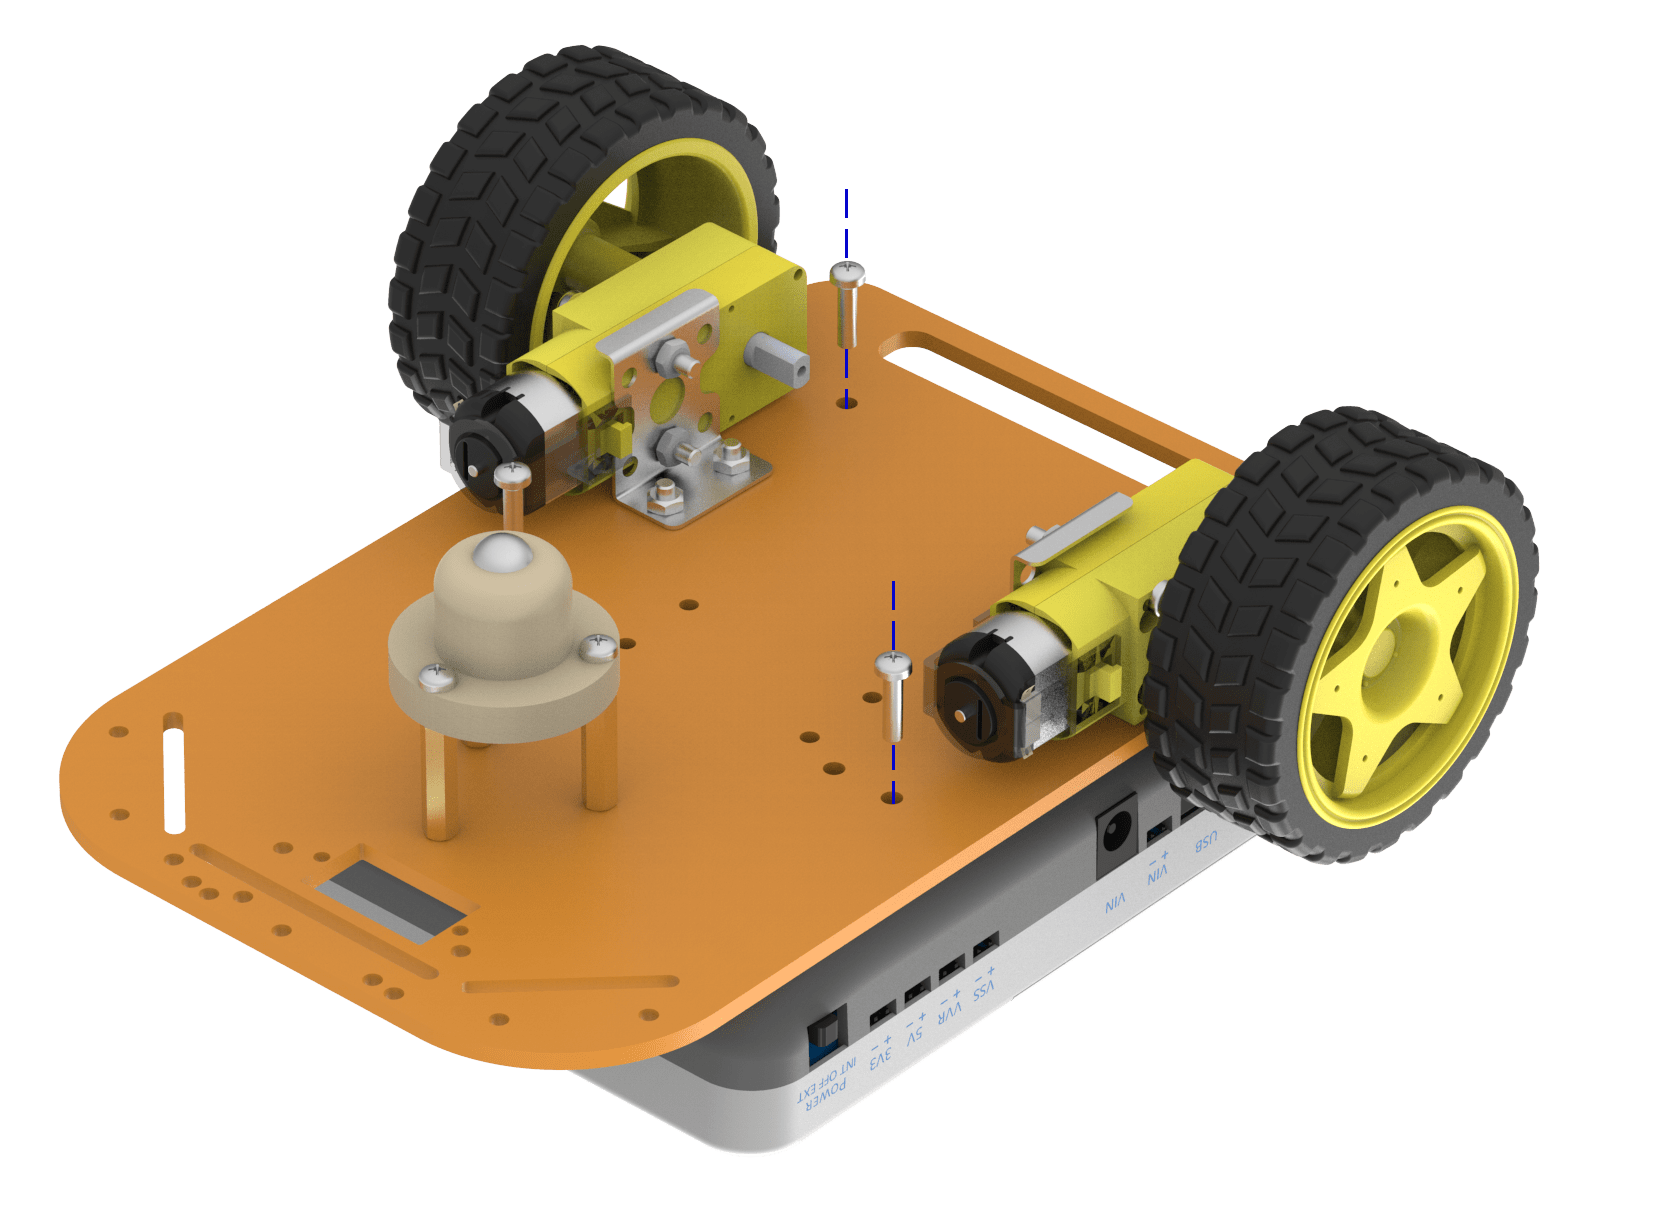
The annotated base is shown on right. This is the bottom side. There is an evive logo on the top side for your reference. So be careful while using the base.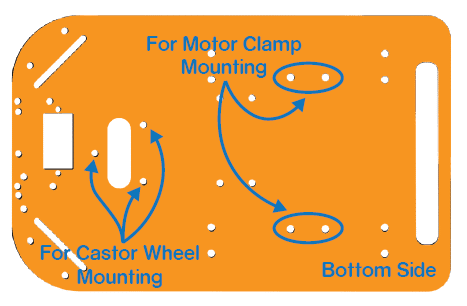
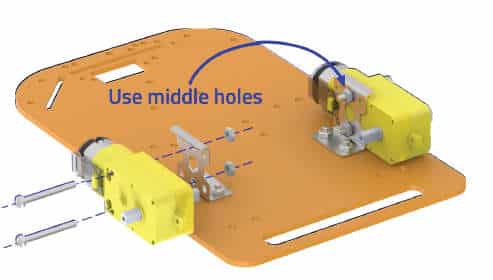
- Fix the motor mounting brackets to the chassis using M3 bolts of 8mm length and M3 nuts.

- Attach the two motors, one to each bracket, side by side and fasten using M3 bolts of 25mm length and M3 nuts.
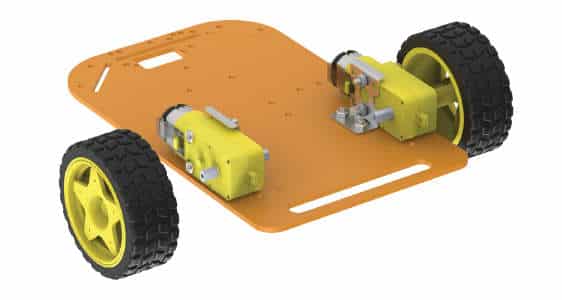
- Now, fit the wheels into the protruding motor shafts.
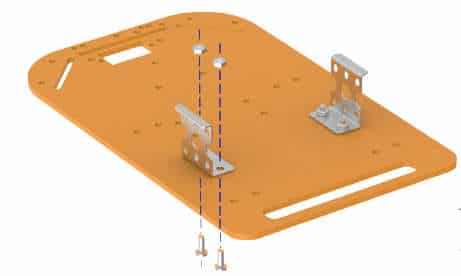
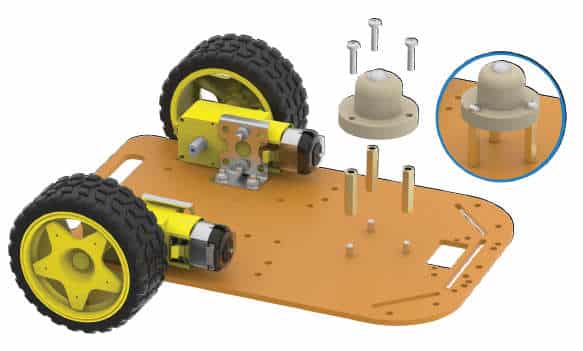
- We’ll attach the Castor wheel now. First, we will mount the M3 standoffs (20 mm) on which the Castor will be attached. Fasten the standoffs to the chassis using M3 bolts of 8mm length.
- Place the Castor on top of the standoffs in the configuration shown and fasten using M3 bolts of 12 mm length.

- Flip the assembly and place evive on the top of the chassis.
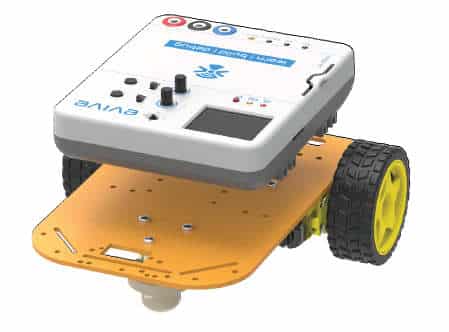
- Using the holes on the back of evive fasten it to the chassis using M3 bolts of 12mm length.
How the Two-Wheel Drive Robot Moves!
Let’s have a look at how will the two-wheel-drive robot:
- On rotating both the wheels in the forward direction, the robot will go forward.
- On rotating both the wheels in the reverse direction, the robot will go backward.
- If the left wheel is rotated in reverse direction and the right wheel is rotated in the forward direction, then the robot should turn left.
- Similarly, if the right wheel is rotated in the reverse direction and left wheel in the forward, then the robot will turn right.
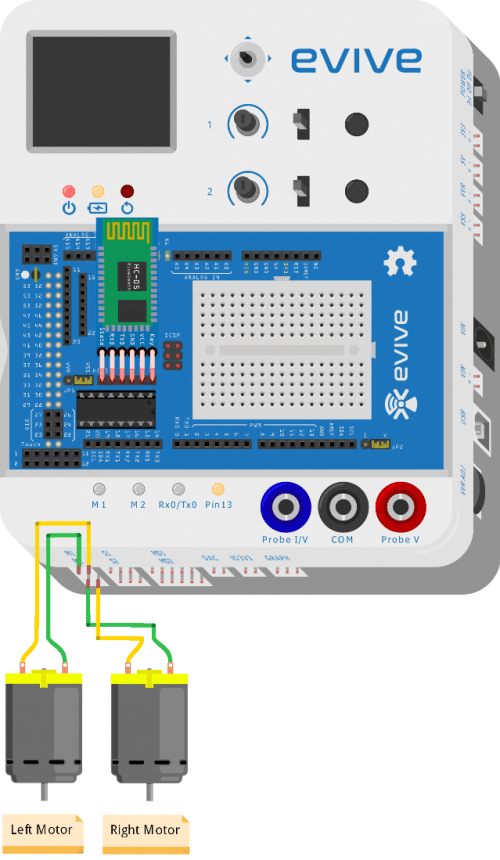
Making the Connection of Two-Wheel Drive Robot
Make the connections as given below:
- Connect the DC motor to evive’s Motor Channel 2 i.e. M2.
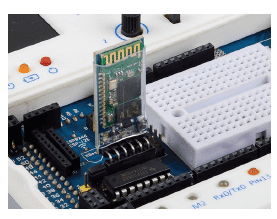
- Connect HC-05 Bluetooth Module to the headers present on evive.

Programming your PictoBlox based Two-Wheel Drive Robot
Let’s make the script in PictoBlox to run the two-wheel drive robot using the PictoBlox Mobile Application.
Before programming evive using the PictoBlox app, make sure that it must have firmware uploaded to it. If not follow the steps below:
- Open PictoBlox on your computer.
- Connect evive to it using a USB cable.
- Click the board button and select evive from the drop-down.
- Next, click the Connect button and select the appropriate serial port.
- Then, click the upload firmware button.
Uploading the firmware is a one-time process.
Now that the firmware is uploaded to evive, Let’s program the robot in PictoBlox App.
- To connect the robot to the app, we’ll need a Bluetooth module. We have our Bluetooth module already connected to evive.
- Now, open the app, go to my space and tap the + button to start a new program.
- Next, tap the board icon on the top-right corner of the screen, third from the right. Then, select evive from the list and tap yes.//GIF
- Next, tap the connect icon, second from the left. A list of nearby Bluetooth devices will appear. Select your Bluetooth module from the list.
You can recognize it either from its name or from the address written at its back.
- Now that the robot is connected to the app, let’s create the script to control it.
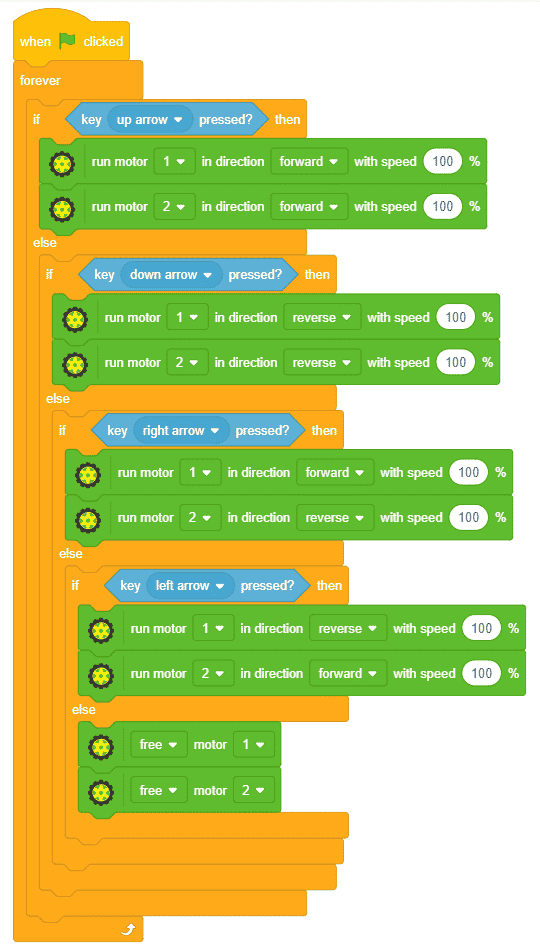
- First, drag and drop an if-else block from the Control palette into the scripting area.
- To sense whether the up arrow key is pressed or not, drag and drop is key pressed block from the Sensing palette and place it inside the hexagonal space of the if-else block.
- If the condition is true, the robot should move forward, i.e. both motors should rotate in the forward direction. Thus, from the Actuators palette drag and drop a run motor block and place below if arm. Add another run motor block and select motor 2 from the dropdown.
- If the down key is pressed, the robot should move backwards. Thus select reverse in both the run motor blocks.
- Similarly, on pressing the right key, the robot should turn right. Select Forward from the drop-down of the first run motor block.
- On pressing the left key, the robot should turn left. Select reverse from the drop-down of the first run-motor block and forward from the second run motor.
- If none of the keys is pressed, the robot should stop moving or stay at rest if not already moving. Thus, drag and drop a free motor block for both the motors and place them under else arm.
- Now, to make these actions execute continuously, drag and drop a forever block around the entire if-else tree.
- Finally, drag and drop a when flag clicked hat block above the entire script to trigger the execution.
- Now, Switch to the stage, tap the green flag to start the script, and use the arrow keys to control your robot.
If the robot doesn’t move according to the code, i.e. any of the motors rotate in a direction opposite to the one selected then just reverse the connections of that particular motor.
Conclusion
With this, your two-whee drive robot is up and ready to follow the commands you give from the PictoBlox app! B-)