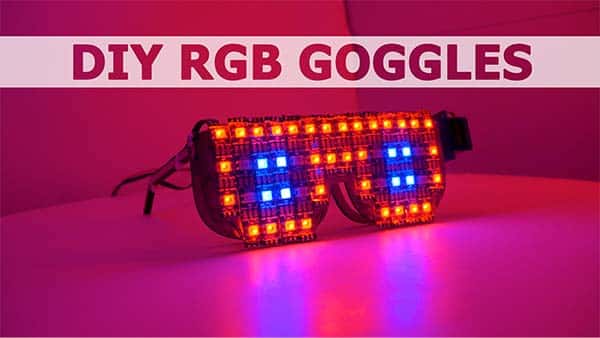

Introduction
It’s a calm Sunday afternoon and you’re wandering by the road lost in thought of what to have for dinner. Suddenly the glaring Sun pops up from behind the clouds breaking your chain of thoughts by its scorching heat.
How amazing it would be if you had a pair of goggles with controllable shades that you could control as per your wish and avoid the burning Sun! And, apart from coming to the rescue during the day, what if it could also make you party-ready in the night?
What if we told you CAN make such goggles, right here, right NOW?
Sounds incredible, right?
So, what are you waiting for? Time to show the Sun who’s the real boss AND become the centre of attraction of every party you go to!
Making the frame
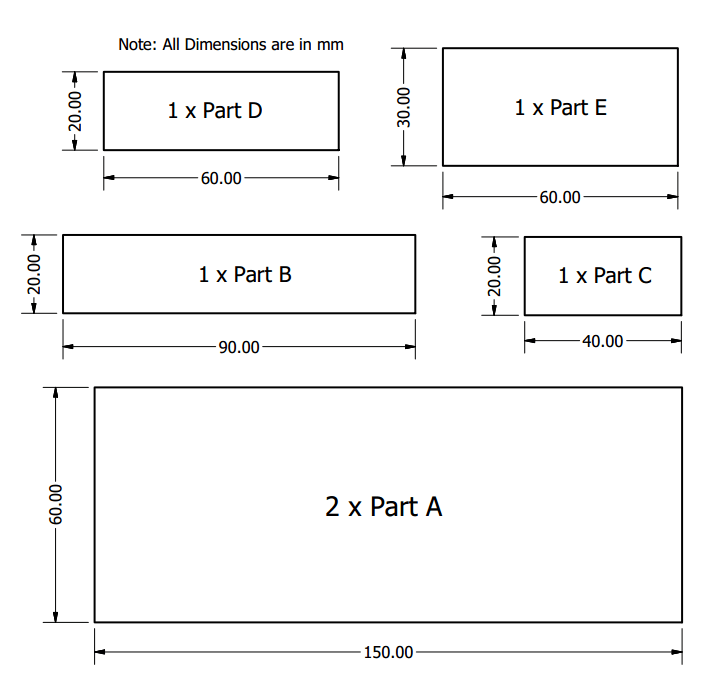
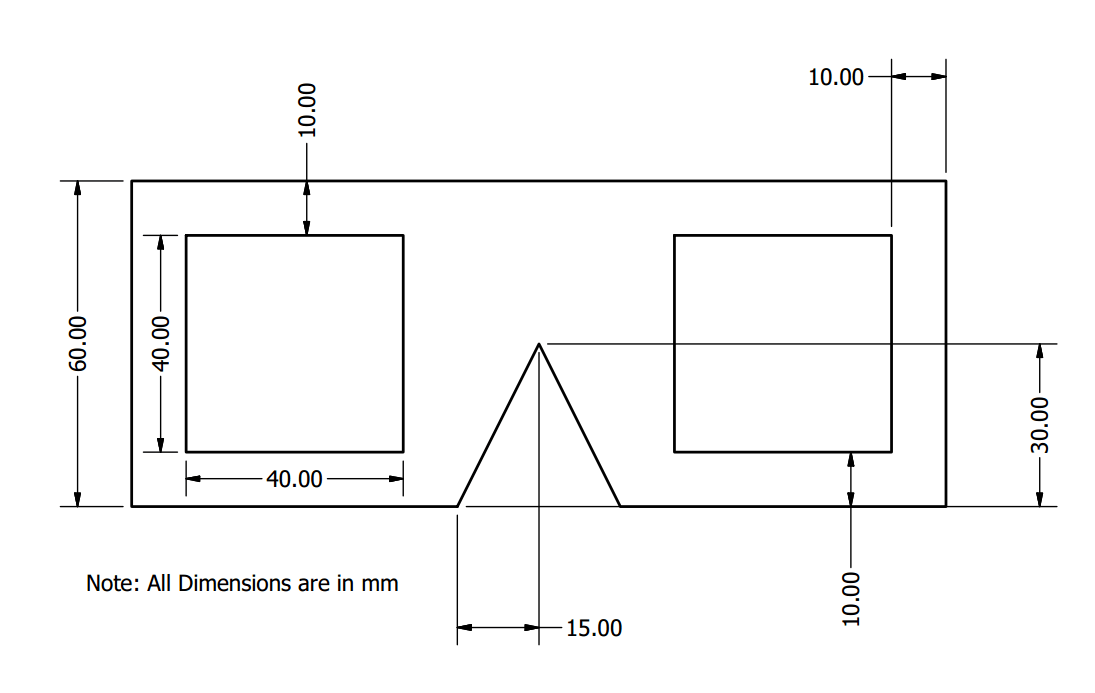
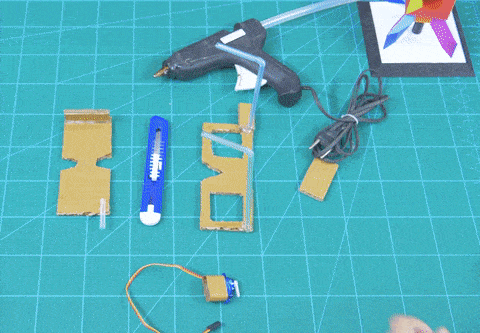
- Cut the following pieces from the Cardboard:
- 2 pieces of 15 cm x 6 cm – Part A
- 1 piece of 9 cm x 2 cm – Part B
- 1 piece of 4 cm x 2 cm – Part C
- 1 piece of 6 cm x 2 cm – Part D
- 1 piece of 6 cm x 3 cm – Part E
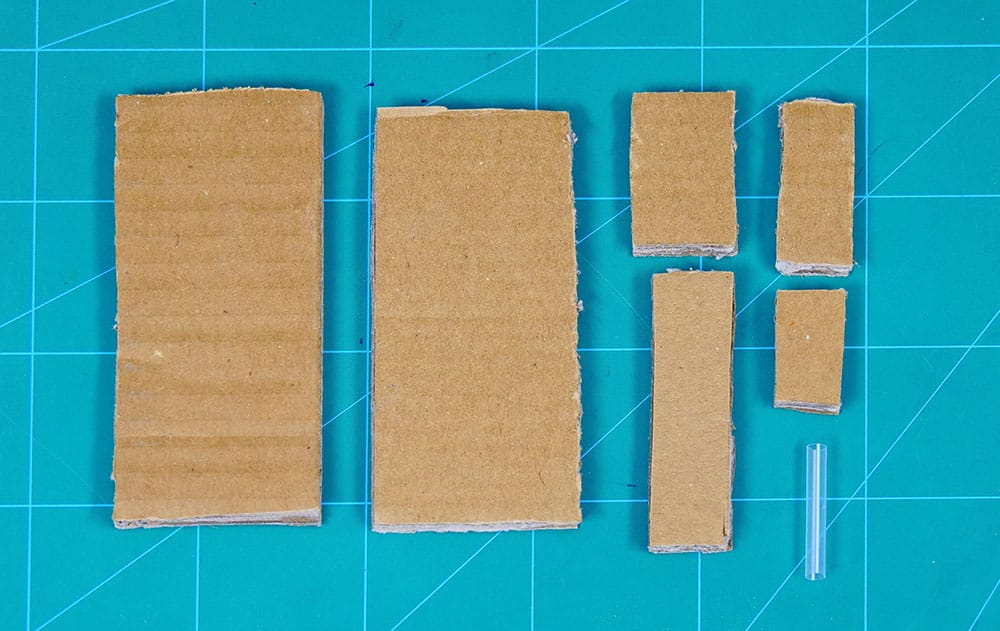
- Also, cut a small piece of straw.

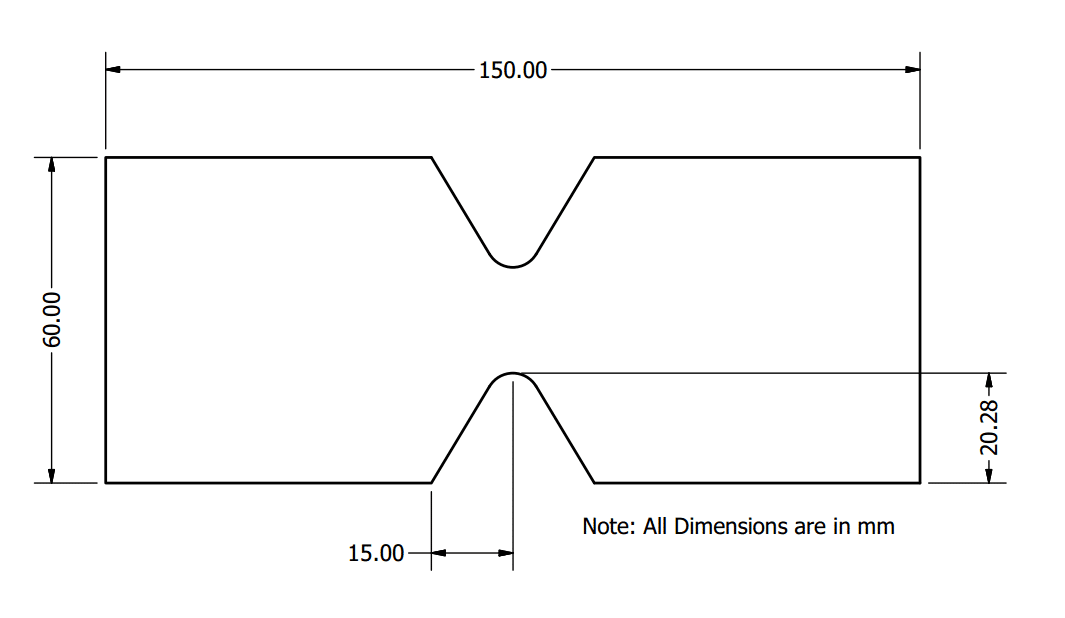
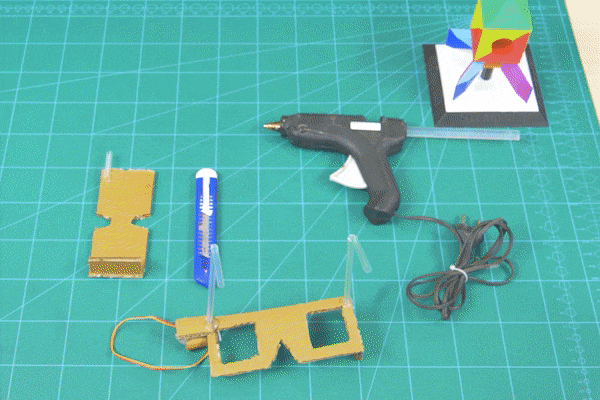
- Now, take one Part A and cut it in the shape of goggles.
- Then, take part E and paste it on one side. Next, take a small piece of straw and paste it on the other side.
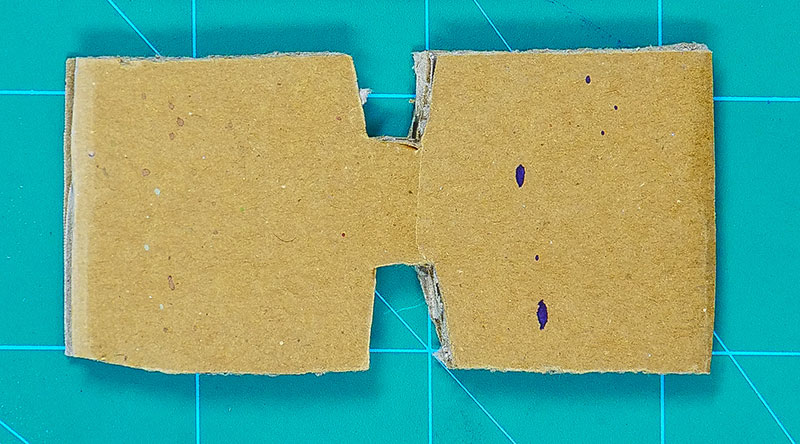
- Next, cut holes in the second Part A.
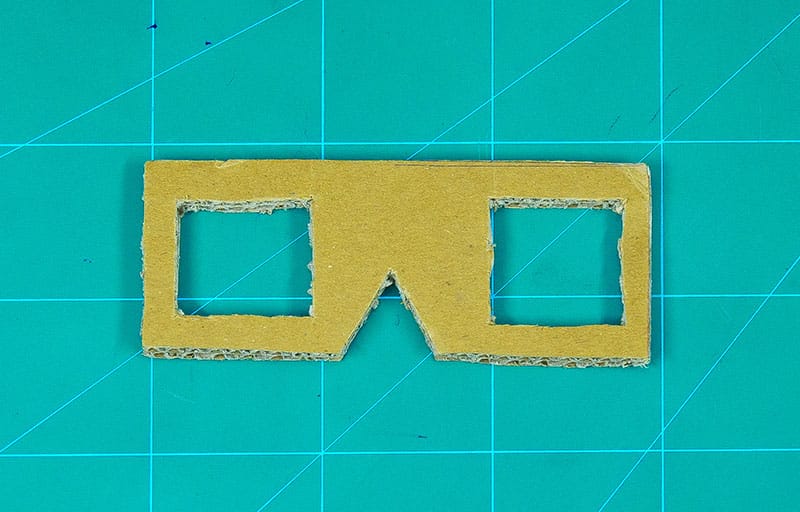
- Then take the smallest cut out, i.e. Part C and paste it on one of the sides of Part A with holes cut in it.

Connecting the Servo
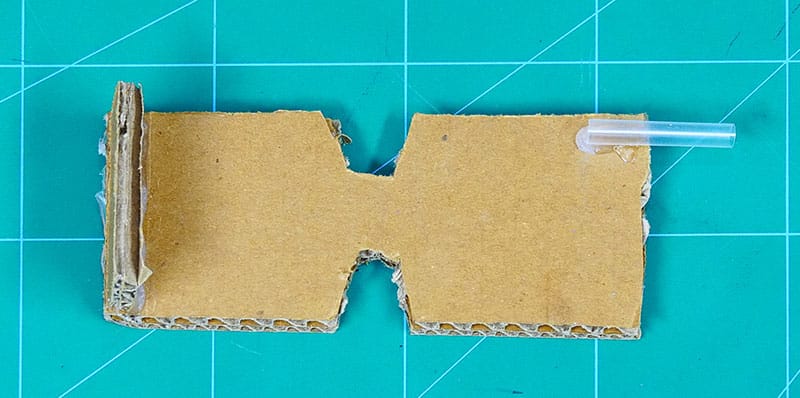
- Take two straws and paste them on both the sides of the back frame, i.e. Part A that has holes cut in it.
- Then, take Part B and wrap it around the servo and paste the two ends with glue.
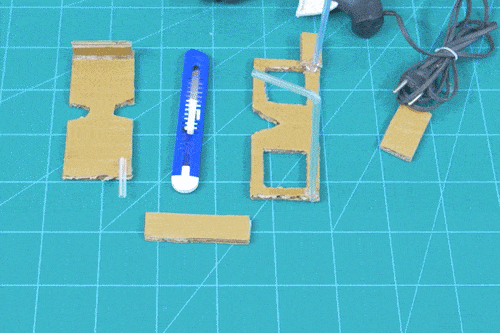
- Then, take the single sided servo horn and fix it on the servo head using the self-threading screw; the horn and the screw are available with the servo accessories.
- Next, take Part E piece and make a small hole in it. Then, paste the servo and Part E piece on the larger piece with holes cut out as shown:
- Finally, join the two large cutouts by fixing the small straw in the hole and insert the servo horn the Part D of the sunglasses and fix the assemblies using hot glue.
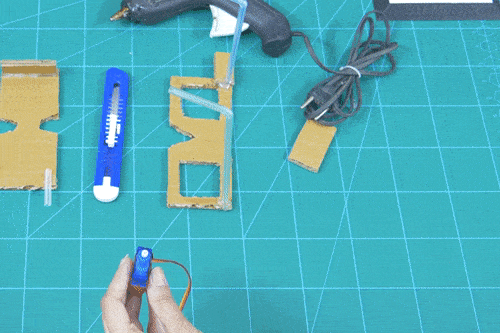
Powering It Up
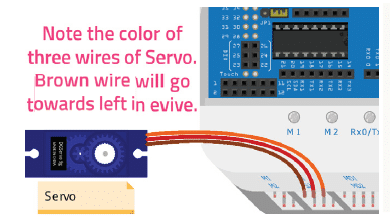
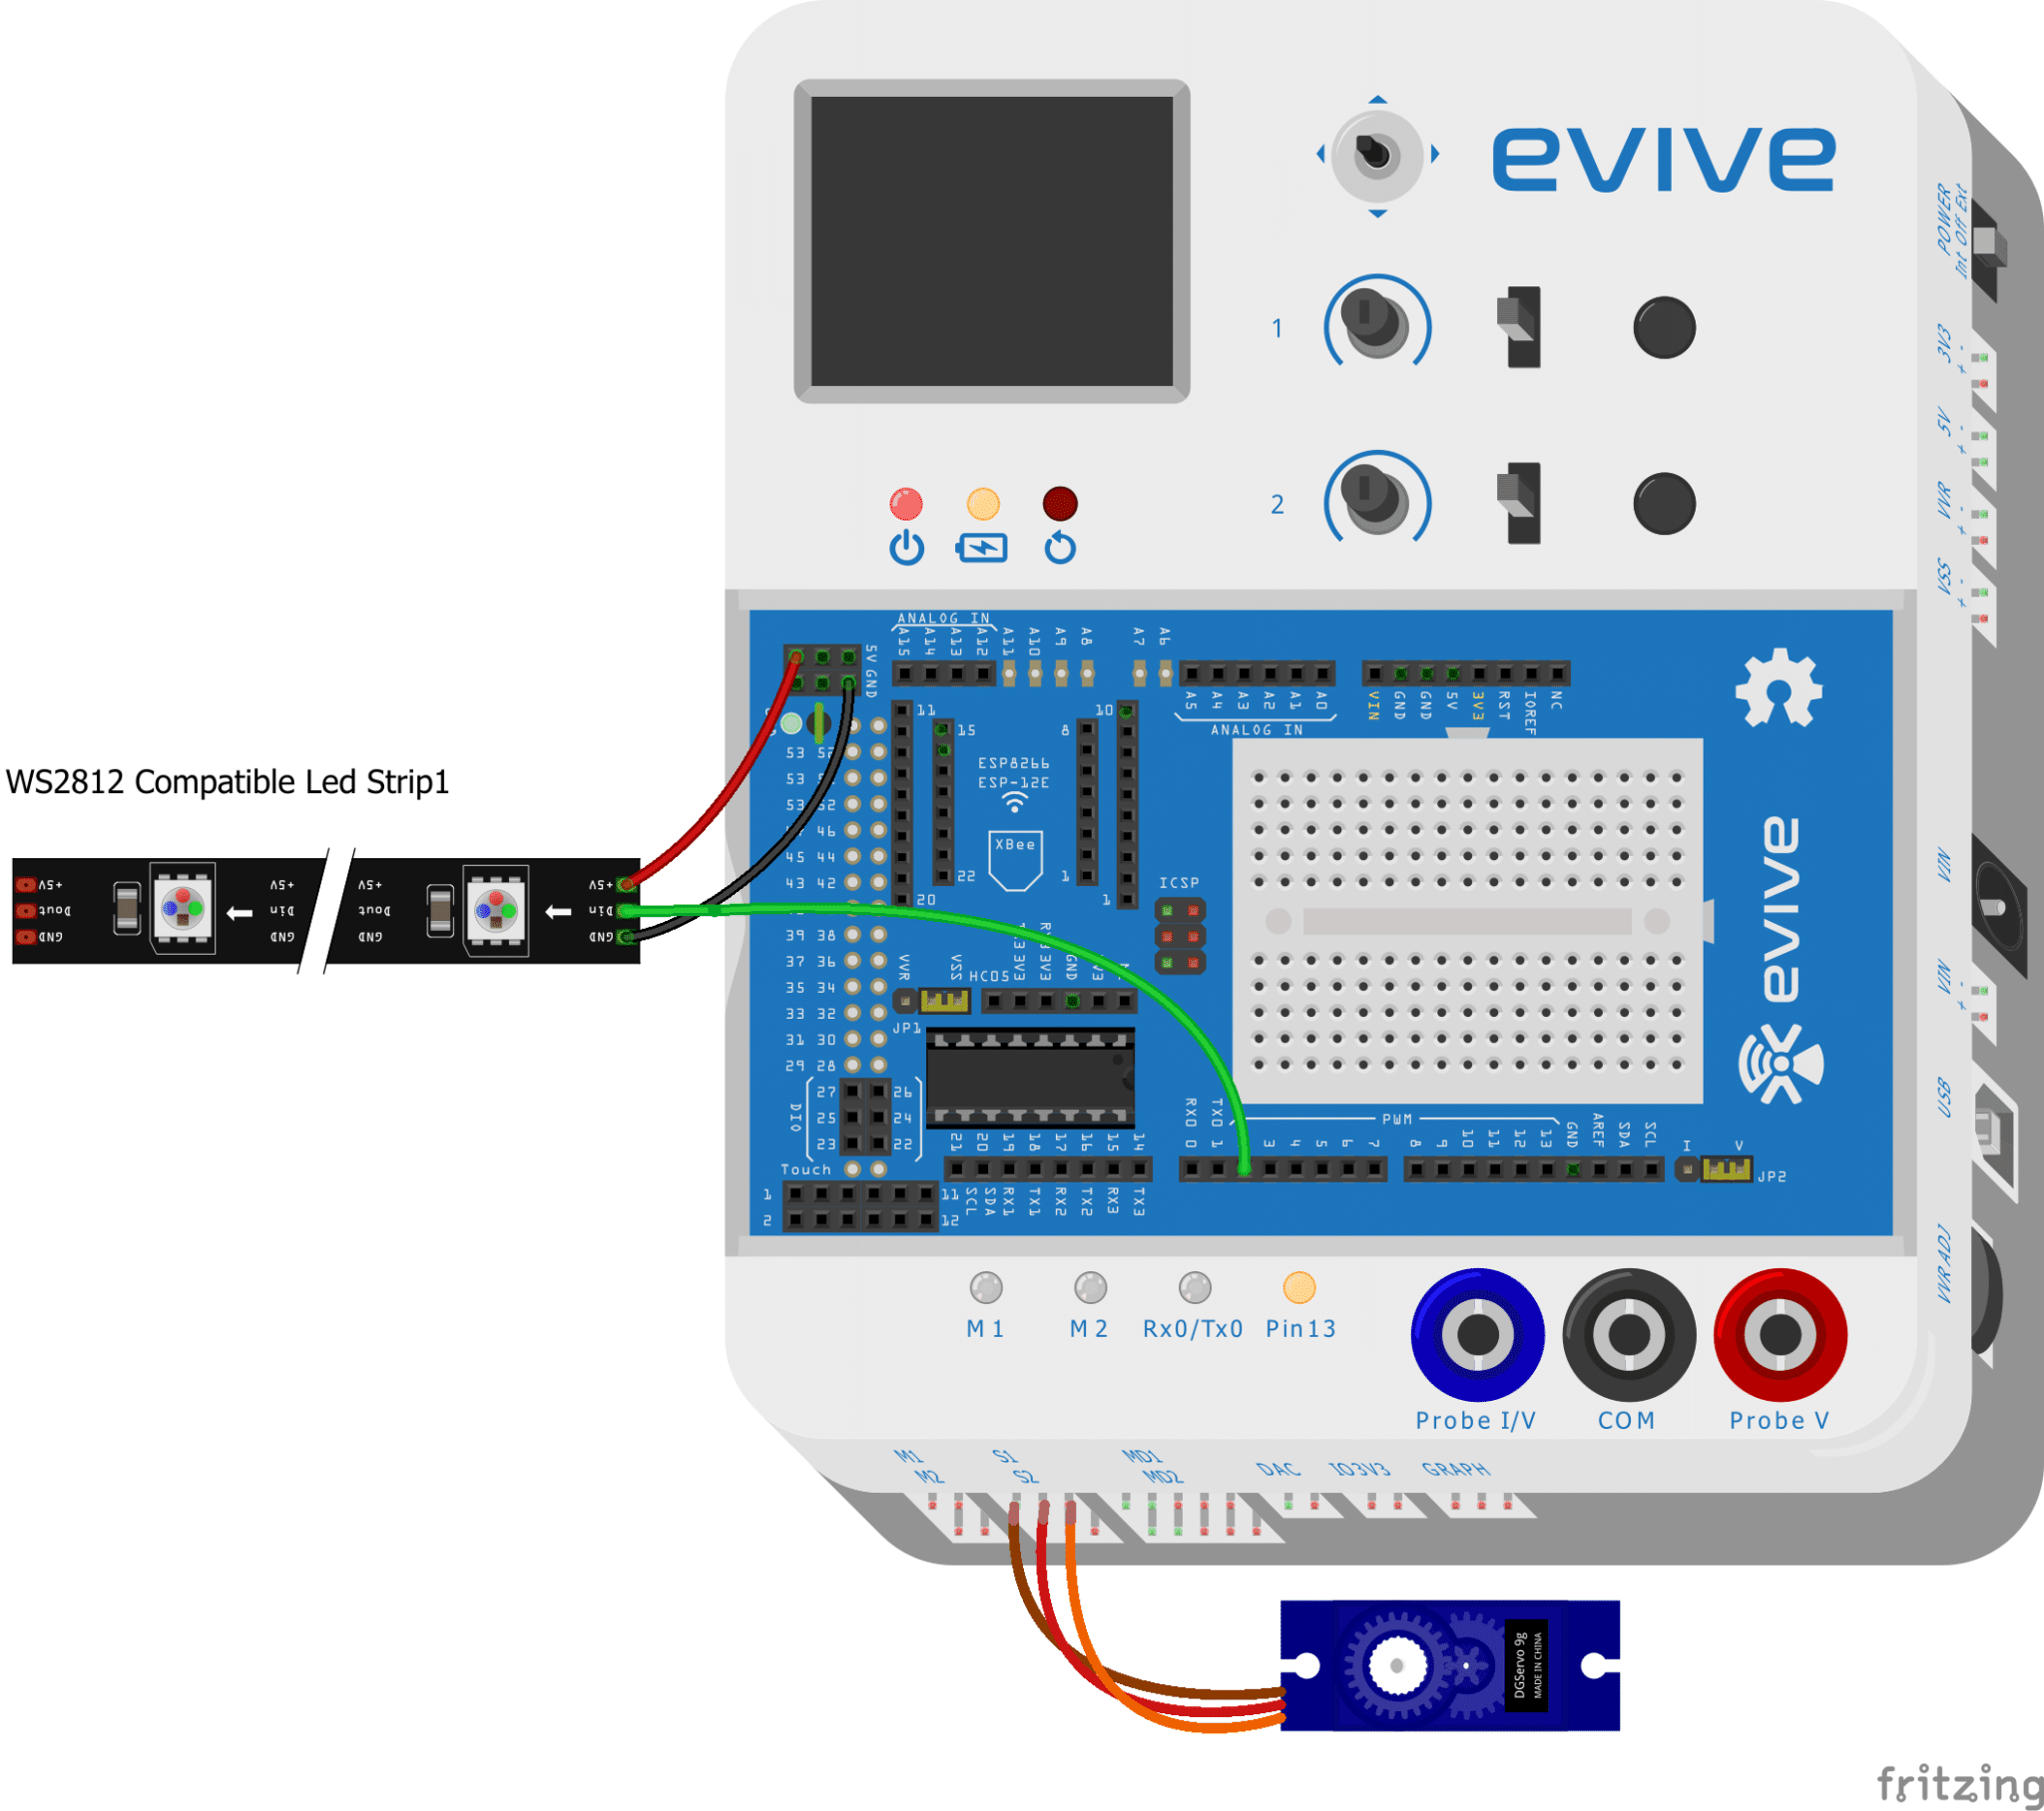
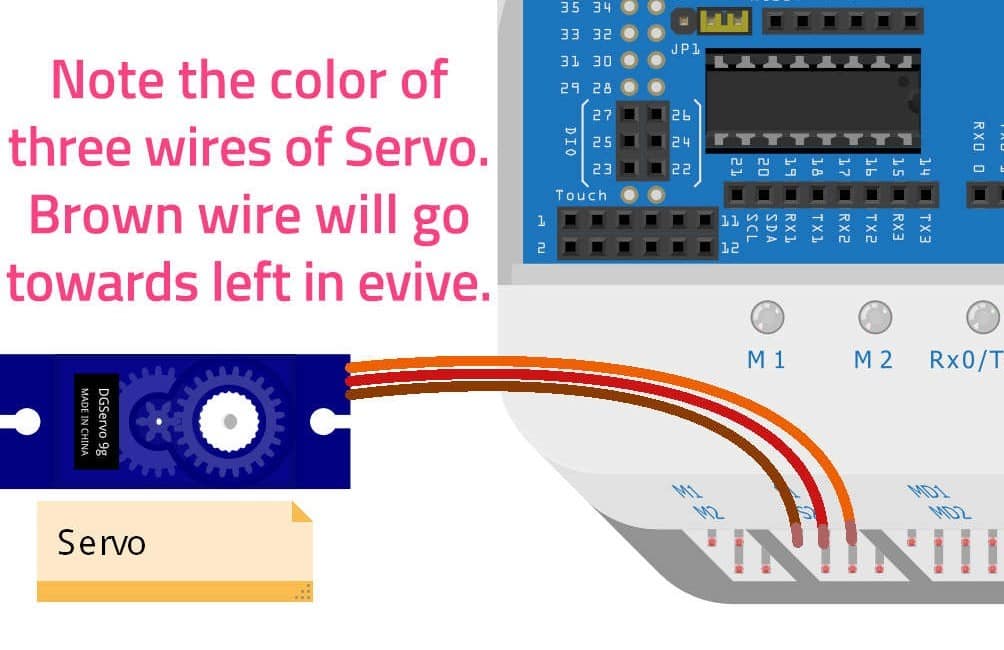
- Connect the three servo wires to servo motor channel S1. Make sure that the brown wire is connected to the leftmost pin.
- Next, let the artist in you come alive and decorate the goggles any way you like!
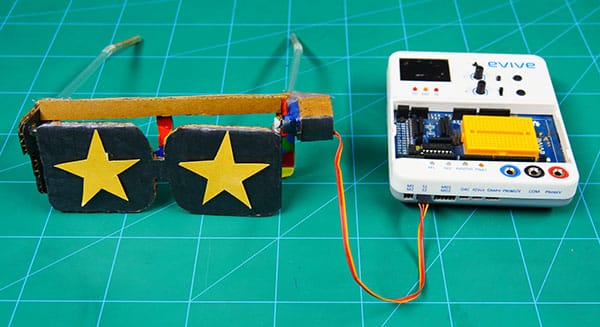
- Now, switch evive ON, navigate through the controls menu and select Servo 1. Now, turn the potentiometer knob and watch the goggles do their magic!
Upgrade RGB LED Strip
You can upgrade your goggles using RGB LED Strip. In this project, we’re using WS2812 RGB LED Strip.
- Cut the LED strip into small pieces:
- 4 LED Strip: 8pcs
- 3 LED Strip: 4pcs
- 2 LED Strip: 2pcs
- Mount the LED Strip on the front frame as shown below:
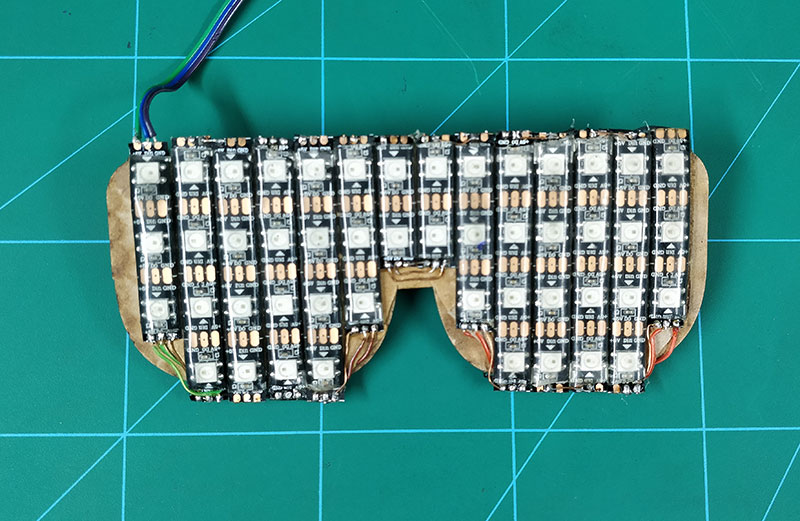
- Solder the ends:
- The ground of one LED strip to ground of the other.
- The 5V of one LED strip to 5V of other.
- Dout of one LED strip to Din of another.
And your RGB goggles is complete.
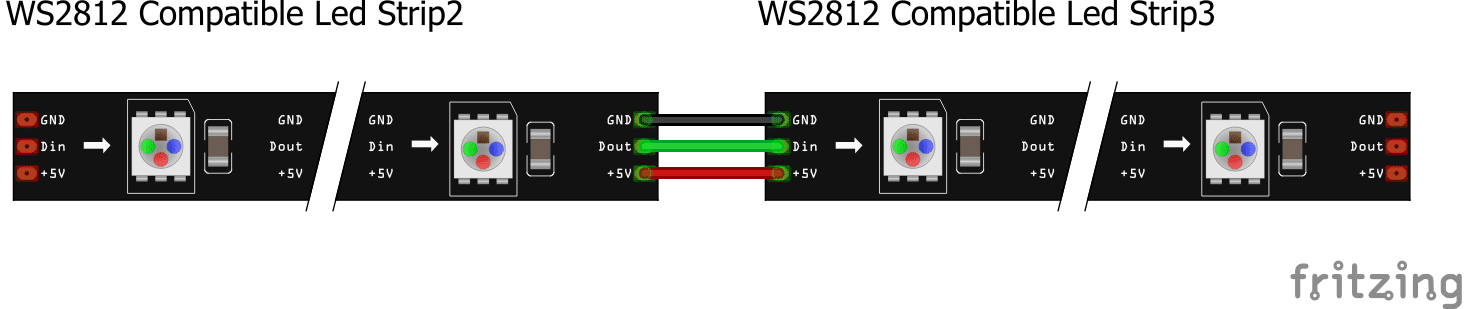
Circuit Diagram of the RGB Goggles
Connect the LED Strip as follows:
- GND of LED strip to GND of evive.
- 5V of LED strip to 5V of evive.
- Din of LED strip to digital pin 2 of evive.

Coding the RGB LED Patterns
For our goggles, we have made 8 different patterns in which the LEDs will glow.
Below is the Arduino code for running these patterns:
Conclusion
With this, we’re done with these SPECtacular sunglasses!
When you go out this time, it will be the Sun who will burn and the whole world will stop and turn back to marvel at your ahead-of-vogue looks!