
Introduction
Doesn’t matter if you are a kid, a teen, or an adult; if you see a bubble, you pop the bubble! Sadly, the person blowing the bubble misses out on all the fun. This. Changes. NOW. Come in DIY Dabble-controlled Bubble Machine: a bubble blowing machine that can be wirelessly controlled using Dabble, our in-house developed project-making mobile application. You can download Dabble from Google Play. A foam sheet, a servo, a DC motor, evive, a blower, some soap solution, and some excitement; you’re all set to make your very own bubble machine!
After all, why shouldn’t everyone have all the fun?
Assembly
We will be using a servo and a DC motor for making the bubble machine.
Let’s start by assembling the platform.
Cut a rectangle out of the polyethylene foam sheet. You can also use any other if you like.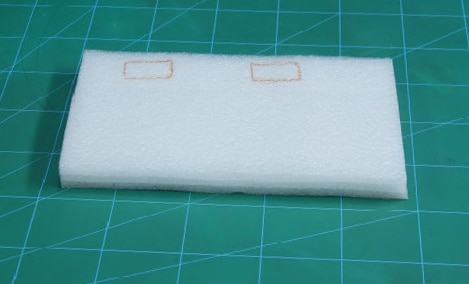
Next, cut out two small rectangles from the rectangular base cut before. We will be mounting the strips holding the servo and DC motor in these slots.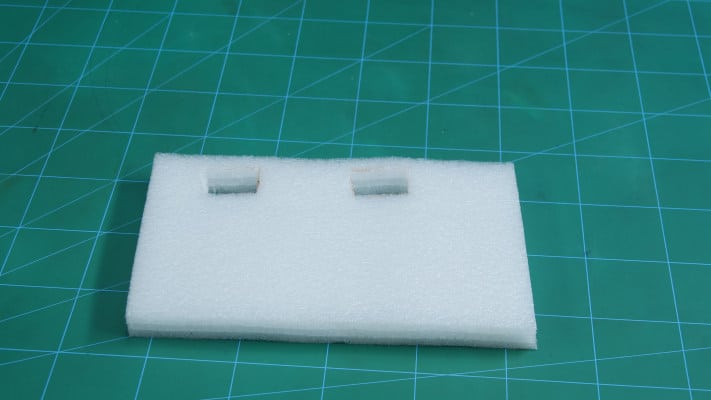
Now, cut two long rectangular strips out from the same sheet. Similarly, mark and make the holes on each of the sizes of the servo motor and DC motor.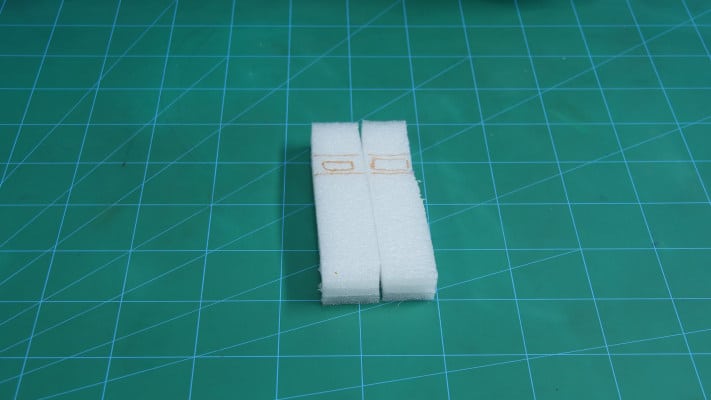
The servo motor and DC motor will be on the same height.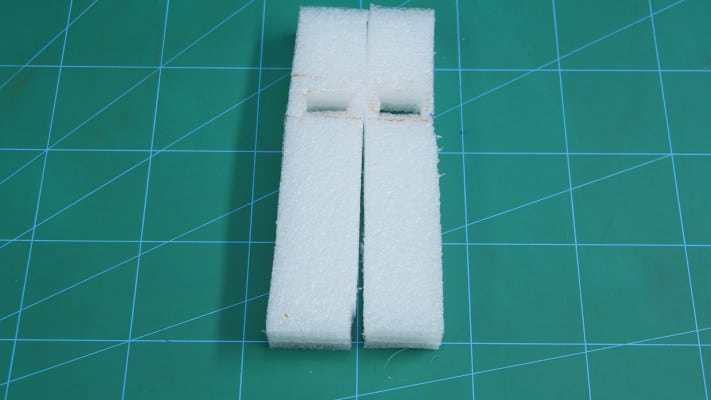
Fix both the motors into their respective holes using hot glue.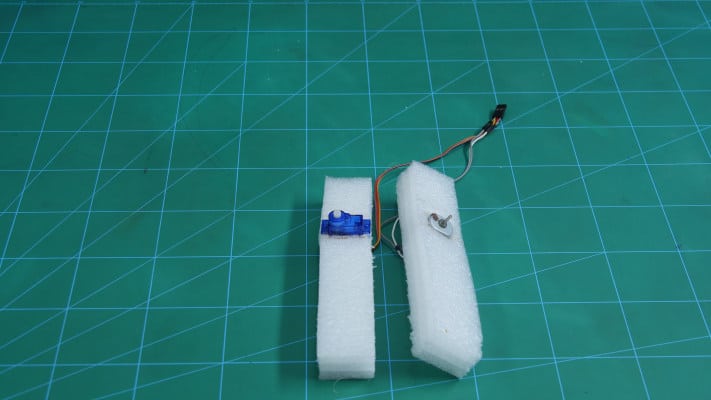
Next, insert the strips into slots on the platform using glue.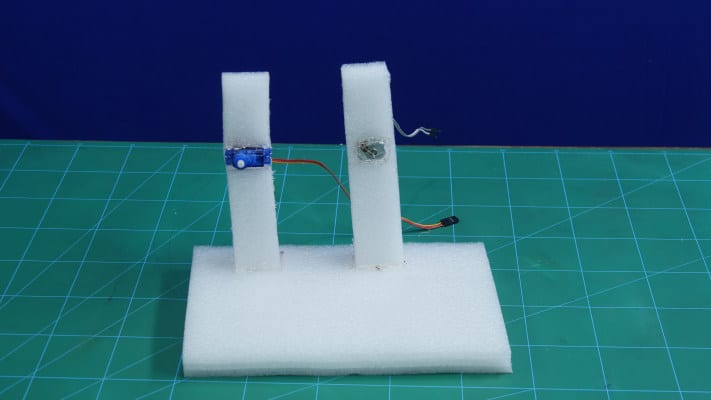
Take the bubble blower and glue it onto the servo horn which you will be fixing onto the servo head.
Then, take a small fan – you can either 3D Print, buy it, or make it yourself using cardboard. Attach the fan to the shaft of DC Motor.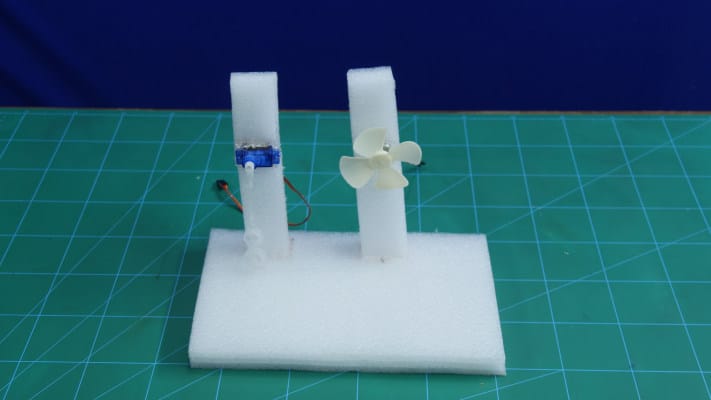
Now, take an empty bowl and fill it with soap solution.
Make sure that the bowl is deep and wide enough for the bubble blower
With this, your assembly is complete.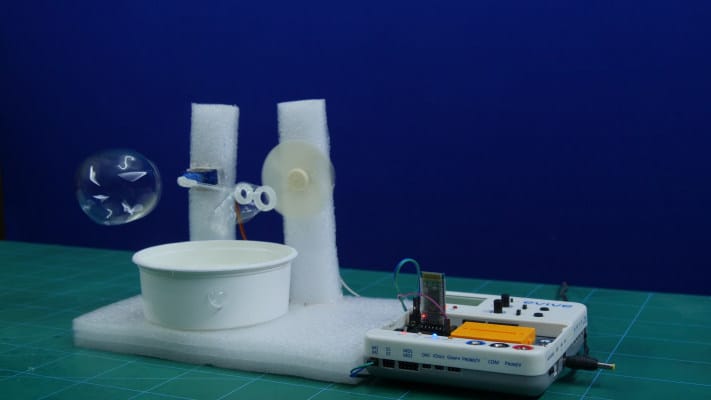
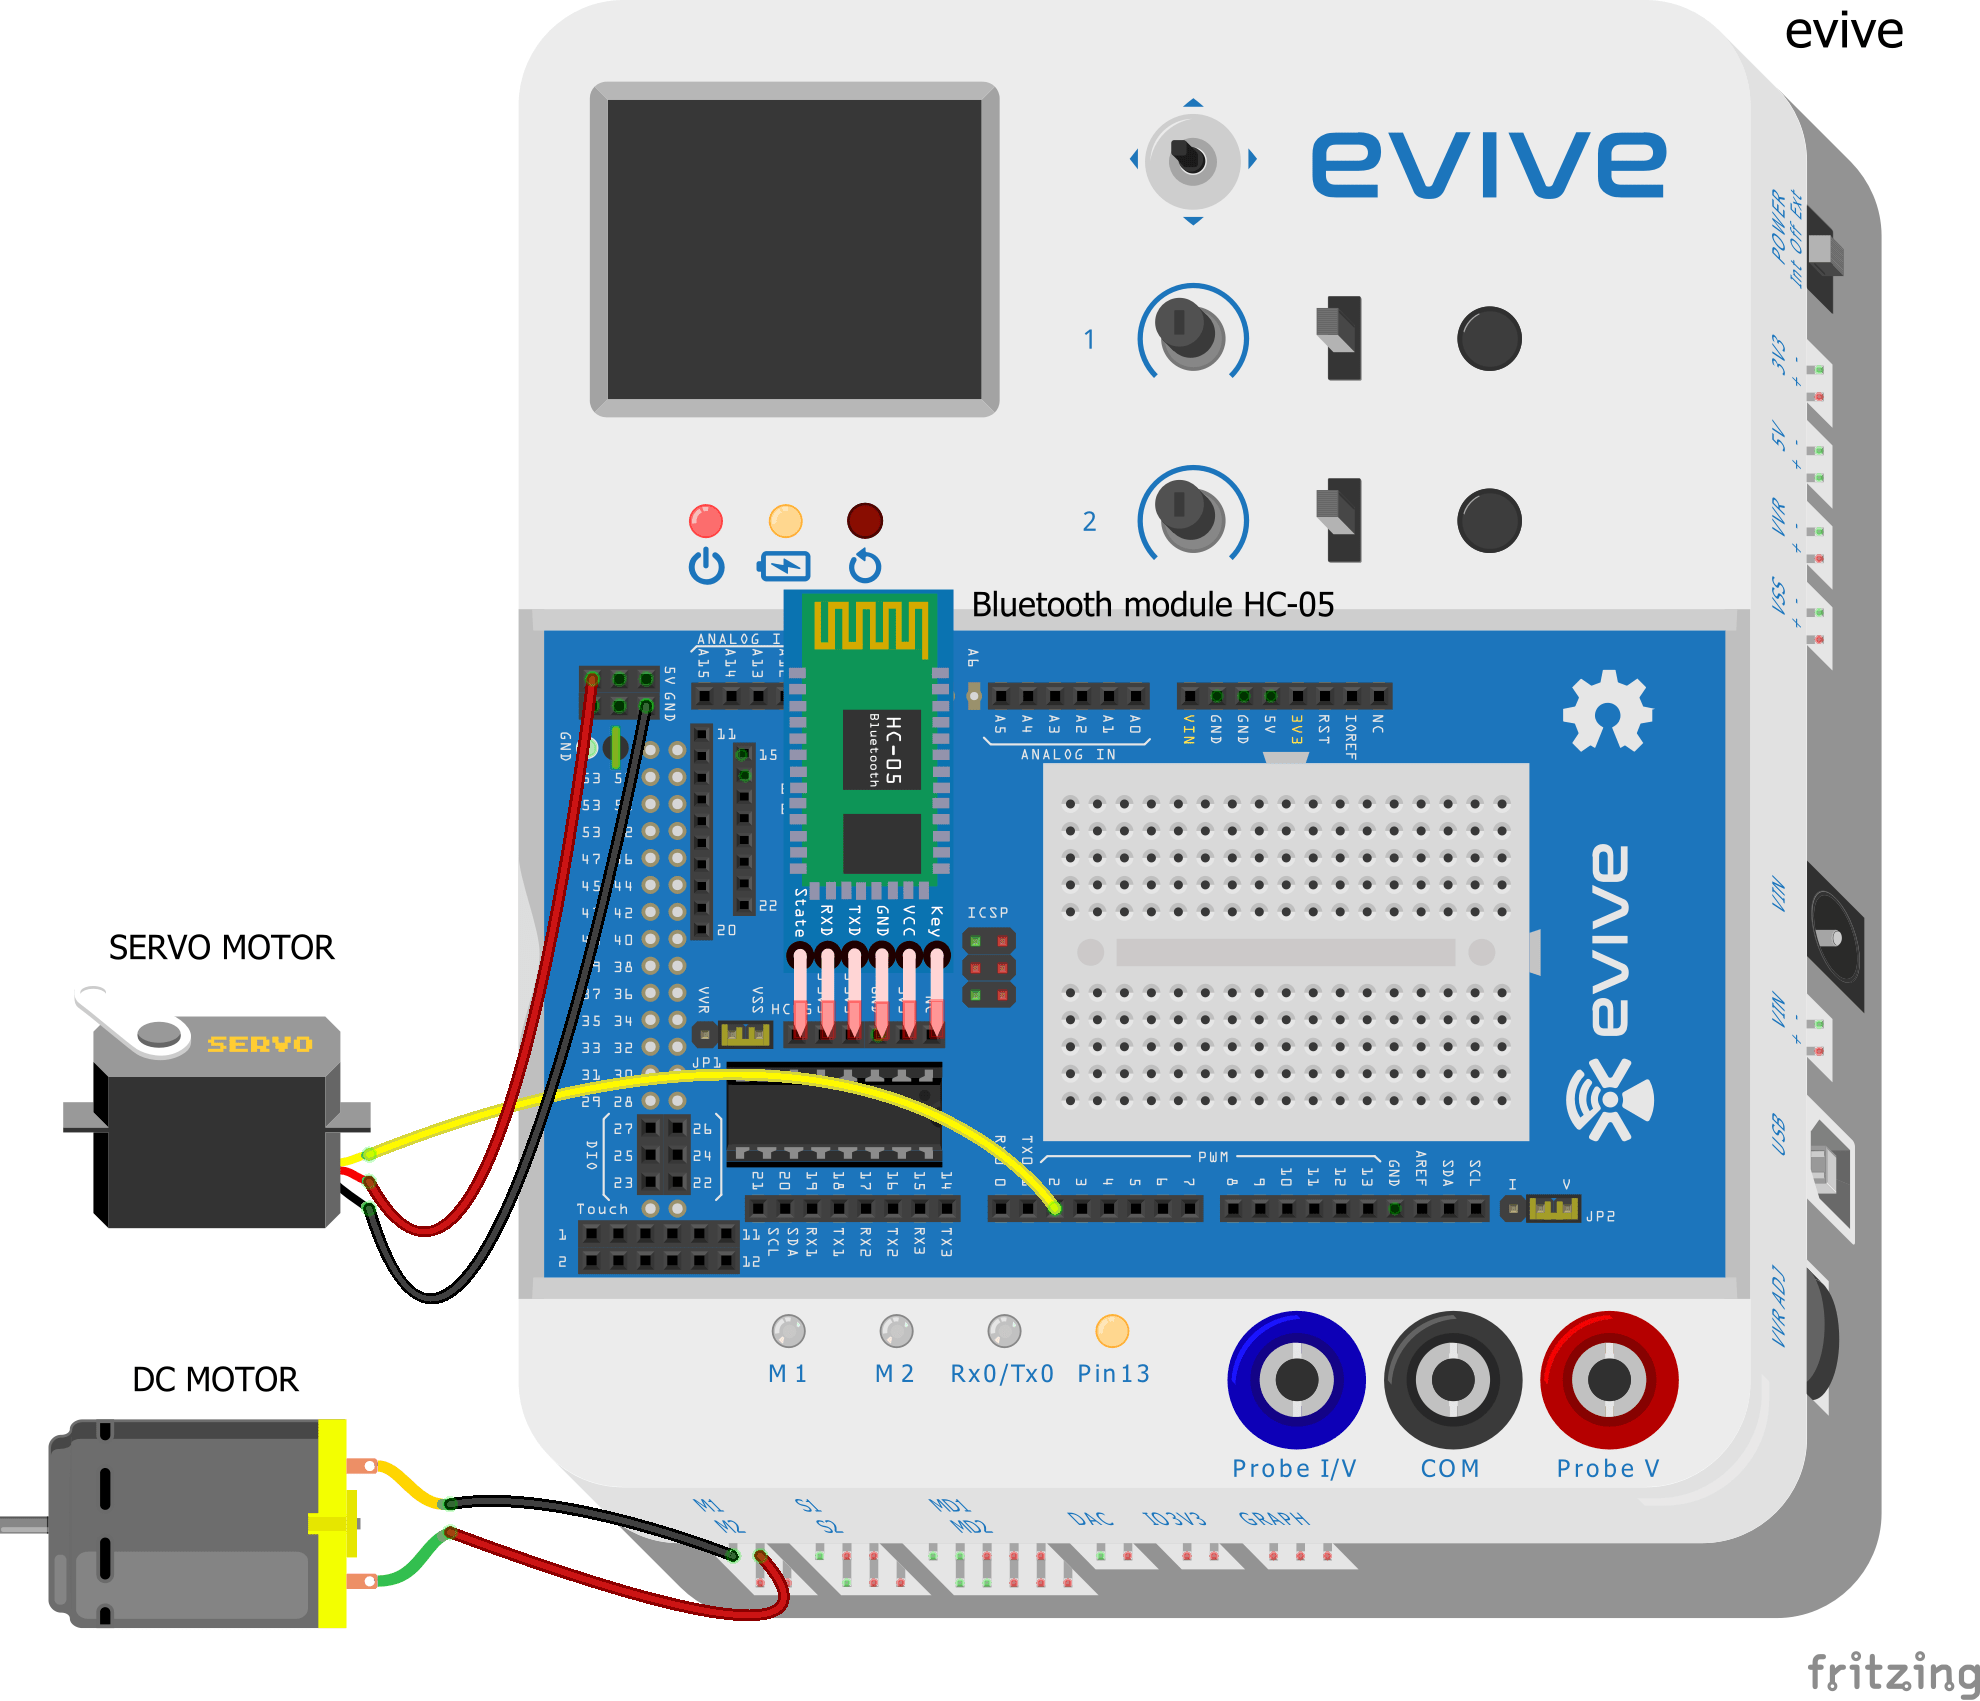
Connection
Make the connections as follows:
- DC Motor – Motor Channel M1
- Servo Motor
- GND – GND of evive
- VCC – +5V of evive
- Signal – Digital Pin 2 of evive
Code
Upload the following code to evive:
Logic
The servo is used to dip the bubble blower in the solution and the DC motor is used to rotate the fan.
We will be controlling both the blower and the fan using Dabble’s ‘Motors’ module.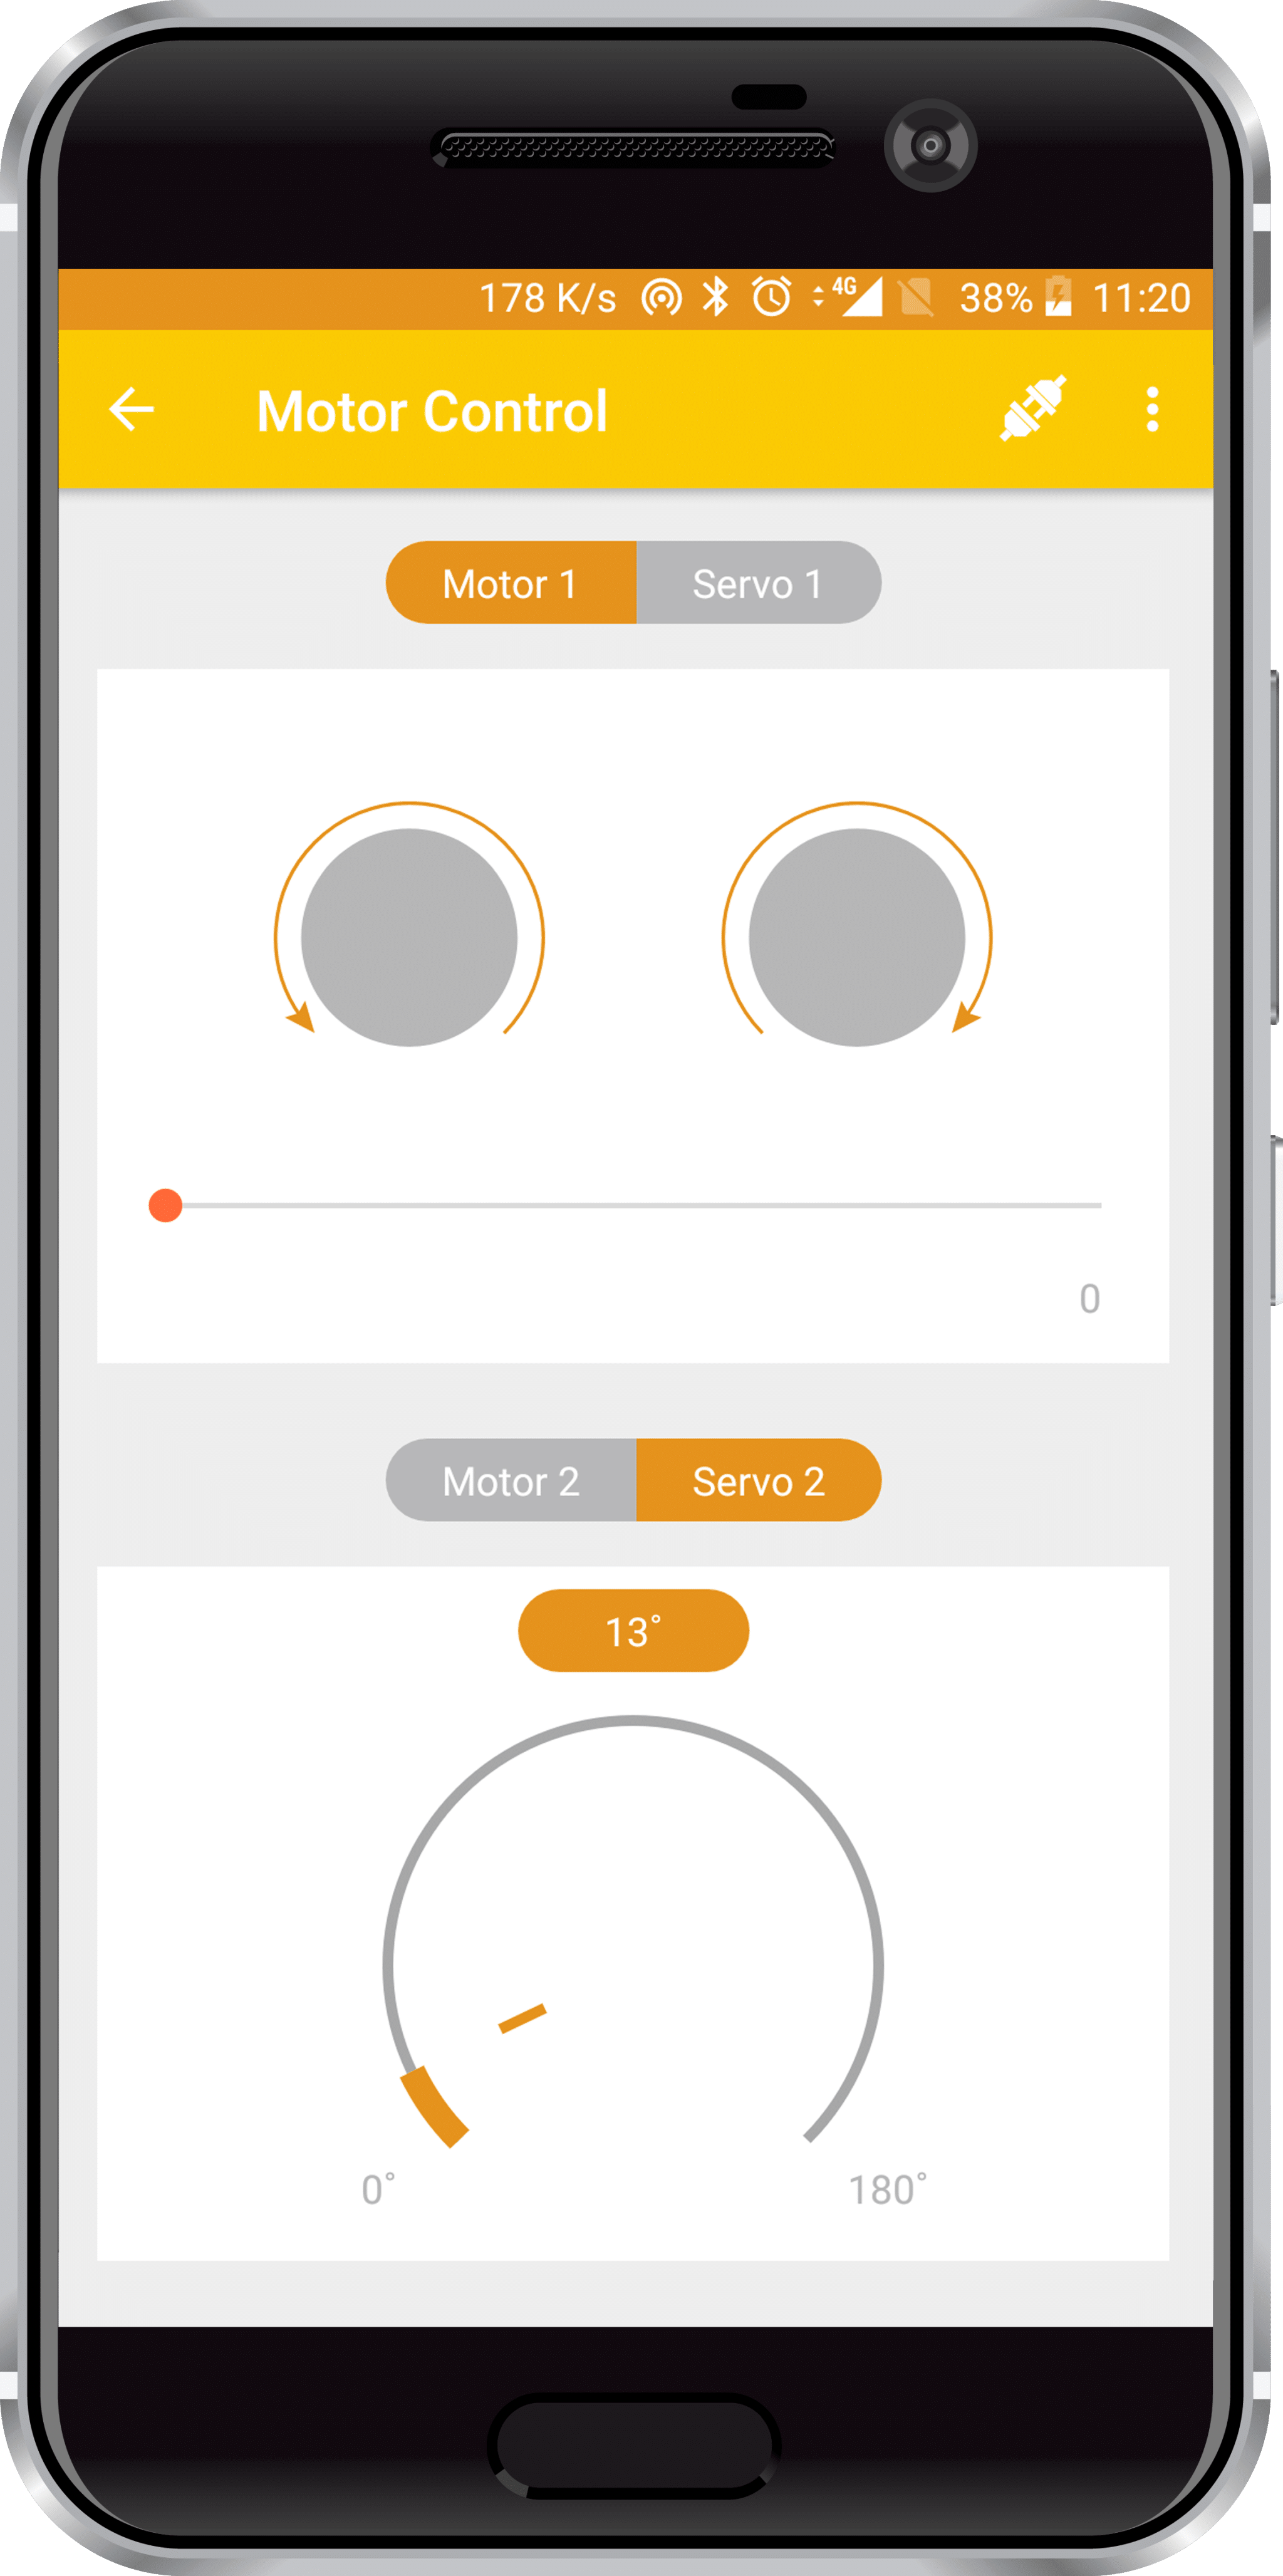
When the bubble blower is initially dipped into the soap solution, the fan will be off.
Turn on the fan using the first nob and control the speed using the slider below.
Next, change the servo angle and bring the bubble blower near the fan using the second nob.
Conclusion
With this, your DIY Dabble-controlled bubble machine is all set to transform everybody into kids. Have fun!


