


Activity Description
In this activity, students will program Quarky to detect a face’s position using the camera and respond with movements. Based on which direction the face is (left, right, or center), Quarky will display a pattern and move accordingly. This teaches camera-based input, angle calculations, and conditional movements.
![]()
Let’s Learn
- Open the PictoBlox application from the Start Menu.
- Select the inviting realm of Blocks as your coding environment.

- Connect “Quarky” to your computer using a USB cable. Then, click the Board button in the toolbar and Select Board as Quarky.

- Next, select the appropriate Serial port if the Quarky is connected via USB or the Bluetooth Port if you want to connect Quarky via Bluetooth and press Connect.
- Click on the Add Extension button and add the Quarky Quadruped extension.
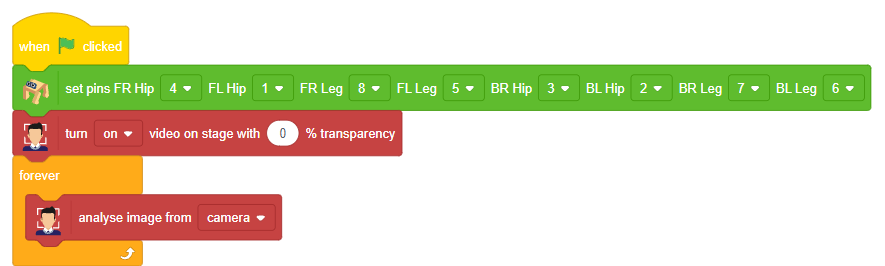
- Add when flag clicked block from the Event Palette. This block helps you to start the script.
- To set up the quadruped, you can drag and drop pins for each leg and hip into the initialisation block using set pins FR Hip () FL Hip () FR Leg () FL Leg() BR Hip () BL Hip () BR Leg () BL Leg () blocks. This block sets which pins on the Quarky controller board control each servo motor for the front right (FR), front left (FL), back right (BR), and back left (BL) hips and legs. Drag this block and set each PIN as shown. FR Hip: 4, FL Hip: 1, FR Leg: 8, FL Leg: 5, BR Hip: 3, BL Hip: 2, BR Leg: 7, BL Leg: 6.

- Turn on the camera video on the stage with 0% transparency so it remains visible.

- Begin a forever loop to keep checking the face’s position continuously.
- Use the analyse image from camera block to start facial recognition.
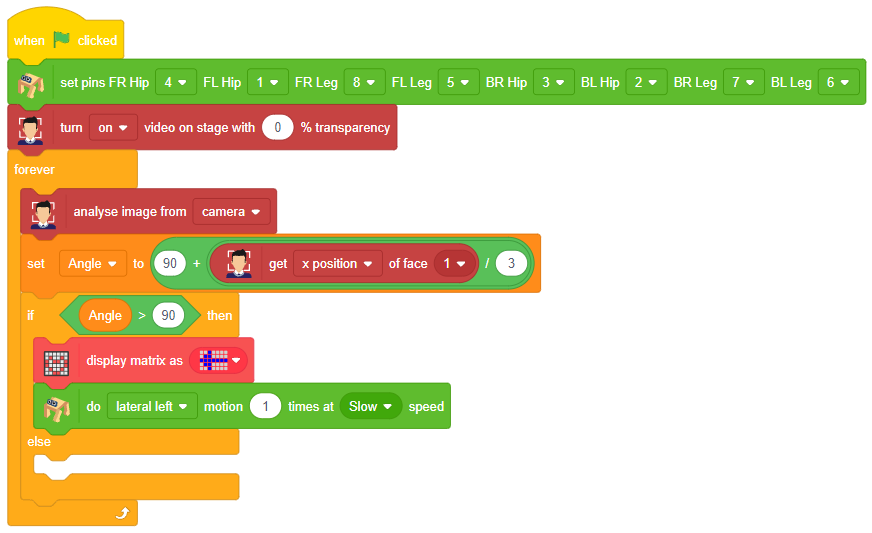
- Declare the Variable ‘Angle’ Place get () of the face () at the first place of addition () + (), and 3 at the second place. From the dropdown, select X position.

- Set the variable Angle by calculating
90 + (x position of face ÷ 3)to decide how far the face is from the center.

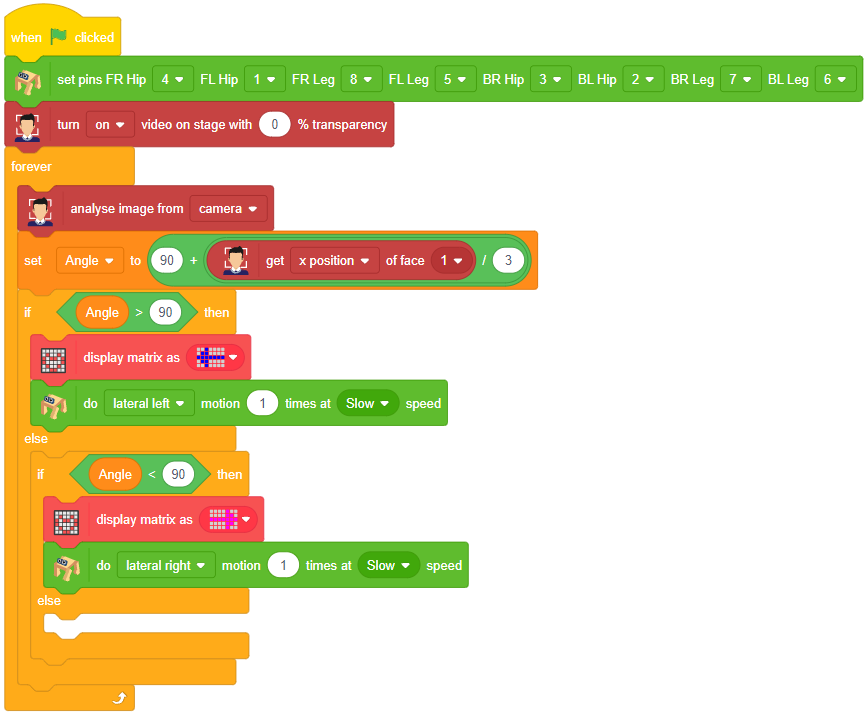
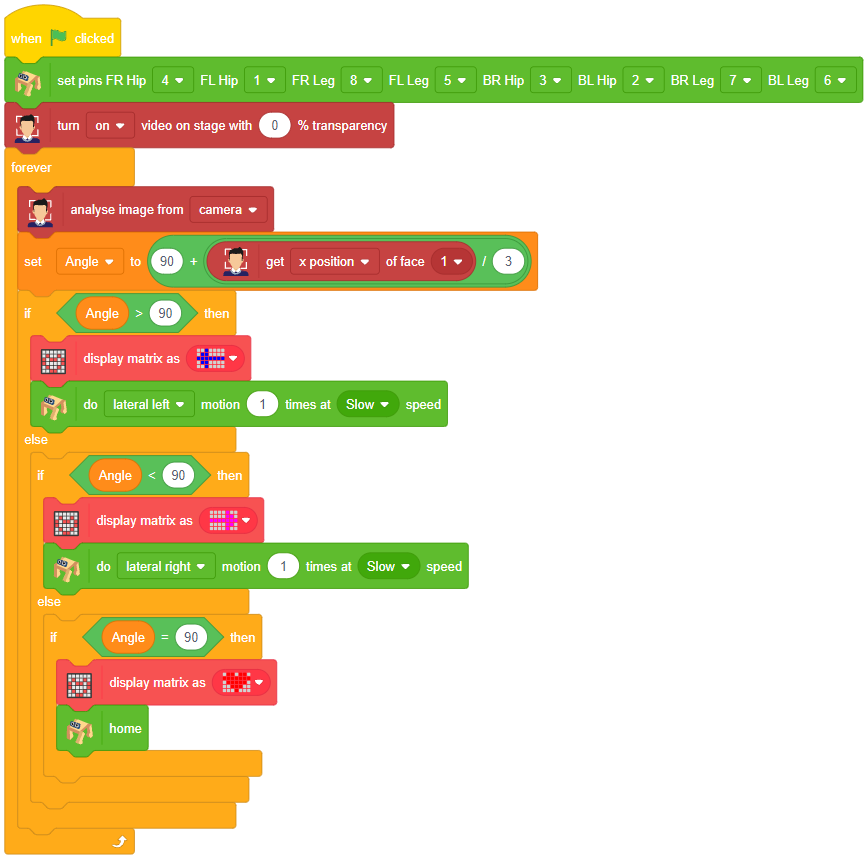
- Use if-else blocks to respond based on the face’s horizontal position: If Angle > 90: Face is on the right side, show a face on the LED matrix and move left using “lateral left” motion.
- Else if Angle < 90: Face is on the left side, show a face and move right using “lateral right” motion.
- Else (Angle = 90): Face is centered, Show a smiley face and move to the home (neutral) position.

Note: Check by changing the angle value and also try to change the icons in the display matrix as L for left and R for right sid directions.
Output
Our next step is to check whether it is working right or not. Whenever your face will come in front of the camera, it should detect it and as you move to the right or left, the head of your Quadruped robot should also move accordingly.
![]()