Introduction
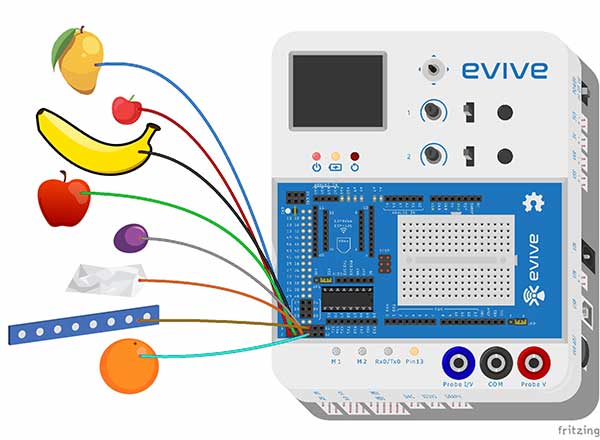
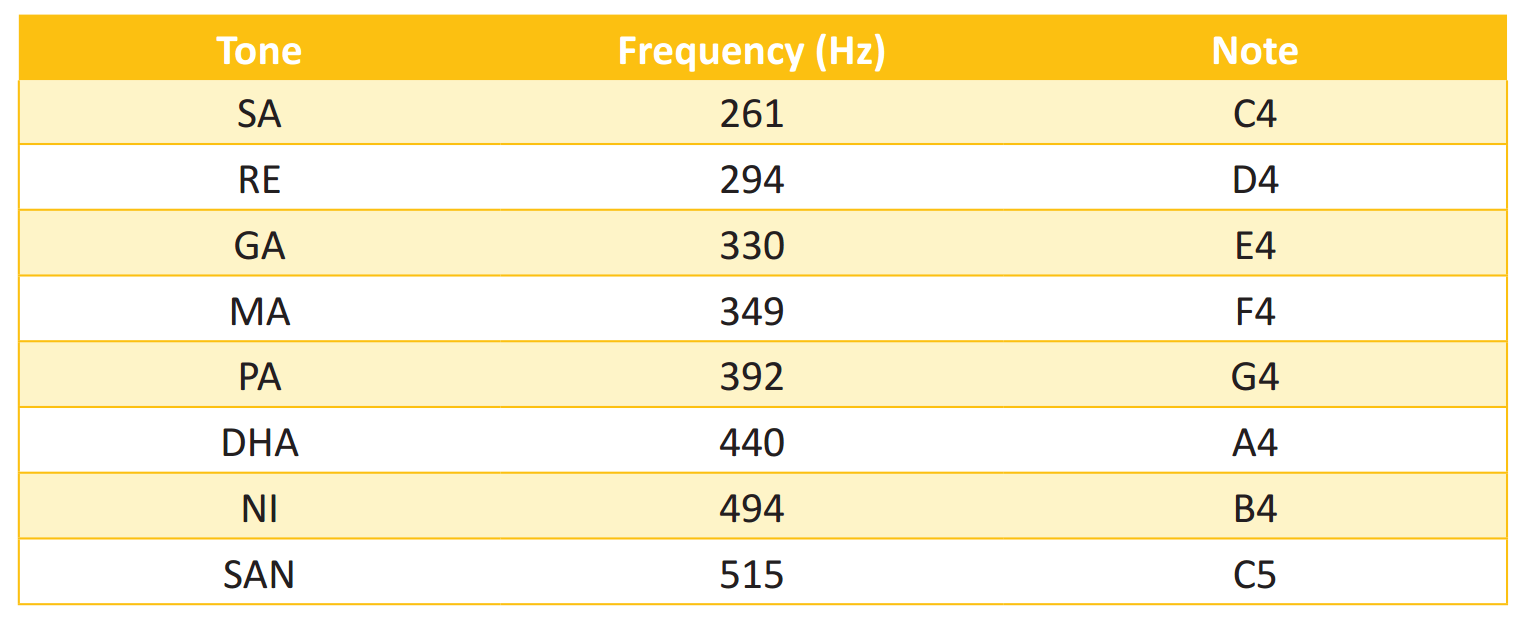
In this project, we will make an eight key DIY piano using capacitive touch. The sound will be generated using a piezo buzzer which is in-built (in evive). We will generate 8 basic tones (Sargam)- Sa, Re, Ga, Ma, Pa, Dha, Ni, San in Hindi. You will need the frequency of each note to make a DIY Piano.
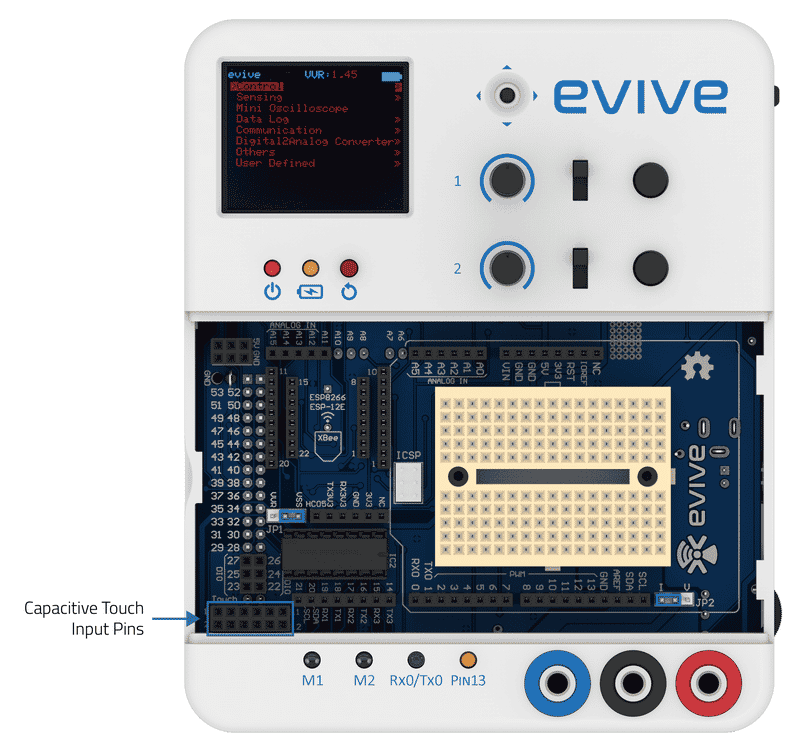
evive capacitive touch input, monitors the capacitance level and notifies the user if the capacitance is above threshold (touched) or below threshold (not touched). You can connect any of these things to make your piano: fruits, vegetable or aluminium foil.
Circuit Diagram
Attach your objects to evive touch input channel 1 to 8.

A Brief About PictoBlox
PictoBlox is a graphical programming software based on Scratch 3.0 that makes learning how to code easy and fun. It allows you to interface and control evive with your computer and even upload code to it.
You can download PictoBlox from here.
PictoBlox has the following extensions that contain special blocks using which you can control evive:
- evive extension: The blocks in this extension allow you to control the inbuilt functionalities of evive such as the tactile switches, slide switches, potentiometer, motors, 5-way navigation key, touch inputs and Real Time Clock.
- Dabble extension: This extension has all the blocks that enable evive to communicate with Dabble.
- Actuators extension: The blocks in this extension enable you to control the actuators such as DC motors and servos connected to evive.
- Sensors extension: This extension allows you to control sensors connected to evive.
- evive Display extension: This extension allows you to control the display on evive screen (change color, font size, and font color), draw shapes, write text, and display values on the screen.
- IoT extension: The blocks in this extension allow you to make IoT-based projects such as home automation, monitoring temperature, etc.
- Lighting extension: This extension enables you to manipulate colors of an RGB LED strip.
- Communication extension: The blocks in this extension allow serial communication.
PictoBlox has two modes in which you can work:
- Stage Mode: In this mode, you can write scripts for the sprite and board and control it in real time. If you disconnect the board, you cannot control it anymore.
- Upload Mode: This mode allows you to write scripts and upload them to your board so that you can control even when it is not connected t your PC/laptop.
In this project, we will work in both the modes – first in Stage mode and then in Upload mode.
Playing The Piano: Stage Mode
First, we will play our fruit piano without writing any script (code). For that, we need to work in Stage mode, which is the default mode in PictoBlox. Follow the steps below for the same:
- Connect evive to your computer using the USB cable.
- Open PictoBlox and select evive as your board from the Board menu. After selecting the board, you will directly be taken to the Extensions window. For the moment, click on Back.
- Select the appropriate COM port from the Connect menu.
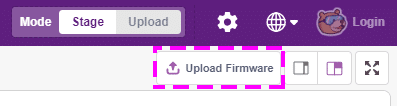
- You can play the piano using only evive using an option named Touch Sensors in its menu. For that, you need to first upload the Firmware; there is an option for the same in PictoBlox. Towards the top-right corner of the screen, you will see three buttons; the left-most button is for uploading the firmware. After selecting the COM port, click on this button. PictoBlox will then start uploading the firmware to evive. Once it is done, disconnect evive.
- Now, from the menu, select Touch sensors. Touch the fruits one by one. You will hear different sounds as you touch them.
Playing The First Note
Piezo buzzers are electrically actuated buzzers, which generate a tone or a sound of a certain frequency. In evive, there is an inbuilt piezo buzzer connected to digital pin 46. In PictoBlox, you have a block in the evive extension that plays tones. Using this block you can play notes of different beats and frequencies, using the buzzer on the selected pin.

Let us now make a small part of our piano, where you will play the ‘Sa’ note (frequency 261 Hz) whenever evive tactile switch 1 is pressed for 0.1s. This time, we will write the script in Upload mode. In selecting Upload mode, the sprite and the stage will disappear. The script is shown below:
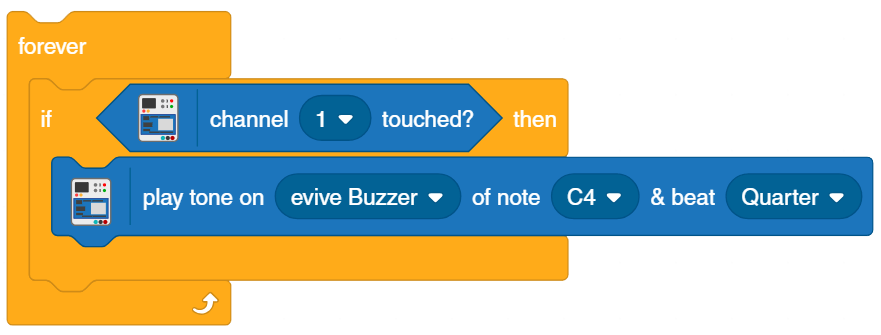
To test the script, we need to upload it to evive. For that, there is a button at the top; it looks similar to the Upload Firmware button. Click on it; PictoBlox will start uploading the script to evive. Once done, you can test it.
Piano Script
Now, we’re going to write the complete script.
As we want to check which touch input is touched continuously, we will use forever block from Control palette.
Now we just have to check if the touch channel is touched; if yes, then evive should play the assigned tone. Below is the complete script:
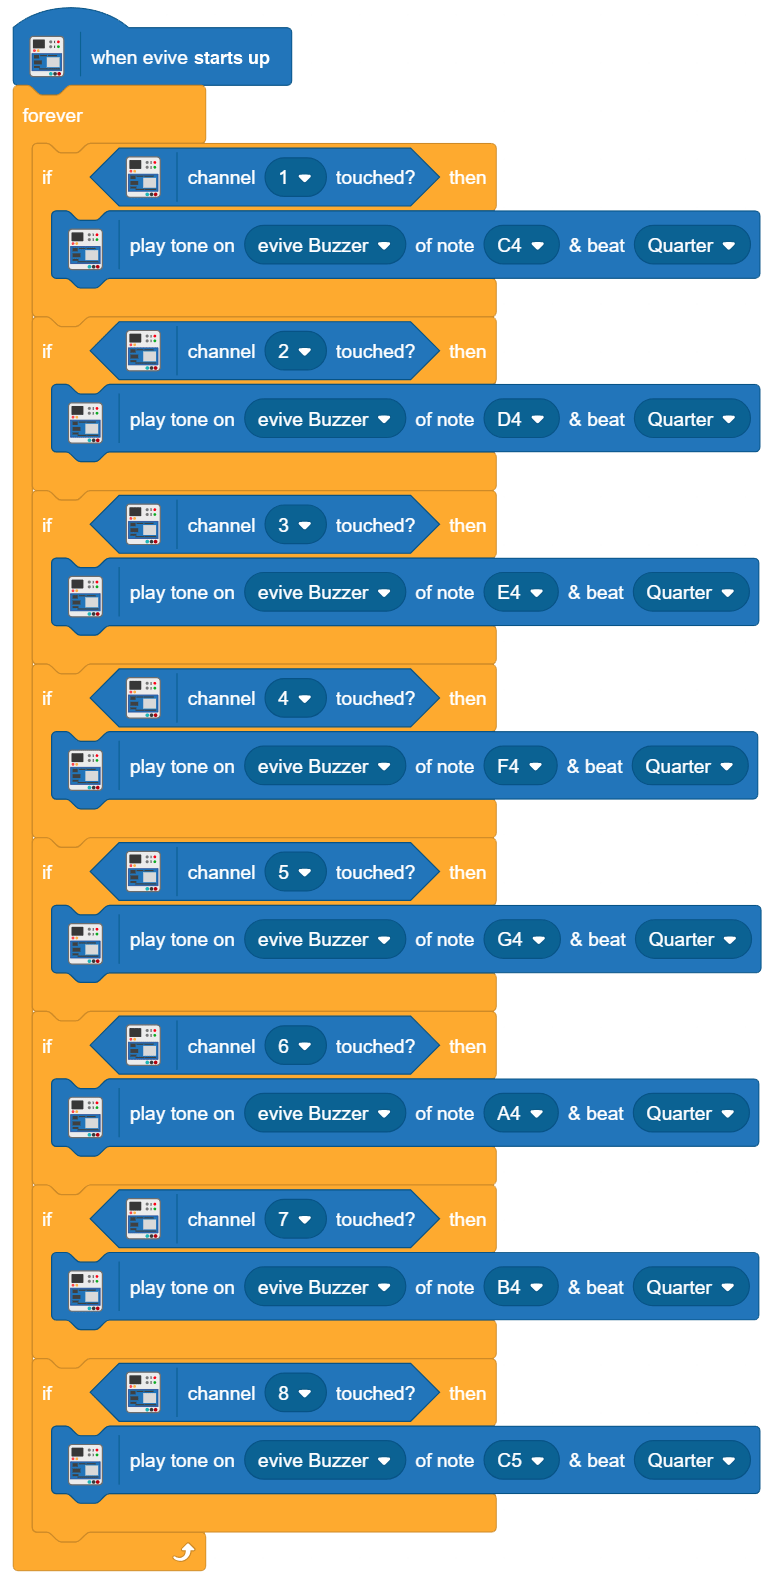
Upload the code in evive and play with your piano!