
Introduction
Ever took the time to wonder how the electricity on which most of our lives depend works? What produces this wondrous thing that has completely transformed the world? You might be surprised to know that a simple yet extremely interesting phenomenon is behind one of the most indispensable aspects of our lives. It is known as Electromagnetic Induction. In this project, you’ll get to learn some of the basic concepts such as what is a magnetic field, magnetic flux, what is a solenoid, and what are Faraday’s laws of electromagnetic induction.
Ready for some fun-filled learning? Let’s begin!
Some Basic Concepts
What is Magnetic Field?
A magnetic field is an area around a magnet in which there is a magnetic force, a force that attracts or repels magnetic objects. An electric field is generated by the stationary object and magnetic field is generated by moving object.
The Fields are generated by the magnet as shown in the below figure: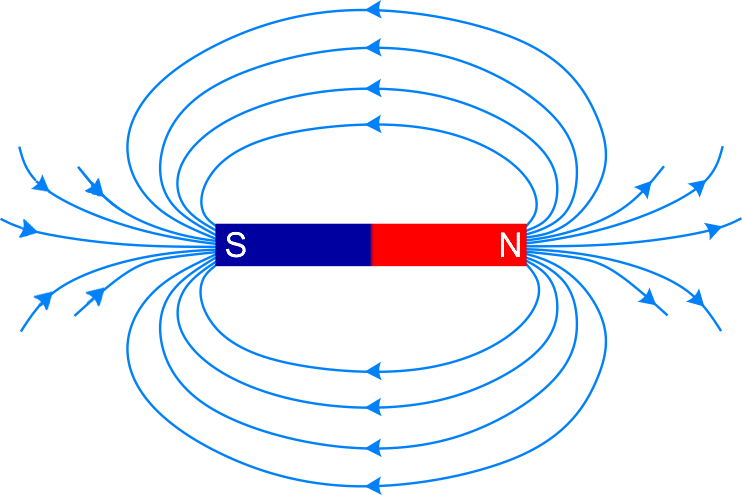
The direction of the Magnetic Field lines is always from North to South. Also, the region, where there are plenty of magnetic lines indicated that there is a strong magnetic force in that region. Whereas, the area with spread out magnetic lines indicated a weaker magnetic force.
What is Magnetic Flux?
Magnetic flux is a measurement of the total magnetic field which passes through a given area such as a closed loop of wire.
The SI unit of flux is Weber (Wb). Every magnetic line adds to some magnetic flux.
One can find the flux as:
Φ=BAcosθ
where,
A is our test area.
B is the magnetic field vector.
is the angel which normal to the surface area and the magnetic field vector.
What is Solenoid?
It is an electromechanical device. In simple terms, a
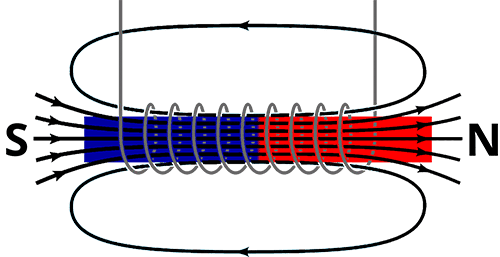
In this project, we are going to make our own solenoid out of the Copper coil and the PVC Pipe.
- Wrap the PVC pipe into any color paper and fix it using glue.
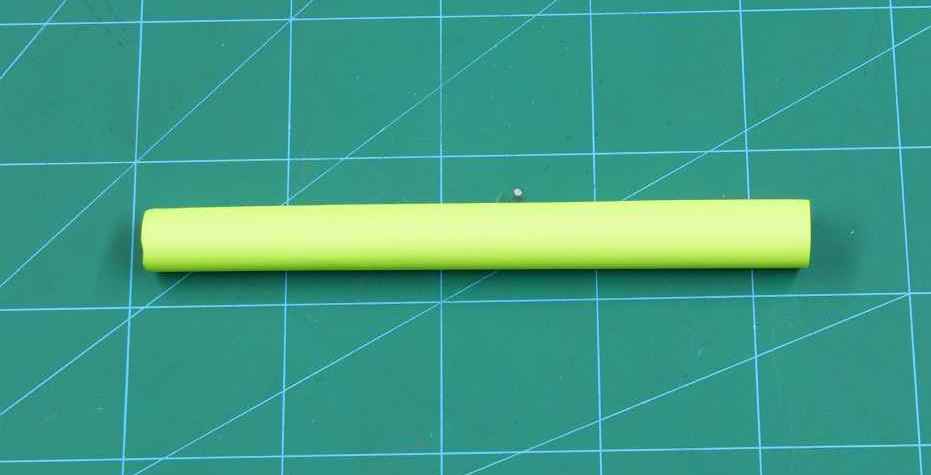
- Once done, wrap the copper wire around it. You can vary the number of turns of the copper wire. Firstly, we have used the solenoid of 100 turns.

Magnetic Induction
According to Faraday’s observation, the relative motion between the solenoid and the magnet generates the Electromotive Force (emf). The reason behind this is the change in the magnetic flux of the coil.
This emf then generates the current into the conductor know as the Induced Current.
The process of inducing an emf in a closed circuit is called Electromagnetic Induction.
Let’s understand the observation by performing an experiment.
Faraday’s Law Experiment
Make the connection as given:
- Connect coil’s one end to evive’s graph (prob V) pin and a second end to graph (ground) pin.
- Make the following changes in the setting of the Oscilloscope:
- Volt/Division: 0.1/s
- Time/Division: 20mv/s
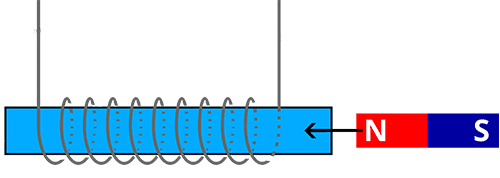
Now take a bar magnet and drop it into the solenoid such that the North Pole enter the solenoid first.
As soon as the magnet goes near to the coil, you may observe that a peak is generated in a positive direction.

Now, take the same magnet again and drop it again, but this time change the direction of the magnet.
You may notice the same graph onto the oscilloscope but in reverse direction.
Now, keep the magnet stationary, you may notice that the graph is flat.
This experiment shows the Faraday’s First Law of Electromagnetic Induction stated in the previous step.
The observations are as follows:
- Magnet at rest in or near the coil: No voltage observed.
- The magnet moving toward the coil: Some voltage measured, rising to a peak as the magnet nears the center of the coil.
- Magnet passes through the middle of the coil: Measured voltage rapidly changes sign.
- Magnet passes out and away from the coil: Voltage measured in the opposite direction to the earlier case of the magnet moving into the coil.
Faraday’s Second Law
Now, let’s understand Faraday’s Second Law.
According to it, the electromotive force generated in the circuit changes with a change in flux linkage. Which can be written as:
e= -N(dՓ/dt).
where,
- NՓ: change in flux linkage.
- N(dՓ/dt): Rate of change of flux linkage.
Negative sign shows the direction of the induced current in the conductor.
Factor Affecting the Change in Flux Linkage
There are a number of factors that affect the change in the flux.
- Strength of Magnetic
- Relative Speed
- Change in Area or the number of turns.
Change in the Speed of the Magnet
To make the comparison, we have placed the coil in the center of the pipe, thus, increasing its distance from the top.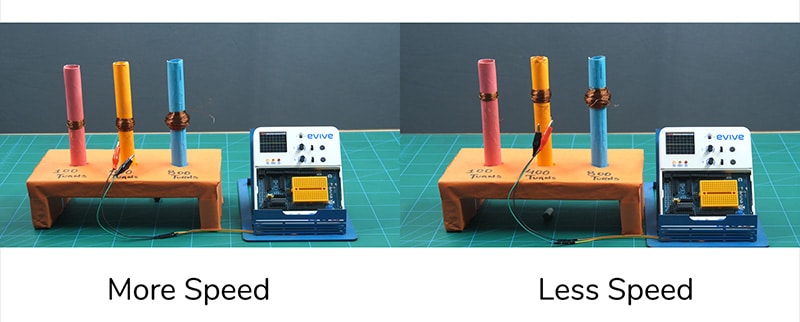
In this case, the speed of the magnet is more when it reaches the coil as compared to when the coil is at the top.
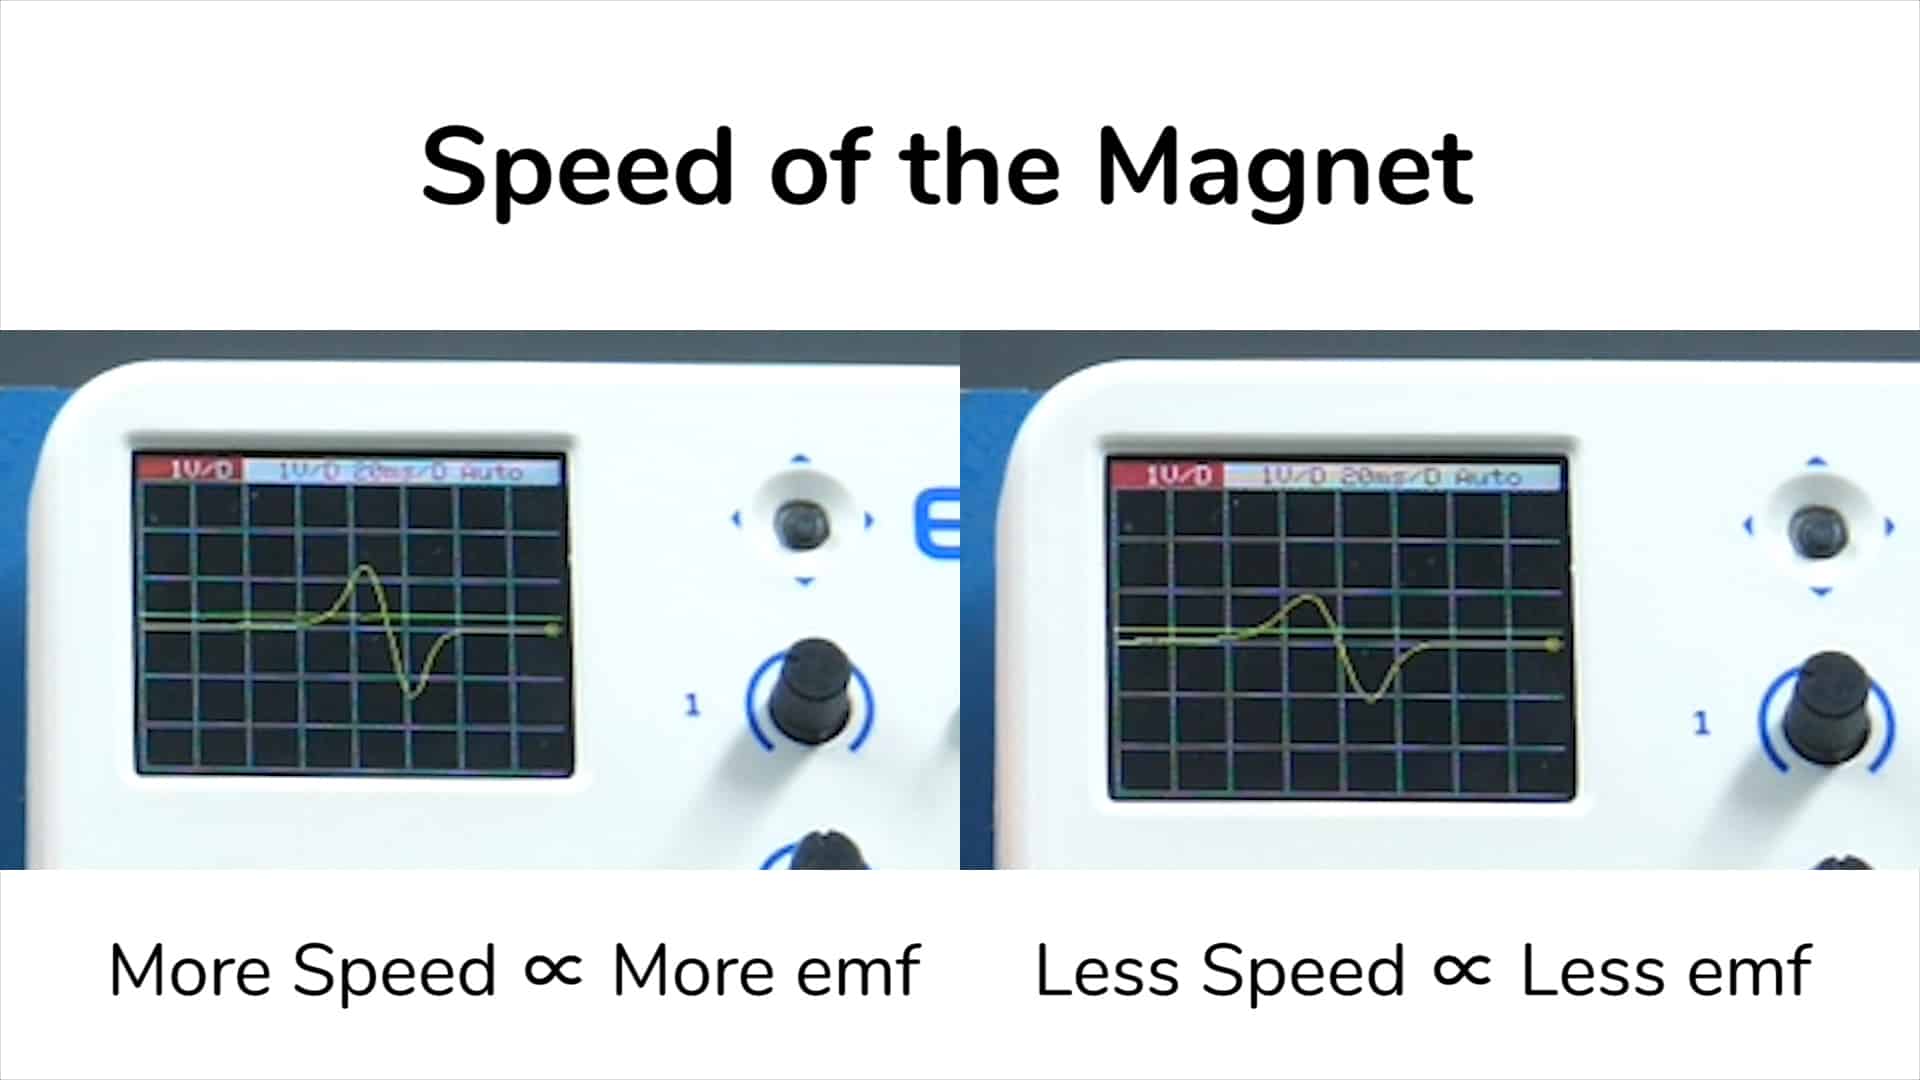
Thus, you may notice the following changes in the graph.
The change in the graph is due to the change in the emf.
As the speed increases the emf of the coil increases and vice-versa.
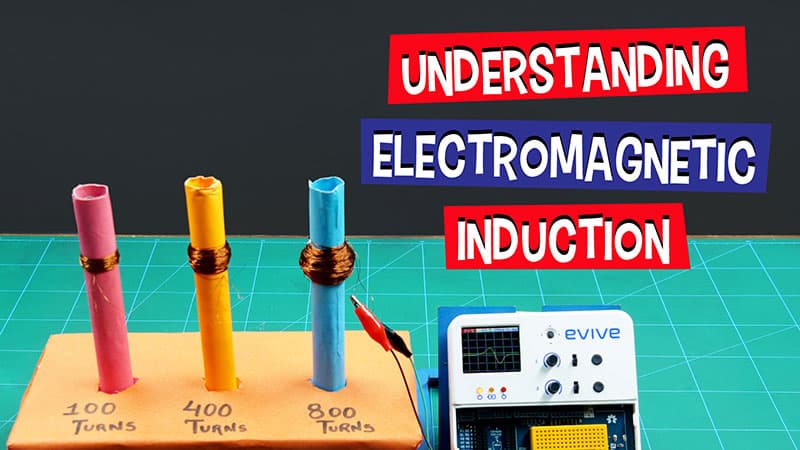
Change in Number of Turns
On changing the number of Turns the graph changes significantly too.
In this experiment, we have solenoids of 100 turns, 400 turns, and 800 turns respectively.
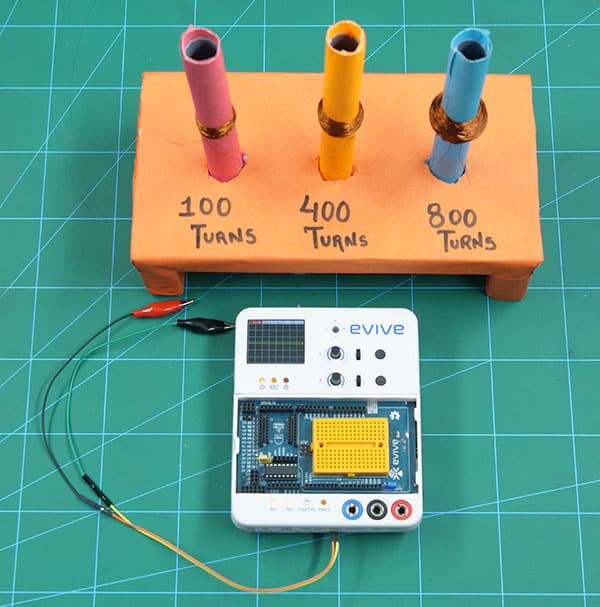
Try comparing the graphs. You notice the following changes:
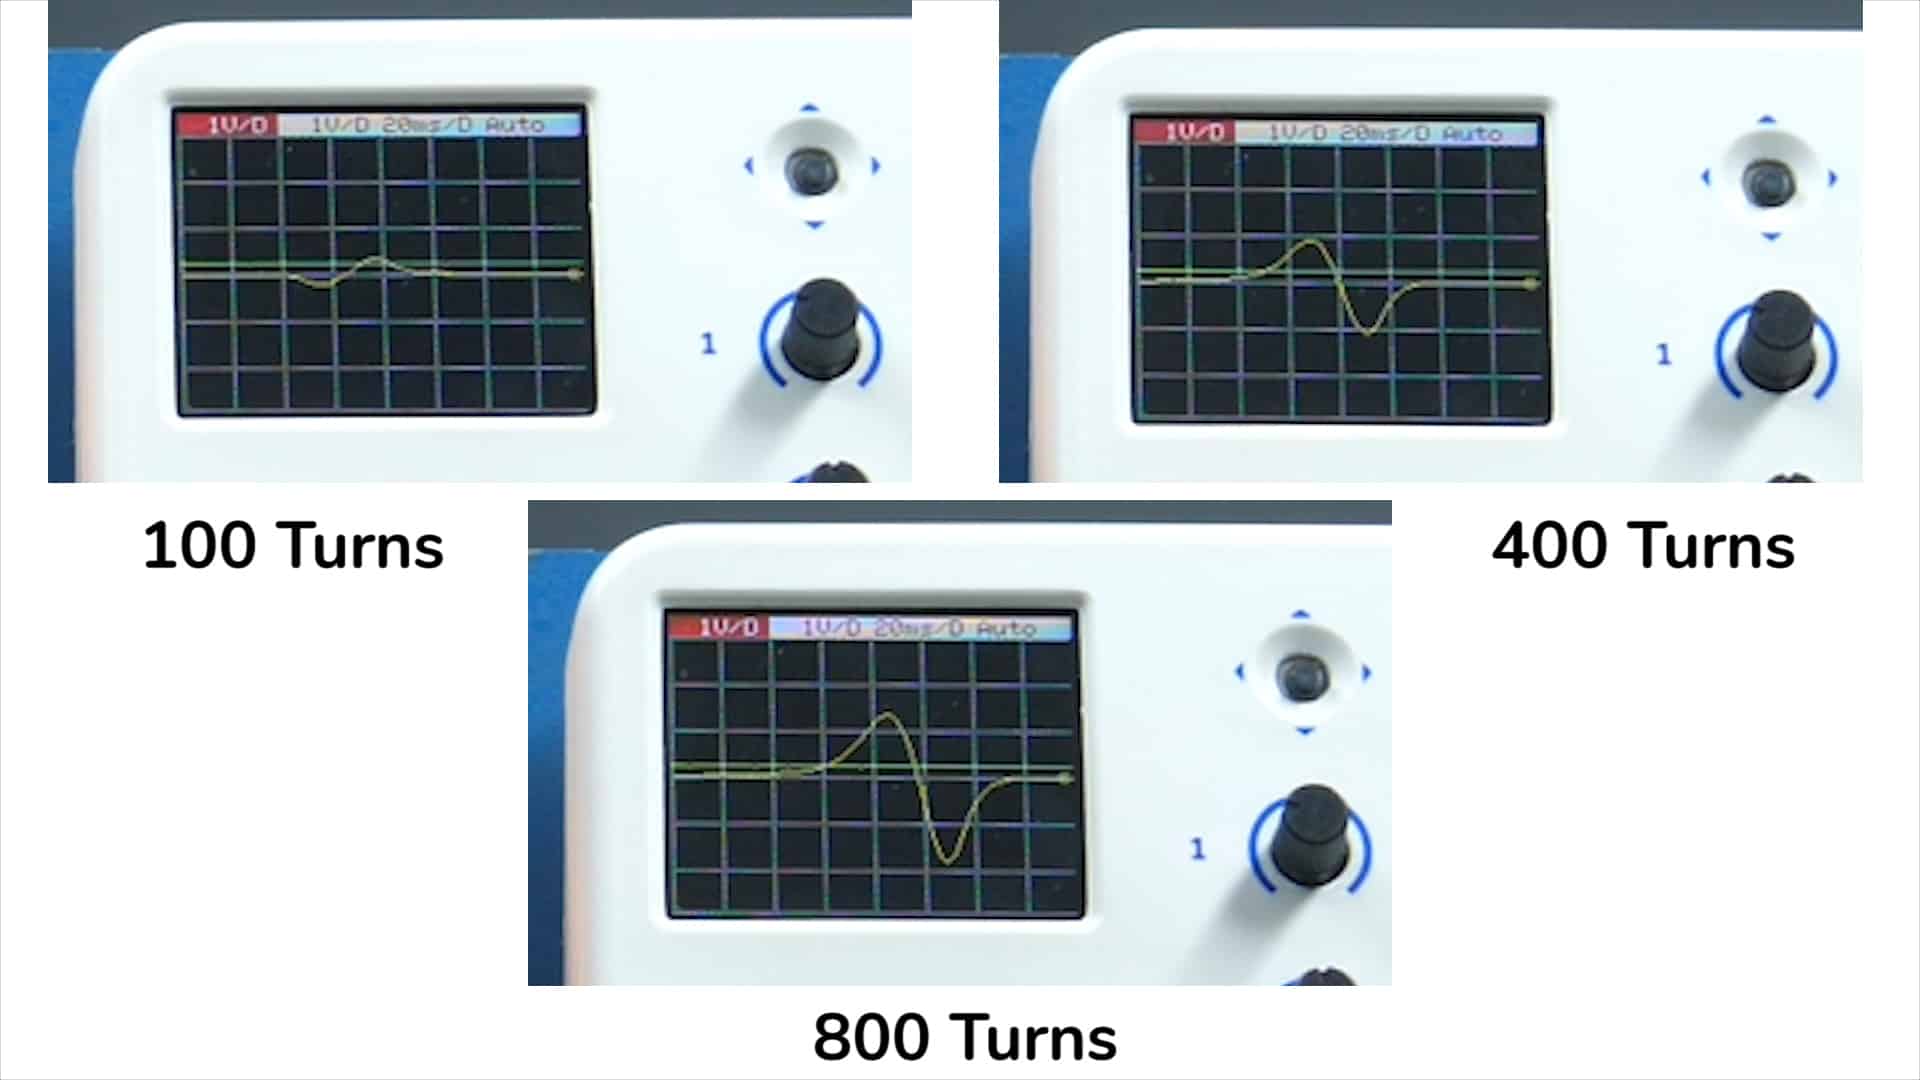
You might notice that for the set-up having 100 turns, a small peak is established whereas for the set-up having 400 turns, a relatively larger the peak is seen. This is because induced emf is directly proportional to the number of turns.
Conclusion
With this, you are now familiar with the basics of electromagnetic induction. You can look up the internet and try other fun activities of the same if you want. Happy tinkering!
PS. As you may know, we’ve been talking about our campaign quite a lot lately. It’s because we’ve put in a lot of efforts to come up with a solution to every DIY needs of makers and STEM enthusiasts like yourself all around the world. And getting positive feedback from known DIYers only strengthens our resolve. So, if you wish to have a look at what we’ve been doing and perhaps take advantage of our campaign, visit HERE!


