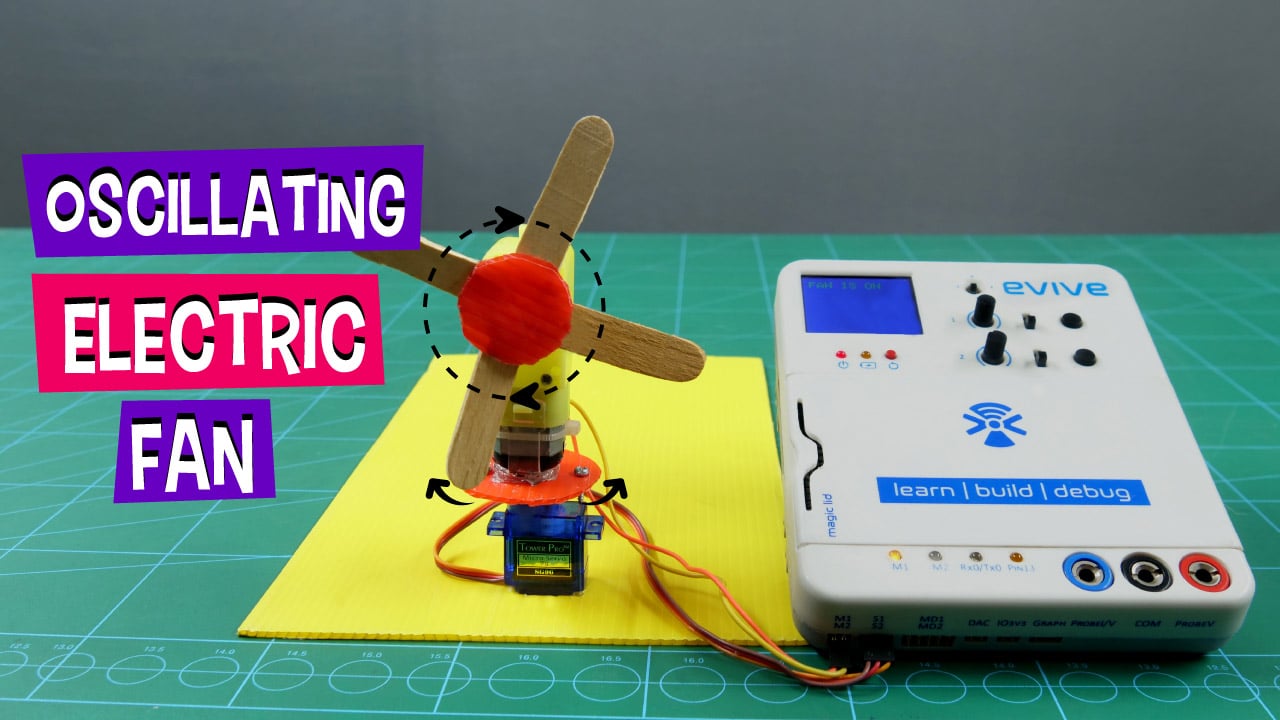

Introduction
Real-world application-based projects are the best for educating students in STEM. And this DIY oscillating electric fan is one of such amazing DIY projects!
The mini DIY oscillating electric fan is similar to the electric table fans that are quite common in offices and at homes and is pretty easy to make. All the components required to the fan are available in the evive Starter Kit and it can easily be programmed in PictoBlox – a Scratch blocks based graphical programming software. You can download it from HERE.
Ready for making your own mini oscillating fan? Let’s begin!
Servo Motor: Reason behind the Oscillation of the Fan
For making the base assembly for the electric fan, that makes all our table fans and wall fans oscillate, as shown in the GIF below.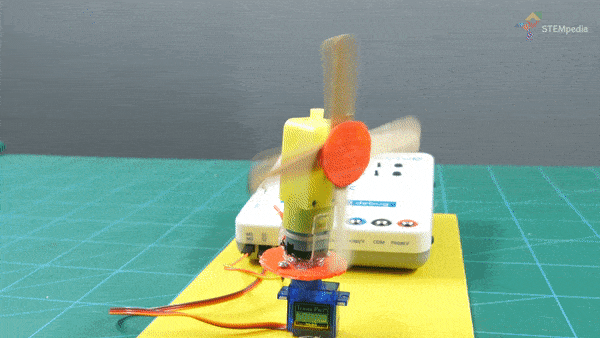
We will be using the servo motor.
Our fan should start oscillating from the center position. Thus, we need to set the servo angle before moving on.
To set the servo angle, we are going to use evive- our all-in-one electronics prototyping device, which has Arduino MEGA 2500 at its core. We are using evive because of its plug and play interface, where we just need to connect our device to its ports and directly control and debug them without writing a single piece of code.
Let’s see how to set the servo angle and test it using our beloved prototyping tool evive
Setting the Servo Angle to 90 °
As the fan will start oscillating from the center, it will oscillate towards left, come back to center, turn to the maximum right and come back to the center again. This completes one entire oscillation of the fan. Thus, we need to set the servo angle to 90°. As it will rotate till 0° to the left and till 180° in the right.
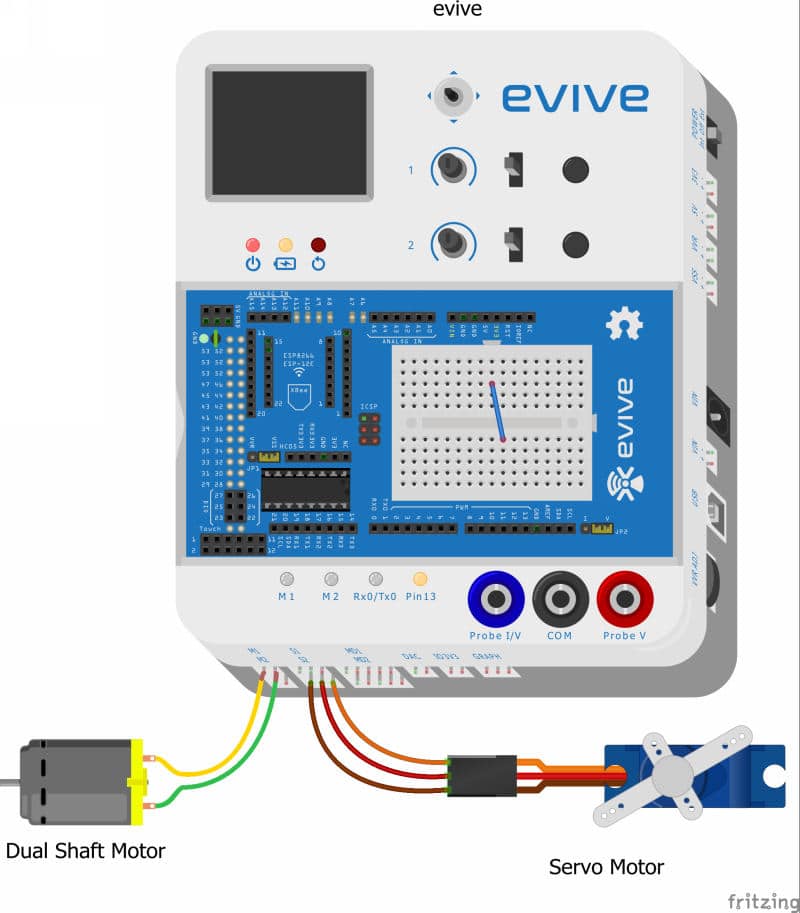
As we are going to use evive’s motor channel 1 for running our dual shaft motor, we will be connecting our Servo to Servo Channel 2 of evive.
- Take a servo motor and connect it to evive’s servo channel 2 or s2 port.
 Make sure that the brown wire of servo motor is connected to the leftmost pin of the Servo Channel.
 - Switch ON evive.
- From evive’s menu, select Controls.
- Navigate to Servos using the navigation key and finally Select Servo 2. As we have connected the servo to S2.
- Now, using potentiometer 2 of the evive set the servo angle at 90°.
Attaching the Servo Motor
We need a base to fix our oscillating fan so that the oscillating movement of the fan gets stabilized.
Take a corrugated sheet of 20cm*15cm approximately to create our base.
Fix the servo motor whose angle we set in the previous step in the center of the corrugated sheet using hot glue.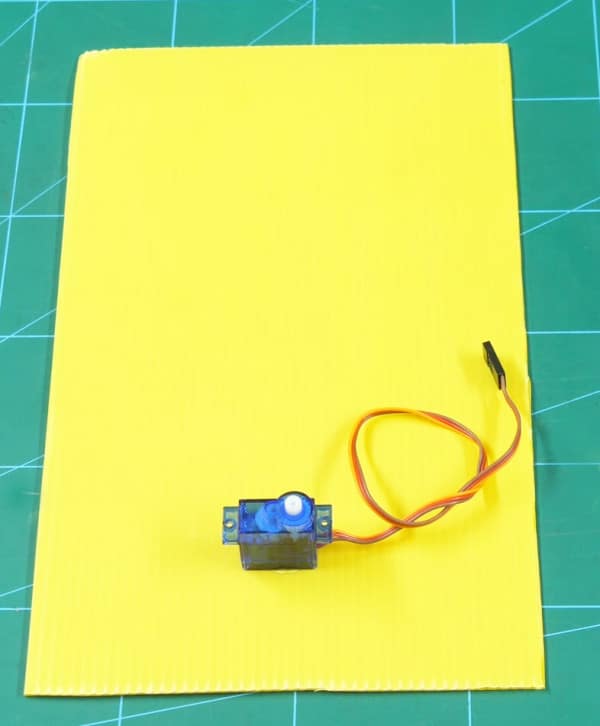
Thus, the main component that will rotate our fan is done. Our entire electric fan assembly will thus be built upon this.
Making the Connector Assembly
As we know there are two separate assemblies in our project, one the oscillating assembly and other the electric fan assembly. Thus, to connect both the assemblies we will be making a small connector (you can name it as you want:)).
To make the connector, we will be using a corrugated sheet.
- Take a small piece of corrugated sheet, and cut out two circular discs one slightly bigger than the other. Make the smaller one of 3cm diameter and the bigger one of 5cm diameter. Why two? The disc with the bigger dimension will act as our connector. You will understand why the second disc was made in the latter steps of the project.
- Take the disc of dimension 5cm and place a double-sided servo horn in the center of the disc.
- We need to attach this servo horn to the connector. Thus, make a hole in the center and two holes on the furthest position of both the side of the horn.
- Once marked, create holes in the corrugated sheet using a sharp object like a board pin or say the tip of the male jumper cable at the places marked.
- Leave the center hole, and fix the servo horn to the disc using servo screws.
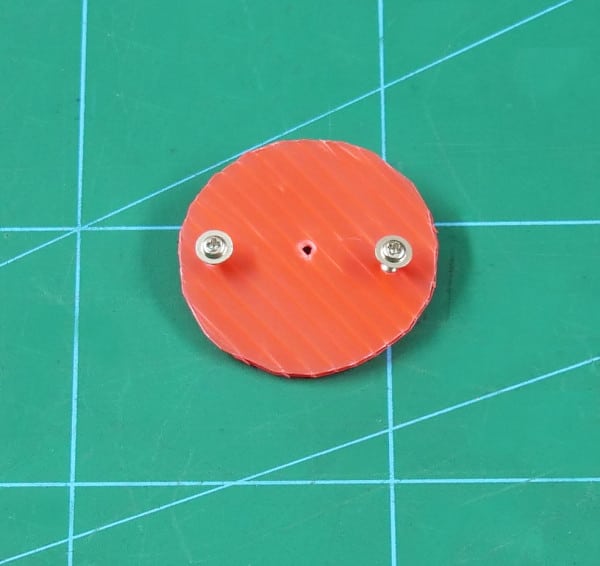
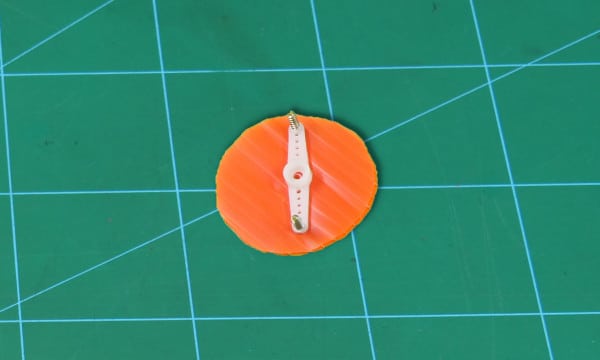
With this the connector assembly is assembly. Now at this point, the only remaining part is the electric fan assembly.
Making the Electric Fan Assembly
Now that the first part of the assembly is completed. Let’s complete the second assembly that is the electric fan assembly or the DC fan assembly.
- Take the dual shaft motor and attach it to the connector at the center of it, where the hole was created.
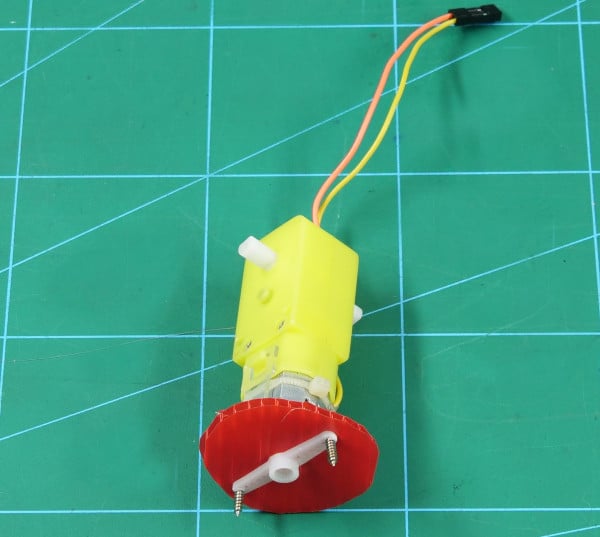
 Make sure that you do not jam the internal motor composition by filling in too much hot glue.
 - Now, that the base of the electric fan is introduced, i.e. the DC motor, it’s time to make the fan blades.
- We are going to use the smaller disc here, as we will be attaching the fan blades to it.
- Take the 3cm disk or smaller disk and 2 ice cream sticks. If you don’t have an ice cream stick, you all know how to get one!
- Create 4 blades of 4 cm from the two ice cream sticks.
- Attach the blades to the smaller disc at an inclined angle using hot glue.
- Finally, attach this blade assembly to one of the two shafts of the DC motor using Hot glue.
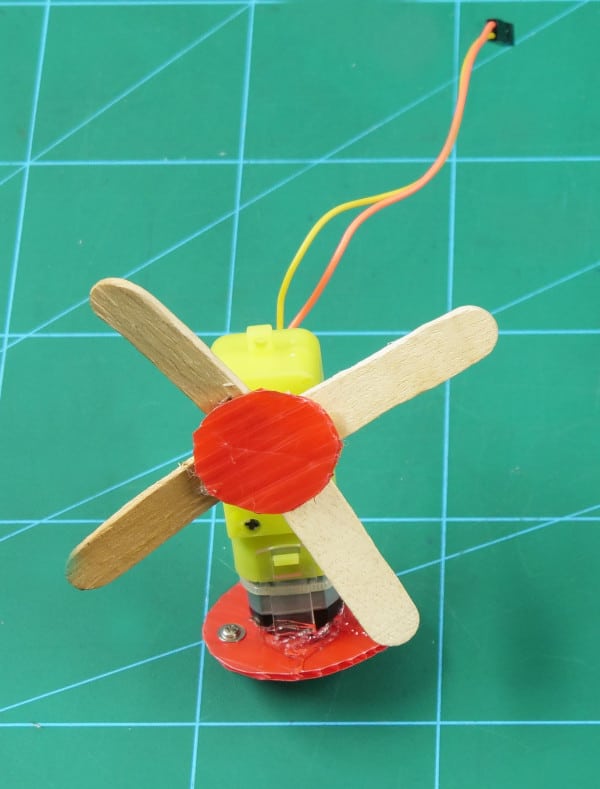
Completing the Oscillating Electric Fan Assembly
Now that all the sub-assemblies of our Oscillating Electric Table Fan is ready, let’s bring them together and complete our project.
Fix the entire electric fan assembly on to the oscillating assembly via connector by connecting the servo horn onto the servo head.
With this, our table fan that oscillates is ready. All you need to do is make some connections and write the code.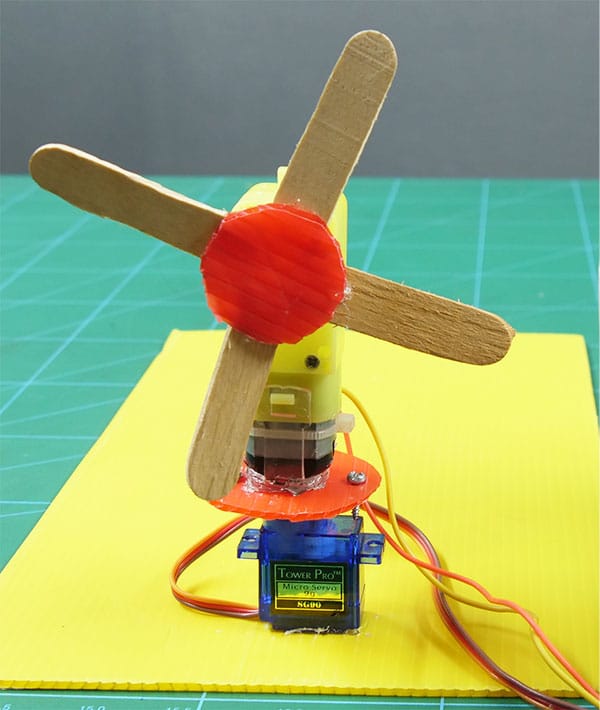
Making the Connections
Let’s begin by connecting the DC motor first. Connect the DC motor to Motor Channel M1 of evive.
Now, let’s connect the servo motor to Servo Channel S2 of evive.
Writing the PictoBlox Code
We will be writing the code in PictoBlox– the graphical programming software based on Scratch, where you can write the entire script by dragging and dropping few blocks.
Let’s understand the program first.
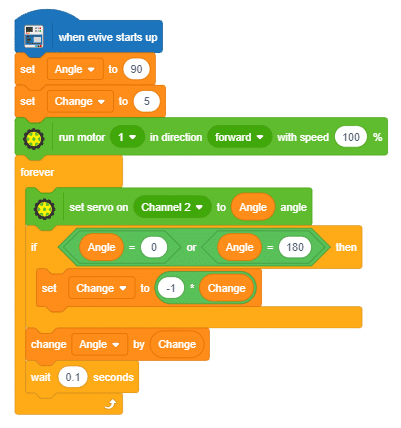
- The program will start executing as soon as evive starts up.
- We would be using two variables Angle and Change to control the angle of a servo motor.
- The angle would be initially set to 90 degrees as servo will start from the centermost position.
- The motor rotating the fan blades would be kept always ON.
- A forever loop is used to create an infinite loop in which the servo would provide the oscillating/rotating action to our fan.
- As servo motor works between 0-180 degrees we would need to create limits for our servo motor.
- The if block would monitor the extreme limits so that when either of limits is matched we multiply the change factor with -1 so it would result in a switch between increment and decrement.
- When angle would be equal to 180 then it would start decrementing like 180,175,170,165……..and when angle would reach 0 degrees it would start incrementing 0,5,10,15,20………. as this happens in forever loop it would run continuously.
- We change the value of variable “Angle” by the value of variable “Change” each time our infinite loop is executed.
Conclusion
With this, your DIY oscillating electric table fan is now ready!


 I Aradhya Gupta I 7th I DL DAV Model School SB I CODEVOUR 2022 2-16 screenshot")


