Tutorial Video
About Object Detection
The Object Detection extension of the PictoBlox Machine Learning Environment is used to detect the objects present in a given picture.
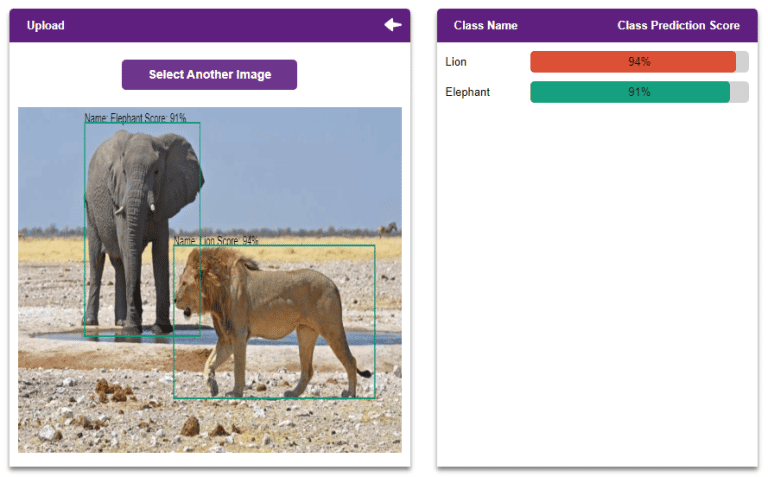
To train an Object Detection model, we need to ensure that the training samples are annotated. That is, target objects are enclosed in bounding boxes, and each bounding box is labeled with the corresponding class.
For this project, we’ll be constructing a model that can identify three different Quarky robot configurations:
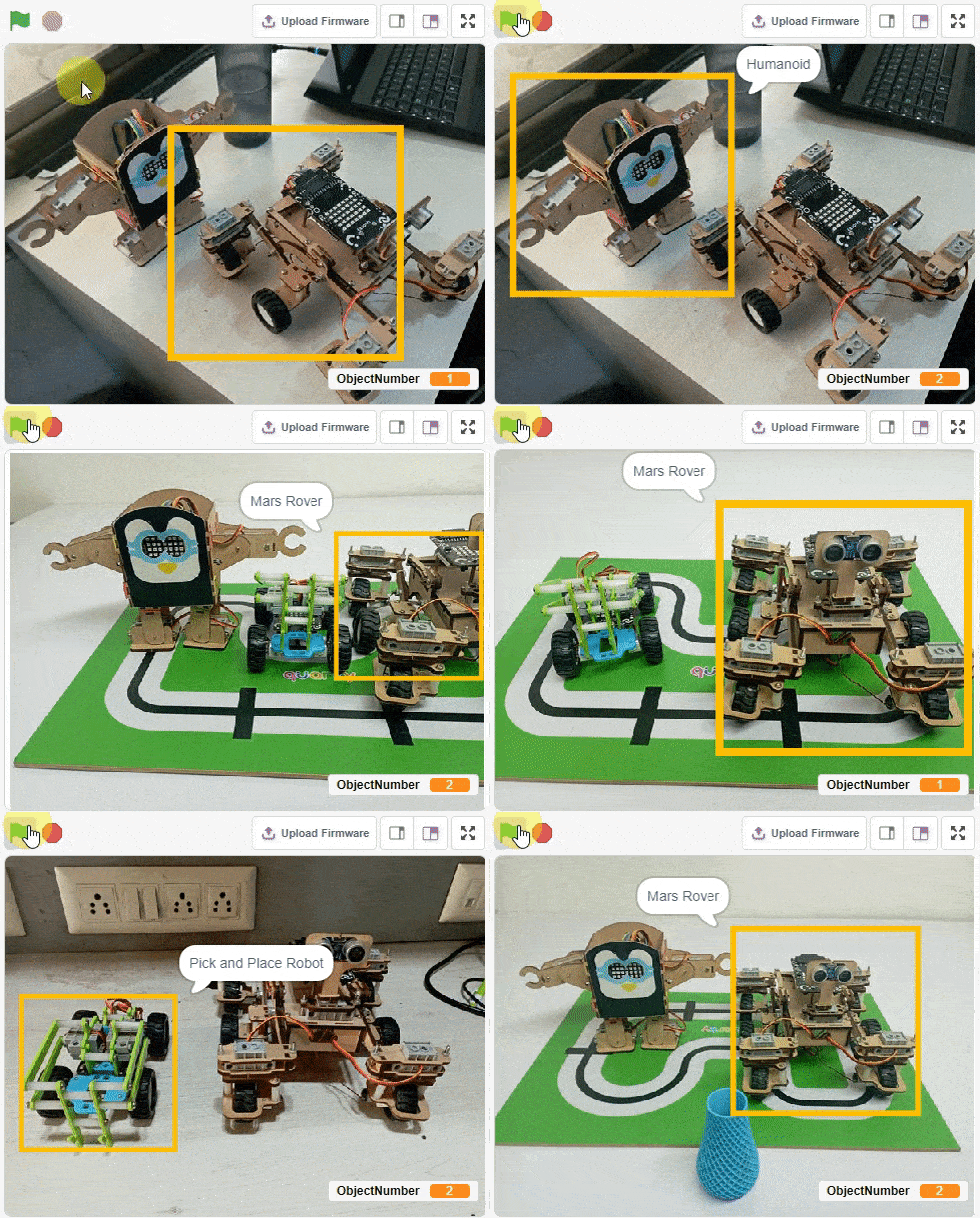
- The Mars Rover
- The Pick and Place Robot
- The Humanoid Robot

The steps required in this project are as follows:
- Setting up the environment
- Gathering the data(Data collection)
- Annotating the data
- Training the model
- Evaluating the model
- Testing the model
- Exporting the model to PictoBlox
- Creating a script in PictoBlox
Opening Image Classifier Workflow

Follow the steps below:
- Open PictoBlox and create a new file.
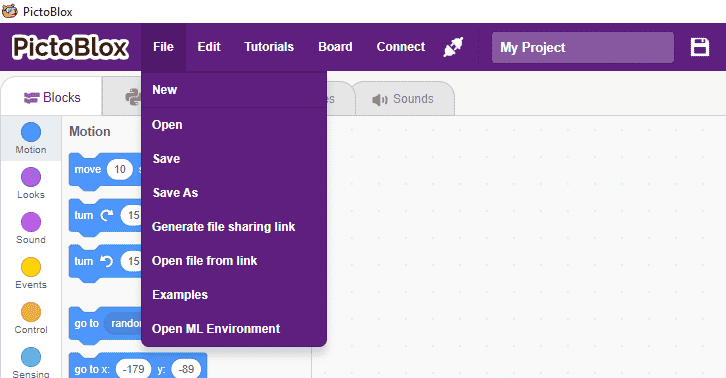
- Select the appropriate Coding Environment.
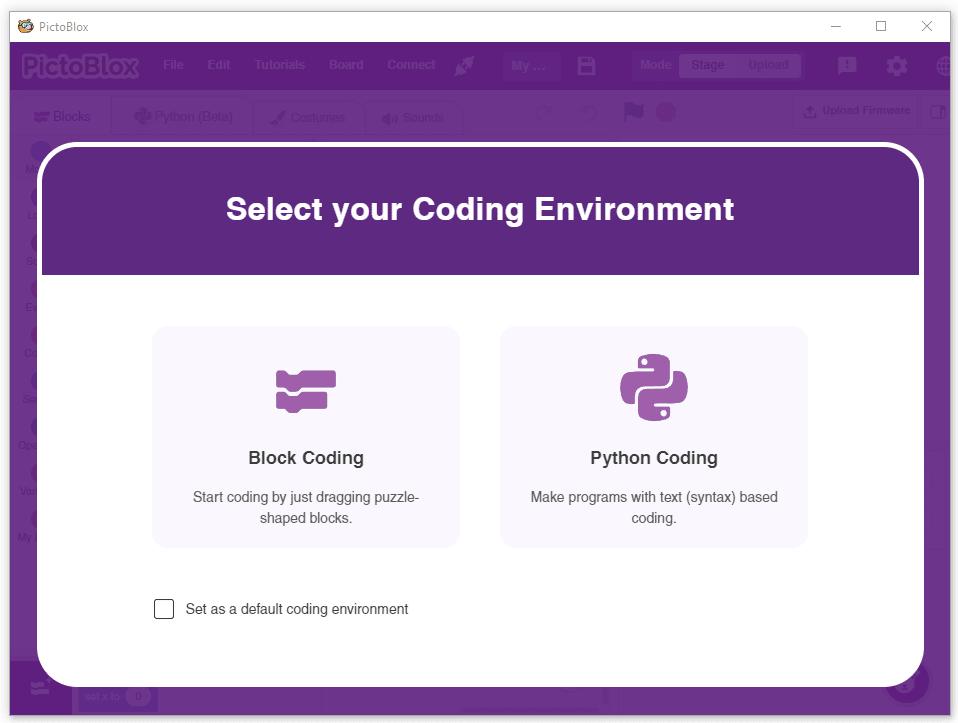
- Select the “Open ML Environment” option under the “Files” tab to access the ML Environment.

- You’ll be greeted with the following screen.
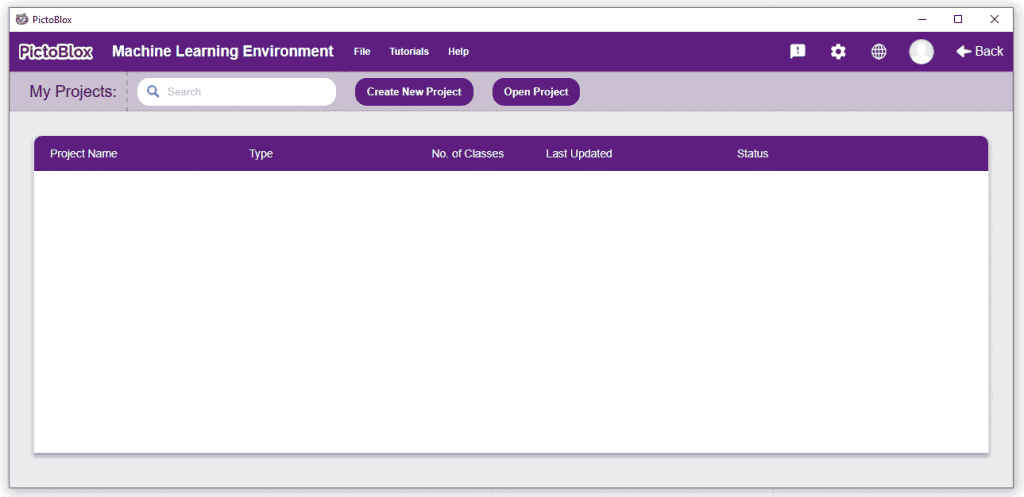 Click on “Create New Project“.
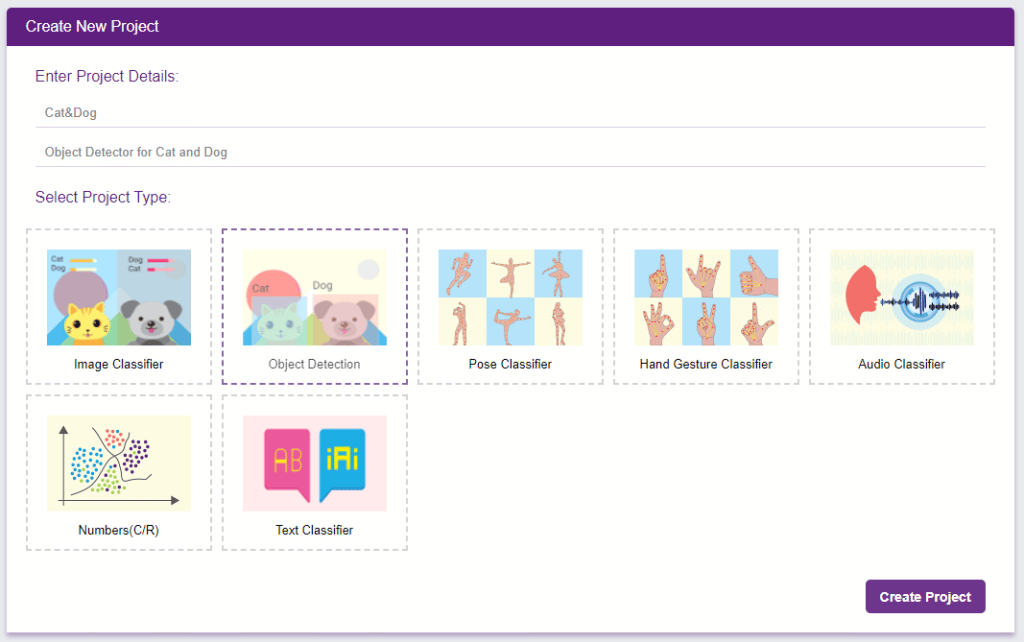
 - A window will open. Type in a project name of your choice and select the “Object Detection” extension. Click the “Create Project” button to open the Object Detection window.
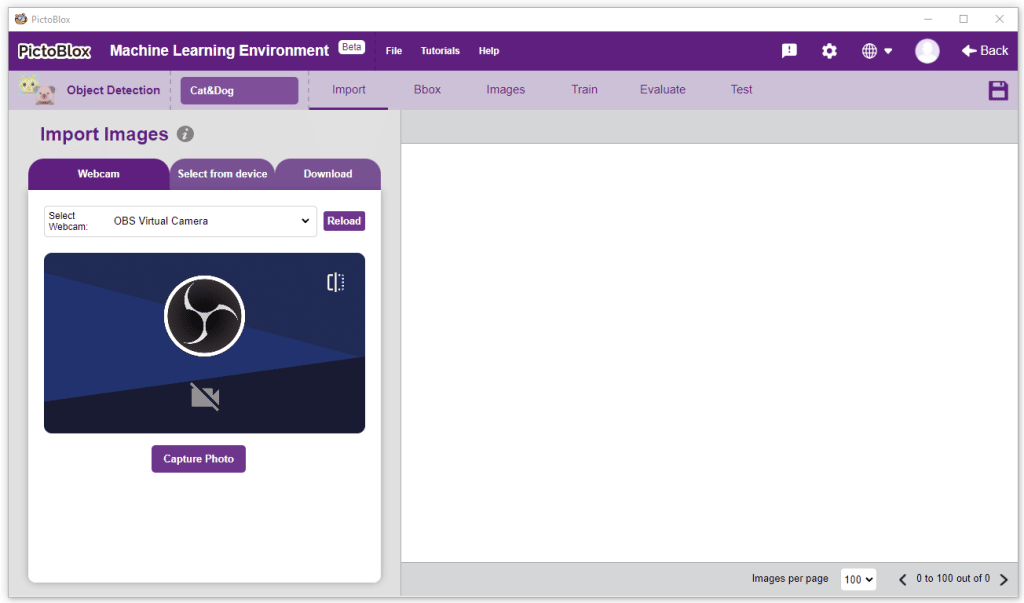
- You shall see the Object Detection workflow with two classes already made for you. Your environment is all set. Now it’s time to upload the data.
Collecting and Uploading the Data
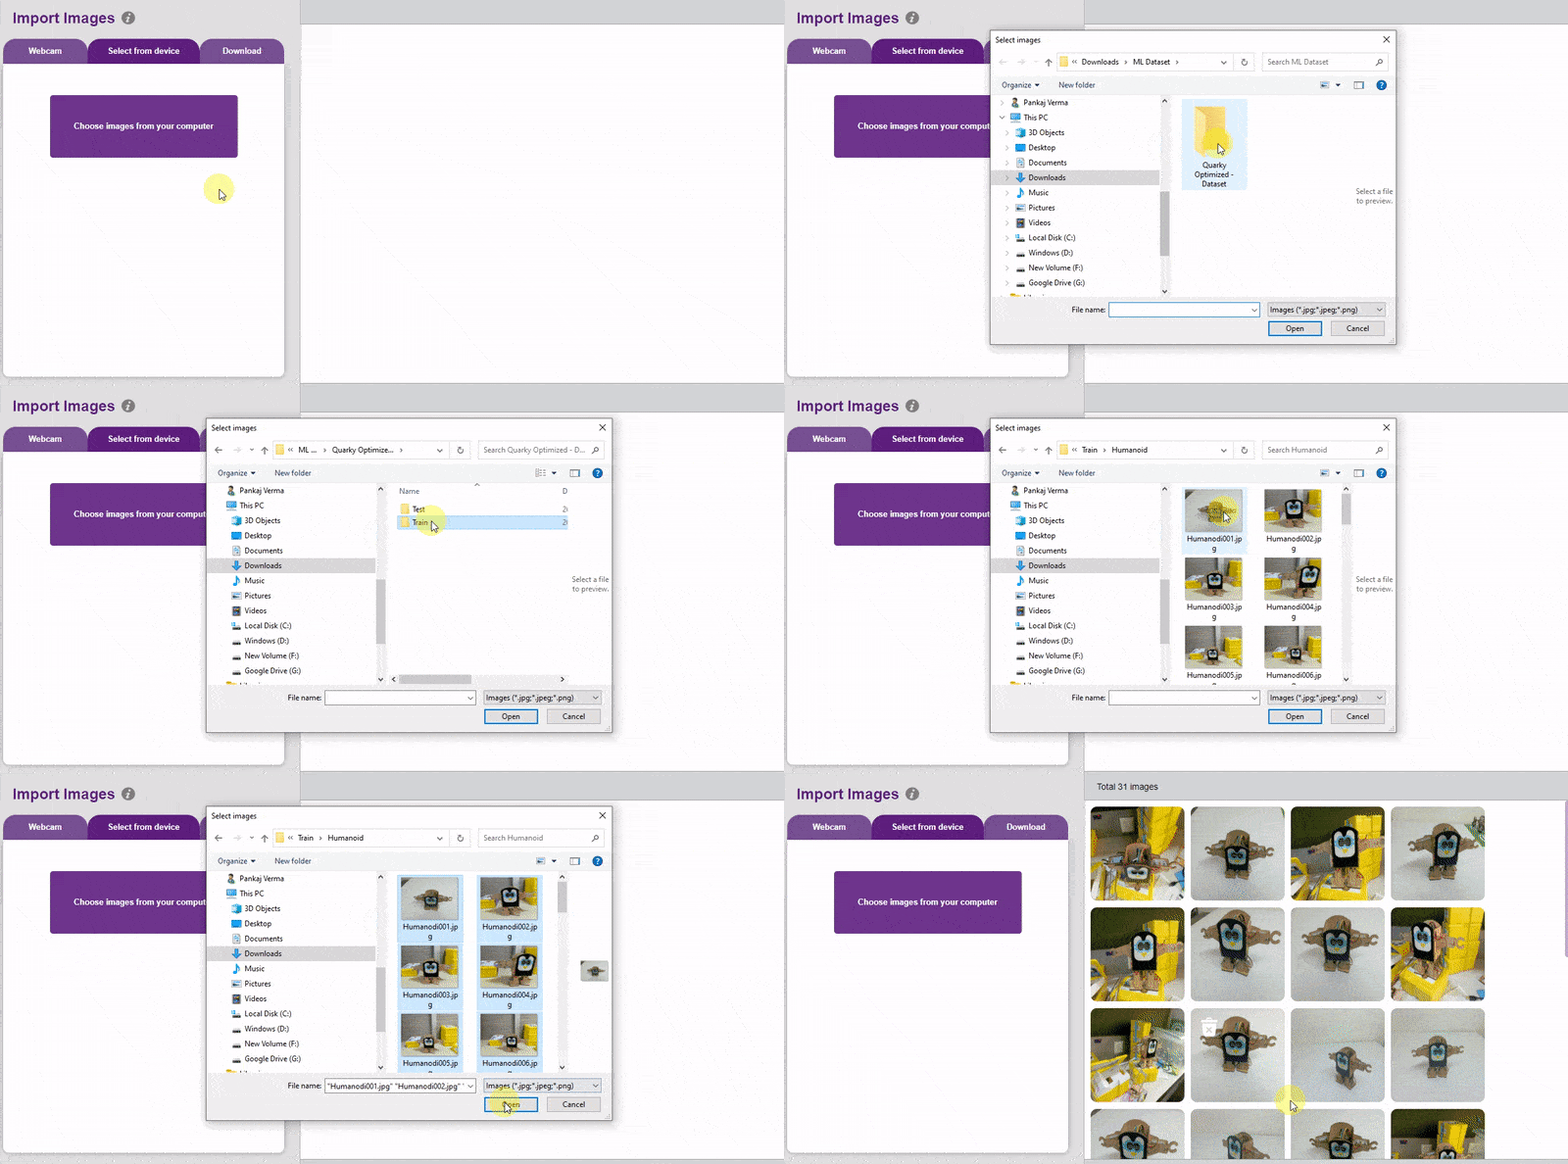
The left side panel will give you three options to gather images:
- Using the Webcam to capture images.
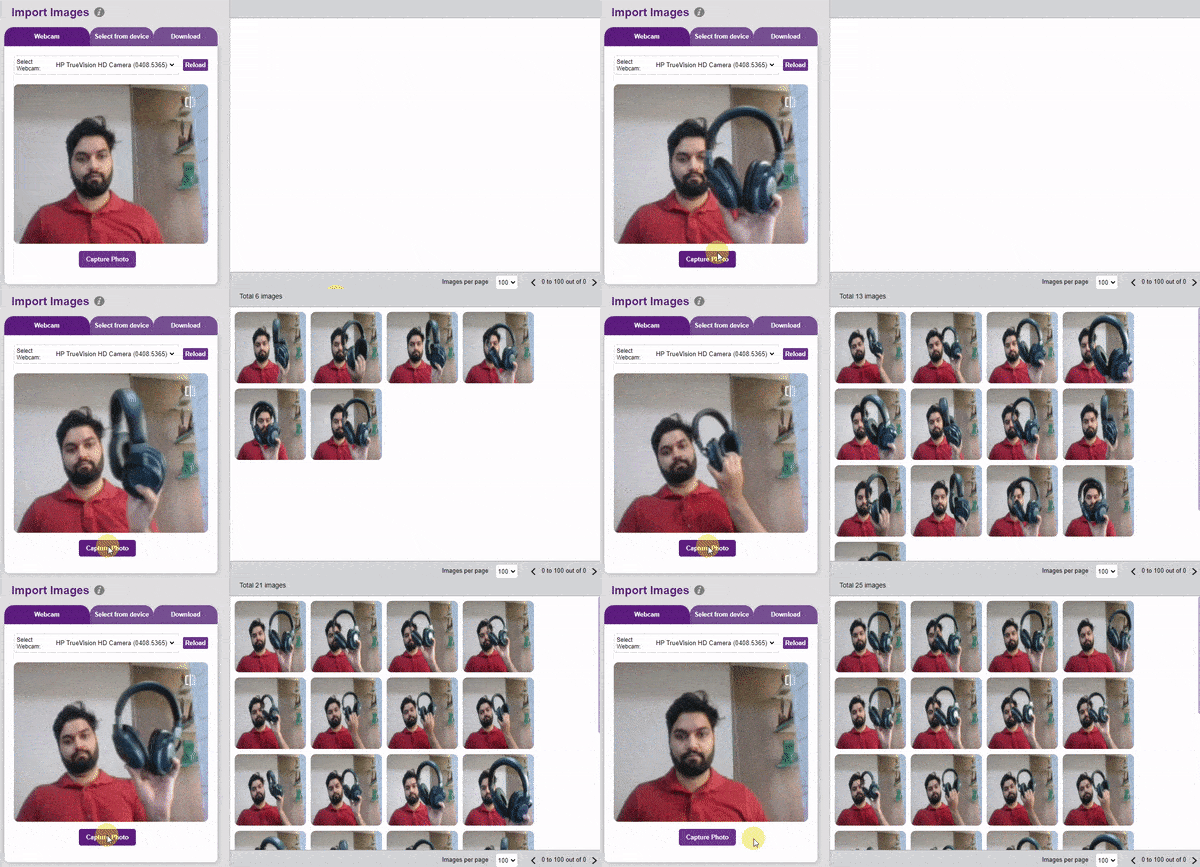
- Upload images from your device’s hard drive.
- Downloading from PictoBlox Database: This gives you the option of downloading pre-annotated images and annotating images captured manually by the user.
For this project, we’ll be making use of a dataset based on three Quraky-based robots: Quarky Optimized – Dataset
- The Mars Rover
- The Pick and Place Robot
- The Humanoid Robot
To import the images, click on the Webcam option and import all the images from the testing folder.
Now that we have our images ready, let’s annotate them to prepare our final dataset.
Annotating the Data
A bounding box is a rectangular box that can be drawn around an object in an image. Bounding boxes are used in object detection algorithms to identify objects in images.
We draw these rectangles over images, outlining the object of interest within each image by defining its X and Y coordinates. This makes it easier for machine learning algorithms to find what they’re looking for, determine collision paths, and conserves valuable computing resources.
Object detection has two components: object classification and object localization. In other words, to detect an object in an image, the computer needs to know what it is and where it is.
Follow the process:
- Go to the “Bbox” tab to access it.
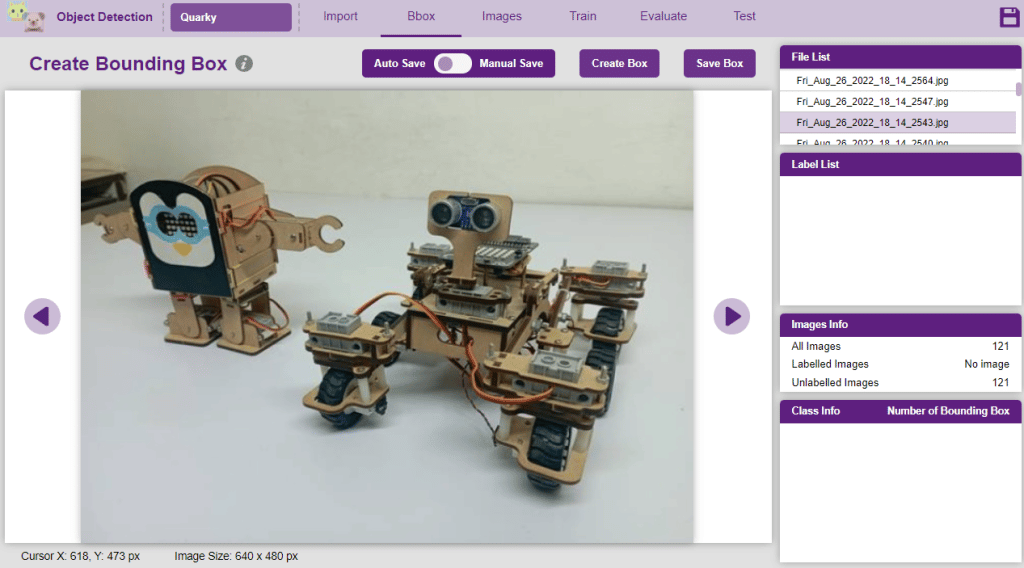
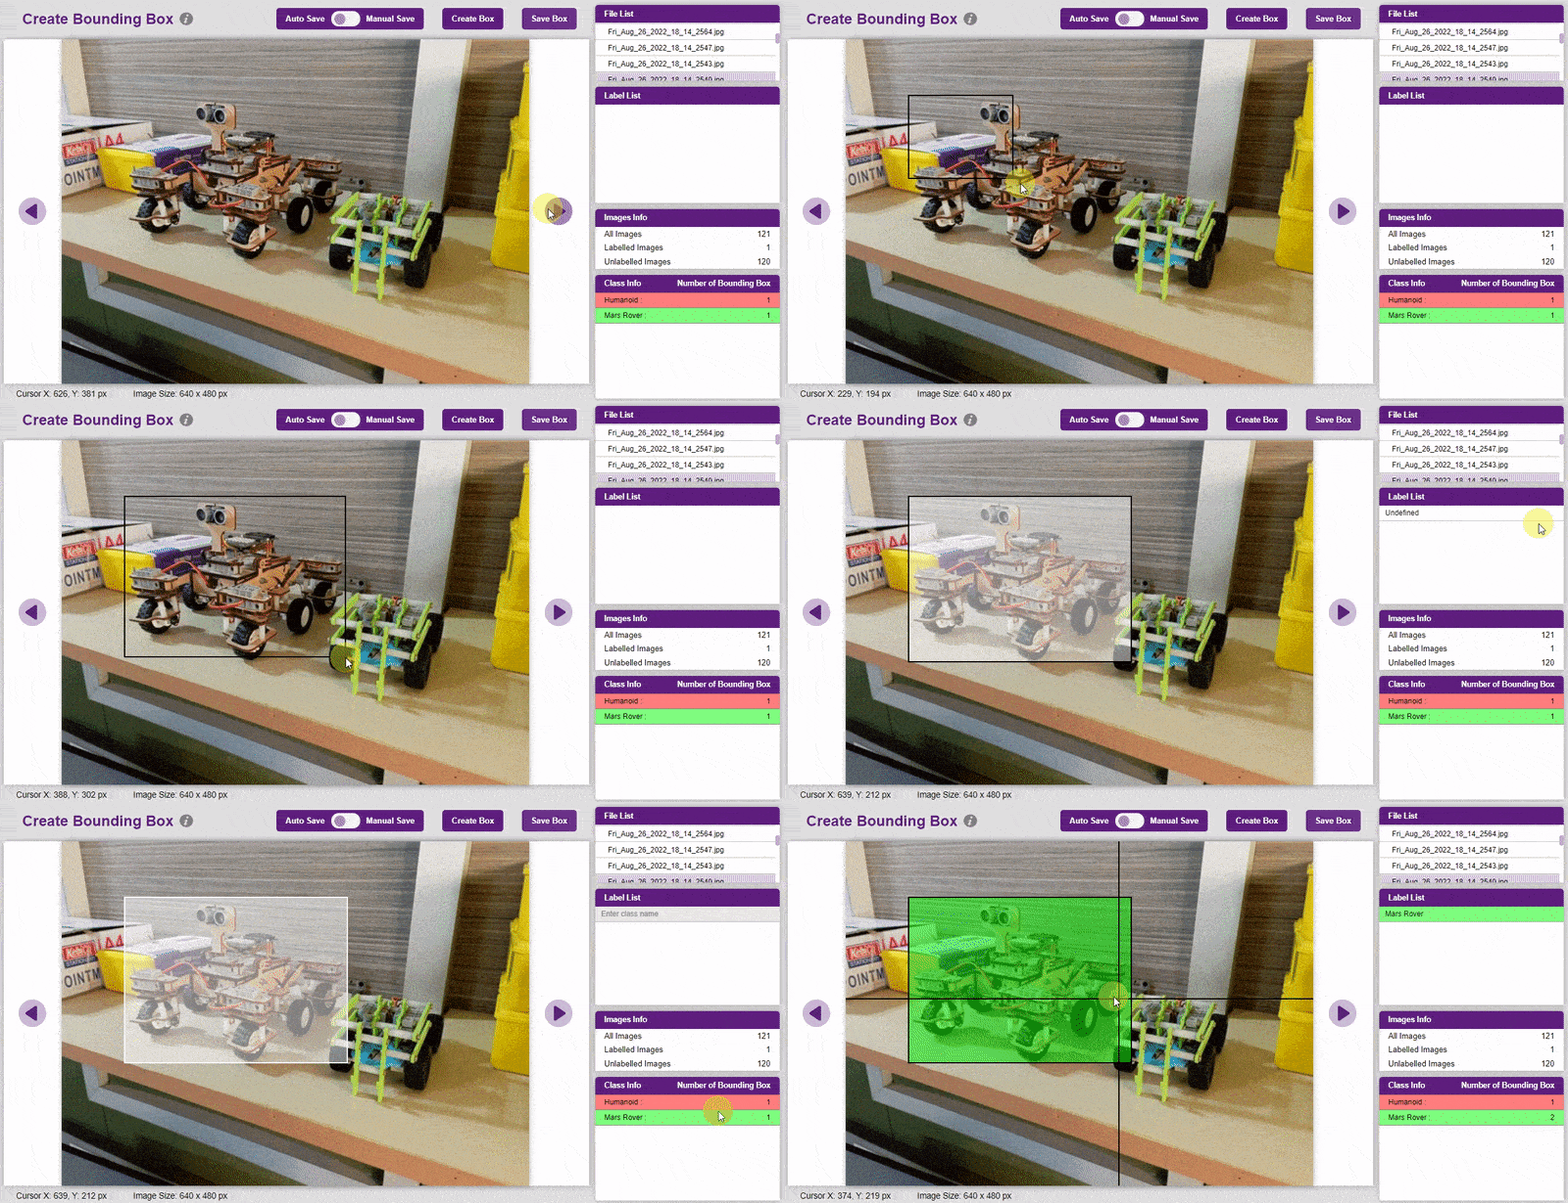
- To create the bounding box in the images, click on the “Create Box” button, to create a bounding box. After the box is drawn, go to the “Label List” column and click on the edit button, and type in a name for the object under the bounding box. This name will become a class. Once you’ve entered the name, click on the tick mark to label the object.
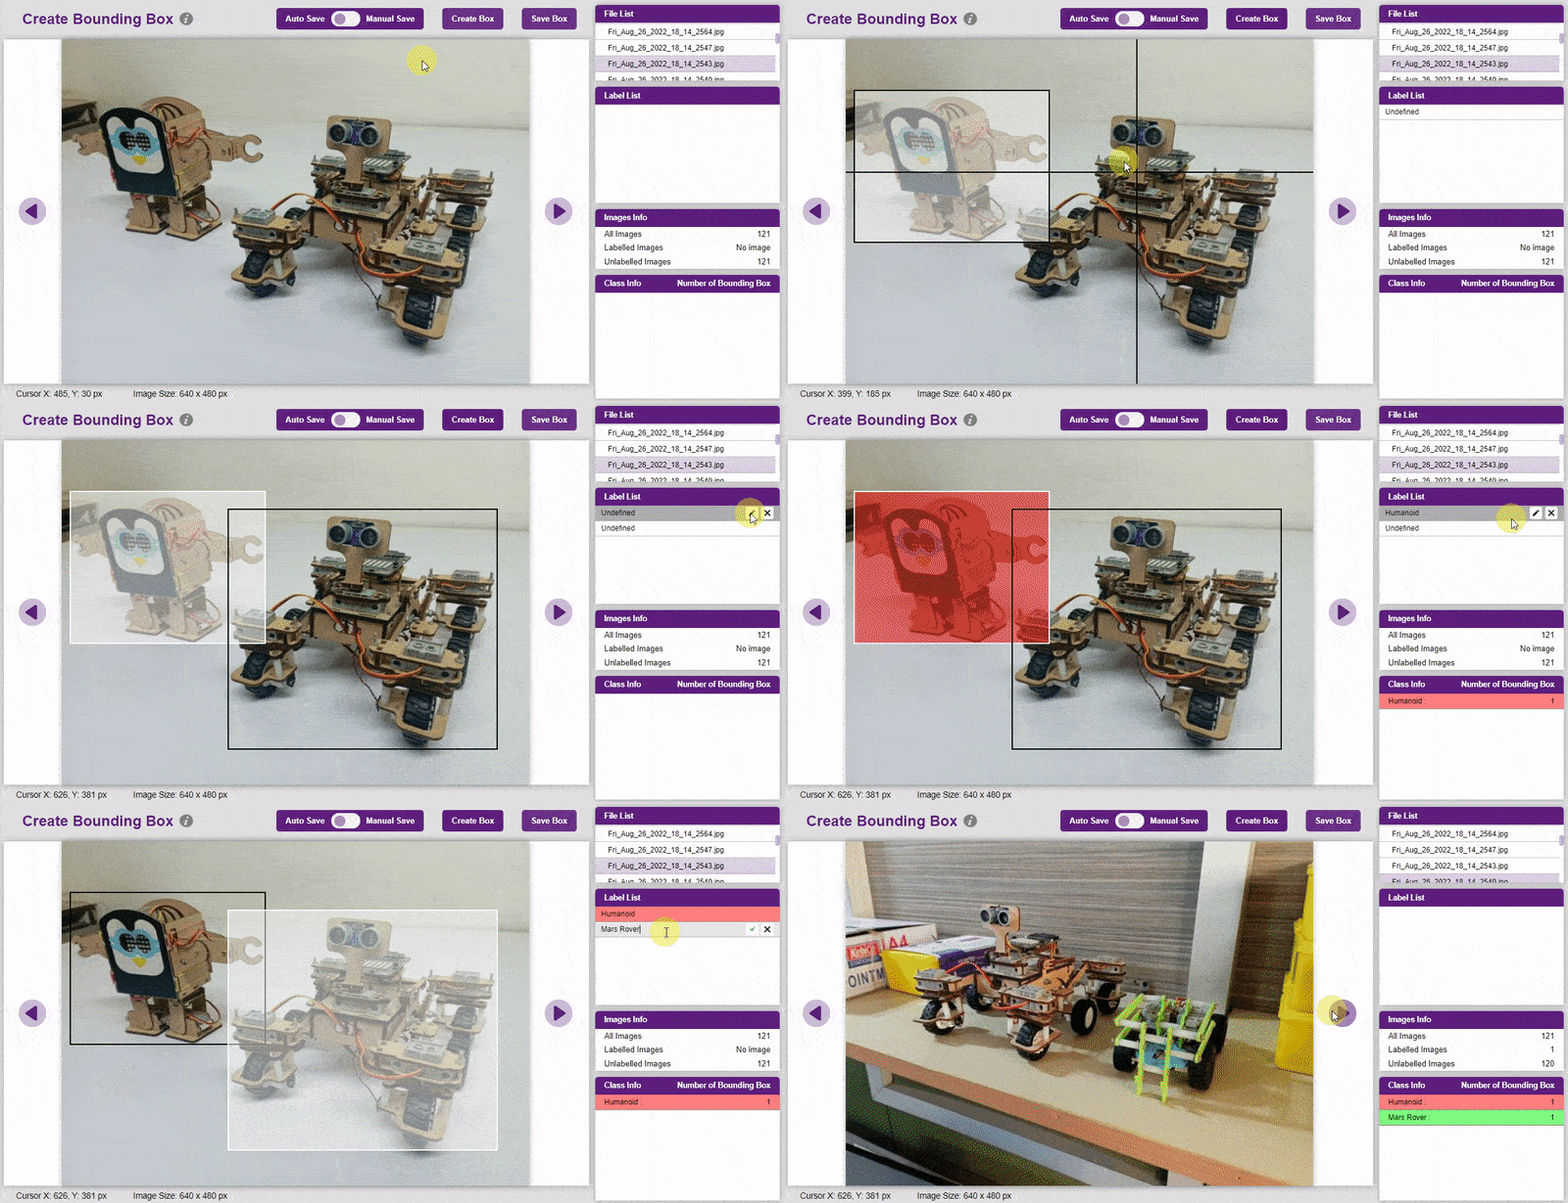
The object will be color coded as soon as you label it. - Once you’ve labeled an object, its count is updated in the “Class Info” column. You can simply click on the class to classify another object under that label.
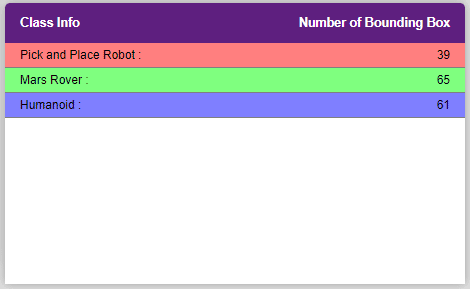
- Once you’ve labeled an object, its count is updated in the “Class Info” column. You can simply click on the class to classify another object under that label.
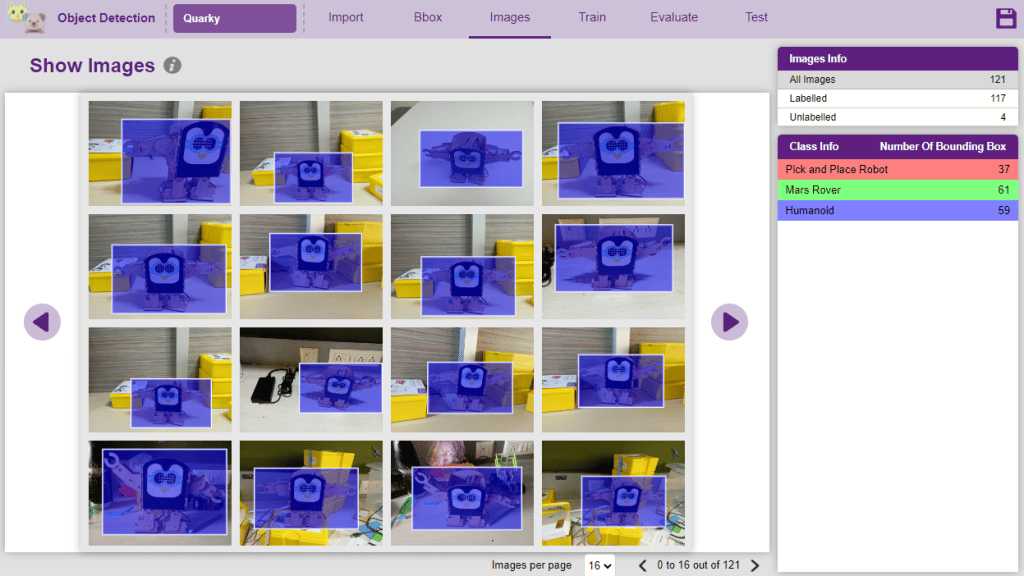
- You can view all the images under the “Image” tab.
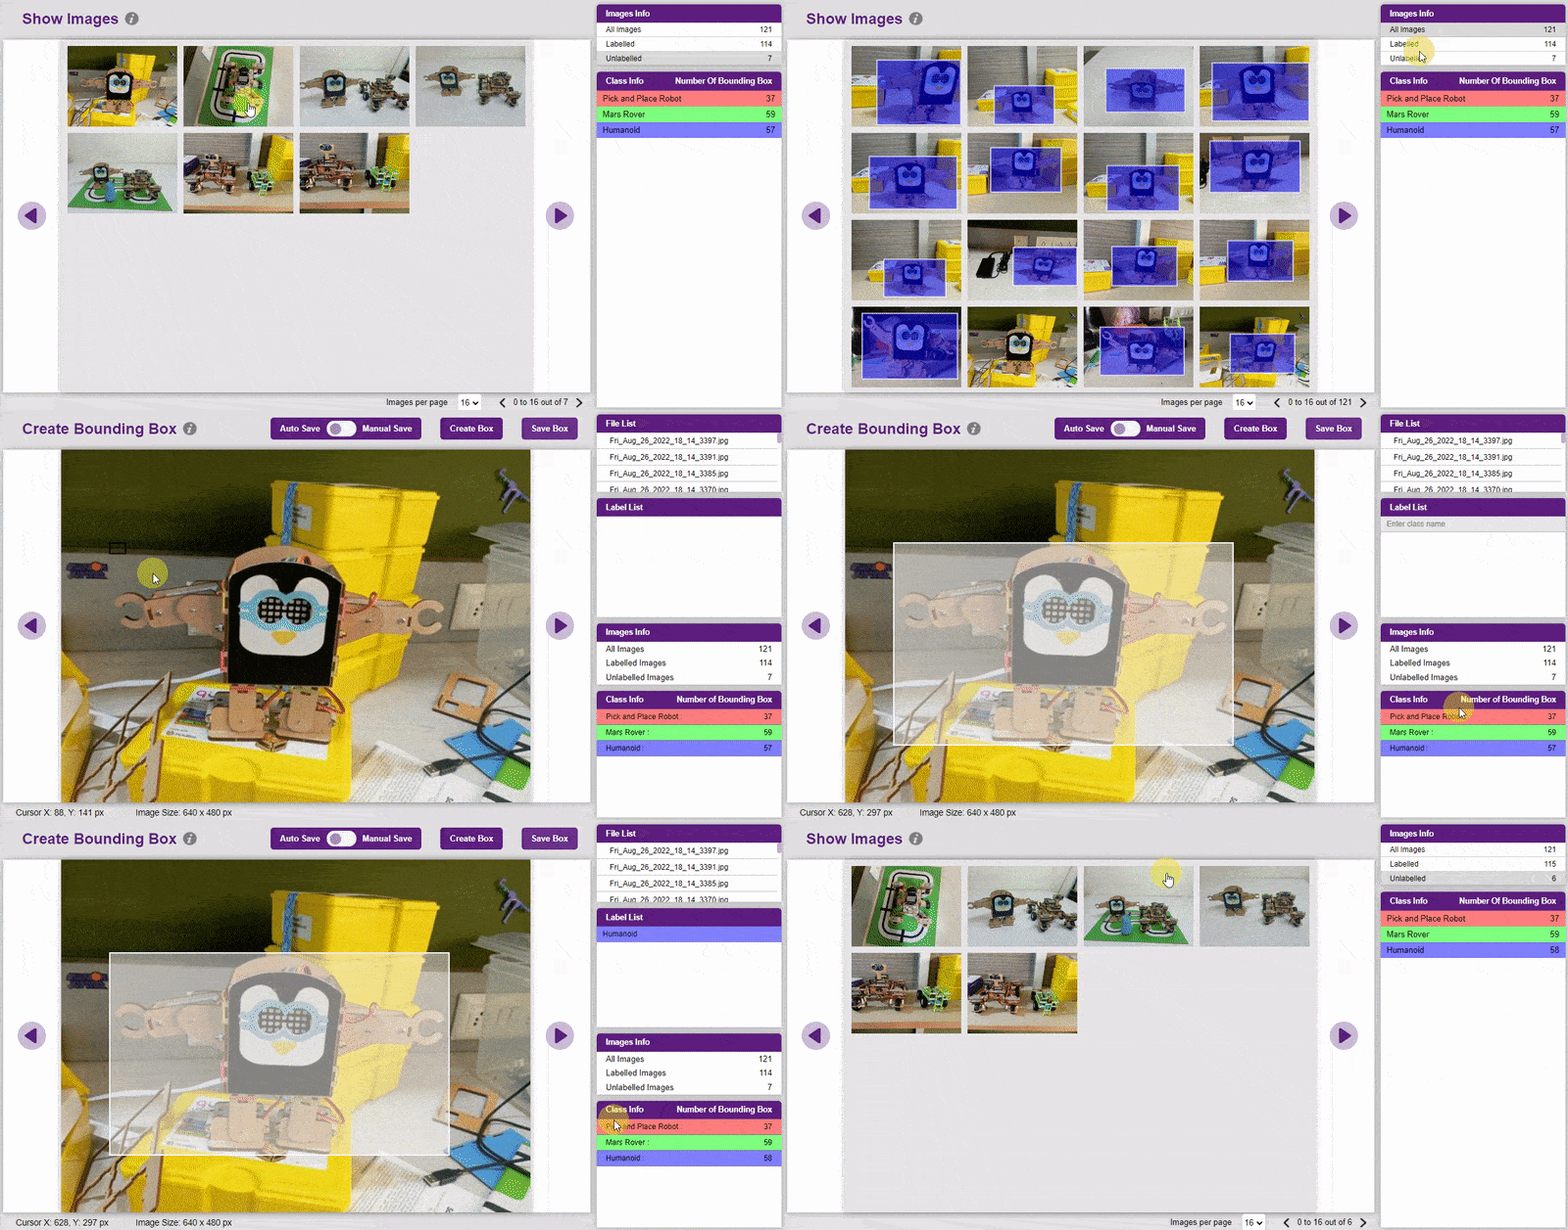
- You can find the Unlabelled images in the tab and you can click on the image to add the label.
Training the Model
In Object Detection, the model must locate and identify all the targets in the given image. This makes Object Detection a complex task to execute. Hence, the hyperparameters work differently in the Object Detection Extension.
Follow the process:
- Go to the “Train” tab.
- Click on the “Train New Model” button. Select the classes that need to be trained, and click on “Generate Dataset”. Once the dataset is generated, click “Next”.
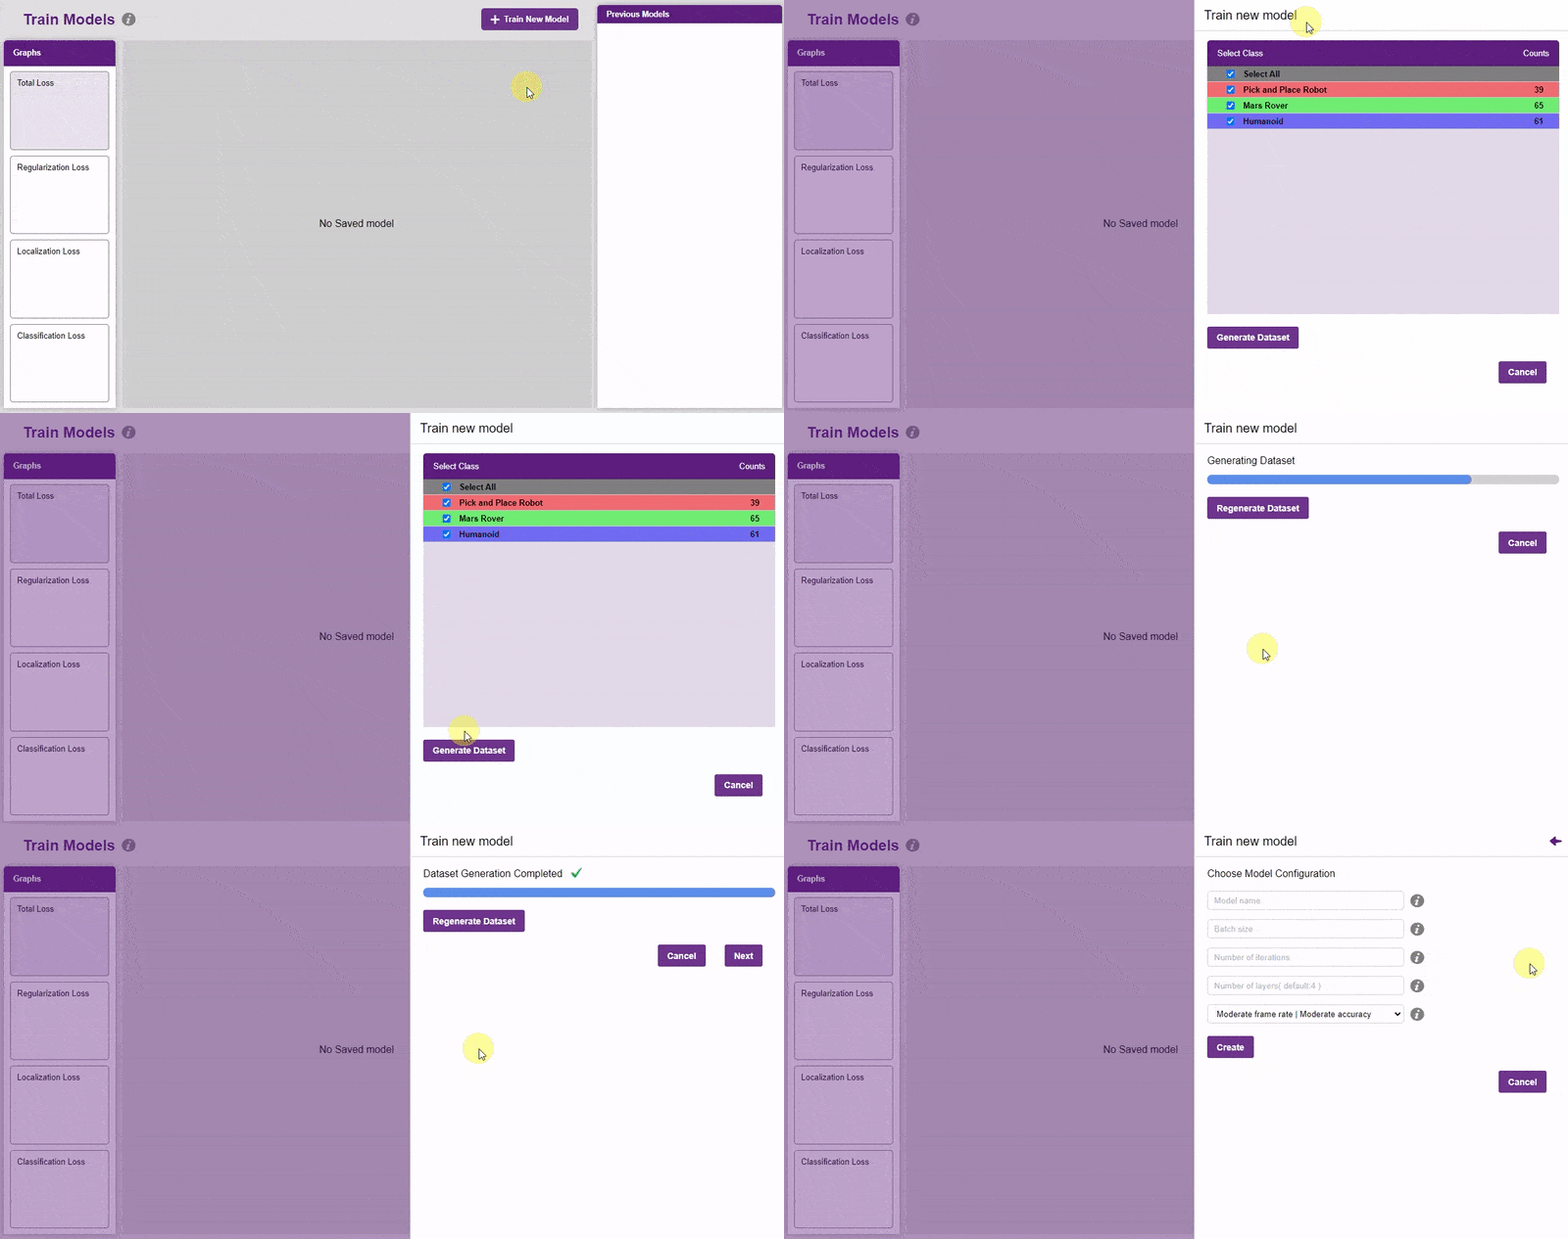
- You shall see the training configurations. Observe the hyperparameters.
- Model name – The name of the model.
- Batch size – The number of training samples utilized in one iteration. The larger the batch size, the larger the RAM required.
- Number of iterations – The number of times your model will iterate through a batch of images.
- Number of layers – The number of layers in your model. Use more layers for large models.
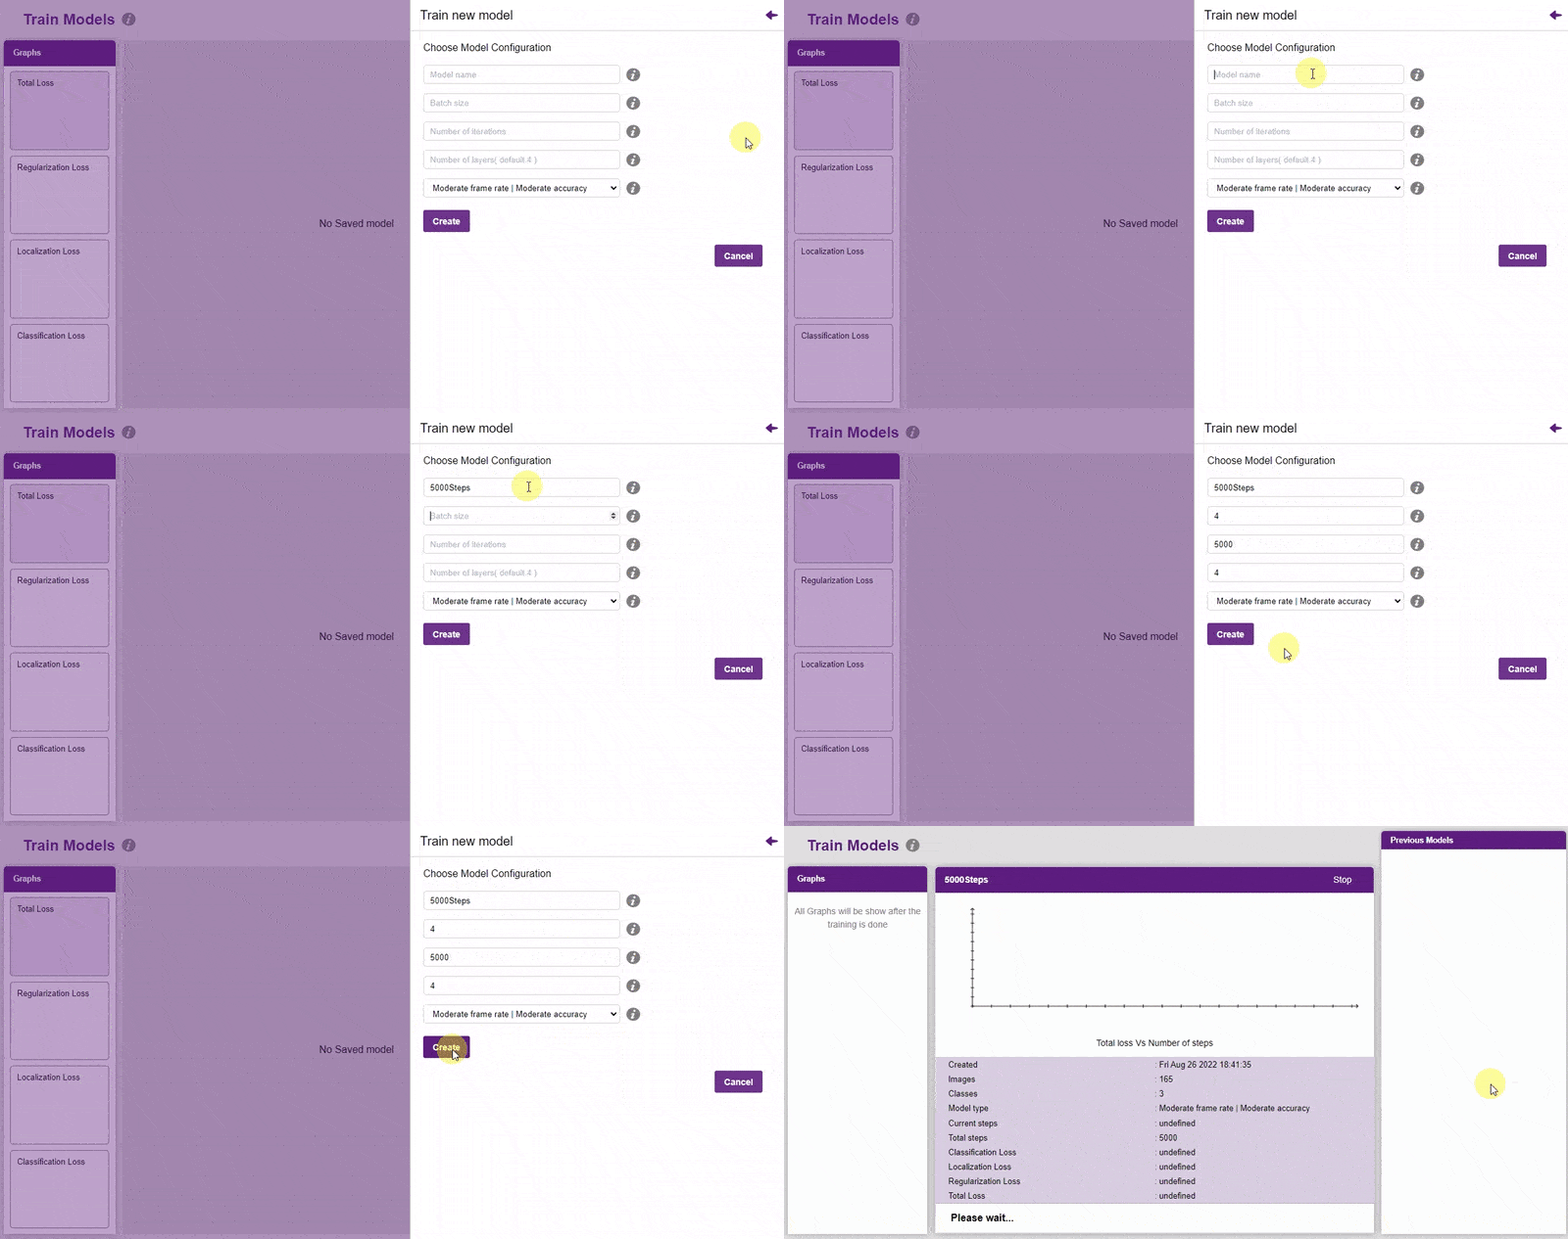
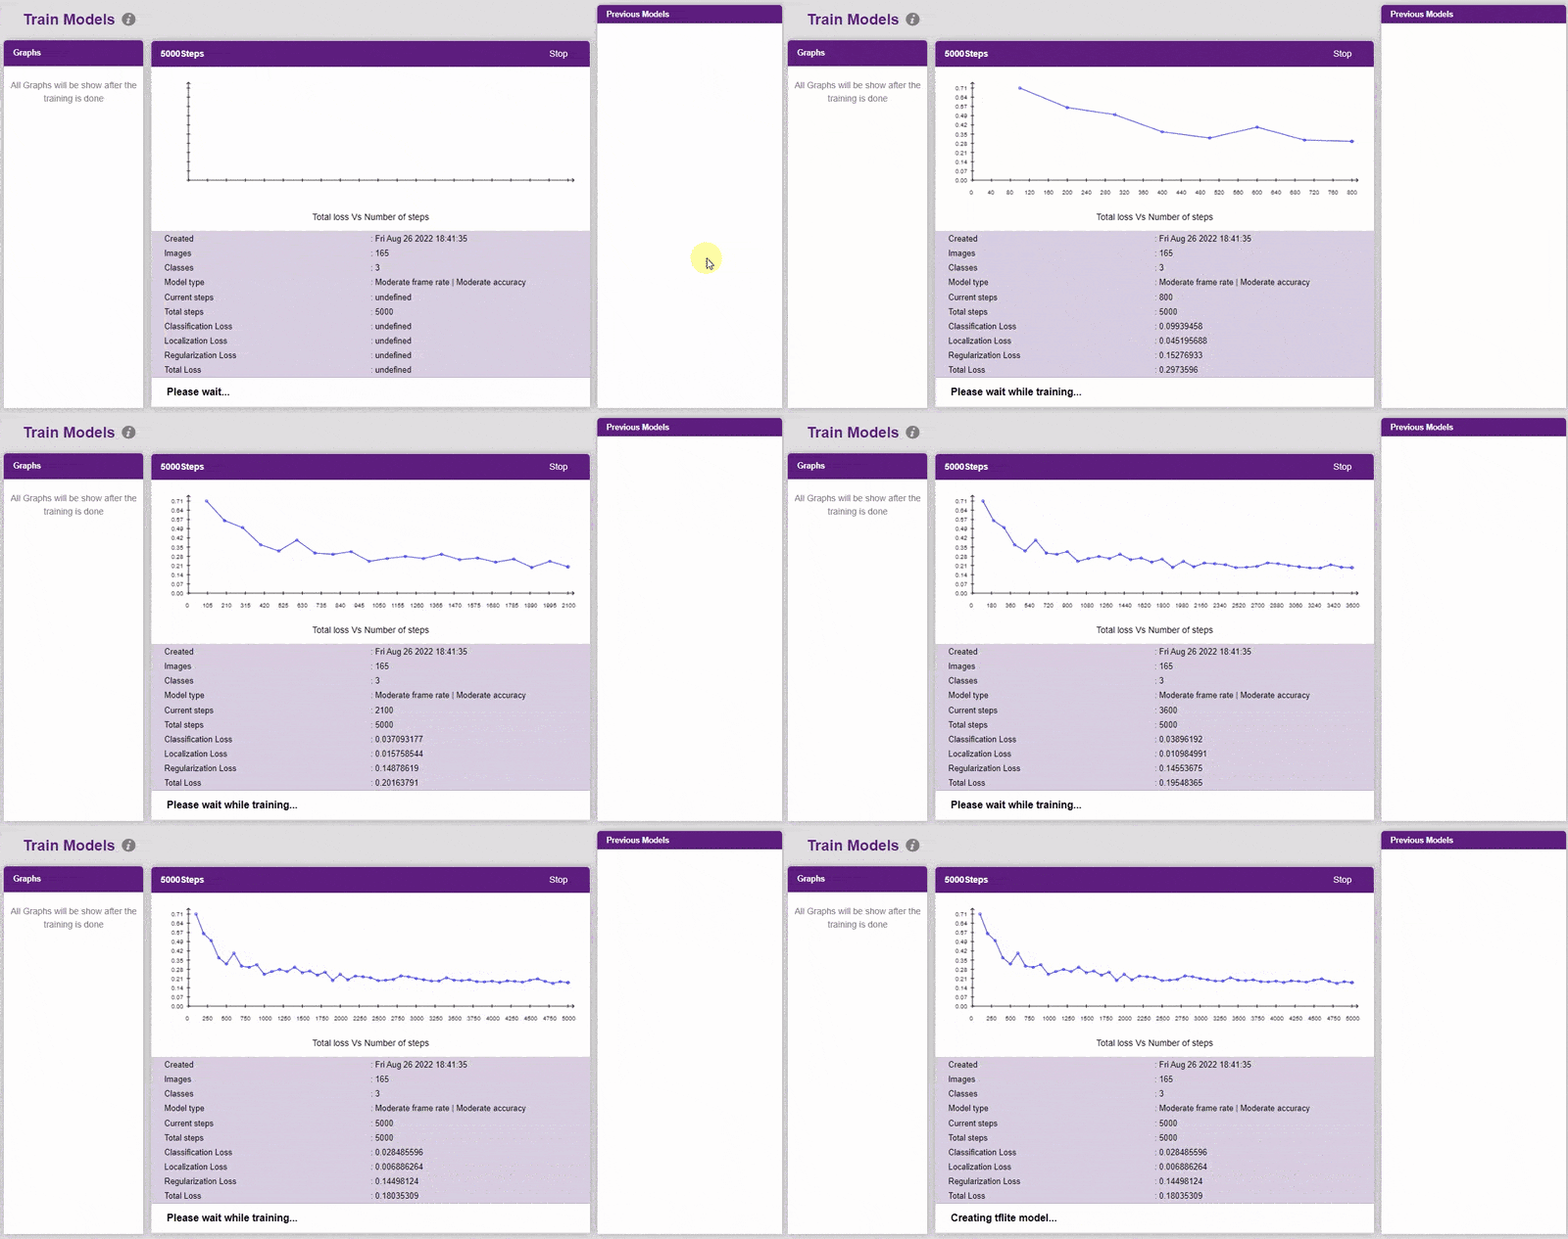
- Specify your hyperparameters. If the numbers go out of range, PictoBlox will show a message. Click “Create”.

Evaluating the Model
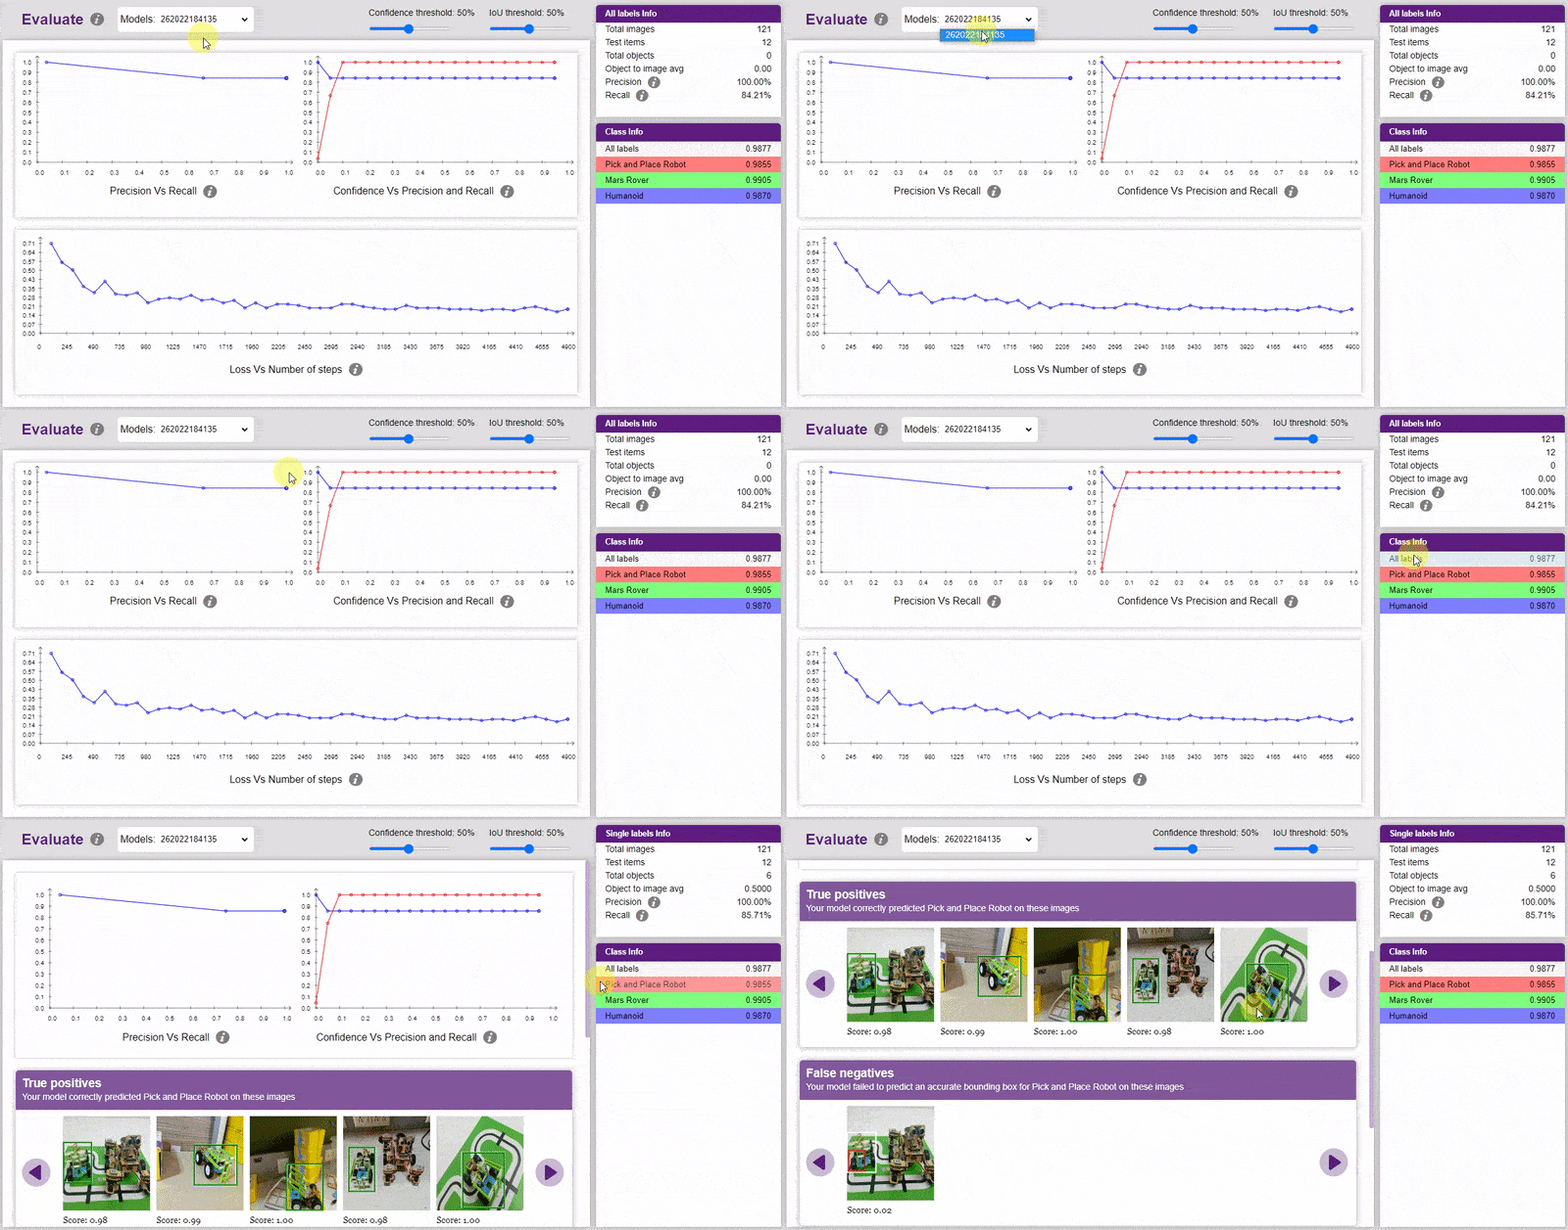
Now, let’s move to the “Evaluate” tab. You can view True Positives, False Negatives, and False Positives for each class here along with metrics like Precision and Recall.
Testing the Model
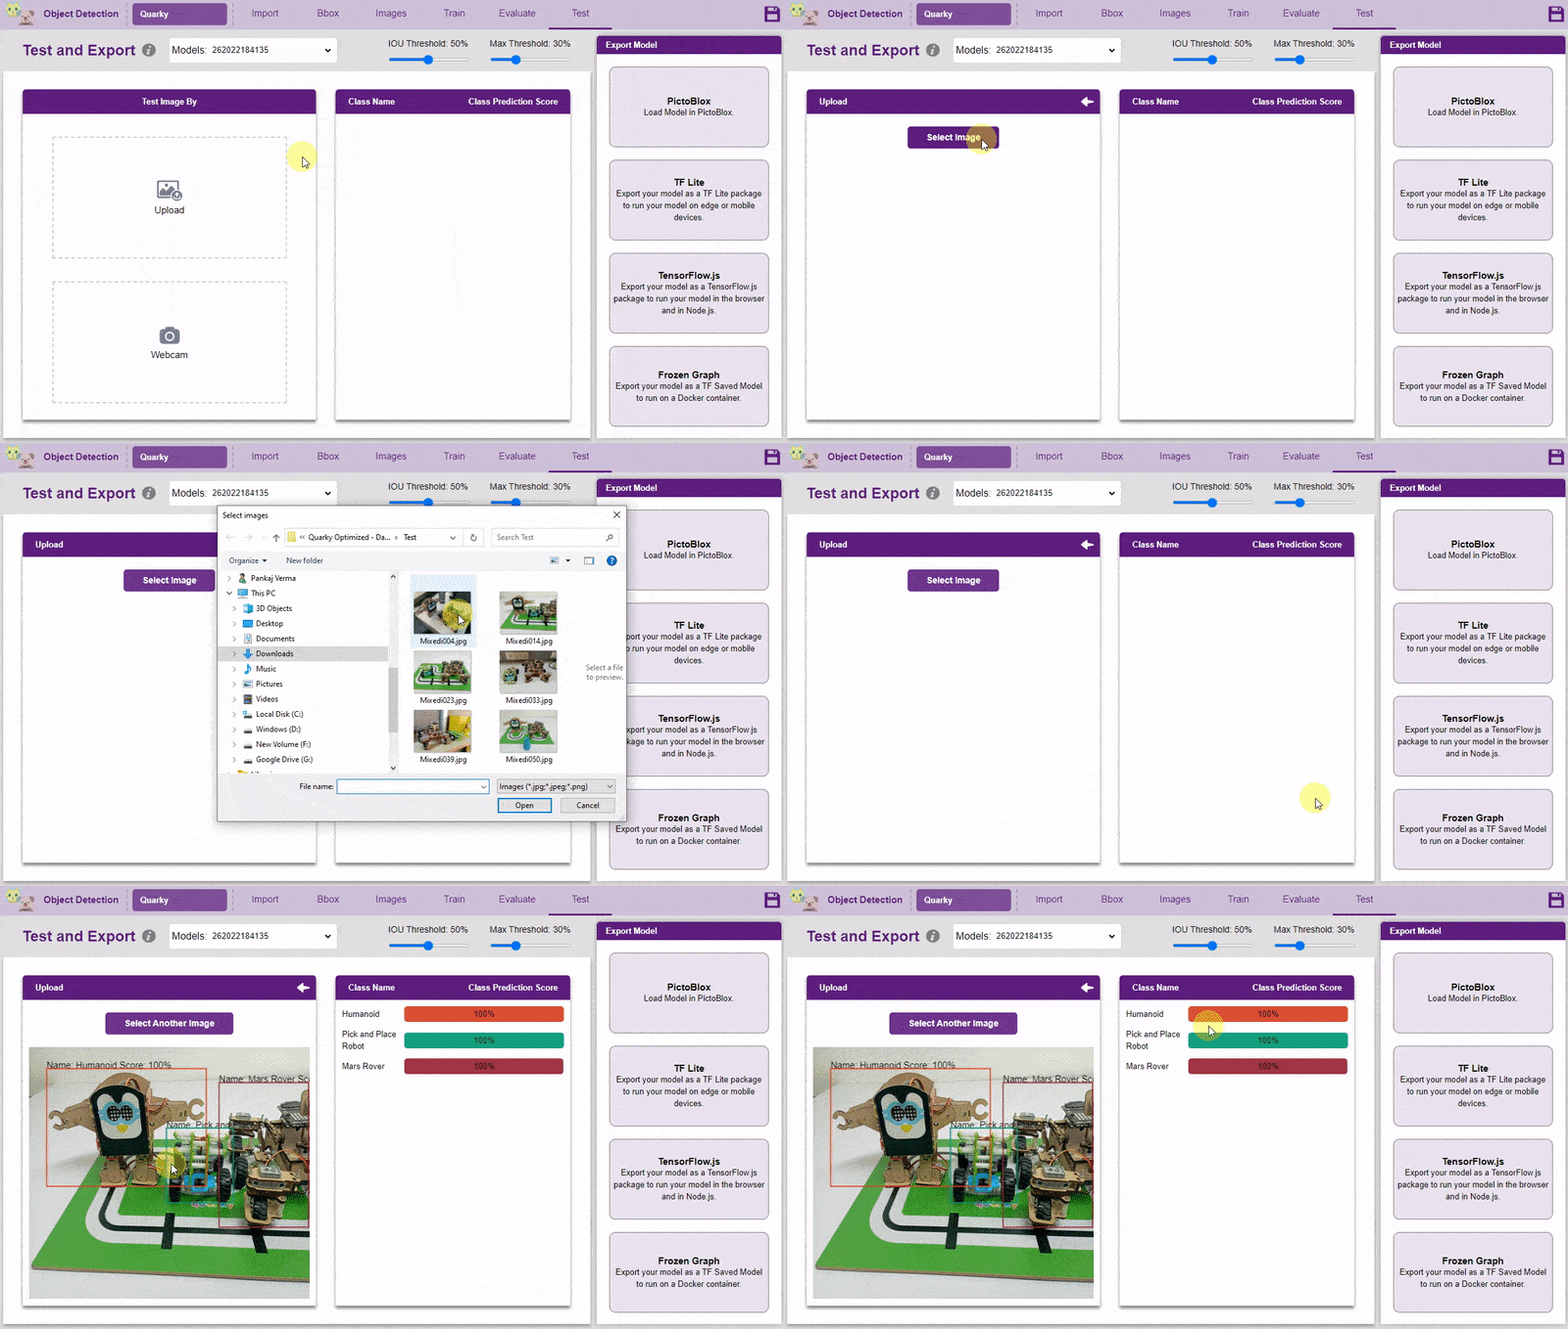
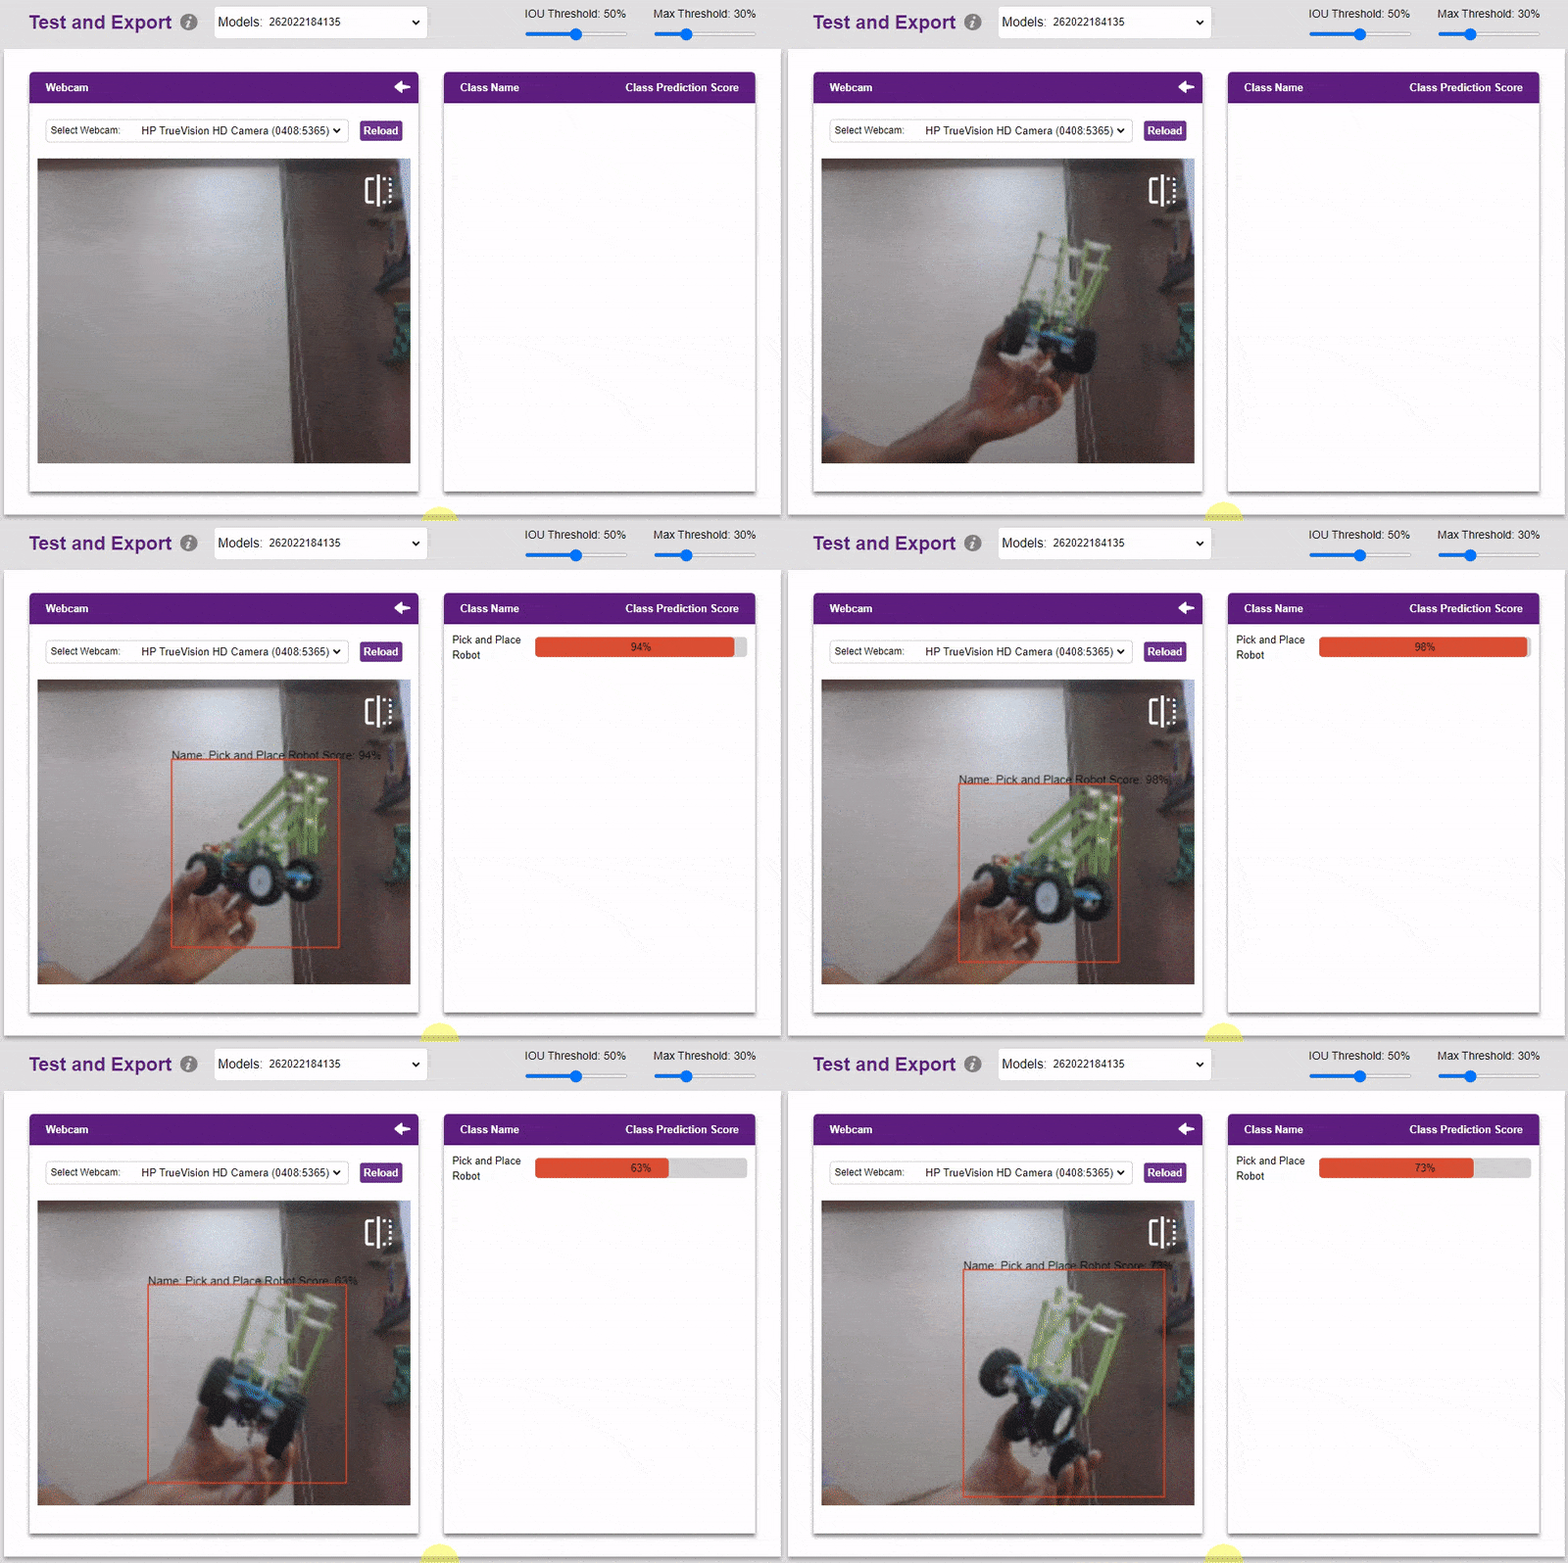
Inside the Testing tab, you can upload or capture images and see how your model performs in the given scenario.
- You can upload the image and test the model.
- You can also test the model with webcam.
Exporting the Model to the Block Coding Environment
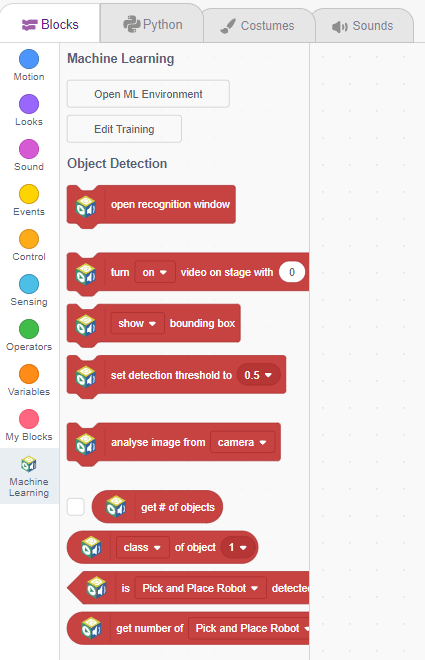
In the “Export Model” column, click on the “PictoBlox” button to export the model into the block coding environment.
Observe how we have blocks pertaining to the model we just trained on the left side panel.
Writing a script in the Block Coding Environment
The idea is simple, we’ll add image samples in the “Backdrops” column. We’ll keep cycling through the backdrops and keep predicting the image on the stage.

Lets code:
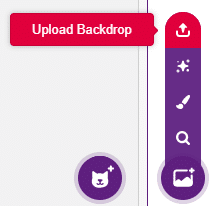
- Hover your mouse over the “Backdrop” icon on the bottom right of your screen. Click on the “Upload Backdrop” button.
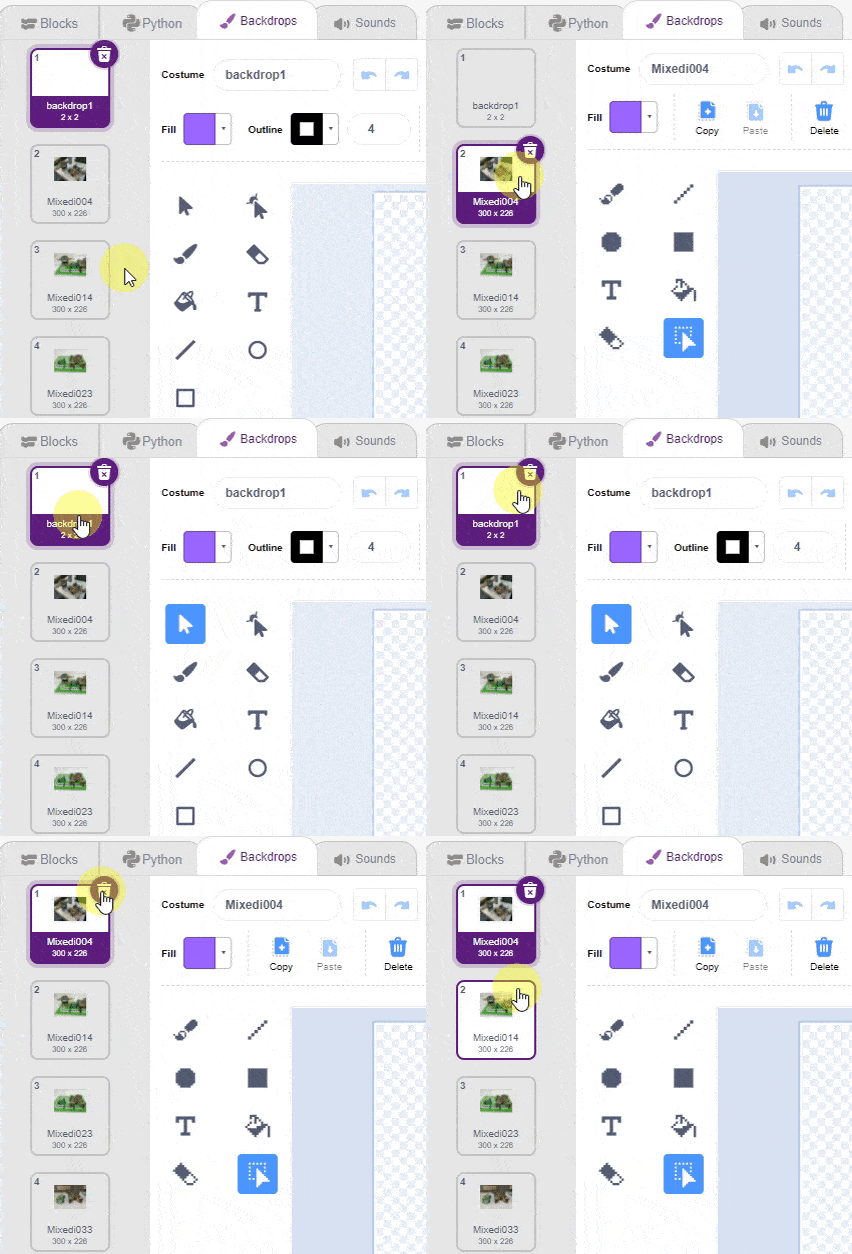
- Select your test images. Delete the default backdrop.
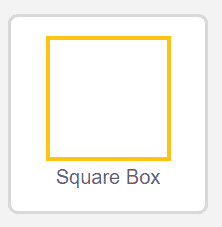
- Add the Square box sprite from the sprite library.
- Delete Tobi sprite.
- Now we need to make the backdrop images cover the full stage.
 Edit the images in the backdrop tab.
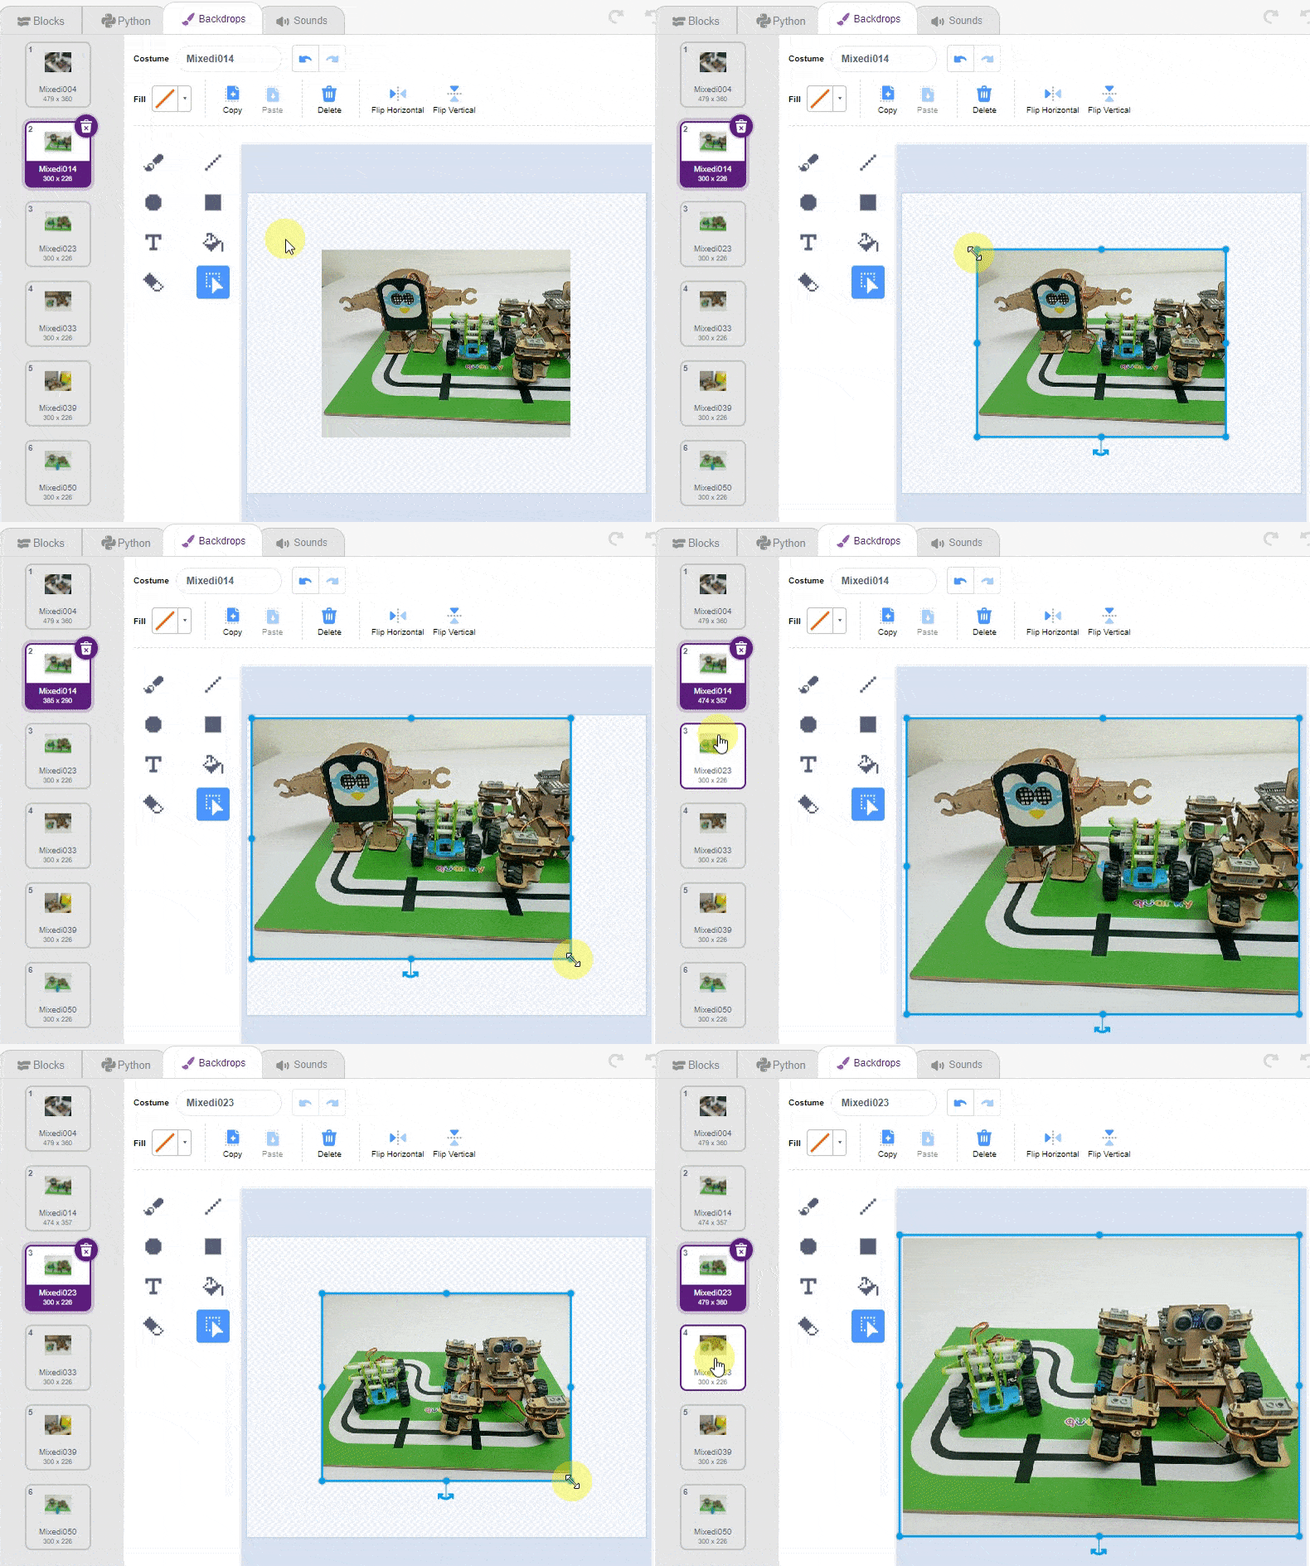
- Now, come back to the coding tab and select the Square sprite.
- We’ll start by adding a when flag clicked block from the Events palette.
- Add () bounding box block from the Machine Learning palette. Select the “hide” option.
- Follow it up with a set detection threshold to () block from the Machine Learning palette and set the drop-down to 0.3.
- Add switch backdrop to () block from the Looks palette. Select any image.
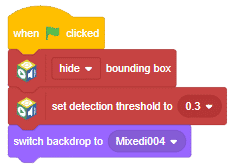
- Add a forever block from the Control palette.
- Inside the forever block add an analyse image from () block from the Machine Learning palette.
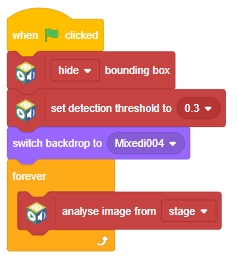
- We will now check if any object is detected or not. Add if else block. Add the condition – get # of objects greater than 0 using blocks.
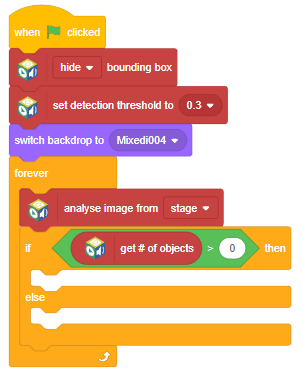
- Since there can be multiple subjects in the same frame, we need to make an iteration variable. Rename the variable in the Variables palette to ObjectNumber.

- Add a set () to () block from the Variables palette, and set it to 0.
- Drag in a repeat block from the Control palette and add a get # of objects block from the Machine Learning palette inside of it.
- Add a change iteration by 1 block from the Variable palette inside the repeat block.
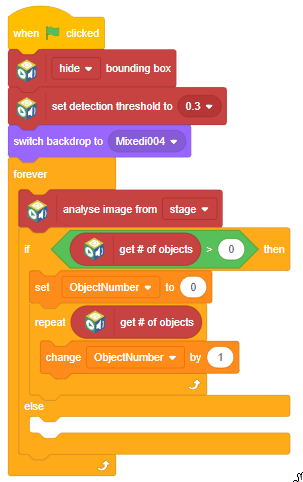
- Add set x to () block from the Motion palette below the change () by () block. Next add a () of object block from the Machine Learning palette and drag in the ObjectNumber variable. Select x position as the option in the () of object block.
- Add set y to () block from the Motion palette. Next add a () of object block from the Machine Learning palette and drag in the ObjectNumber variable. Select y position as the option in the () of object block.
- Add set size to () block from the Looks palette. Next add a () of object block from the Machine Learning palette and drag in the ObjectNumber variable. Select width as the option in the () of object block.
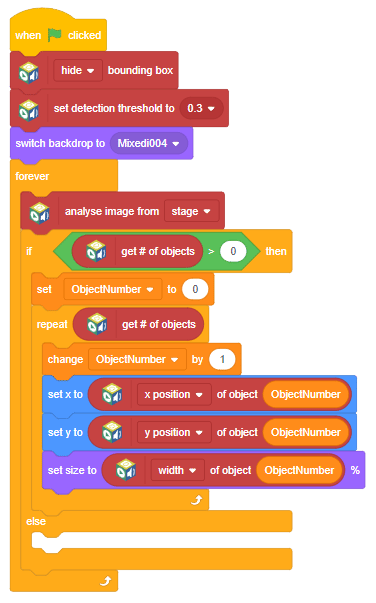
- Add the show block from the Looks palette below the set size to () block.
- Add say () for () seconds block from the Looks palette. Next add a () of object block from the Machine Learning palette and drag in the ObjectNumber variable. Select class as the option in the () of object block.
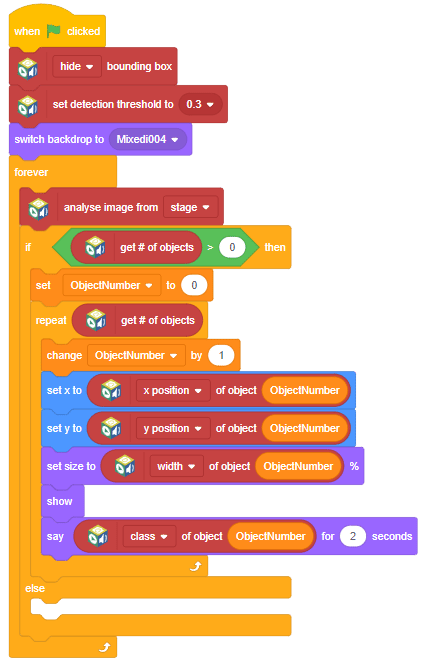
- Inside the else branch add the hide block from the Looks palette.
- Finally, add the next backdrop block from the Looks palette below the if else block.
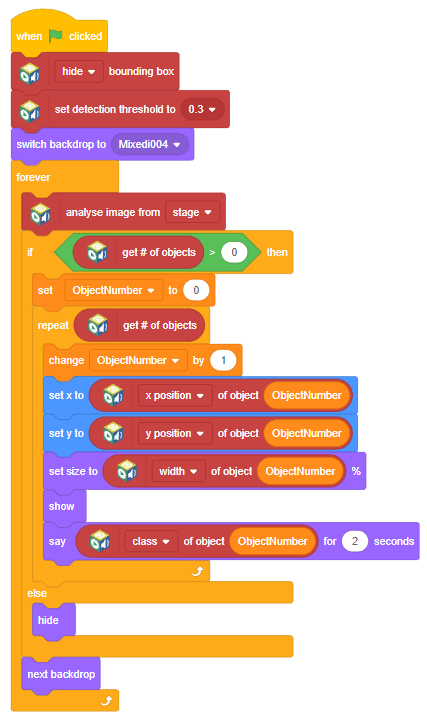
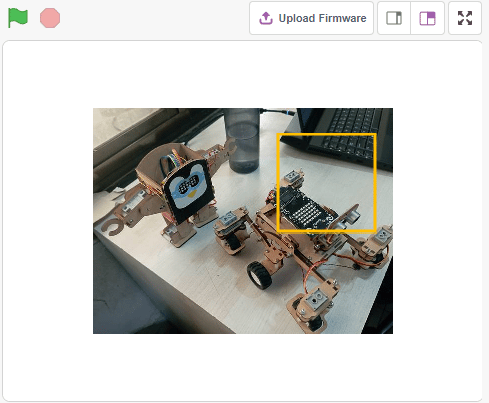
That’s it! Let’s see the project in action.


