Tutorial Video
Introduction
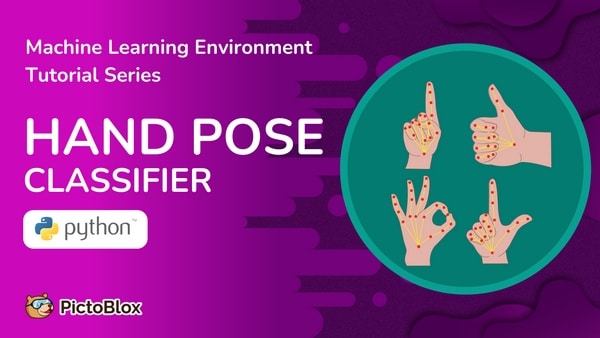
The Hand Gesture Classifier of the PictoBlox Machine Learning Environment is used for classifying different hand poses into different classes. The model works by analyzing the position of your hand with the help of 21 data points. We’ll look at this in detail in this tutorial.
For this project, we’re going to make a “Beetle in the Maze” game with hand gesture control.
We will control the Beetle using hand gestures and make sure that it doesn’t touch the maze. For this task, we’ll need 5 classes:
- Forward
- Backward
- Left
- Right
- Stop
We’ll train our model to recognize different gestures and then map them to the Beetle Sprite. That way, the Beetle can execute specific functions when a specific gesture is recognized.
In this lesson, we’ll learn how to construct the ML model using the PictoBlox Hand Gesture Classifier. These are the steps involved in the procedure:
- Setting up the environment
- Gathering gestures(Data Collection)
- Training the model
- Testing the model
- Exporting the model to PictoBlox
- Creating a script in PictoBlox
Setting up the Environment
First, we need to set the ML environment for hand gesture classification.

Follow the steps below:
- Download the Beetle in the Maze game from here: https://pictoblox.page.link/LXRyqnr16FRyeKf89
- Open PictoBlox and open the downloaded project. The environment of the project is already set for us to code.
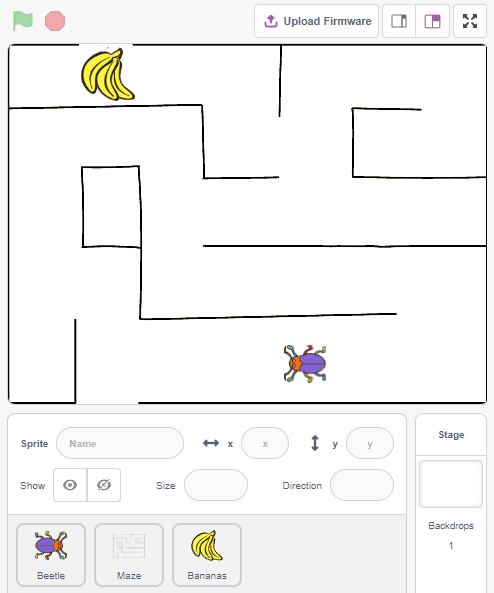 The project has 3 sprites:
- Beetle – The protagonist
- Maze
- Bananas
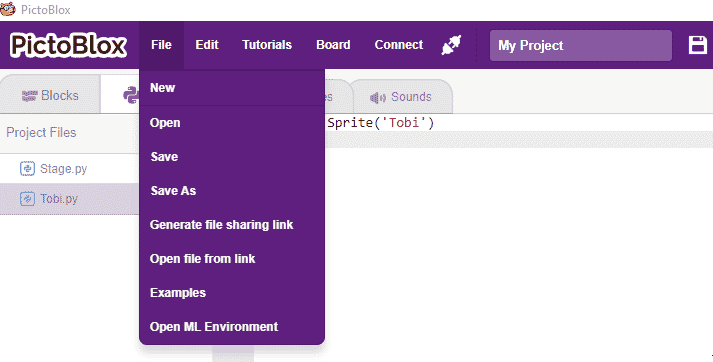
- We will first begin by making the ML model. To access the ML Environment, select the “Open ML Environment” option under the “Files” tab.
- You’ll be greeted with the following screen.
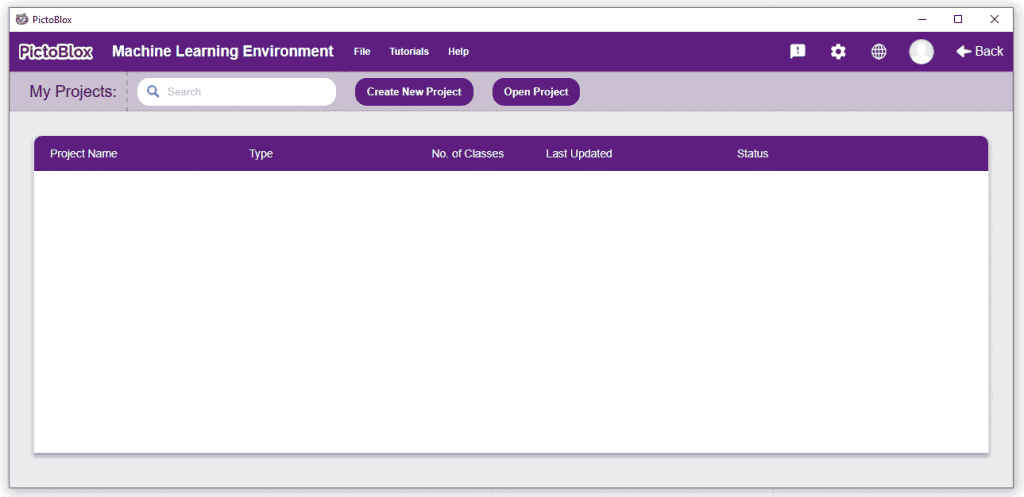 Click on “Create New Project“.
 - A window will open. Type in a project name of your choice and select the “Hand Gesture Classifier” extension. Click the “Create Project” button to open the Hand Gesture Classifier window.

- You shall see the Hand Gesture Classifier workflow with two classes already made for you. Your environment is all set. Now it’s time to upload the data.

Collecting and Uploading the Data
Class is the category in which the Machine Learning model classifies the images. Similar images are put in one class.
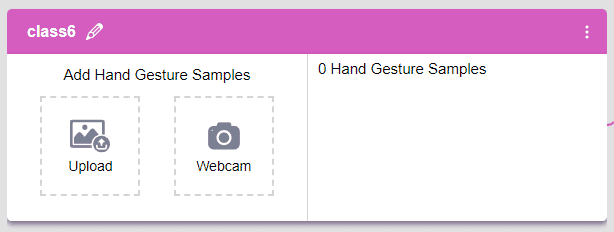
There are 2 things that you have to provide in a class:
- Class Name
- Image Data: This data can either be taken from the webcam or by uploading from local storage or from google drive.
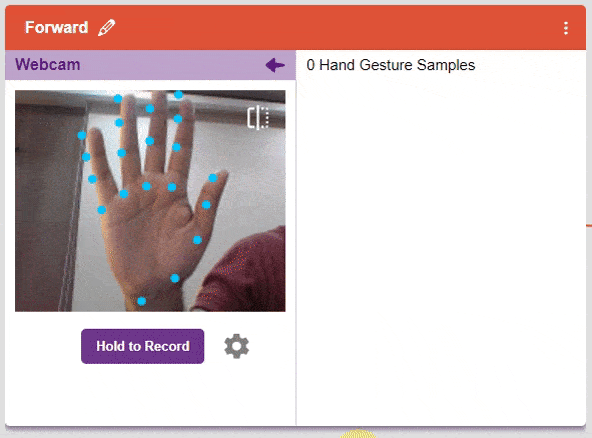
In this project:
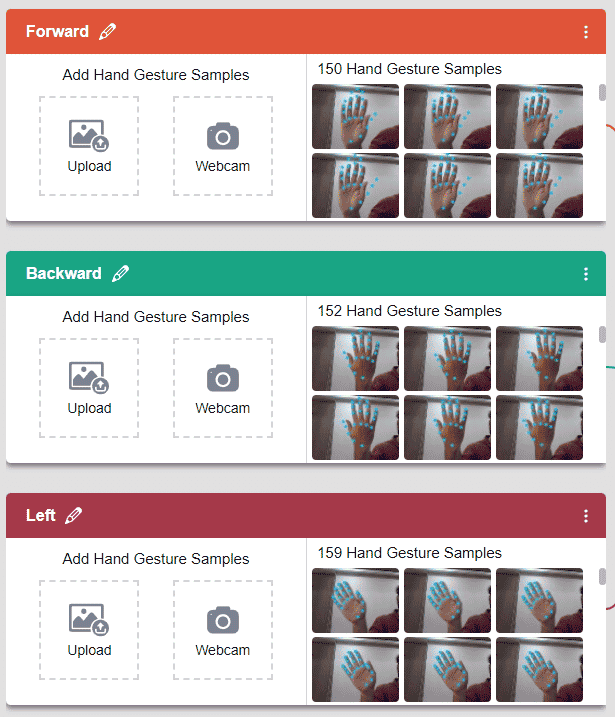
- The face of the palm is set to “Forward”.
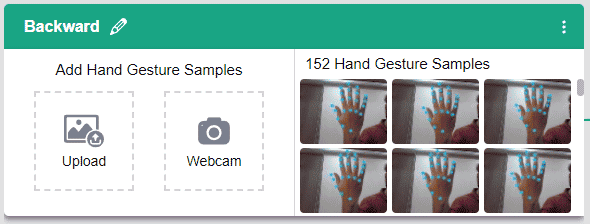
- The back of the palm is set to “Backward”.
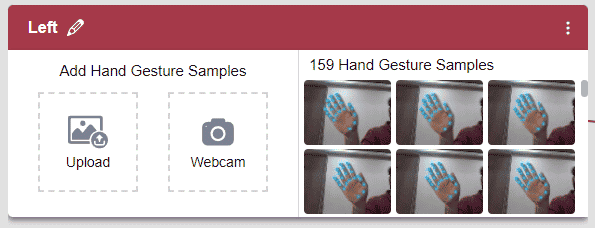
- The palm tilted towards the left is set to “Left”.
- The palm tilted towards the right is set to “Right”.
- The closed fist is set to “Stop”.

Follow the steps to upload the data for the classes:
- Rename the first class name Forward.
- Click the Webcam button.
If you want to change your camera feed, you can do it from the webcam selector in the top right corner.

- Next, click on the “Hold to Record” button to capture the for. Take 100+ hand gestures with different hand positions.
 If you want to delete any image, then hover over the image and click on the delete button.
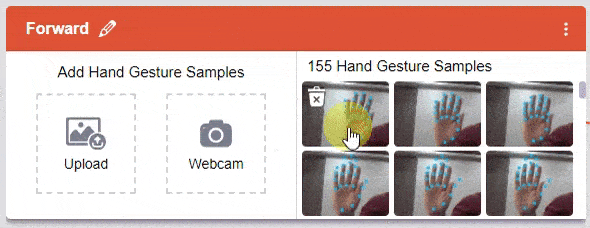 Once uploaded, you will be able to see the images in the class.
 - Rename Class 2 as Backward and take the samples from the webcam while showing the back of the palm.
- Click the “Add Class” button, and you shall see a new class in your Environment. Rename the class name to Left. Take the samples from the webcam while showing the palm tilted towards the left.
- Click the “Add Class” button and rename the class name to Right. Take the samples from the webcam while showing the palm tilted towards the right.

- Click the “Add Class” button and rename the class name to Stop. Take the samples from the webcam while showing the closed fist.

As you can see, now each class has some data to derive patterns from. In order to extract and use these patterns, we must train our model.
Training the Model
Now that we have gathered the data, it’s time to teach our model how to classify new, unseen data into these three classes. In order to do this, we have to train the model.
By training the model, we extract meaningful information from the images, and that in turn updates the weights. Once these weights are saved, we can use our model to make predictions on data previously unseen.
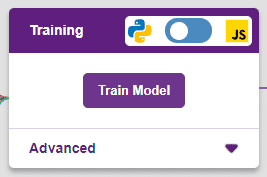
However, before training the model, there are a few hyperparameters that you should be aware of. Click on the “Advanced” tab to view them.
There are three hyperparameters you can play along with here:
- Epochs– The total number of times your data will be fed through the training model. Therefore, in 10 epochs, the dataset will be fed through the training model 10 times. Increasing the number of epochs can often lead to better performance.
- Batch Size– The size of the set of samples that will be used in one step. For example, if you have 160 data samples in your dataset, and you have a batch size of 16, each epoch will be completed in 160/16=10 steps. You’ll rarely need to alter this hyperparameter.
- Learning Rate– It dictates the speed at which your model updates the weights after iterating through a step. Even small changes in this parameter can have a huge impact on the model performance. The usual range lies between 0.001 and 0.0001.
Let’s train the model with the standard hyperparameters and see how it performs. You can train the model only in Python if you are making a python project. In order to choose between the two, click on the switch on top of the Training box.
We’ll be training this model in Python. Click on the “Train Model” button to commence training. Let’s change the “Epochs” hyperparameter to 20.

The model shows great results! Remember, the higher the reading in the accuracy graph, the better the model. The x-axis of the graph shows the epochs, and the y-axis represents the corresponding accuracy. The range of the accuracy is 0 to 1.
Testing the Model
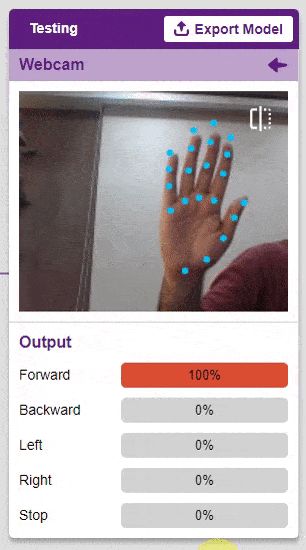
Now that the model is trained, let us see if it delivers the expected results. We can test the model by either using the device’s camera or by uploading an image from the device’s storage. Let’s use our webcam to start with.
Click on the “Webcam” option in the testing box and the model will start predicting based on the image in the window.
Great! The model is able to recognize gestures in real-time. Now close the window by clicking on the left arrow on the top right of the testing box. Time to export the model into PictoBlox!
Exporting the Model to the Python Coding Environment
Click on the “Export Model” button on the top right of the Testing box, and PictoBlox will load your model into the Python Coding Environment.
Observe that have created a python testing code already for you.
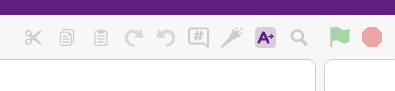
Click on Beautify Button to make the code error-free of any indentation errors. It’s the left icon from the A+ (Magic Wand).
Following is the code which is created by PictoBlox.
####################imports####################
# Do not change

import numpy as np
import tensorflow as tf
import time

# Do not change
####################imports####################

#Following are the model and video capture configurations
# Do not change

model = tf.keras.models.load_model("num_model.h5",
                                   custom_objects=None,
                                   compile=True,
                                   options=None)
pose = Posenet()  # Initializing Posenet
pose.enablebox()  # Enabling video capture box
pose.video("on", 0)  # Taking video input
class_list = ['Forward', 'Backward', 'Left', 'Right',
              'Stop']  # List of all the classes

# Do not change
###############################################

#This is the while loop block, computations happen here
# Do not change

while True:
  pose.analysehand()  # Using Posenet to analyse hand pose
  coordinate_xy = []

  # for loop to iterate through 21 points of recognition
  for i in range(21):
    if (pose.gethandposition(1, i, 0) != "NULL"
        or pose.gethandposition(2, i, 0) != "NULL"):
      coordinate_xy.append(int(240 + float(pose.gethandposition(1, i, 0))))
      coordinate_xy.append(int(180 - float(pose.gethandposition(2, i, 0))))
    else:
      coordinate_xy.append(0)
      coordinate_xy.append(0)

  coordinate_xy_tensor = tf.expand_dims(
      coordinate_xy, 0)  # Expanding the dimension of the coordinate list
  predict = model.predict(
      coordinate_xy_tensor)  # Making an initial prediction using the model
  predict_index = np.argmax(predict[0],
                            axis=0)  # Generating index out of the prediction
  predicted_class = class_list[
      predict_index]  # Tallying the index with class list
  print(predicted_class)
The code uses three libraries:
- OpenCV – For image capture and image processing
- Numpy – For array manipulation
- Tensorflow – For machine learning
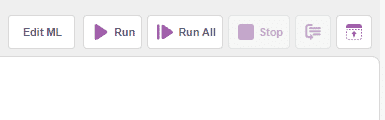
Click on the Run button to run and test the code.
Modifying the Code
Let’s add the code for the Beetle in the Maze.
We need to do the following:
- Setup the Sprites on the Stage.
- Add conditions for the Beetle to move on hand gestures.
- Add conditions for the Beetle to sense the Maze and return to the initial position.
- Add conditions for the Beetle to sense the Banana and announce GAME OVER.
Let’s start!
Setting up the Sprite
- Select the Beetle sprite.
- Add the sprite class declaration at the start of the program.
sprite = Sprite("Beetle") - Before the while loop, set the initial positions for the Beetle:
sprite.setdirection(0) sprite.setsize(50) sprite.gotoxy(-150, -150) - Select the Maze sprite and set the position of the Maze:
sprite = Sprite('Maze') sprite.gotoxy(0, 0) sprite.setsize(100) - Select the Banana sprite and set the position of the Banana:
sprite = Sprite('Bananas')

sprite.setsize(70)
sprite.gotoxy(-140, 150)
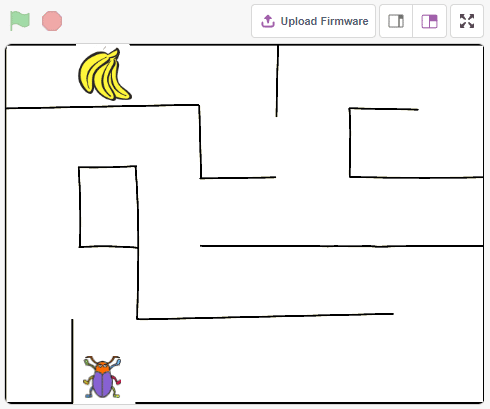
At the start the stage should look like this:
Moving Beetle
Select the Beetle sprite.
The predicted class result is stored in the predicted_class variable in the loop. We will run if else to check each condition and make the sprite say the following conditions accordingly.
  if pose.ishanddetected():
    if predicted_class == "Forward":
      sprite.setdirection(0)
      sprite.move(5)
    if predicted_class == "Backward":
      sprite.setdirection(180)
      sprite.move(5)
    if predicted_class == "Left":
      sprite.setdirection(-90)
      sprite.move(5)
    if predicted_class == "Right":
      sprite.setdirection(90)
      sprite.move(5)
Condition for Maze
Select the Beetle sprite.
Add the condition to check if the Beetle is touching the Maze. If yes, make it go back to the initial position.
  if sprite.istouching("Maze"):
    sprite.gotoxy(-150, -150)
Condition for Banana
Select the Beetle sprite.
Add the condition to check if the Beetle is touching the Banana. If yes, make Beetle say “Game Over”.
  if sprite.istouching("Bananas"):
    sprite.say("Game Over", 2)
    break
Your code is ready:
####################imports####################
# Do not change
import numpy as np
import tensorflow as tf
import time
sprite = Sprite("Beetle")
# Do not change
####################imports####################
#Following are the model and video capture configurations
# Do not change
model = tf.keras.models.load_model("num_model.h5",
custom_objects=None,
compile=True,
options=None)
pose = Posenet() # Initializing Posenet
pose.enablebox() # Enabling video capture box
pose.video("on", 50) # Taking video input
class_list = ['Forward', 'Backward', 'Left', 'Right',
'Stop'] # List of all the classes
# Do not change
###############################################
sprite.setdirection(0)
sprite.setsize(50)
sprite.gotoxy(-150, -150)
#This is the while loop block, computations happen here
# Do not change
while True:
pose.analysehand() # Using Posenet to analyse hand pose
coordinate_xy = []
# for loop to iterate through 21 points of recognition
for i in range(21):
if (pose.gethandposition(1, i, 0) != "NULL"
or pose.gethandposition(2, i, 0) != "NULL"):
coordinate_xy.append(int(240 + float(pose.gethandposition(1, i, 0))))
coordinate_xy.append(int(180 - float(pose.gethandposition(2, i, 0))))
else:
coordinate_xy.append(0)
coordinate_xy.append(0)
coordinate_xy_tensor = tf.expand_dims(
coordinate_xy, 0) # Expanding the dimension of the coordinate list
predict = model.predict(
coordinate_xy_tensor) # Making an initial prediction using the model
predict_index = np.argmax(predict[0],
axis=0) # Generating index out of the prediction
predicted_class = class_list[
predict_index] # Tallying the index with class list
print(predicted_class)
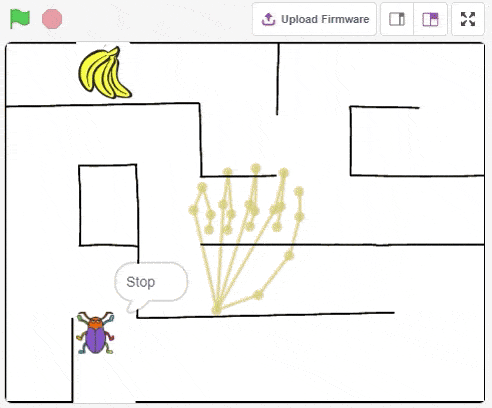
sprite.say(predicted_class)
if pose.ishanddetected():
if predicted_class == "Forward":
sprite.setdirection(0)
sprite.move(5)
if predicted_class == "Backward":
sprite.setdirection(180)
sprite.move(5)
if predicted_class == "Left":
sprite.setdirection(-90)
sprite.move(5)
if predicted_class == "Right":
sprite.setdirection(90)
sprite.move(5)
if sprite.istouching("Maze"):
sprite.gotoxy(-150, -150)
if sprite.istouching("Bananas"):
sprite.say("Game Over", 2)
breakRun the code and test it.