
Introduction
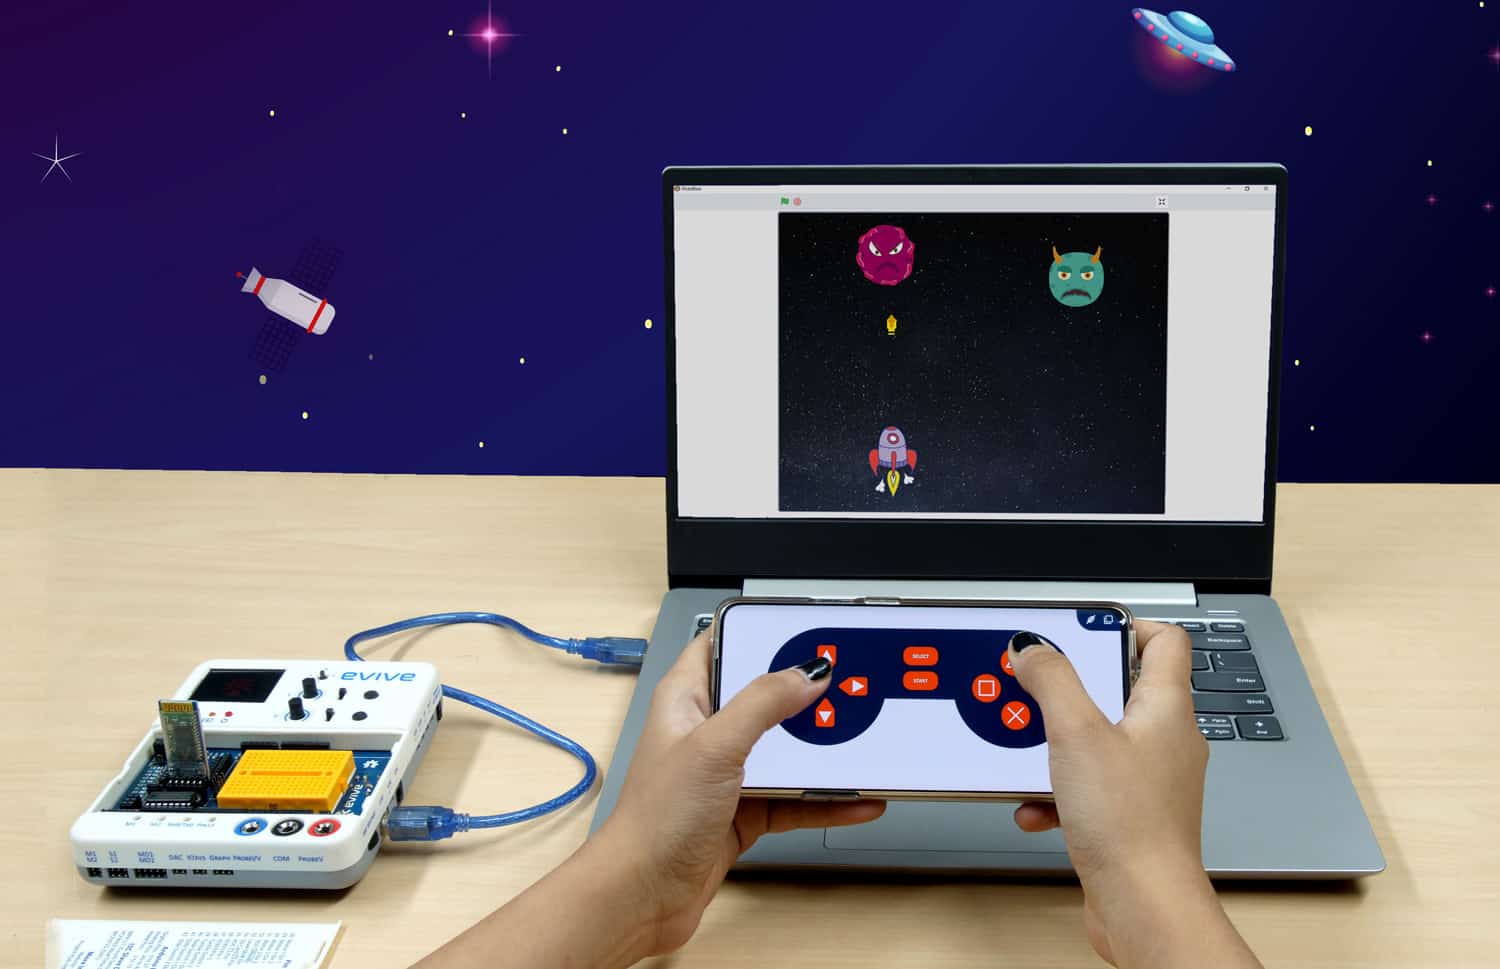
Fans of video games out there! This project’s especially for you! You may have played loads of videos games right from the classic oldies to the latest ones. But have you ever made one yourself? If your answer is NO, then get ready to change it after you dive into this project! In this project, you’re going to learn how to make a cool space battle game using PictoBlox – a graphical programming software based on Scratch that makes coding easy, fun, and interactive. The best part? We’re going to play the game with a Smartphone using the ingenious project interaction and controlled app, Dabble.
You can download PictoBlox from HERE and get Dabble on Google Play.
So, who’s ready to kick down some monsters?
Ready, set, SHOOT!
Setting Up the Stage
Since this battle will take place in space, we need a backdrop that looks like outer space. Click on Choose a Backdrop and select the Stars backdrop from the library. 
Bringing in the Sprites
For this game, we need three sprites: our rocketship, our enemy – the space monsters, and something to destroy them with – special monster-killing bullets. Click on the Choose a Sprite button and add the three sprites one by one from the library.![]()
Readying the Rocketship
Follow the steps below to write the script:

- Connect evive to your computer and open PictoBlox. Then, choose it as your board and select the appropriate port from the Connect menu. Don’t forget to upload the firmware!
- Drag and drop the when flag clicked block in the scripting area.
- Drag and drop the goto x() y() block below the when flag clicked block. Set x as 0 and y as -140; this will be our rocketship’s initial position.
- Adjust the rocket’s size using the set size to () % block. Change it to 40% of the original size.
- This time, let’s add some music at the beginning of the game. Add the start sound () block from the Sound palette. Now, click on the Sound tab; it is next to the Code tab in the Block palette. In the bottom-left corner, you will find the Choose a Sound button. Select Video Game 1 from the library.
- To go back to writing the script, click on the Code tab. Now, from the drop-down of the start sound () block, choose Video Game 1.
- Now, we need to create two variables: one to monitor the health of our rocketship and the other to keep track of how many enemies we have killed. Go to the Variables palette and create the variables Health and Score.
- Set the Initial value of health to 3 and Score to 0.
- Drag and drop a forever block.
Now comes the fun part! We are going to use a Smartphone to control the actions of our rocketship. For that, we are going to use Dabble, a project-making Smartphone app.
We will use Dabble’s Gamepad module. From the Dabble palette, drag and drop the is () pressed on gamepad? block and select Left from the drop-down. On pressing Left, the value of x coordinate will change by -15 i.e your rocketship will move 15 steps in the left. Similarly, on pressing Right on the gamepad, the value of x coordinate will change by 15 and the rocket will go right.
We will fire the bullets using the Triangle button on the gamepad. For generating multiple bullets, we are going to use the create clone of () block. Select Bullet from its drop-down.
Below is the complete script: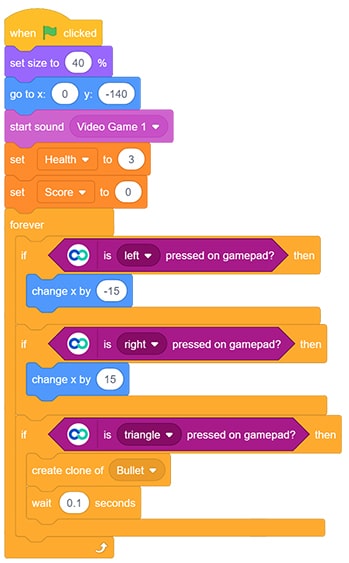
Scripts for the Monsters
We will write two scripts: first for creating multiple monsters and second for assigning actions to them.
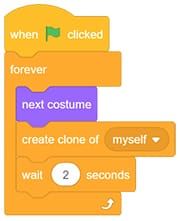
Creating Multiple Monsters
- Drag and drop the when flag clicked block.
- Drag and drop the forever block.
- Inside it, drag and drop the next costume block; then, create its clone.
- Add the wait () seconds block and set the time as 2 seconds.
Assigning Actions to the Monsters
The monsters should randomly appear from the top of the stage and gradually move downward until either they reach the bottom of the stage or you shoot them down. If they hit by the bullet, they should disappear and the score should increase by 1; however, if anyone of them touches our rocketship, they will harm us! Hence, the value of the Health variable should decrease by one. If it reaches 0, the game should end. Below is the script based on this logic: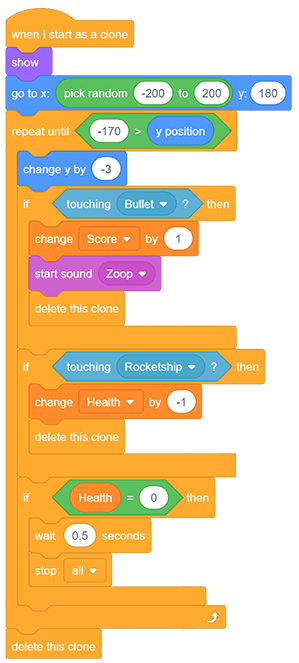
Shooting the Bullets
- Drag and drop the when I start as a clone block.
- Set the size and add the Laser2 sound.
- Go to the same initial position as that of the rocketship so that it appears that the ship is firing the bullets.
- Drag and drop a repeat until block to decide the duration of the bullet’s movement. It should move upward until it hits any of the monsters or reaches the top of the stage. To provide upward motion, its y coordinate should change by 12 steps every time.
Below is the script.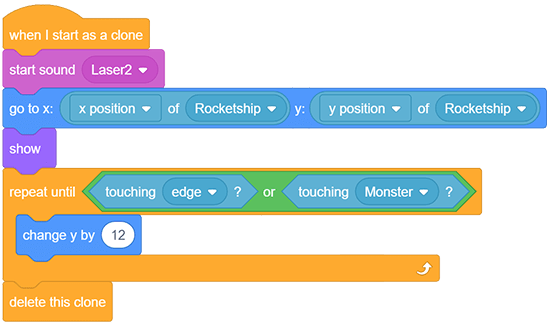
Connection with Smartphone
Follow the steps below to pair Dabble with evive:
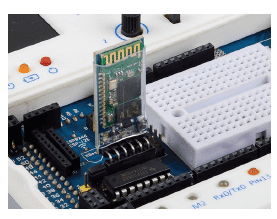
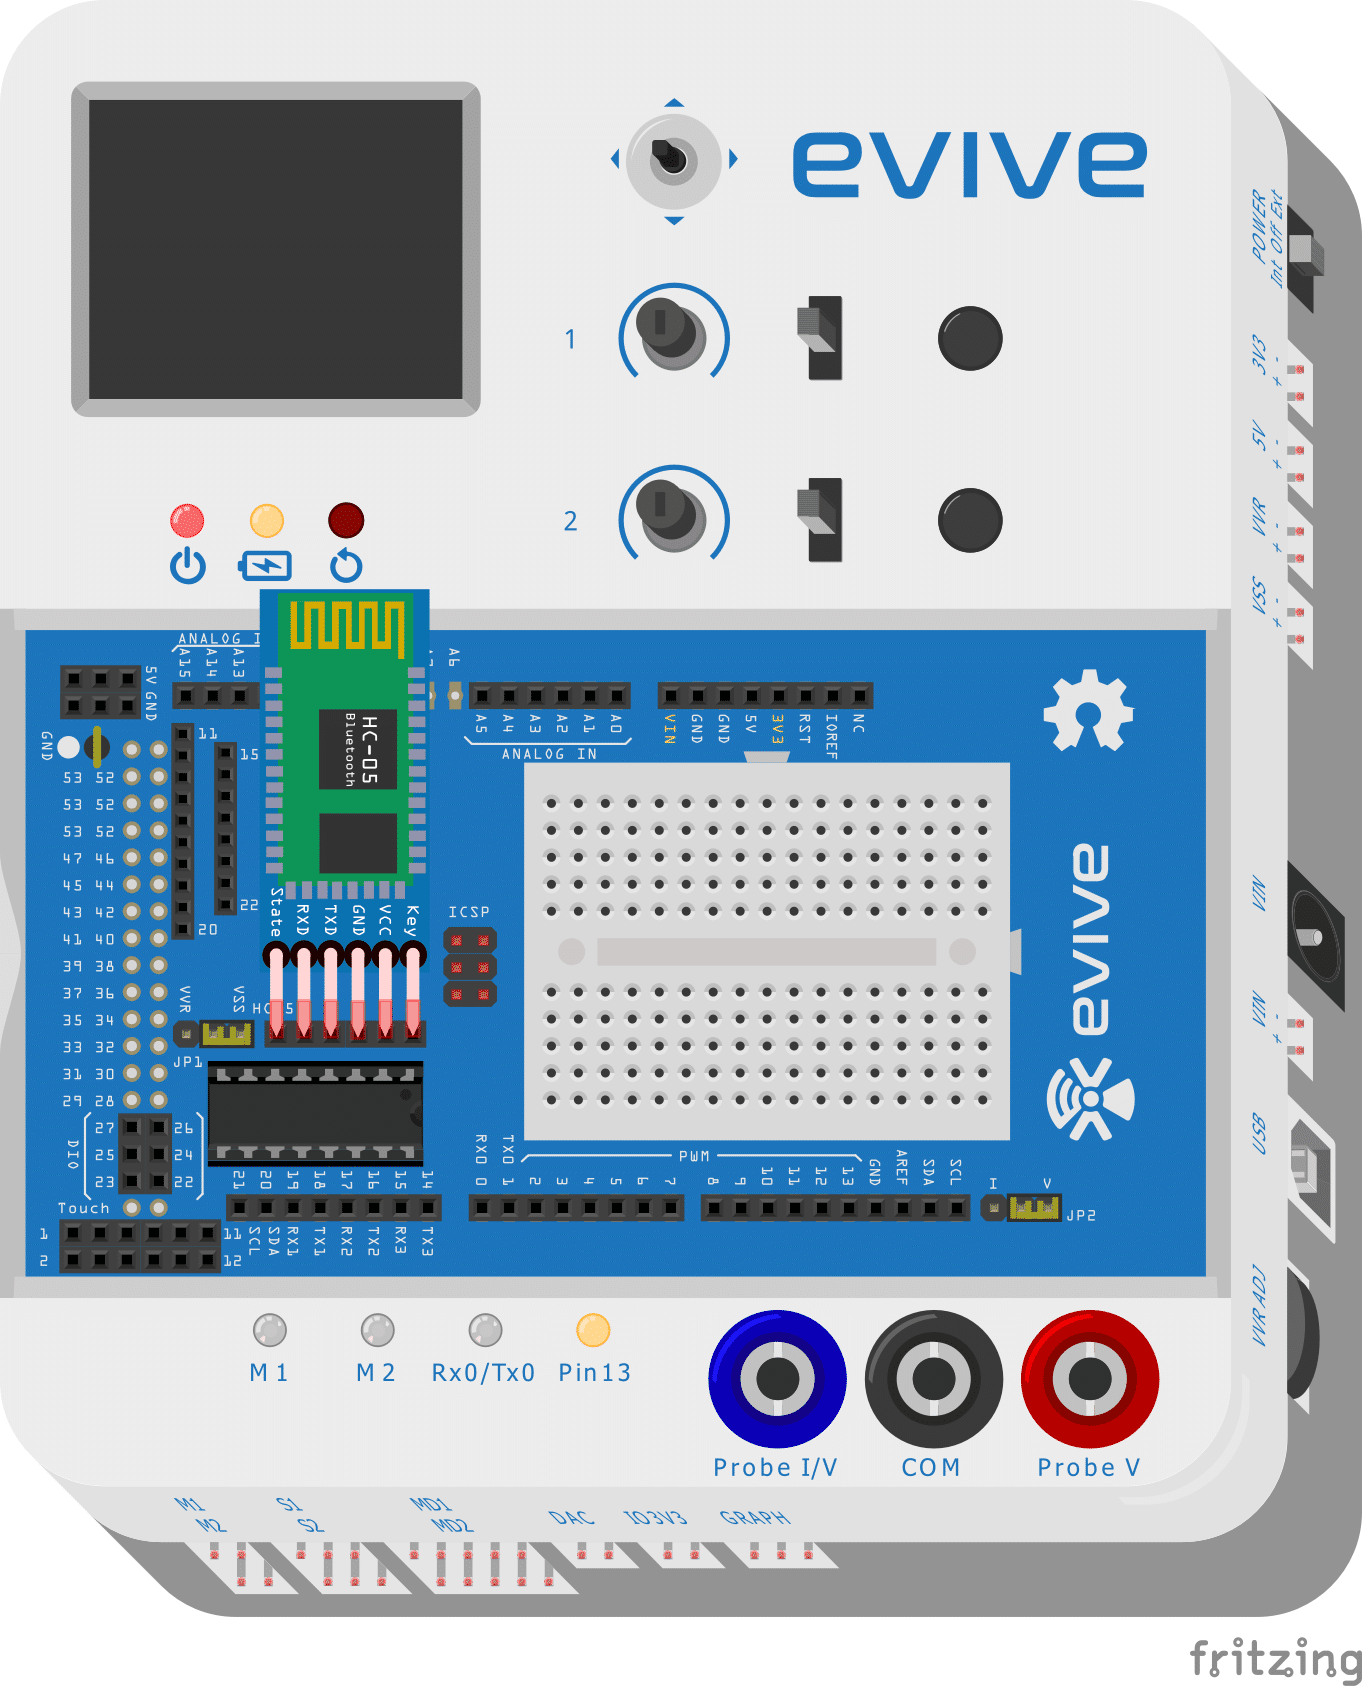
- Connect the HC-05 Bluetooth module (available in the Starter Kit) to evive as shown below:
- Install Dabble in your Smartphone from Play Store.
- Click on the Connect-Disconnect icon and select the appropriate device from the list. You can find it by matching the last few characters of the ID written on the Bluetooth module. After a successful connection, a message will be displayed for the same. If not, then go to the Bluetooth settings of your phone to pair the devices (The default passwords 1234 or 0000).
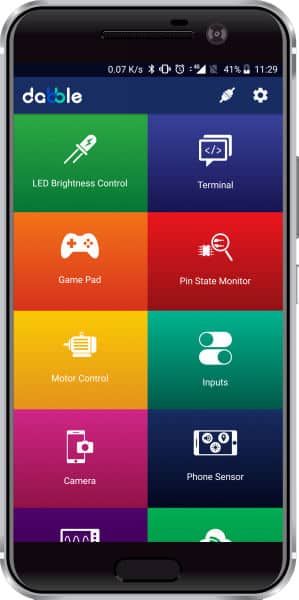
- Open the Gamepad module in Dabble and select Digital mode.
Enjoy the game!
Conclusion
With this, you’re all set to take down those monsters and save the universe! Good luck, commander!


 _ Naga Pranav Patcha 3-39 screenshot")


