
Activity Overview
Have you ever used Snapchat filters, Instagram filters, or video call effects and wondered how the computer knows where to place glasses, crowns, masks, or bunny ears on your face?
In this activity, you will explore Face Detection, a type of Computer Vision that helps AI systems detect facial features such as the eyes, nose, and mouth. You will build your own interactive AI-powered face filter using the Face Detection extension in PictoBlox.
What You’ll Learn
By completing this activity, you will learn:
- How AI detects facial features?
- How face filters work?
- How Computer Vision is used in real-life apps?
- Why AI sometimes makes mistakes?
- How testing helps improve AI projects?
- How to create an interactive face filter in PictoBlox?
What You’ll Create
You will create an interactive AI-powered face filter that follows the user’s face in real time using the webcam.
The filter will automatically adjust its position and size based on the detected face.
What You’ll Need
To complete this activity, you will need:
- A laptop or computer with a camera
- Latest version of PictoBlox installed
- A good internet connection
- PictoBlox account login
- Face Detection extension added in PictoBlox
Note: The Face Detection extension requires an internet connection and a PictoBlox login to load the AI models properly.
Setting Up the Project
Engage: Think First
Before opening PictoBlox, think about the face filters you may have seen or used.
Think About It
Have you ever used:
- Snapchat filters?
- Instagram filters?
- Video call effects?
Have you ever wondered how the computer knows where your face is? Before moving on, write down your prediction.
Explore AI
Before building the project, students can observe how a webcam reacts to different face positions.
Try This: Open your webcam and think about what might happen if:
- You move farther away
- You wear glasses
- You tilt your head
Note: Write your predictions in your notebook before building the project. Don’t worry if they are incorrect; you will test your ideas after completing the project.
Explain: Learn the AI Concept
How Does Face Detection Work?
Face Detection is an AI technology that helps a computer find a human face in an image or video.
It looks for important parts of the face, such as:
- Eyes
- Nose
- Mouth
- Face position
- Face size
Once the AI detects the face, it estimates where the filter should be placed. This is how face filters can follow the face when the person moves.
Did You Know?
- Face Detection tells where a face is.
- Face Recognition tries to identify whose face it is.
Build Your Project
You will build an AI-powered face filter project in PictoBlox.
Let’s begin by adding the Face Detection extension.
- Open PictoBlox on your computer and select Block Coding.
- Click on the Add Extension button. Choose the Face Detection extension.
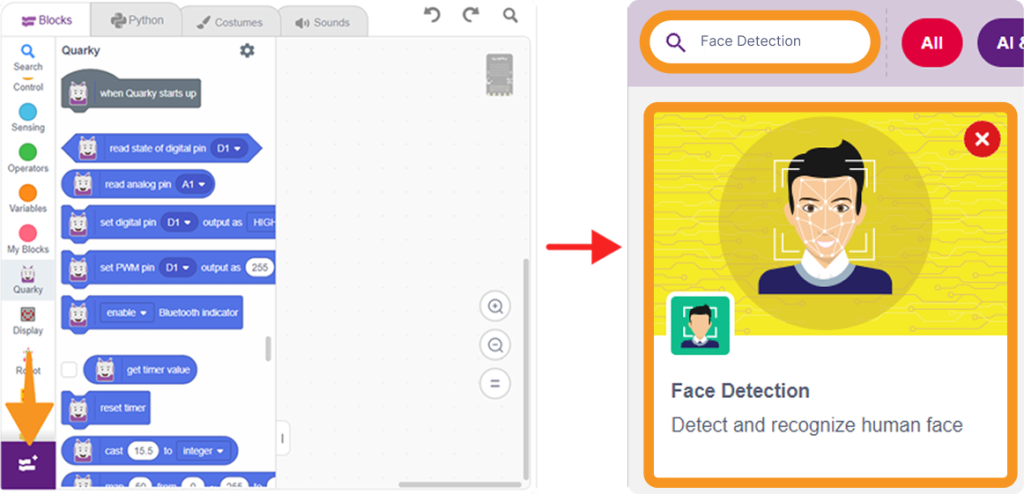
- Wait for a short time while the AI models load. Make sure the Face Detection extension is loaded successfully.
Once the extension is added, you are ready to start building the project.
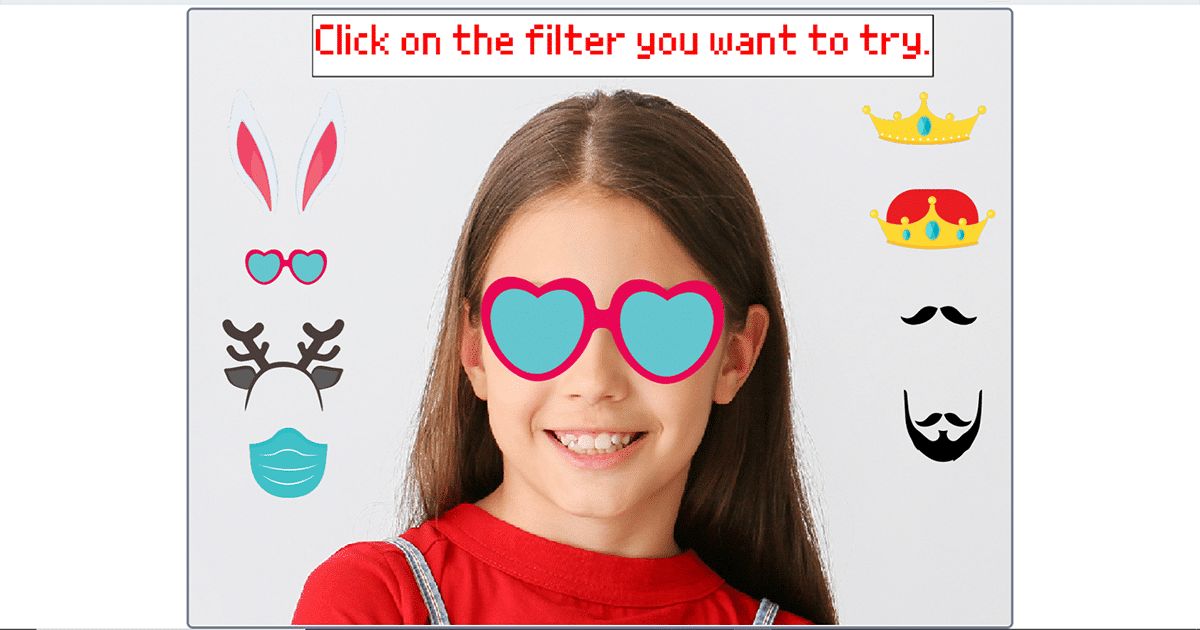
Create Your Face Filter Library
In this part, students will add different face filter sprites that can be selected during the activity.
Making the Face Filter Library
In this part, you will add different face filter sprites that can be selected during the activity.
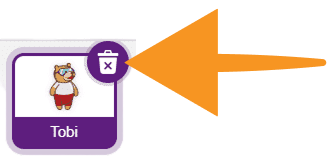
- Delete the default Tobi sprite from the stage.
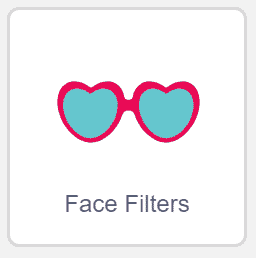
- Click on the Choose a Sprite button. Add the face filter sprite you want to apply to your face.
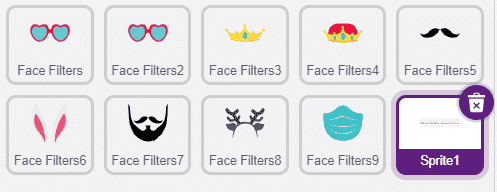
 You can add multiple face filter sprites one by one to create a small filter library.
 - Go to the Costumes tab and change the costumes of the face filter sprites.
Use the suggested costumes for the face filter sprites as follows: Face Filter 2 should be changed to Heart Goggles, Face Filter 3 to Crown 1, Face Filter 4 to Crown 2, Face Filter 5 to Mustache, Face Filter 6 to Bunny Ears, Face Filter 7 to Beard, Face Filter 8 to Deer, and Face Filter 9 to Face Mask.
Students can also choose their own filters.
- Let’s create an additional sprite with a small message that prompts users to click on different filters to try them. Click on the Choose a Sprite button and select Paint.
- Use the Rectangle tool to draw the background and the Text tool to display the message.

- Now that the sprites are added, let’s begin by setting up the stage. You can choose the filters of your choice.
Customizing the Face Filter Sprite
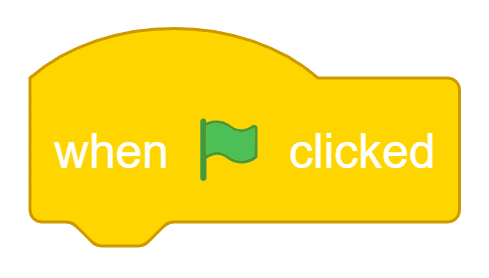
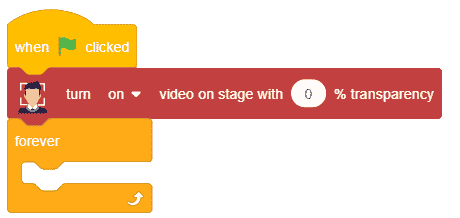
- Select the main face filter sprite. Add the when green flag clicked block.
- From the Face Detection palette, add the block to turn on the video on the stage. Set the camera to ON with 0% transparency.

- From the Control palette, add a forever block. This keeps the face filter updating continuously.
- Inside the forever block, add the analyse image from stage block. This allows PictoBlox to continuously analyze the webcam feed and detect the face.

- Inside the forever block, add the analyse image from stage block. This allows PictoBlox to continuously analyze the webcam feed and detect the face.
- Add the set size to % block from the Looks palette. Inside it, place the get width of face 1 block from the Face Detection palette.

- Next, we need to detect the location where the face filter should be applied. Add the go to x() y() block from the Motion palette. Add the get () of face () block from the Face Detection palette in the X parameter and choose x position from the first drop-down.
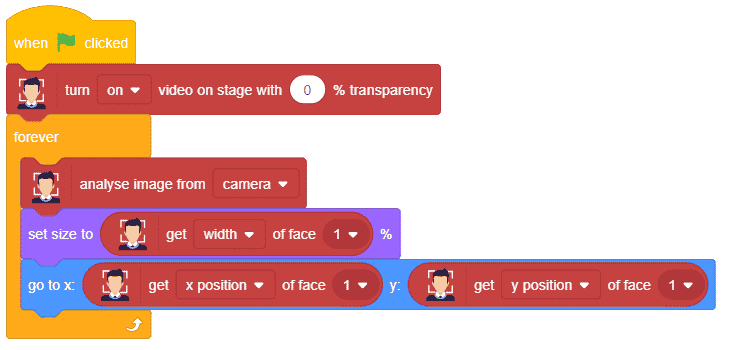
Now the filter will move to the detected face position and follow the face in real time.
Making the Face Filters Clickable
Now students will make the filter library interactive.
- Add the when green flag clicked block. Set the size of each filter sprite to 50%. This makes the filter buttons small and easy to place on the stage.

- when this sprite clicked, then add a broadcast message block. Create a different broadcast message for each filter.
Examples: Face Filter 2 – Heart Goggles, Face Filter 3 – Crown 1, Face Filter 4 – Crown 2, Face Filter 5 – Mustache, Face Filter 6 – Bunny Ears, Face Filter 7 – Beard, Face Filter 8 – Deer, and Face Filter 9 – Face Mask.
Completing the Script
Select the main face filter sprite.
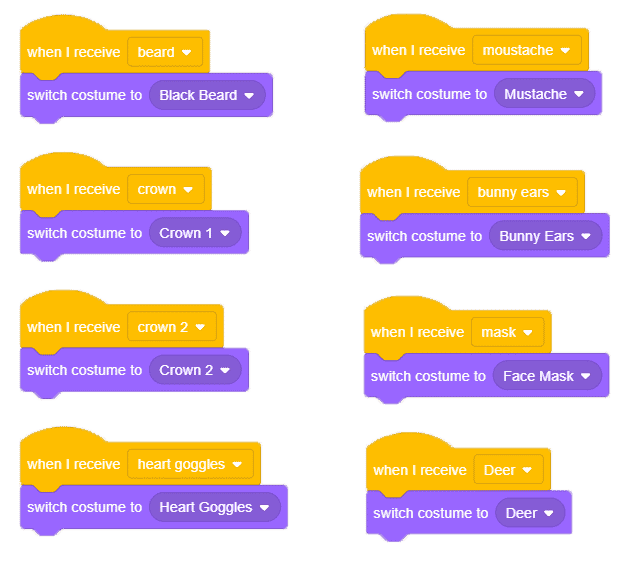
- Add the when I receive block.
- Choose the broadcast message, such as Heart Goggles.
- Add the switch costume to block and select the matching costume.
Repeat this for all filter messages.
Example:
- When I receive Heart Goggles → switch costume to Heart Goggles
- When I receive Crown 1 → switch costume to Crown 1
- When I receive Mustache → switch costume to Mustache
- When I receive Bunny Ears → switch costume to Bunny Ears
Now the user can click different filters and apply them to their face.
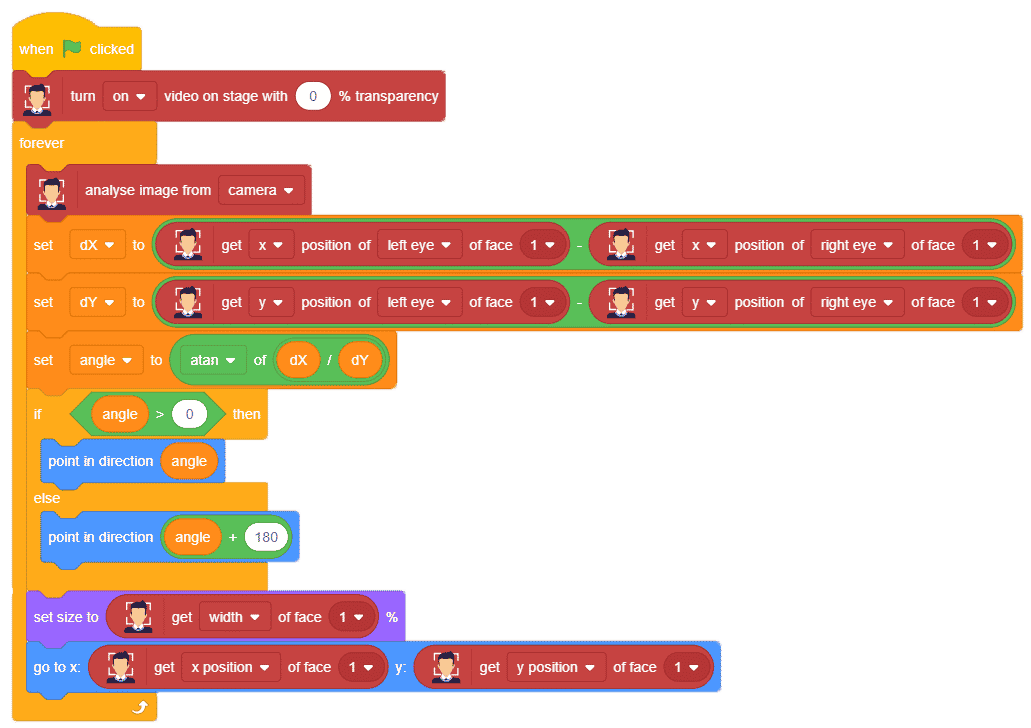
Making the Face Filter Tilt
After testing the filter, students may notice that the filter follows the face but does not tilt when the head tilts.
To make the filter tilt, we need to estimate the face angle using the positions of the eyes.
- To find the tilt angle of your head, we will use the slope of a line that joins your eyes.
- We will calculate the difference in the X-position and Y-position of the left and right eyes and store them in variables named dX and dY. The slope is then equal to dX/dY.
- To find the angle, we will apply the Tan inverse function to it.
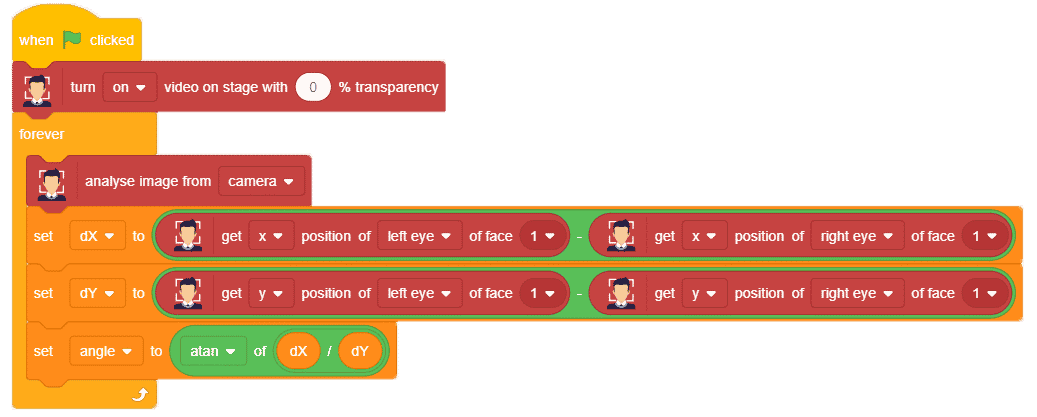
- If the angle is positive, make the filter point in the direction of that angle.
- If the angle is negative, add 180 to it to get the correct angle.
You can download and test the project here. Click here to download and open it in PictoBlox.
AI Investigation
After building the project, you should test how well the AI works in different situations.
Try the face filter in these conditions:
- Bright light
- Dim light
- Wearing glasses
- Covering one eye
- Standing far away
- Using a printed photograph
Observe what happens in each case.
Evaluate
After testing, what did you learn?
- What surprised you in this activity?
- In which condition did the filter work best?
- If you improved this AI, what would you change?
Keep Exploring AI
Now that you have built one AI project, you can try creating more projects such as:
- Emotion detector
- Gesture-controlled game
- AI photo booth
- Accessibility tool
- Face mask detector
- Smart attendance activity
Explore more PictoBlox AI projects and continue testing how AI works in the real world.
Conclusion
In this activity, you created an AI-powered face filter using PictoBlox and the Face Detection extension.
You learned how AI detects facial features, how face filters follow the face, and why AI may make mistakes in different conditions. You also explored important concepts such as Computer Vision, face position, face size, costume switching, broadcast messages, and real-time testing.
This project helps young learners understand how AI is used in popular apps like Snapchat, Instagram, and video calling tools, while giving them hands-on experience in building their own interactive AI project.


