Activity Description
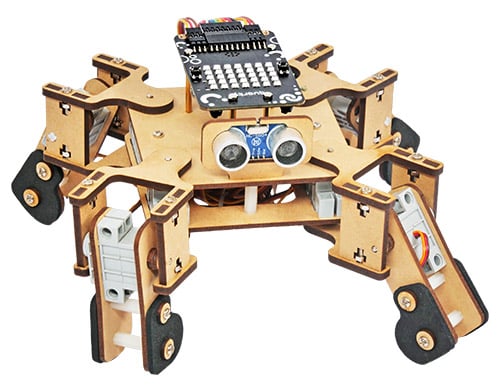
In this activity, you use a visual block-based coding environment to program a quadruped robot. The code shows how to set servo motor pins for each leg and define movement patterns such as forward, backward, lateral left, and lateral right. You also learn to control the robot’s speed and timing using variables and wait blocks. The robot starts in a neutral “home” position and performs motion sequences repeatedly or based on your inputs. This activity helps you understand basic robotics, motion control, and sequential logic in a hands-on, engaging way.
Activity 1: Quadruped Movements
Let’s Code
Follow the steps
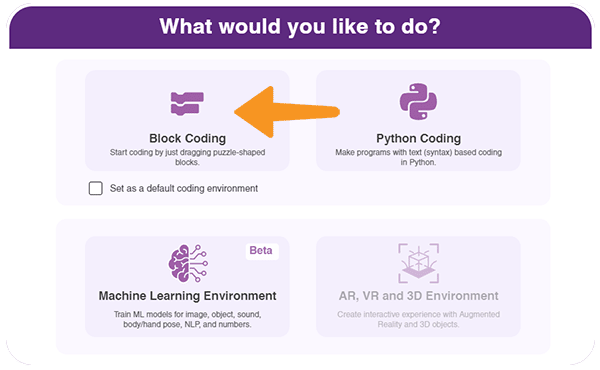
- Open the PictoBlox application from the Start Menu.
- Select the inviting realm of Blocks as your coding environment.
- Connect “Quarky” to your computer using a USB cable. Then, click the Board button in the toolbar and select board as Quarky.
- Next, select the appropriate Serial port if the Quarky is connected via USB or the Bluetooth Port if you want to connect Quarky via Bluetooth and press Connect.
- Click on the Add Extension button and add the Quarky Quadruped extension.
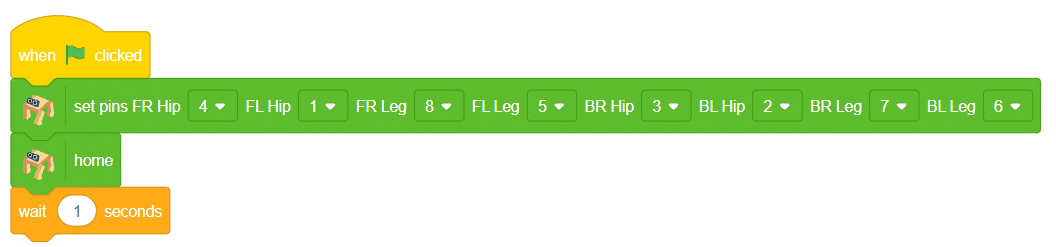
- Add when flag clicked block from the Event Palette.
- To set up the quadruped, you can drag and drop pins for each leg and hip into the initialisation block using set pins FR Hip () FL Hip () FR Leg () FL Leg() BR Hip () BL Hip () BR Leg () BL Leg () blocks. This block sets which pins on the Quarky controller board control each servo motor for the front right (FR), front left (FL), back right (BR), and back left (BL) hips and legs. Drag this block and set each PIN as shown.

- Add the “home” block right after setting pins.. This will bring the robot to its initial position.
- Add a wait block after home. This gives the robot time to move to the home position before doing the next action.
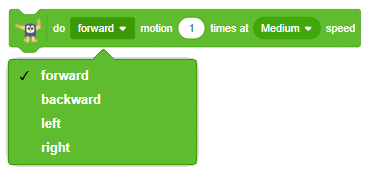
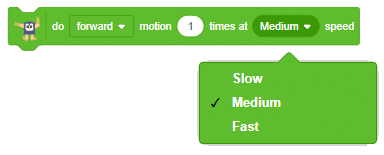
- Add the
do forward motion 1 time at Medium speed block. This block instructs the quadruped robot on how to move, how many times, and at what speed.
For example:

This makes the robot take one step forward at medium speed.
- Add the “home” block right after setting pins.. This will bring the robot to its initial position. Click on the green flag to run the motion sequence.


Note: You can change the direction, number of times, and speed of the motion block. There are 8 predefined motions to choose from for your robot’s movement!
Activity 2: Controlling Speed using Variables
Introduction to Variable
A variable is a named storage that holds a value which can change during the program. In programming, a variable is a named space in memory used to store data that can change during the execution of a program. It acts like a container that holds information—such as numbers, text, or other data types—which you can create, modify, and use throughout your code. Variables make programs flexible and dynamic by allowing data to be reused and updated.
Example:
Think of a school bag with your favourite toy inside. You can change the toy anytime — today it’s a car, tomorrow it’s a doll.

Let’s Code
- Click on the Variables category in the blocks palette.
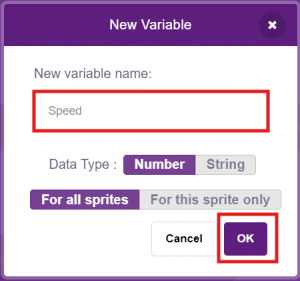
- Create a New Variable: Click on the “Make a Variable” button.
- Enter Variable Name: In the New Variable window, type your variable name in the box.
(e.g., type Speed as shown in the picture)
- Click the OK button to create your variable.
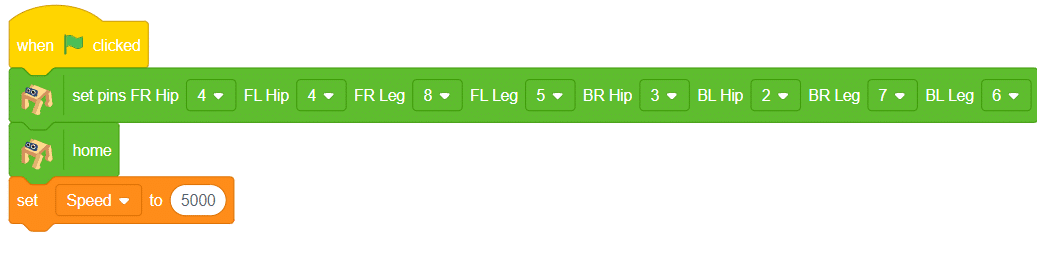
- Add when flag clicked block from the Event Palette.
- To set up the quadruped, you can drag and drop pins for each leg and hip into the initialisation block using set pins FR Hip () FL Hip () FR Leg () FL Leg() BR Hip () BL Hip () BR Leg () BL Leg () blocks. This block sets which pins on the Quarky controller board control each servo motor for the front right (FR), front left (FL), back right (BR), and back left (BL) hips and legs. Drag this block and set each PIN as shown.
- Add the “home” block right after setting pins.. This will bring the robot to its initial position.
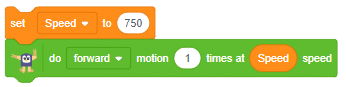
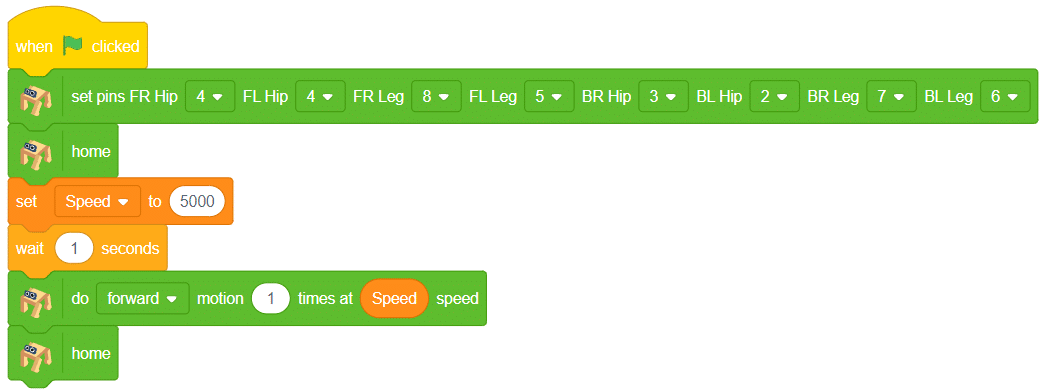
- Set the variable Speed to the value 5000 (this controls how fast the robot moves).
- Add a wait block after home. This gives the robot time to move to the home position before doing the next action.
- Add the do (forward) motion (1) times at () speed block to move forward for 1 motion cycle at the speed set by the variable Speed.
- Add the “home” block right after setting pins.. This will bring the robot to its initial position.
Note: You can change the value of the ‘Speed’ variable to test how it affects the robot’s movement, and program the quadruped robot to perform predefined motions such as forward, backward, left, and right using motion blocks.
Output
Activity 3: Quadruped Predefined Motions
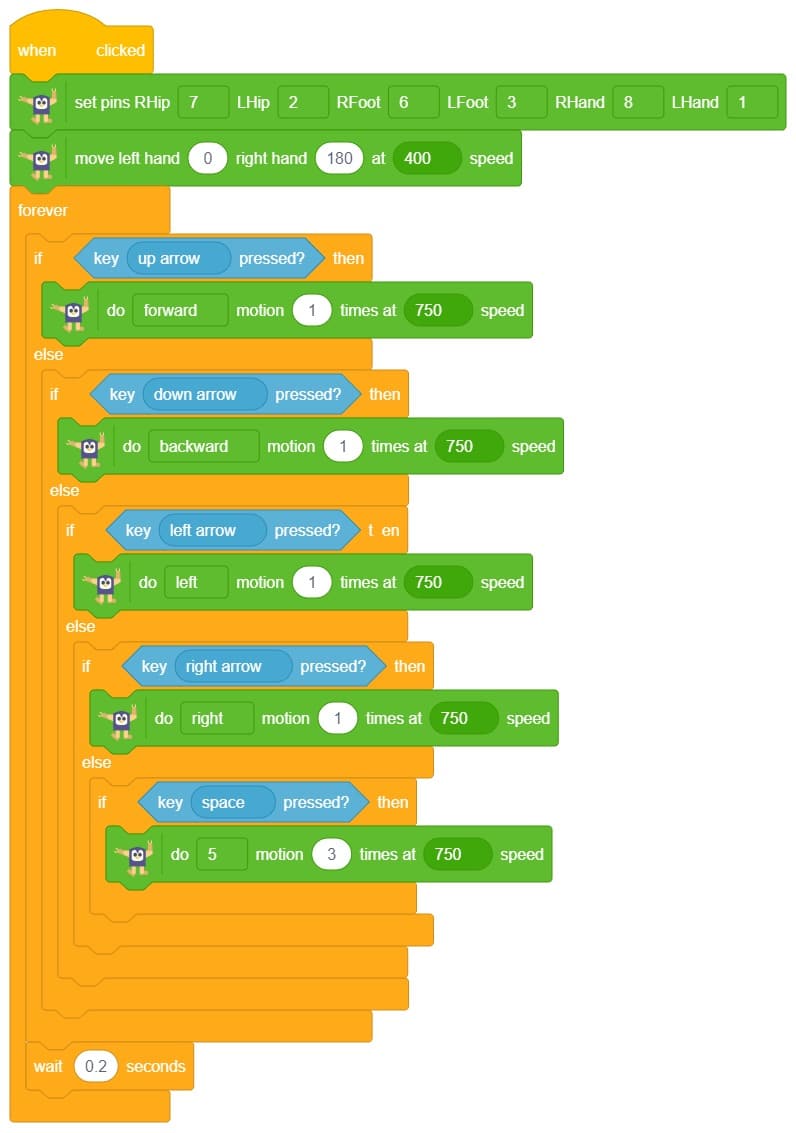
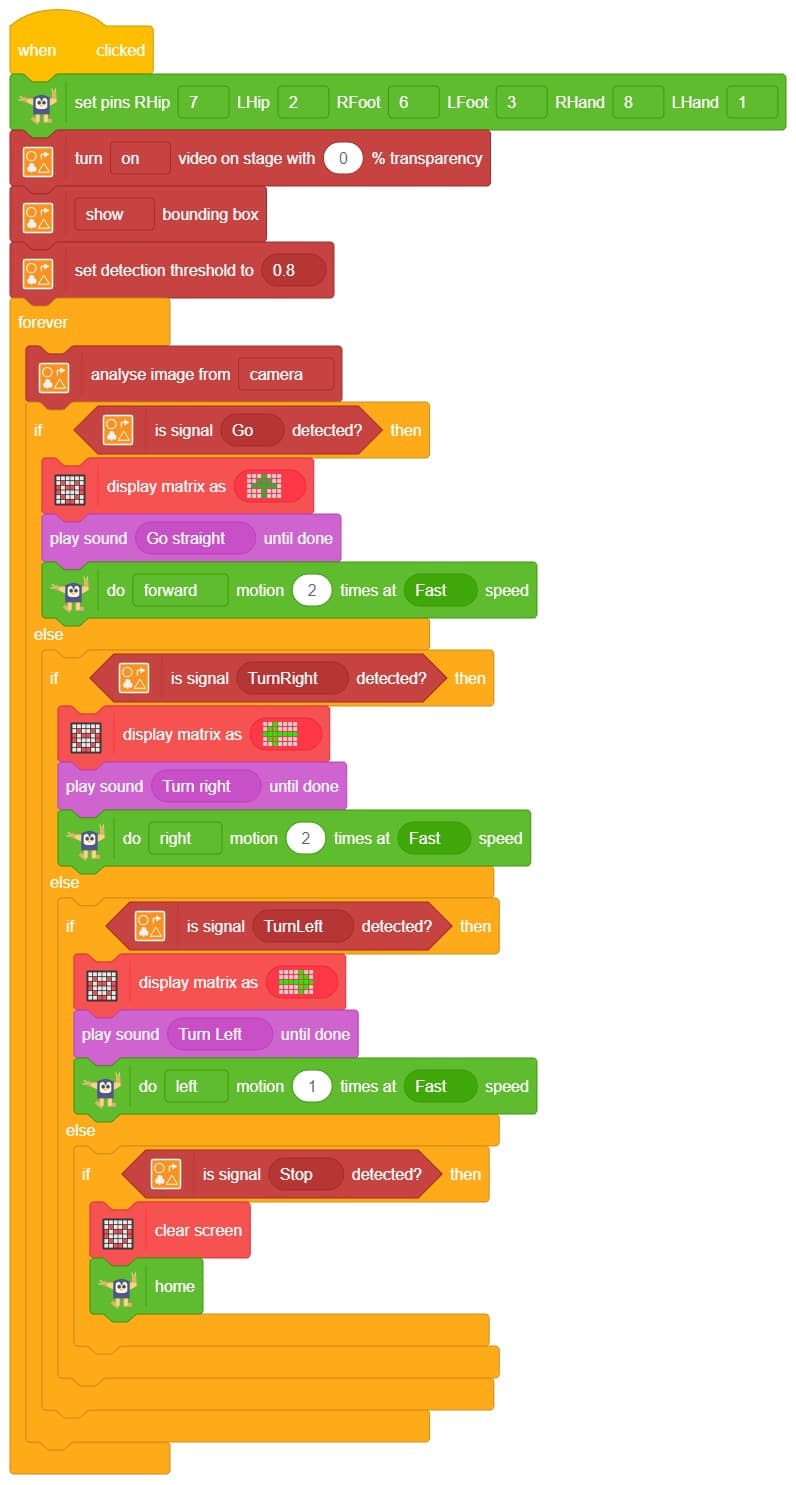
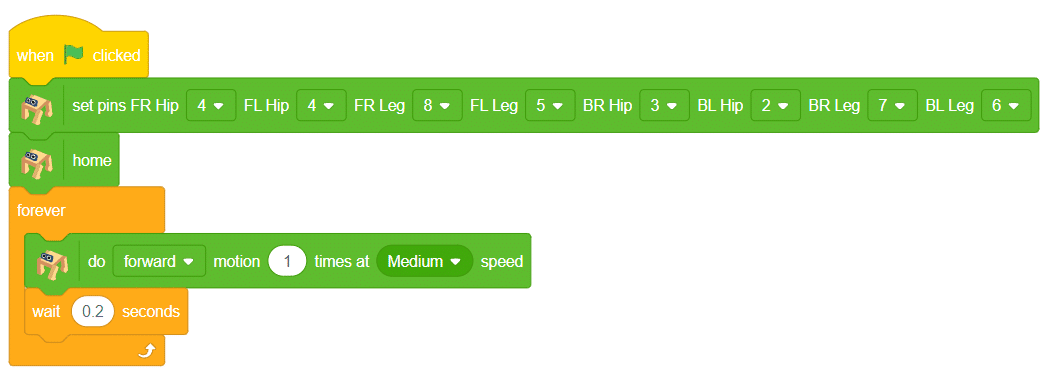
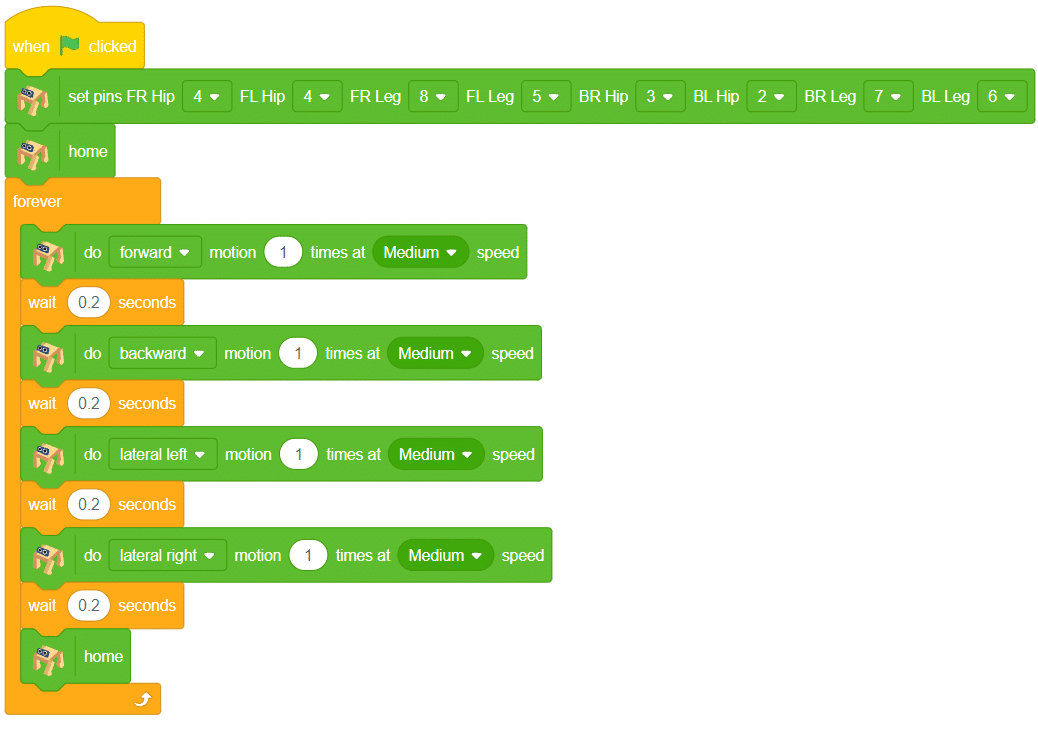
- Click on the Events palette and choose the ‘when flag clicked’ block. This block starts the program when the green flag is clicked.
- Set the servo motion pins using the ‘set pins’ block from the Quarky Quadruped palette. Assign the pins exactly as shown in the image for all 8 legs and hips.
- Add the ‘home’ block from the Quarky Quadruped palette. This brings the robot to a stable starting position.
- Add a ‘forever’ block from the Control palette. This repeats the movement continuously.
- Inside the ‘forever’ block, add the block:
do (forward) motion (1) times at (Medium) speed This makes the robot take one forward step at medium speed.
- Finally, add a ‘wait (0.2 seconds)’ block from the Control palette. This gives a short pause before the next step is repeated.
- Similarly, repeat Steps 5 and 6 for the movement of the Robot in the different directions.
 Output