Introduction
Push buttons, also known as tactile switches, can be found everywhere: from phones to elevators to large industrial machines. They are the simplest type of input device. Learn what is push button, how do they work, how to interface them with evive and program them in PictoBlox – our Scratch blocks-based graphical programming platform with advanced hardware interaction abilities, and finally what exciting DIY projects you can make using the push buttons available in the evive Starter Kit.
To work in PictoBlox, you’ll first need to download it from HERE.
Ready? Set. Go!
What is Tactile Switch or Push Button
Tactile Switches, also known as push buttons, can be found everywhere: from phones to elevators to large industrial machines. They are the simplest type of input device.
A push button helps in closing an open electronic circuit or the reverse temporarily during the time it is pressed. It has a small spring which helps it to return to its original position when the user takes the pressure off the button.
There are mainly two types of push-buttons:
- Normally open (NO)
- Normally closed (NC).
Normally open (NO) Push Button
A circuit with a normally open push-button is open by default. When the user presses the button, the circuit becomes complete and the current starts flowing through it.
Normally closed (NC) Push Button
A circuit with a normally closed push-button is closed by default. The circuit breaks on pressing the button.
How to interface a Tactile Switch with evive
Now that we know what push buttons are, let’s take a look at how to interface it with evive and see it in action.
evive already has two push-buttons internally connected to Digital Pin 38 and pin 39.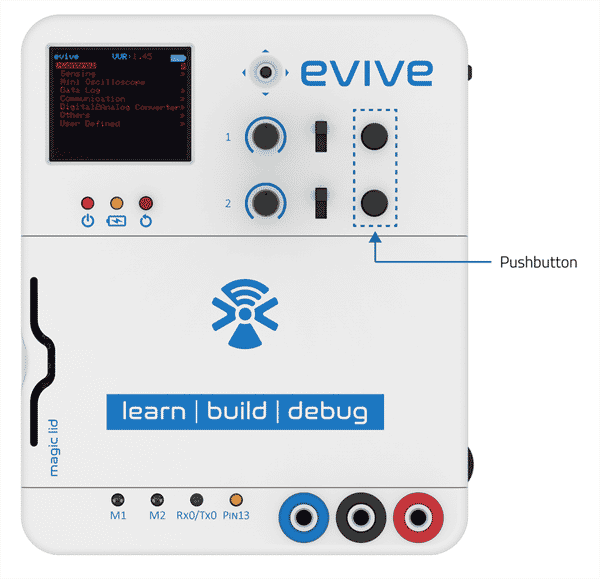
If you want to connect an external push-button, you can make a circuit like this on evive’s breadboard.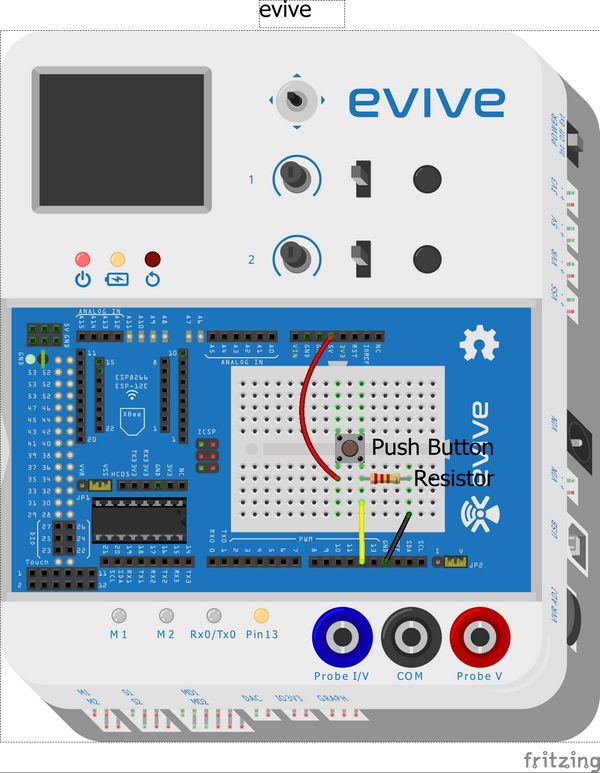
Making the Tobi Jump in Real-Time using Tactile Switch
Now, we have a Push Button connected to the evive, let’s write a script to make Tobi jump every time we press the tactile switch 1 on evive. Follow the steps to write the script to make the LED blink after each second.
- Open PictoBlox. Connect evive/your prototyping board to the computer using the USB cable.
- Click on the board button and select evive from the drop-down.
- Next, from the dialogue box that appears, select the appropriate serial port.
- To check whether the tactile switch is pressed or not we will use the tactitle switch () pressed? block from the evive palette.

- Add an if block to check whether the tactile switch is pressed or not and place the tactile switch () pressed? block into the hexagonal space given.
- If you are using an external switch, you need to use a read state of digital pin () block to check whether the switch is pressed or not. Select the pin to which you have connected the switch from the drop-down menu.

- Now to make Tobi jump. Add a change Y by () block from the motion palette and write 50 in the space given. To bring it back to the original position add a wait block of 1 second and duplicate the entire set and write -50 in the space of the second change Y by block.
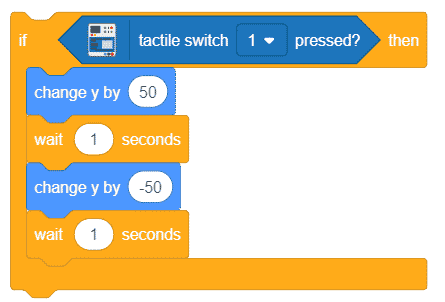
- To make the script run forever, add the forever block around the script.
- Now, we’ll place a when flag clicked hat block above the forever block. It will ensure that the script runs when the green flag is clicked.
Press the flag and watch tobi jump every time you press the tactile switch. The following is the complete script. 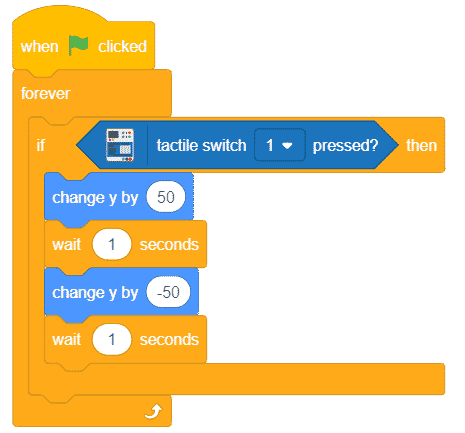
You can download the entire code from here.
Working with the Tactile Switch in Upload Mode
Now, let’s create a script to turn the LED connected to evive’s Pin 13 ON every time we press the tactile switch. Follow the steps to make the script.
- Switch to the Upload Mode.
- Add an if-else block to check if the tactile switch 1 is pressed.
- Place a tactile switch () pressed? block inside the hexagonal space of the if-else block.
- Since we need to turn the LED ON, add a set digital pin () block and set the output as HIGH under the if arm.

- To turn the LED off, duplicate the set digital block and place it below the else arm; select LOW from the drop-down.
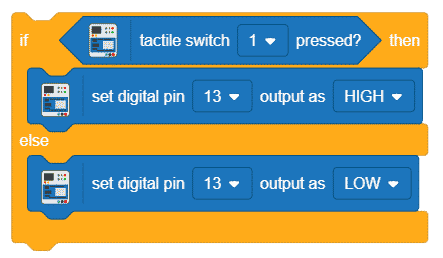
- Use a forever block to run the code continuously. Place the when evive starts up hat block to execute the program.
- Upload the code using the upload button.
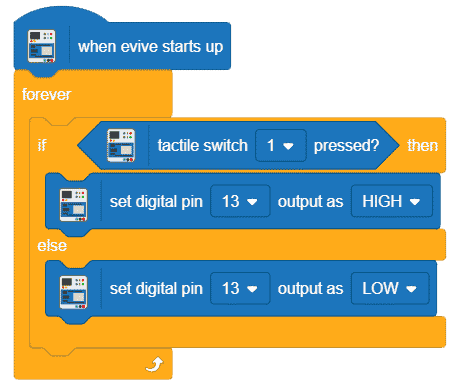
You can download the entire script from here.
Conclusion
In this lesson, we learned what is a tactile switch or a push button and how it works. We further learned how to interface it with evive and create scripts in Upload Mode and PictoBlox with evive. We also saw how to make Tobi Jump in real-time using the tactile switch. We can make exciting projects like a Simon Says game, a traffic light system, a digital doorbell and many more using the tactile switch available in the evive Starter Kit.

