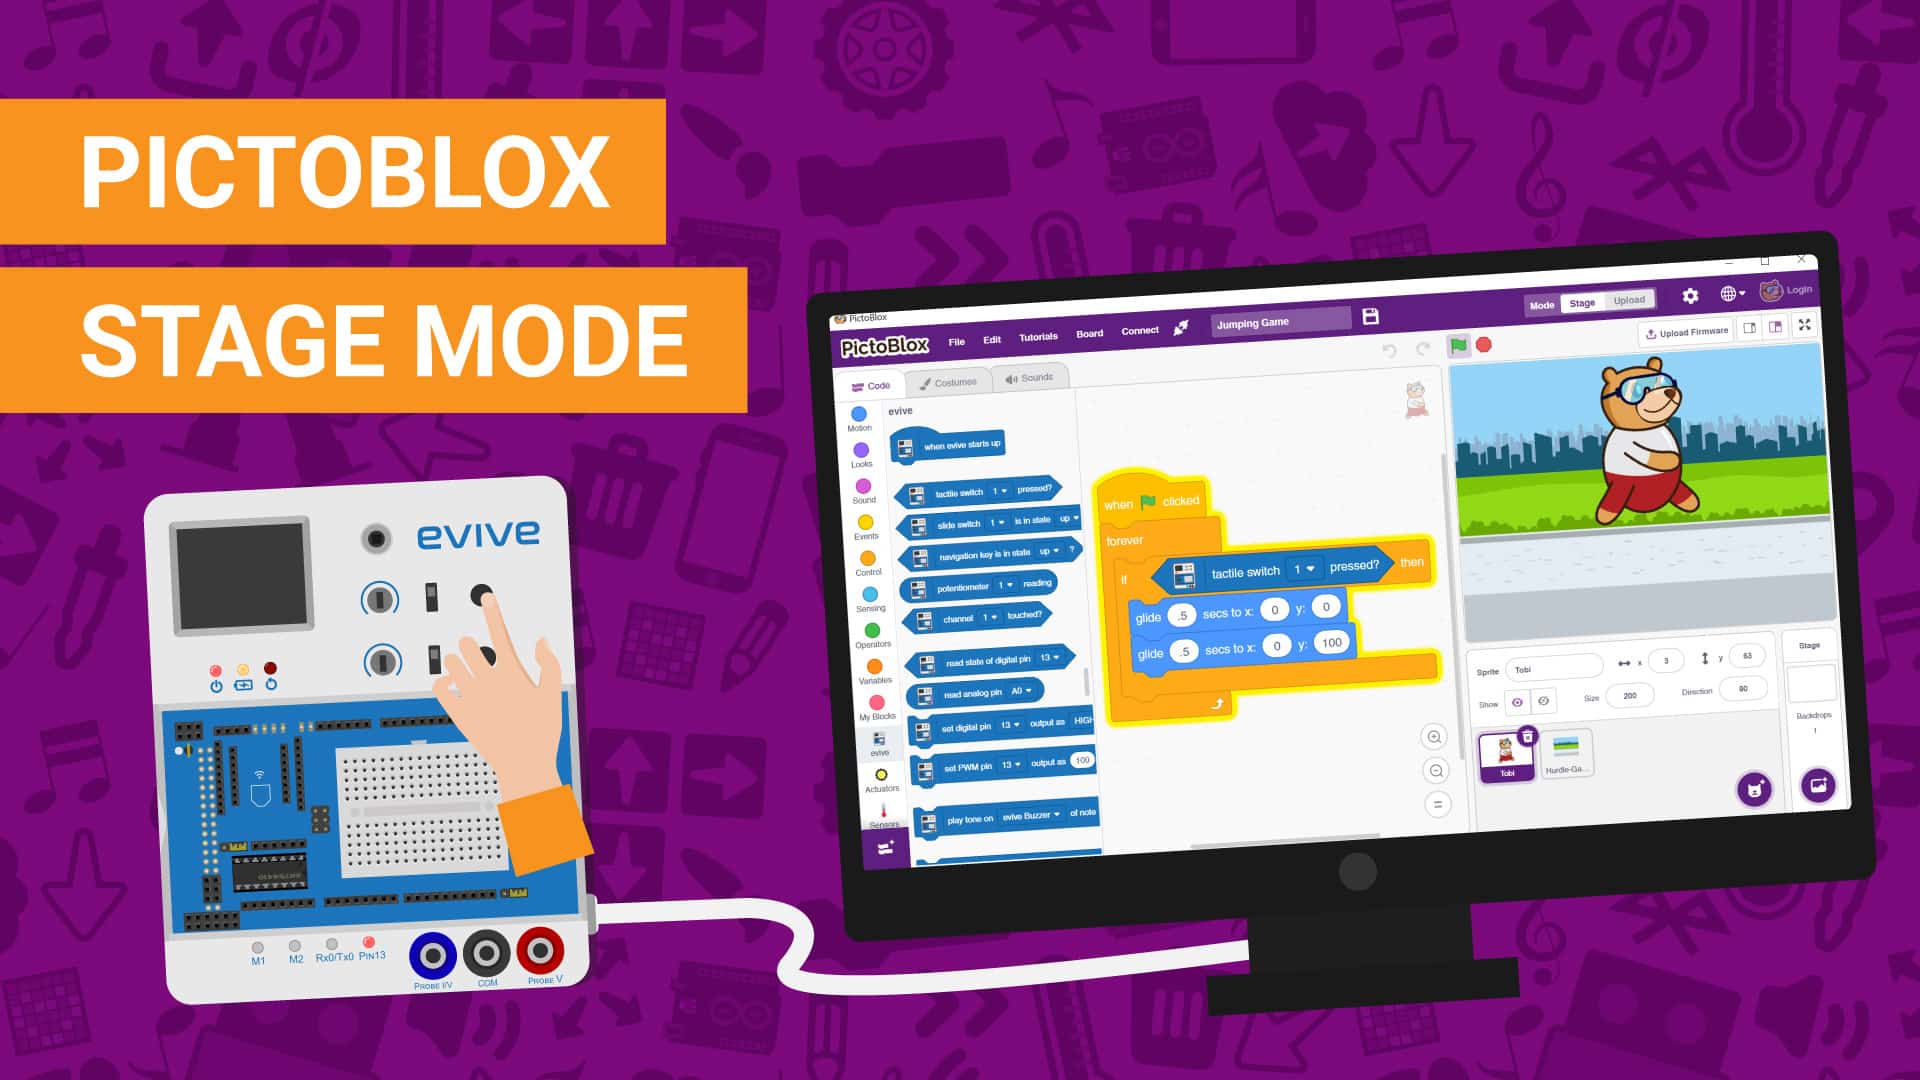
In this tutorial, we’re going to explore PictoBlox’s Stage mode and see how we can control hardware in real-time. We’re also going to create a script to make our sprite, Tobi, jump when we press evive’s tactile switch by connecting evive to the computer using a USB cable or over Bluetooth.
Let’s begin.
What is Stage Mode?
Let’s first understand what Stage mode is.
The Stage mode is a mode of working in PictoBlox in which we can interact with the components like sensors, actuators, and prototyping boards such as evive, Arduino, and ESP32 in real-time. If you disconnect the board with Pictoblox, you cannot interact with the board anymore. In this mode, you can make games and animation interacting with evive or any other prototyping board
How does the Stage Mode Work?
Let’s see how it works first-hand.
- First, open PictoBlox.
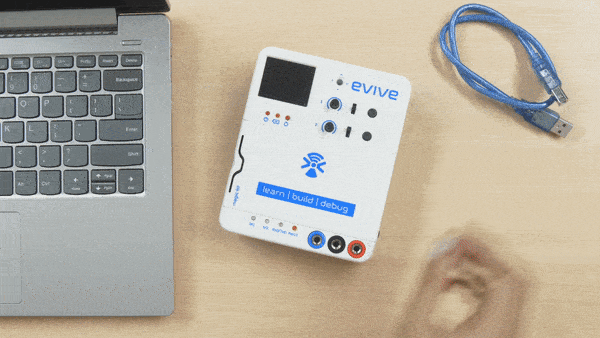
- Then, connect evive to your computer via a USB cable.
- Click on the Board button in the toolbar. A list of the boards that are compatible with PictoBlox will appear in the drop-down. Boards like evive, Arduino Uno, Mega, Nano, and ESP32 can be programmed using PictoBlox.
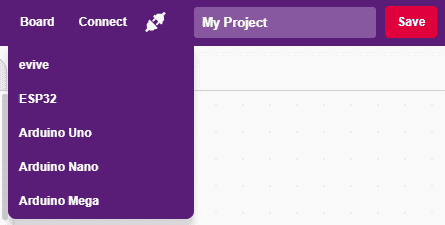
- Select evive from the drop-down. Next, click on the connect button and select the appropriate serial port.
- You’ll notice new palettes under the Code tab. You can interact with evive using the blocks in these palettes.
- Since we’re going to work in the Stage mode, we must upload the firmware to the board. It will ensure real-time communication between the board and the computer. Uploading the firmware it is a one-time process. To do so, click on the Upload Firmware button.

- Observe that in doing so, the Rx0/Tx0 LED starts blinking.
- To check whether the firmware has successfully been uploaded or not observe evive’s screen. If evive’s logo appears on the screen, it indicates success. Otherwise, retry the process.
Now, let’s explore the new palettes.
Blocks in the evive palette allow us to control several of the evive’s features such as the tactile switches, slide switches, potentiometer, navigation key, touch inputs, Real-Time Clock, and many others.
Let’s try a few of these blocks.
Activity 1: Controlling Pin 13 LED
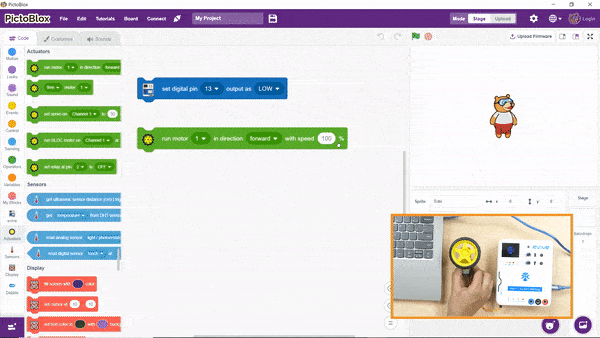
- Drag and drop the set digital pin () output block into the scripting area.
- This block, as the name suggests, can set the output of any of evive’s digital pin as HIGH or LOW in real-time.
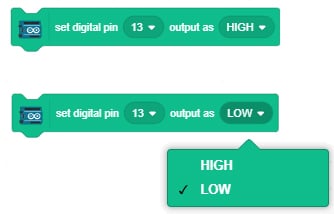
- By default, pin 13 is selected, which also has an LED connected to it.
- Click on the block, to see what happens. You’ll observe that the pin 13 LED turns ON. Similarly, to turn the LED OFF, select LOW from the drop-down menu and click on the block again. The LED will turn OFF.
Activity 2: Controlling DC Motor
Now, let’s move on to the Actuator Palette. It lets you control actuators like the DC motors and servo motors.
- Let’s try running a DC motor in real-time using the run motor block.
- Connect the motor to evive’s Motor Channel 1 and attach a wheel to it.
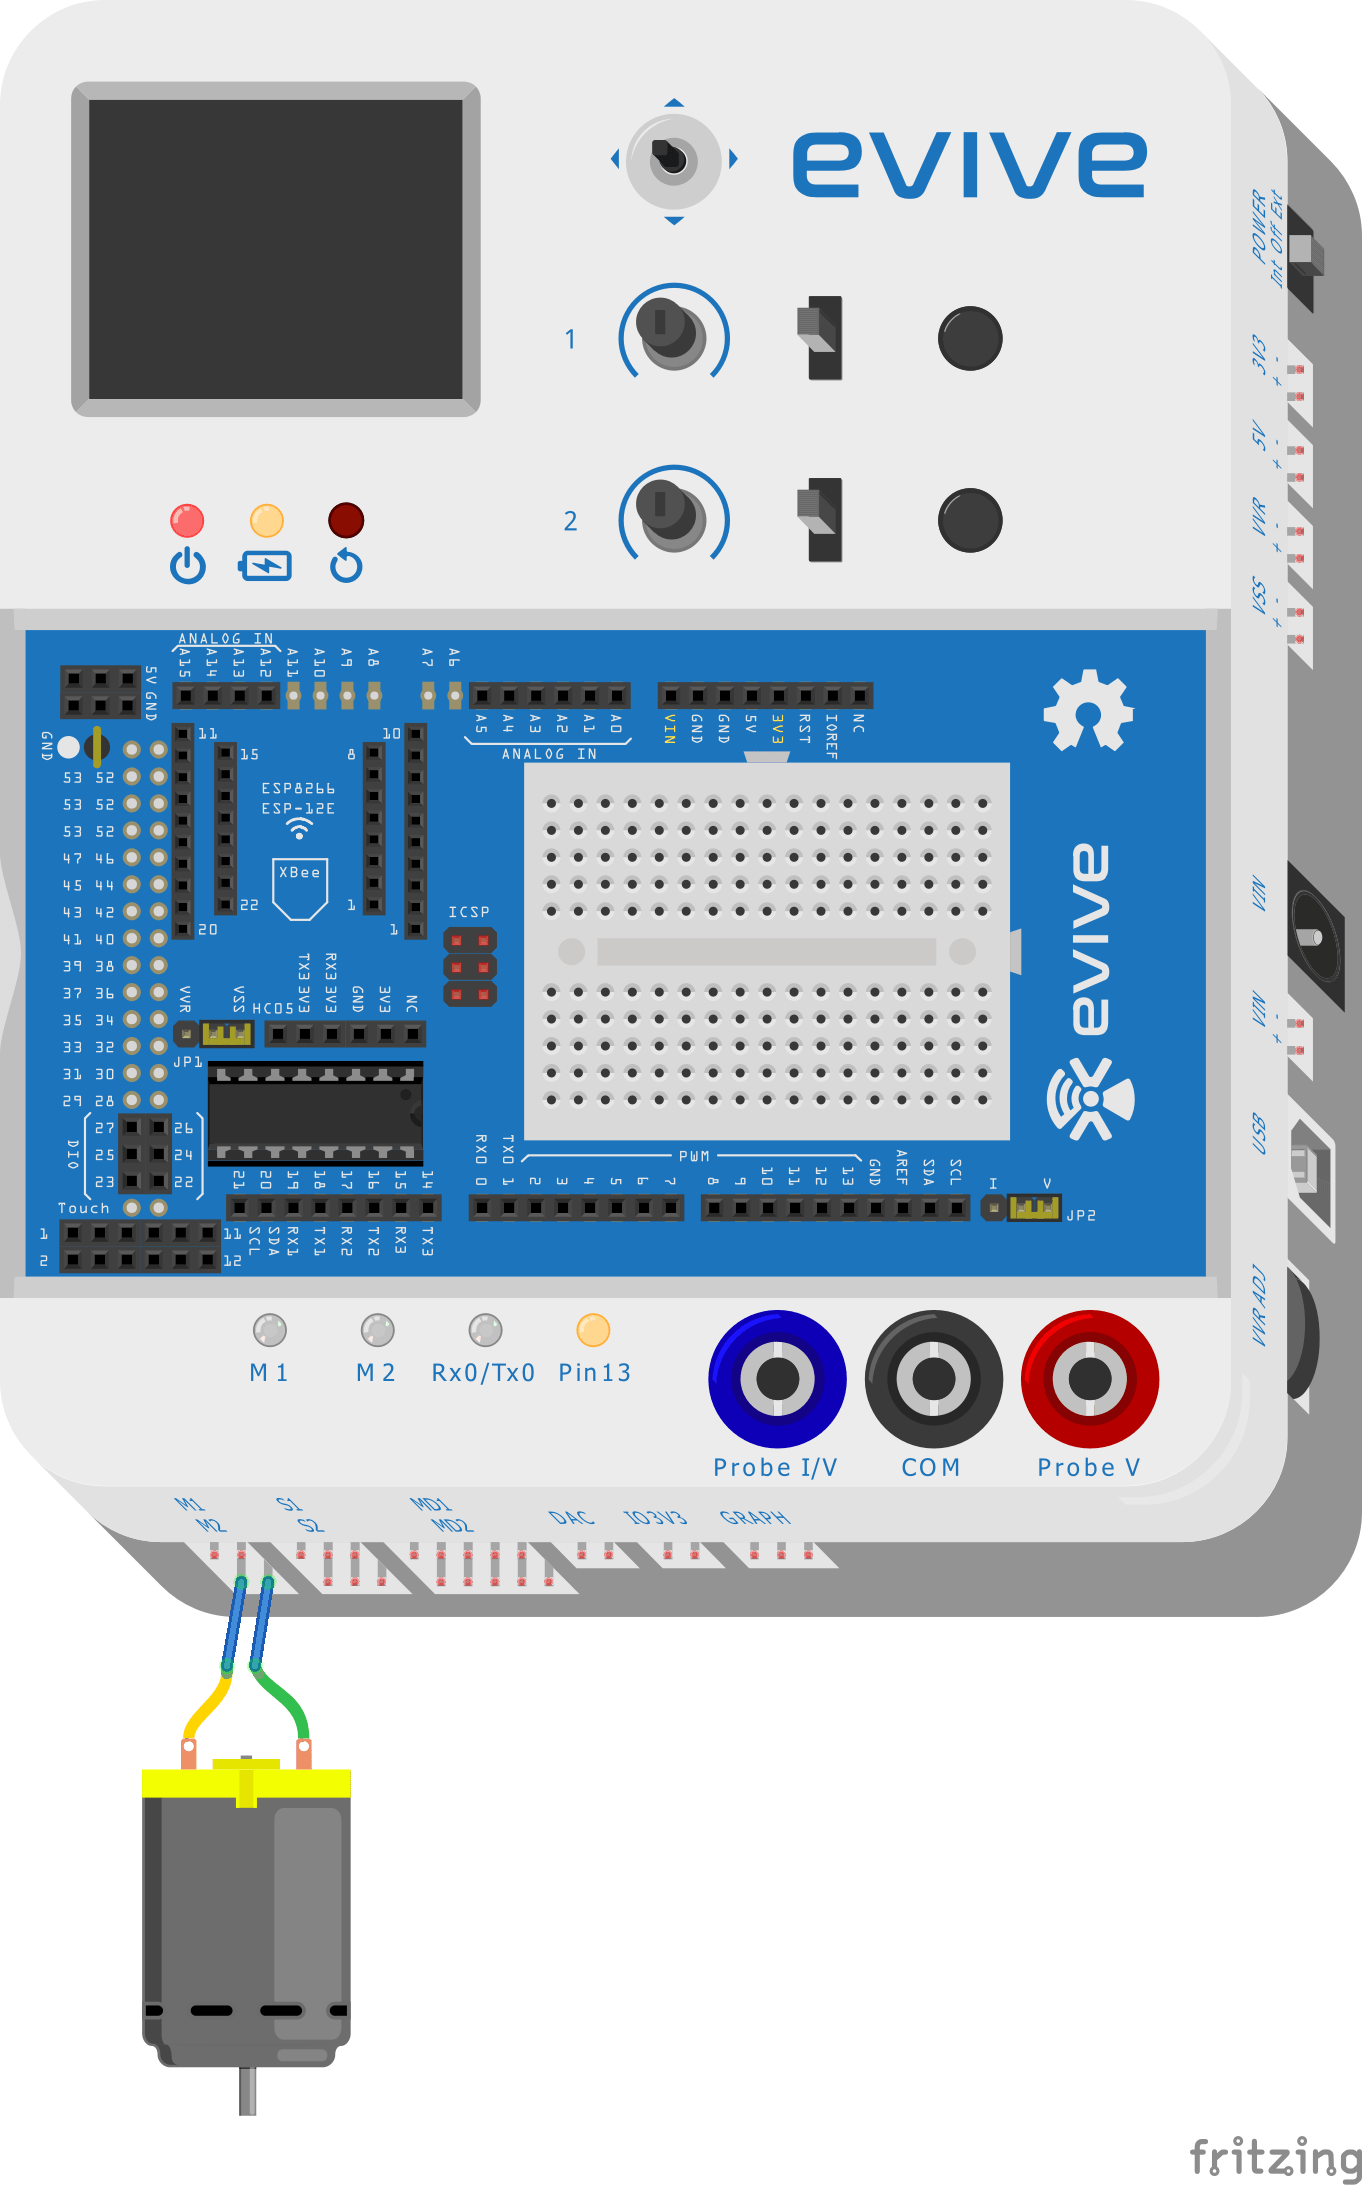
- The run motor block has three drop-downs:

- The first drop-down in the block is for selecting the Motor Channel to which the motor is connected. In our case, it is 1.
- The second drop-down is for changing the direction.
- The third is for changing the speed.
- As soon as you click on the block, the motor starts rotating in the selected direction at the set speed.
- Now, to stop the motor, drag and drop the free motor () block. Select free motor from the first drop-down and the motor channel from the second drop-down. Click on the block to stop the motor.

Next is the Sensor palette. It lets you record the reading from the sensors connected to your board. You can interface various analog and digital sensors using the blocks in this palette.
Activity 3: Controlling evive’s TFT Display
The Blocks in the Display Palette let you customize evive’s display.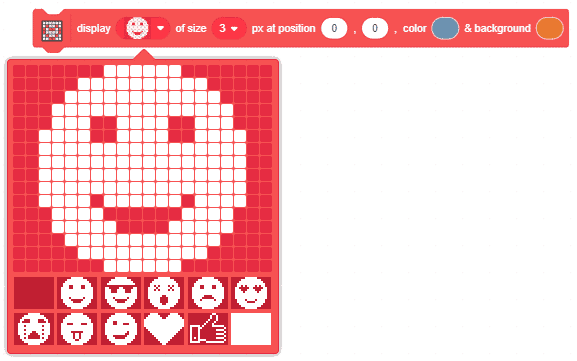
- Let’s display a smiley on evive’s screen using the display smiley () block.
- Select the type of smiley you want to display from the first drop-down and the size from the second drop-down. Then, enter the x and y coordinates of the position at which you want to display the smiley. You can even set the background color and the color of the smiley using the last two drop-downs.
- Now, click on the block and watch how evive’s screen becomes full of life!
Next is the Dabble palette. Blocks in this palette let you interface your board with Dabble, a project interaction, and a Bluetooth controller app. We’ll cover it in detail in the next tutorial.
Making Tobi Jump
Now, let’s create a script to make Tobi, our coding partner in PictoBlox, jump using evive’s tactile switch.
- First, let’s change the backdrop. Click on the choose a backdrop button and choose the Blue Sky backdrop from the library.
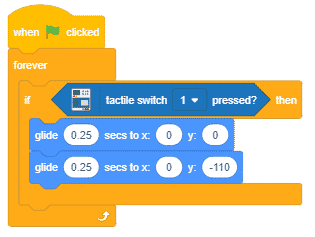
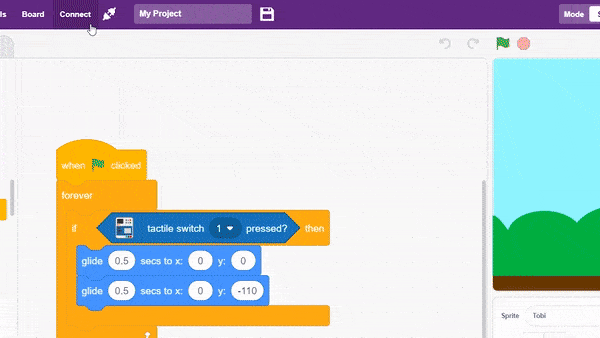
- Now, select Tobi from the sprite palette to create his script. You’ll notice that Tobi is standing in the center of the stage. And we want him to be near the bottom edge. For doing so, change his y coordinate to -110 in sprite palette.
- Now, go to the Motion palette, drag and drop the glide () secs to x () y () block. Set the gliding time as 0.5 secs and x and y as 0. With this Tobi glides in the upward direction.

- Now, to bring him back to his initial position, we need another glide block. So, duplicate the block by right-clicking on it and drop it below the previous block; change y to -110, Tobi’s initial y coordinate. This will Tobi can now jump!
- But, how do we make Tobi jump using evive’s tactile switch? By using the tactile switch () pressed? Block from evive palette! And to check whether the tactile switch has been pressed or not, we’re going to use an if block from the Control palette. Drop it around the glide blocks.

- Then, drag and drop the tactile switch () pressed? block inside the hexagonal space of the if arm.
- Now, drag and drop the forever block around the if arm to run the script forever.
- Finally, to trigger the script, drag and drop the when flag clicked block above the entire script.
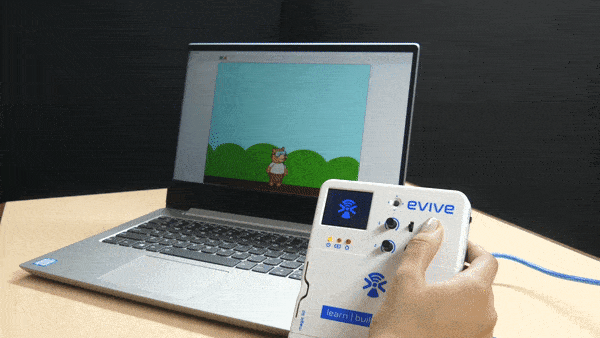
Maximize the Stage and click on the flag to run the script. Press tactile switch 1 on evive and watch Tobi jump!

Control Sprites Wirelessly!
You can interact with your hardware via Bluetooth as well. This means you can now control Tobi or any other sprite wirelessly!
- Get rid of the USB cable, open the magic lid of evive, connect the Bluetooth module by placing it in the headers provided and switch on evive.
 Make sure that the RX pin of the Bluetooth module is connected to the TX3V3 pin on evive. As soon as you connect it, a red LED will start blinking on the module.
 - Now, if you remember, to connect the board, we first clicked on the Connect button and then selected the serial port to which our board was connected. Similarly, for establishing a connection via Bluetooth, click on the Connect Button and instead of selecting serial ports, select Bluetooth ports. A list of near-by devices will appear. Select your Bluetooth module from the list.
- You can recognize either it from its name or from the address written at its back. With this, evive is now interfaced with PictoBlox via Bluetooth!
- Now, maximize the Stage, click on the green flag and make Tobi jump wirelessly!
Not only can you interact with sprites but also control robots in real-time.
You must have noticed that while you were running the script, the menu wasn’t visible on the screen. To access the menu, center-press the navigation key. If you want to come back to the Stage mode, select exit firmware from the menu.
Conclusion
In this tutorial, we have explored PictoBlox‘s Stage mode and seen how we can control hardware in real–time. We have created a script to make our sprite, Tobi, jump when we press evive‘s tactile switch by connecting evive to the computer using a USB cable or over Bluetooth. By using the blocks in the palettes, we can interact with evive’s features, control actuators like DC motors, and sensors connected to the board. We can also control sprites and robots wirelessly using Bluetooth.
With these powerful tools, you can create interactive projects and applications with PictoBlox.