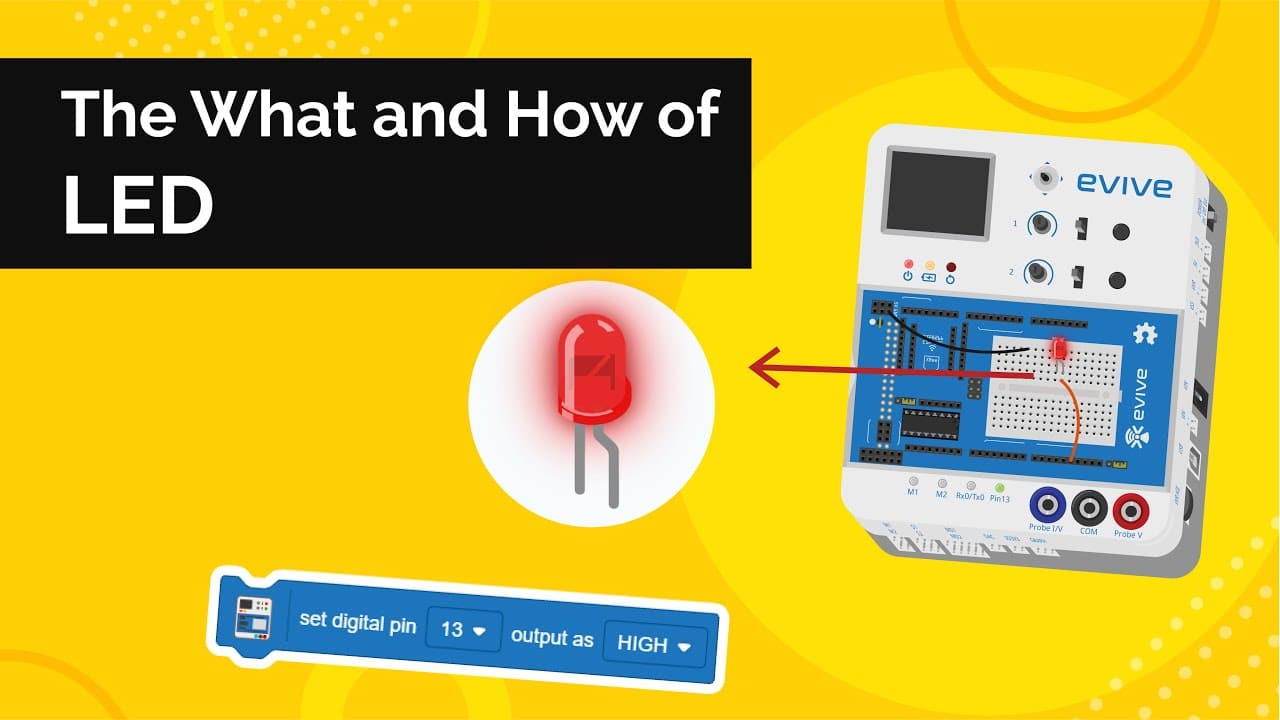
Introduction
LEDs (short for light emitting diodes) are fascinating little things. Though tiny, together they are capable of lighting up an entire room! Learn what is LED, how do LEDs work, how to interface them with evive and program them in PictoBlox – our PictoBlocks-based graphical programming platform with advanced hardware interaction abilities, and finally what exciting DIY projects you can make using the colorful light emitting diodes available in the evive Starter Kit.
To work in PictoBlox, you’ll first need to download it from HERE:
Ready? Set. Go!
What is LED (Light Emitting Diode) and How do LED works?
Light emitting diodes, aka LEDs, are tiny light-bulb-like devices that glow when current passes through them. 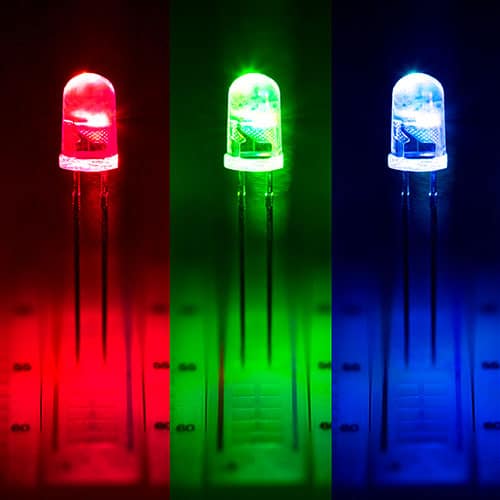
Basic properties of an LED
Let’s have a look at three important concepts we must keep in mind when dealing with LEDs:
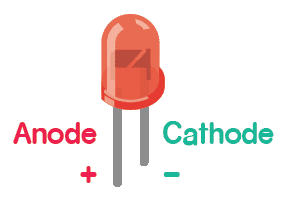
- Polarity: Just like batteries, LEDs also have positive and negative terminals. Therefore, they allow the current to pass ONLY in one direction, i.e. from the positive terminal to the negative terminal. Connecting them in reverse might blow them up. Out of the two, the longer one is the positive terminal, and the other is negative. However, this isn’t a foolproof method. If you look closely at the base of the LED, you’ll notice that the boundary is flat/cut above one of the terminals. This terminal is the negative terminal. The other is, therefore, positive.
- Intensity: We know that according to Ohm’s law, currents increase when the voltage across the circuit is increased. This law can be exploited to vary the brightness of the LED, by changing the amount of current passing through it. As the current increases, the brightness also increases, and vice-versa.
- Current Limit/Rating: Their current rating is the maximum value of the current they can withstand; if you pass a current greater than that value, they may blow up! The safe value of current for LEDs is usually around 20 milliamperes. To limit the value of current we use resistors, the value of which is calculated using Ohm’s law.
How to interface an LED with evive
Now that we have a little idea about LEDs, let’s take a look at how to interface it with evive and see it in action.
evive already has an LED connected to Digital Pin 13. 
If you want to connect an external LED, you can make a circuit like this on evive’s breadboard and connect the +ve terminal of the LED to a digital pin through which you want to control the LED.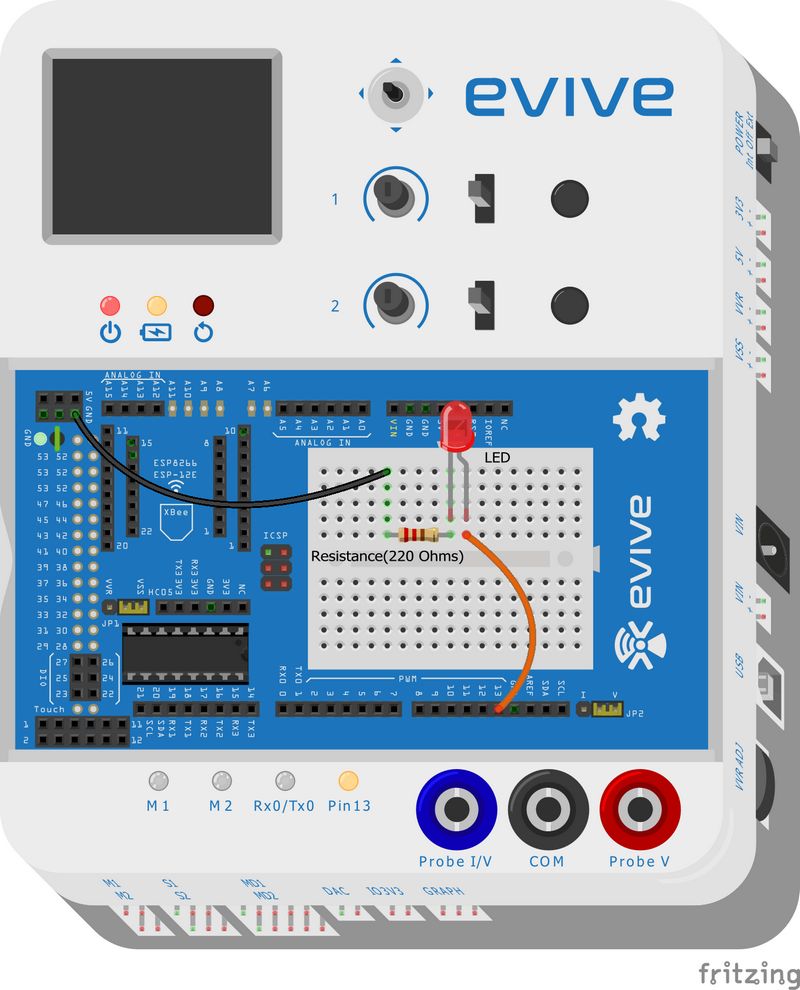
Making the LED Blink in Real-Time
Now, we have an LED connected to the evive, let’s write a script to make the LED connected to Pin 13 blink in real-time using PictoBlox- a graphical programming software based on PictoBlocks. Follow the steps to write the script to make the LED blink after each second.
- Open PictoBlox. Connect evive/your prototyping board to the computer using the USB cable.
- Click on the board button and select evive from the drop-down.
- Next, from the dialogue box that appears, select the appropriate serial port.
- We will use the set digital pin () output as () block to turn the LED ON/OFF. Choose the pin to which the LED is connected in the first drop-down menu and the second drop-down menu helps to set the status of the LED whether ON/OFF.

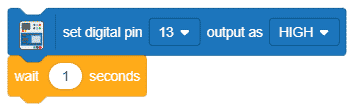
- Drag and drop the set digital pin block. By default Pin 13 is already selected, now to on the LED, select HIGH from the second dropdown.
- Add a wait of 1 second below the set digital pin.
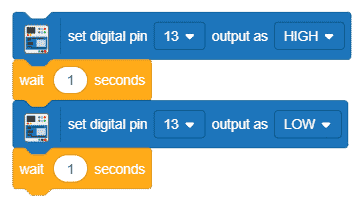
- Now, to turn the LED off, duplicate the above set of codes and drop it below the wait block.
- Now, into the second drop-down of the second set digital pin select LOW.
- To blink the LED continuously, use the forever block around the entire code.
- Now, place a when flag clicked hat block above the forever block. It will ensure that the script runs when the green flag is clicked.
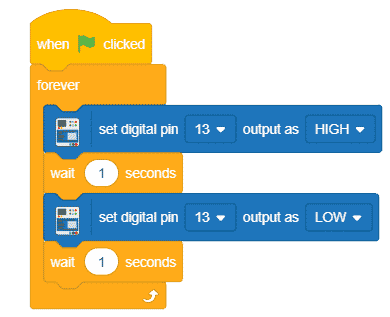
You can download the entire code to make the LED blink in real time here.
Controlling Brightness of pin 13 LED Using PWM in Real-Time
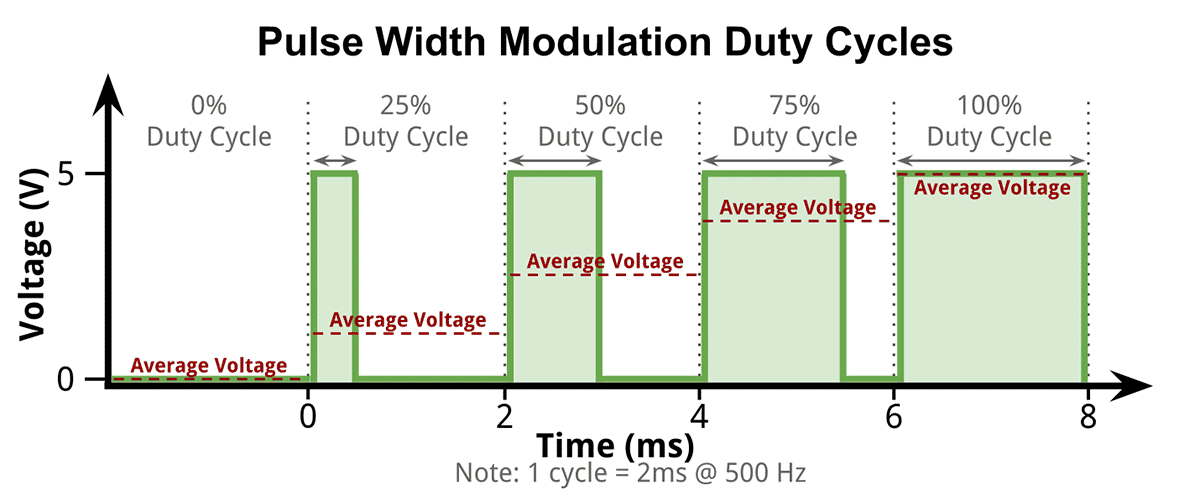
To control the brightness we will use Pulse Width Modulation. It is a technique to reduce the average voltage at a digital pin by controlling the width of the digital pulse at that pin.
What is PWM (Pulse Width Modulation)?
PWM or Pulse Width Modulation is a technique for getting an analog output using digital signals. A digital signal, in general, can have either of two values: HIGH/ON or LOW/OFF. If we switch the signal between these two values at an extremely fast rate, say, 500 times in 1 second, the signal at the output will appear to be continuous; it will seem as if it is an analog signal.
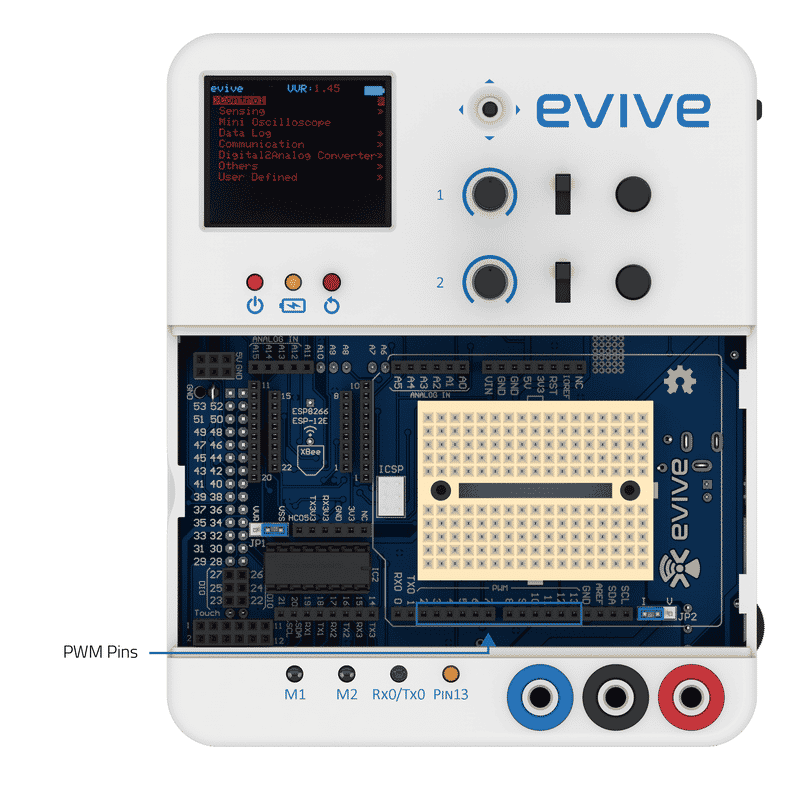
evive generates analog output in PWM form. It has 12 PWM pins for the same; they are numbered 2 – 13. Pin 13 is internally connected to the pin 13 LED.
Script to Control the Brightness in Real-Time
Follow the steps given here, to control the brightness of the LED in real time.
- Here, we want the brightness of the LED to change to the value we enter in PictoBlox in real-time.
- Now, go to the Variables palette and create a variable named Brightness. Once you create it, you’ll also see it in the top left corner of the stage. Right-click on the variable in the stage. From the drop-down menu, select slider. In doing this you’ll see a slider, i.e. a line and a small rectangle that you can slide on that line. You can control the brightness of the LED with it.
- Next, use to the set PWM pin () output as () block to set the brightness of the LED.
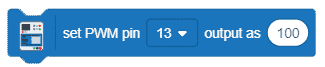
- We, need to set the brightness of the LED by the value entered by us in the brightness variable, thus drag and drop brightness variable into the blank space given. And select the Pin to which the LED is connected in the first drop-down.

- Add a wait of 0.1 seconds to gradually change the brightness.
- Add a forever block around the script to run it forever.
- Finally, add when flag clicked hat block to execute the program.
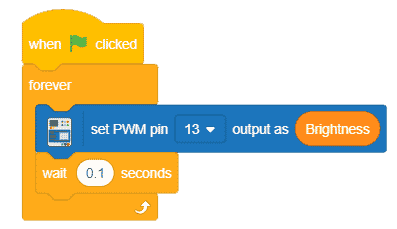
Click on the green flag to run the script, and then slide the ball on the slider to change the brightness of the LED.
You can find the entire script to change the brightness of the LED using PWM here.
Working with the Light Emitting Diode in Upload Mode

- To work in the upload mode, click the toggle button.
- We will use the set digital pin () output as () block to turn the LED ON/OFF. Choose the pin to which it is connected in the first drop-down menu and the second drop-down menu helps to set the status of it whether ON/OFF.
- Drag and drop the set digital pin block. By default Pin 13 is already selected, now to turn it on the LED, select HIGH from the second dropdown.
- Add a wait of 1 second below the set digital pin.
- Now, to turn the LED off, duplicate the above set of codes and drop it below the wait block.
- Now, into the second drop-down of the second set digital pin select LOW.
- To blink the LED continuously, use the forever block around the entire code.
- As we are going to upload the script to evive, we will use the when evive starts up hat block above the entire script to execute the program.
- Now, upload the code using the upload button.
Below is the complete script: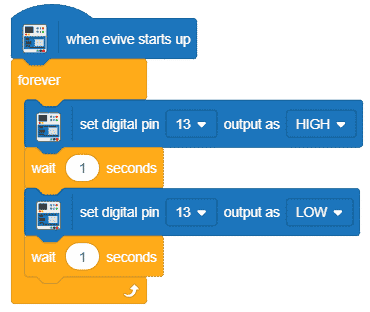
You can download the code to make the LED blink in upload mode from here.
Conclusion
In this lesson, we learned about LEDs, their basic properties, how to interface them with evive, and how to program them using PictoBlox. We also experimented with varying the brightness of the LED using PWM and made it blink in both real-time and upload mode. Hopefully, you have now gained some knowledge on using LEDs with evive. Now, you can use LEDs to create amazing DIY projects!