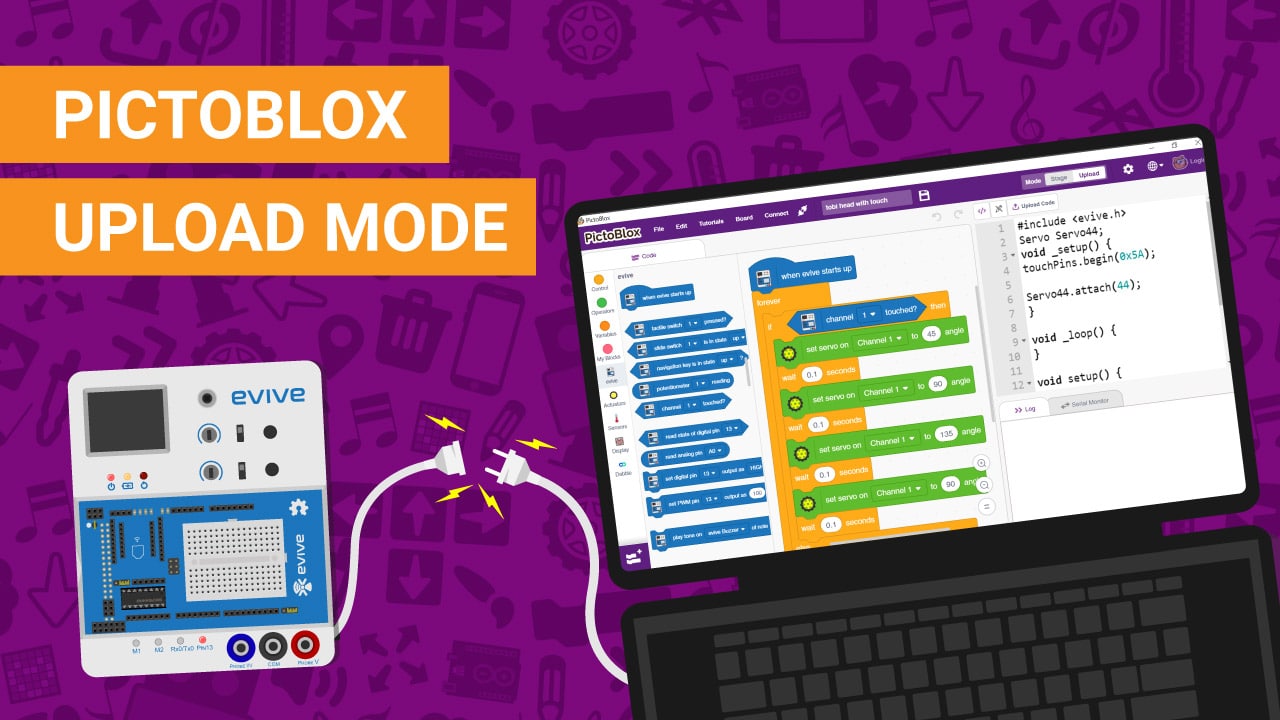
In this tutorial, we’re going to explore PictoBlox’s Upload mode and understand how to use it to make a board work independently, i.e. without being connected to the computer.
Ready. Set. Go.
What is Upload Mode?
Let’s begin by understanding what Upload mode is.
Upload mode is one of the two modes you can write your programs in Pictoblox. This mode allows you to write scripts and upload them to the board so that you can use them even when it is not connected to your computer, for example, you need to upload a script for making moving robots.
Once uploaded, the board runs independently according to the script.
How Does the Upload Mode Work?
Let’s have a look at how the Upload Mode works.
- First, open PictoBlox.
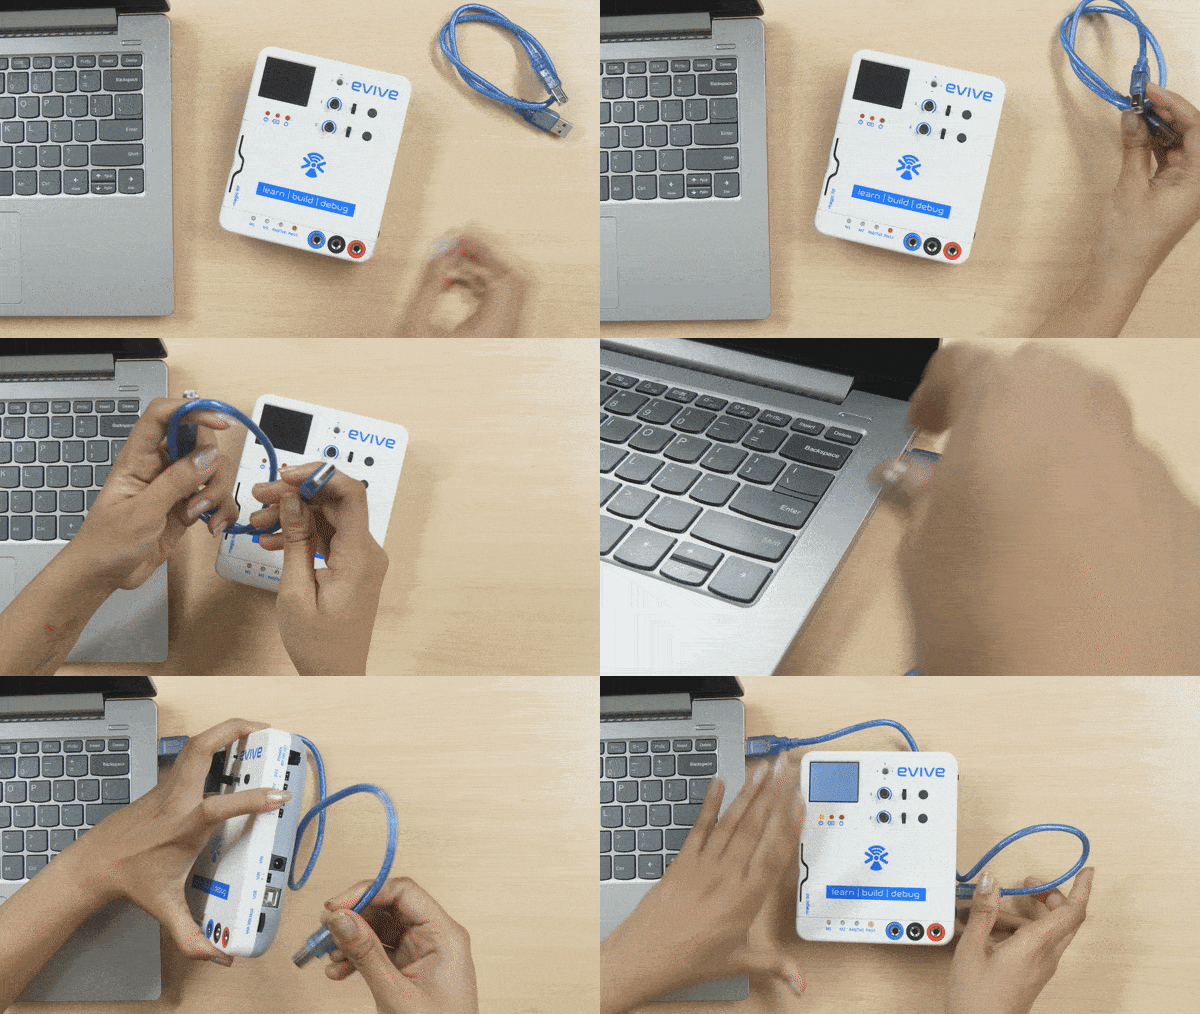
- Then, connect evive to your computer via a USB cable.
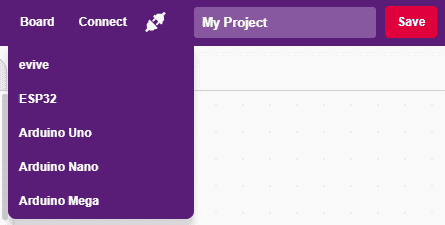
- Click on the Board button in the toolbar and select evive from the drop-down.
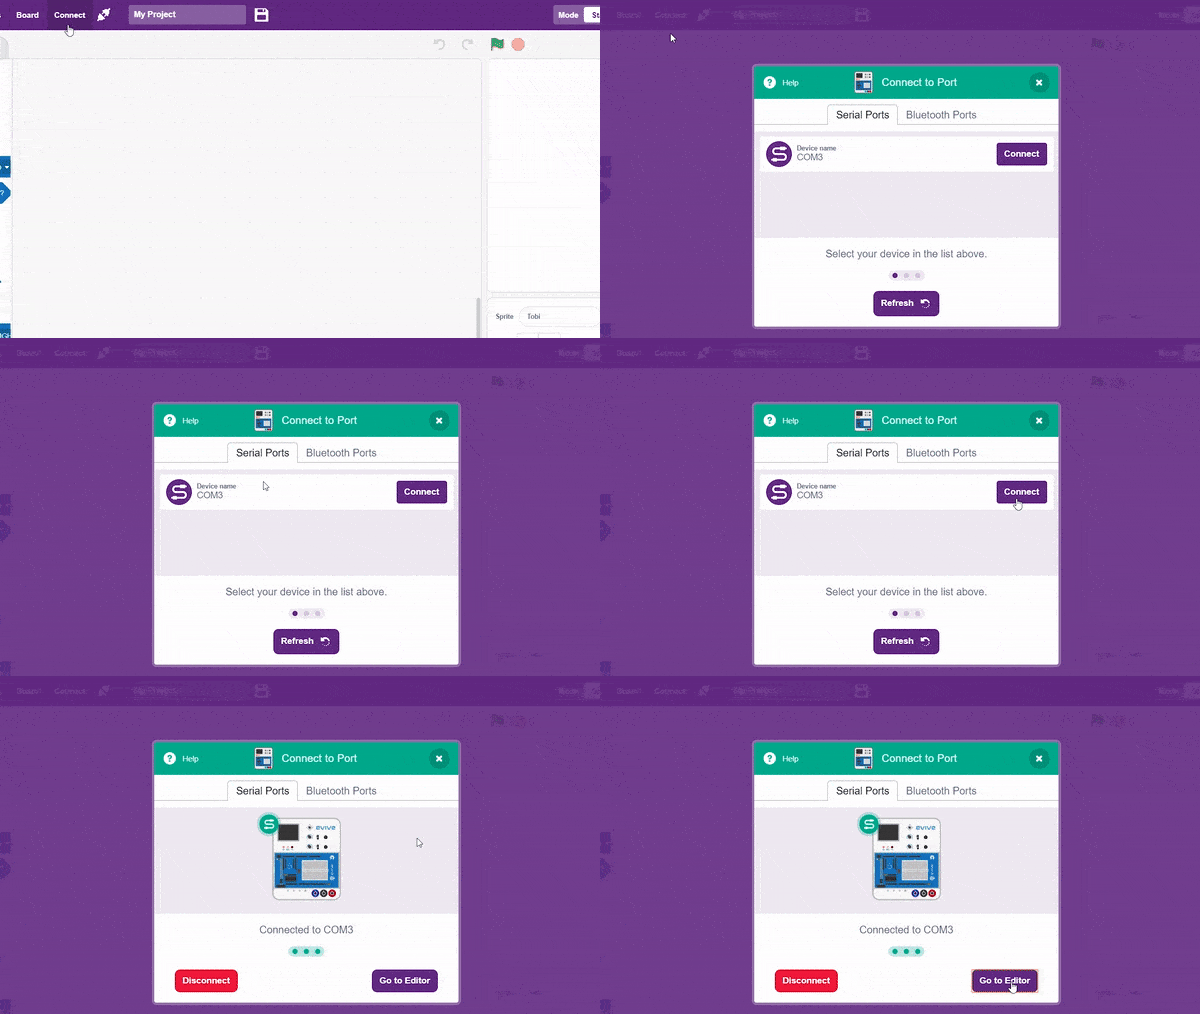
- Next, click on the connect button and select the appropriate serial port.
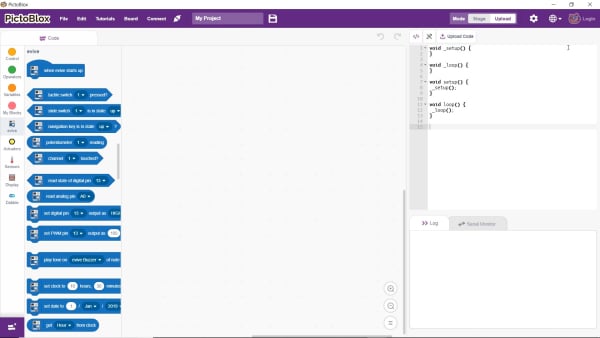
- On the top right corner, there is a toggle button named Mode. This button is used to switch between the two working modes of PictoBlox, namely the stage mode and the upload mode.
- Switch to Upload mode by toggling this button. You’ll observe some changes in the UI.

- For starters, the stage is replaced by the editor window. The editor window shows the equivalent C++ code of the script you create.
- The other difference that you’ll notice is in the block palette. Of the three tabs, only the Code tab remains and the number of palettes is also reduced. Those palettes whose blocks are used to interact with the stage and sprite such as motion, sound, looks disappear.
Making Tobi’s Head Move
Now, we’re going to create a script to make the head of Tobi’s cutout move using evive’s touch sensors.
Before creating the script, let’s first prepare the cut-out.
- Cut out Tobi’s head and body from the sheet provided in the Starter Kit.

- Then, cut along this red dotted line and fold the flaps inwards.

- Now, take a servo motor and insert it inside the space in the neck.
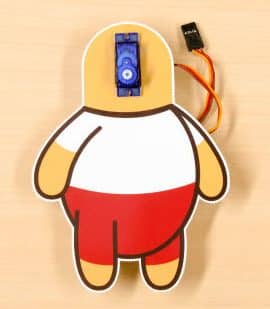
- Connect the servo to evive’s servo Channel 1 and set its angle to 90 degrees using the potentiometer.
 Make sure that the brown wire of the servo is connected to the left-most pin of the servo channel.
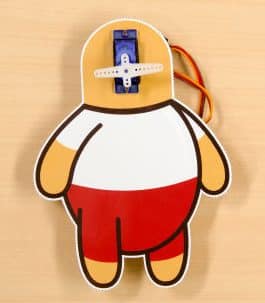
 - Now, take the cut-out of the head and fix it to the servo head using this teeny tiny screw.

- To work with the touch sensors, we’re going to use fruit as the conducting element. Thus, connect one end of the jumper cable to evive’s 1st touch sensor and insert the other end in the fruit.
Now that everything’s ready, let’s create the script in PictoBlox!
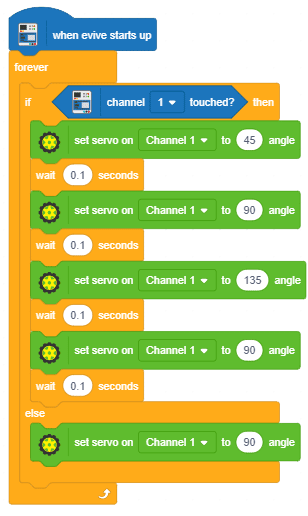
- First, drag and drop an if-else block into the scripting area.
- Now, Tobi’s head should turn whenever we touch the fruit that is connected to the touch sensor pin 1. For making that happen, drag and drop the channel () touched? block from the evive palette inside the hexagonal space of the if-block. The part of the script responsible for rotating the head will be created inside the if-else block.

- To control the servo, we’re going to use the set servo to angle to () block from the Actuators palette. Drag and drop it below the if arm. Set the servo angle as 45 ° to turn the head to the left.

- To make the movement smooth, use the wait block and set the time as 0.1 seconds.
- To bring the head back in the center, duplicate these blocks and stack them together. Then, set the servo angle to 90°.
- Repeat the process for making the head turn right. Set the servo angle to 135° in the third set servo block.
- And to bring it back to the center, write 90 in the 4th set of the servo block.
- Now, all of this will happen only when we touch the fruit. What about the time when we’re not touching it? In that case, the head should remain in the center. Thus, drag and drop the set servo to angle () block below the else-arm and set the servo angle to 90°.
- To make this code run forever, drag and drop the forever block around the if-else block.
- Now, comes the most important block: the when evive starts up hat block. This block is a must for successfully executing the script. Drag and drop it above the script.
- Notice that the equivalent C++ code of the script has automatically been written in the editor window. If you know C++, you can edit the code in the editor window too.
- Now it’s time to upload the script to evive! For that, click on the Upload Code button and voila!
- As soon as the upload is finished, a message saying “Upload Successfully” will appear on the screen.
- Now, disconnect evive from the computer and check whether the script is working or not!
- Switch it ON.
Whenever you touch the fruit, Tobi’s head should move.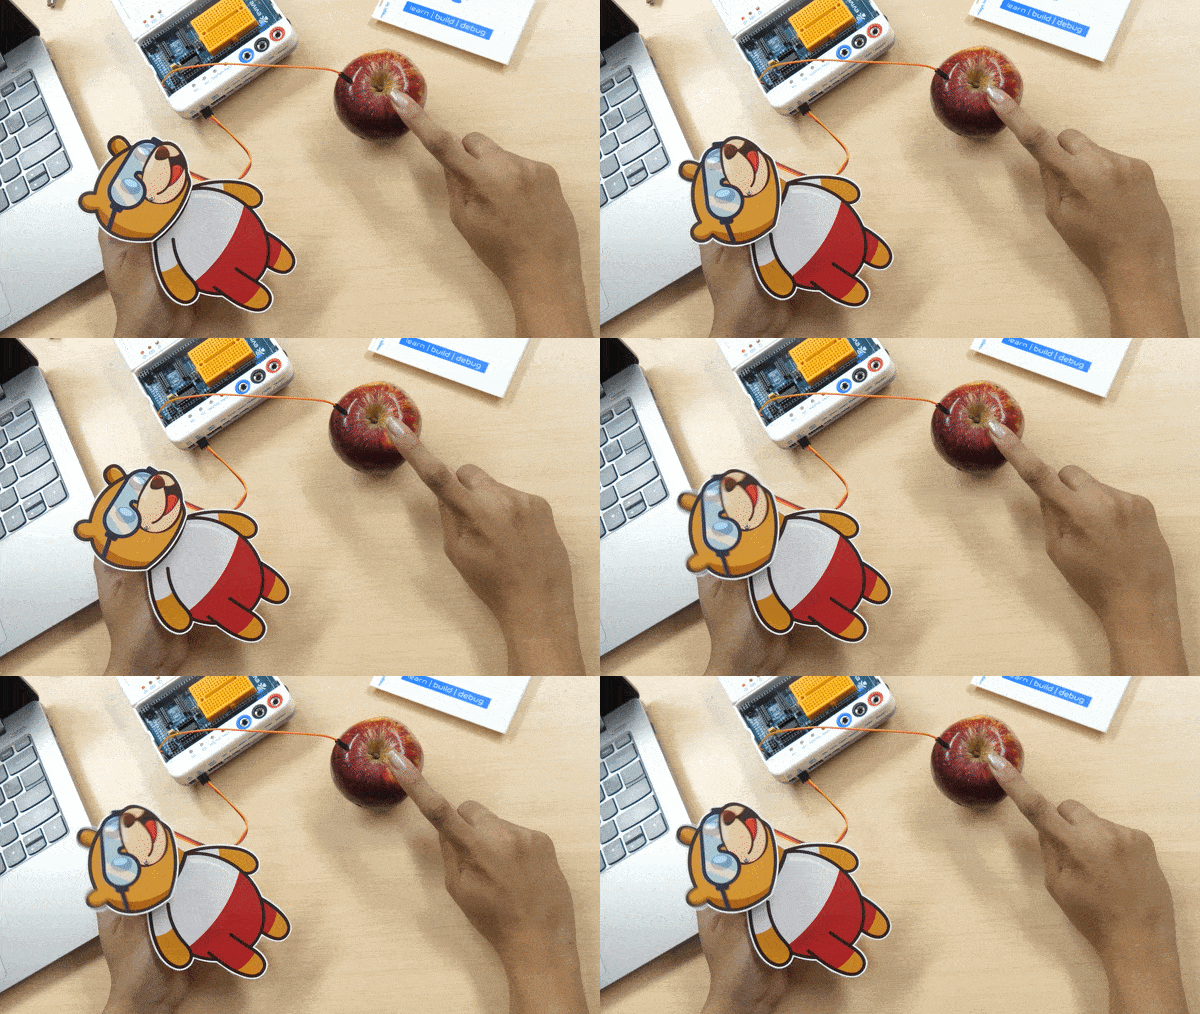
Now that you know how the upload mode works, you can create countless exciting projects!
Conclusion
In this lesson, we explored PictoBlox’s Upload mode and understood how to use it to make evive work independently. We also learned how to create and upload a script to control a servo motor and make Tobi‘s head move. We hope this tutorial has helped you gain a better understanding of the Upload mode and get you started on creating exciting projects.

