Introduction
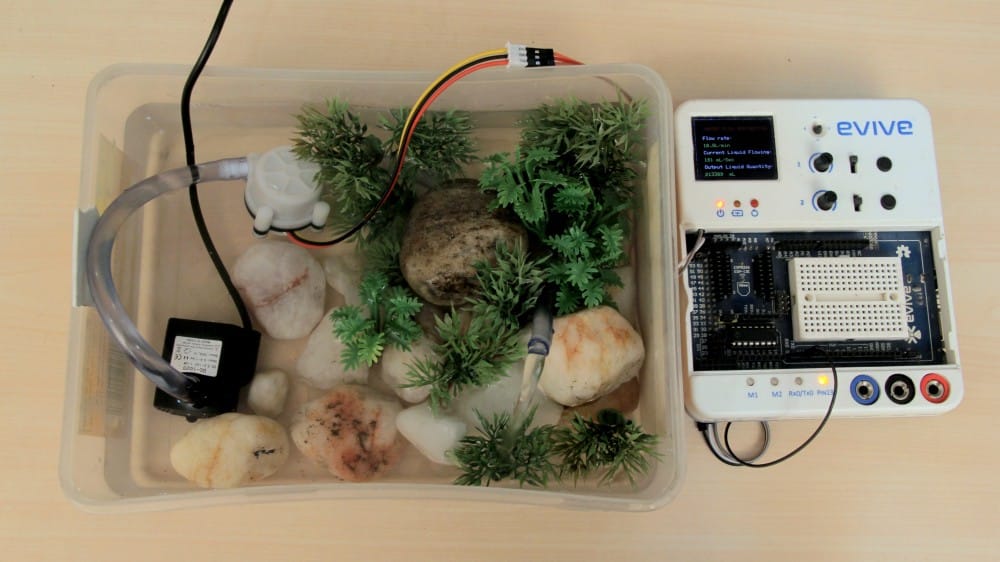
A water flow sensor is an instrument capable of measuring the amount of water passing through a pipe. Water flow sensor consists of a plastic valve body, a water rotor, and a hall-effect sensor. When water flows through the rotor, rotor rolls and its speed changes with the different rate-flow. The hall-effect sensor outputs the corresponding pulse signal. This one is suitable to detect flow in water dispenser or coffee machine.
Interfacing water flow sensor with evive
Wiring
Follow the steps below to connect the water pump to evive:
- First of all, a 3W-12V water pump is interfaced with evive.The end wire of the pump containing male connector is connected to female DC connector as shown in GIF.

- The male end of jumper wires(2 wires) are connected to the female DC connector.

-
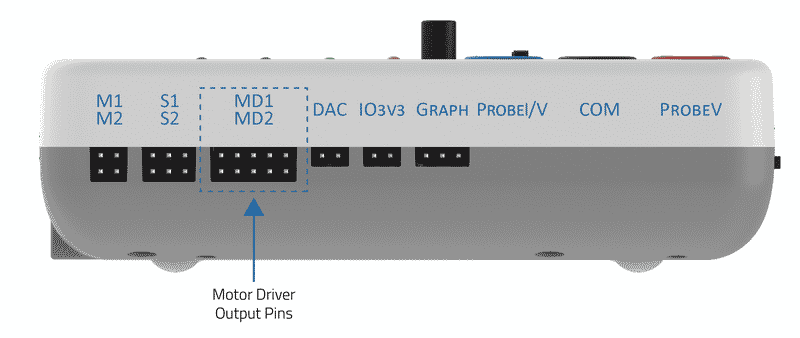
The female end of the jumper cables is connected to the evive motor M1 slot as shown in the figure.
- Dip the water pump into the water reservoir.
-
Finally, a 12V,2A power adapter powers the evive.
Follow the steps below to connect the water pump to evive:
- Now, a water flow sensor is taken. It comes with three wires colored RED, BLACK, and YELLOW.Red signifies the voltage while Black signifies the ground and the Yellow signifies the signal pin.
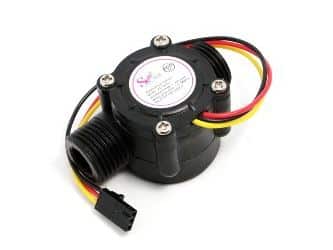
- The end of the flowmeter goes to 4mm pipes. One end of the pipe goes to the water pump while the other end is free.
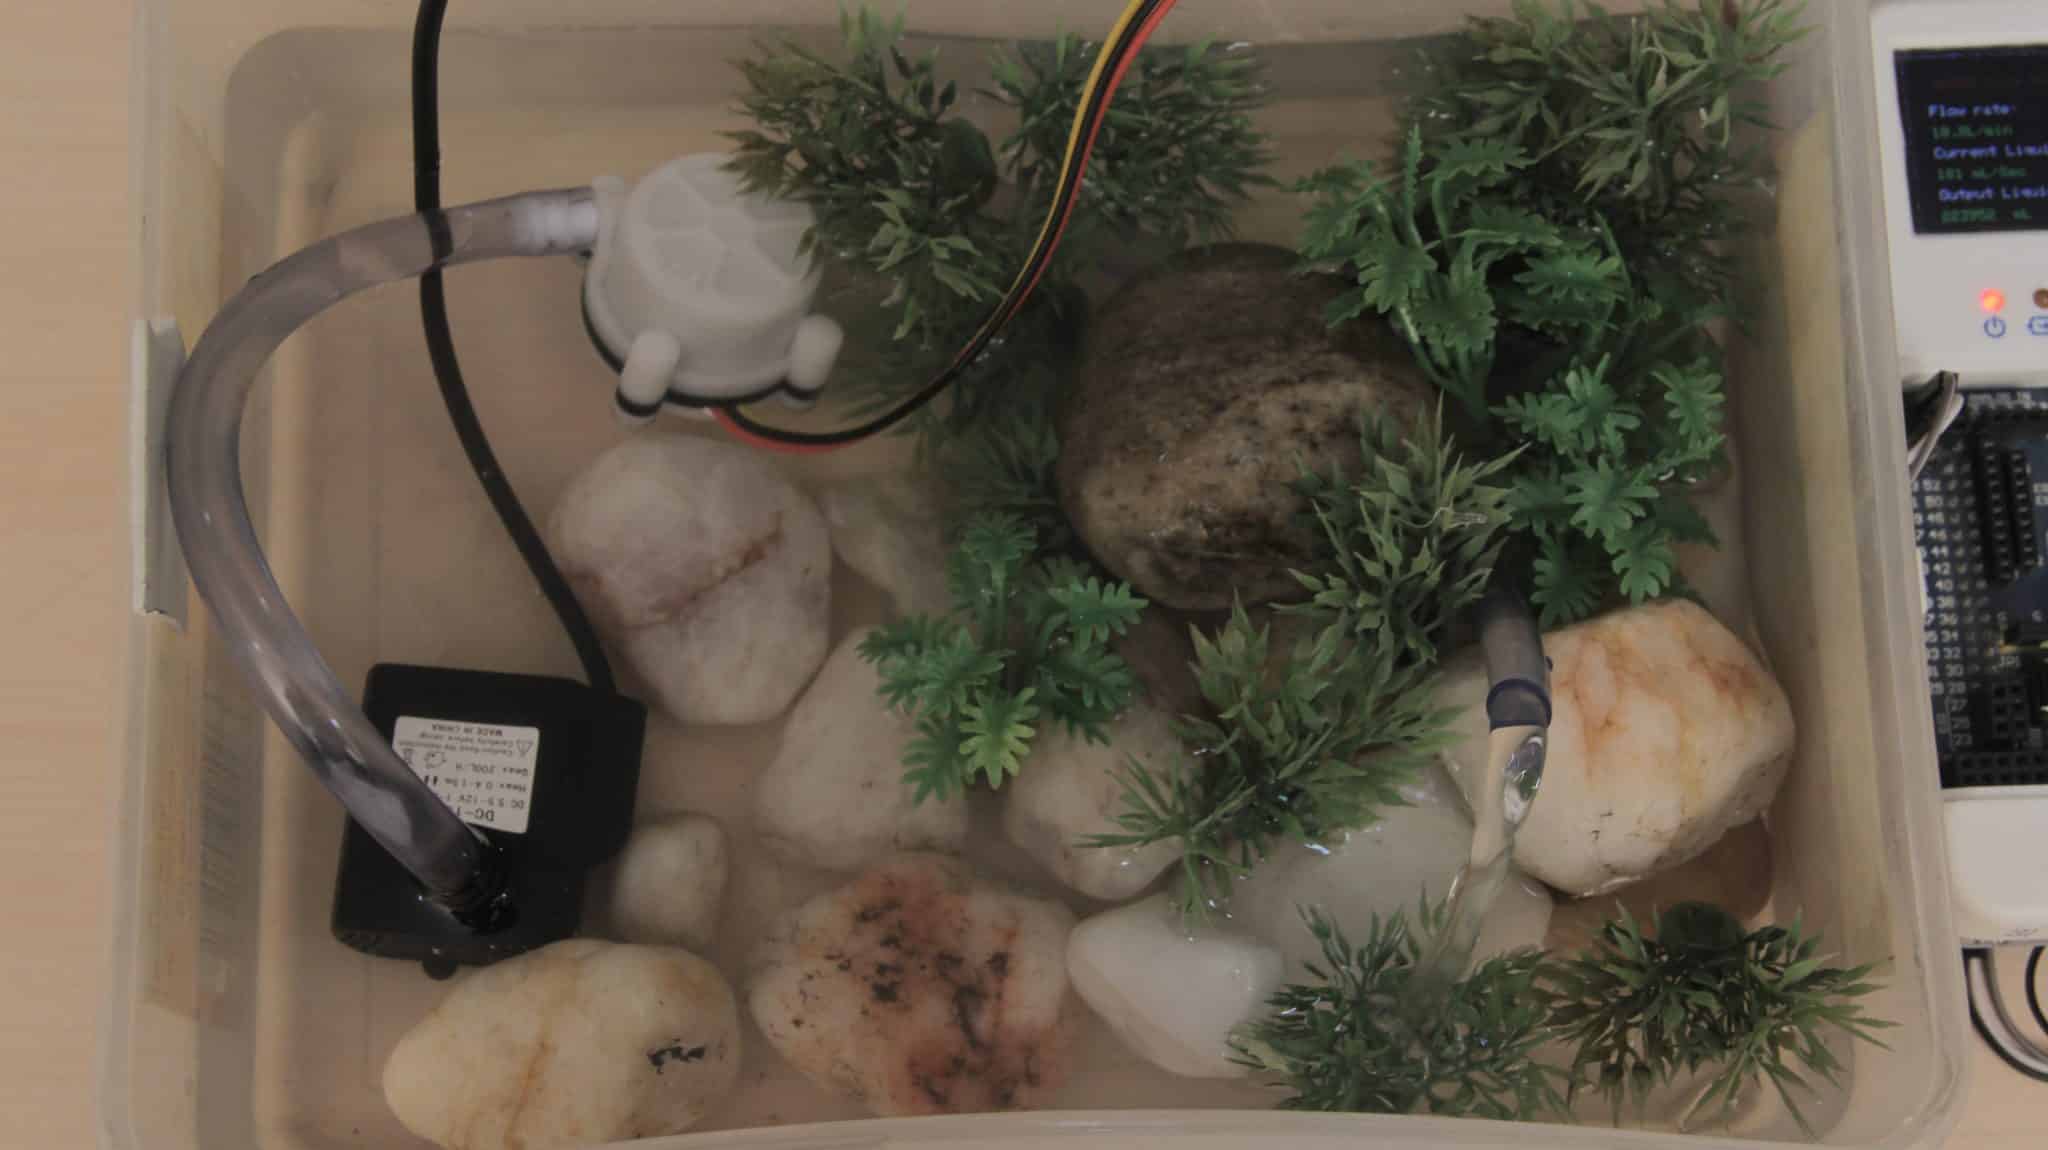
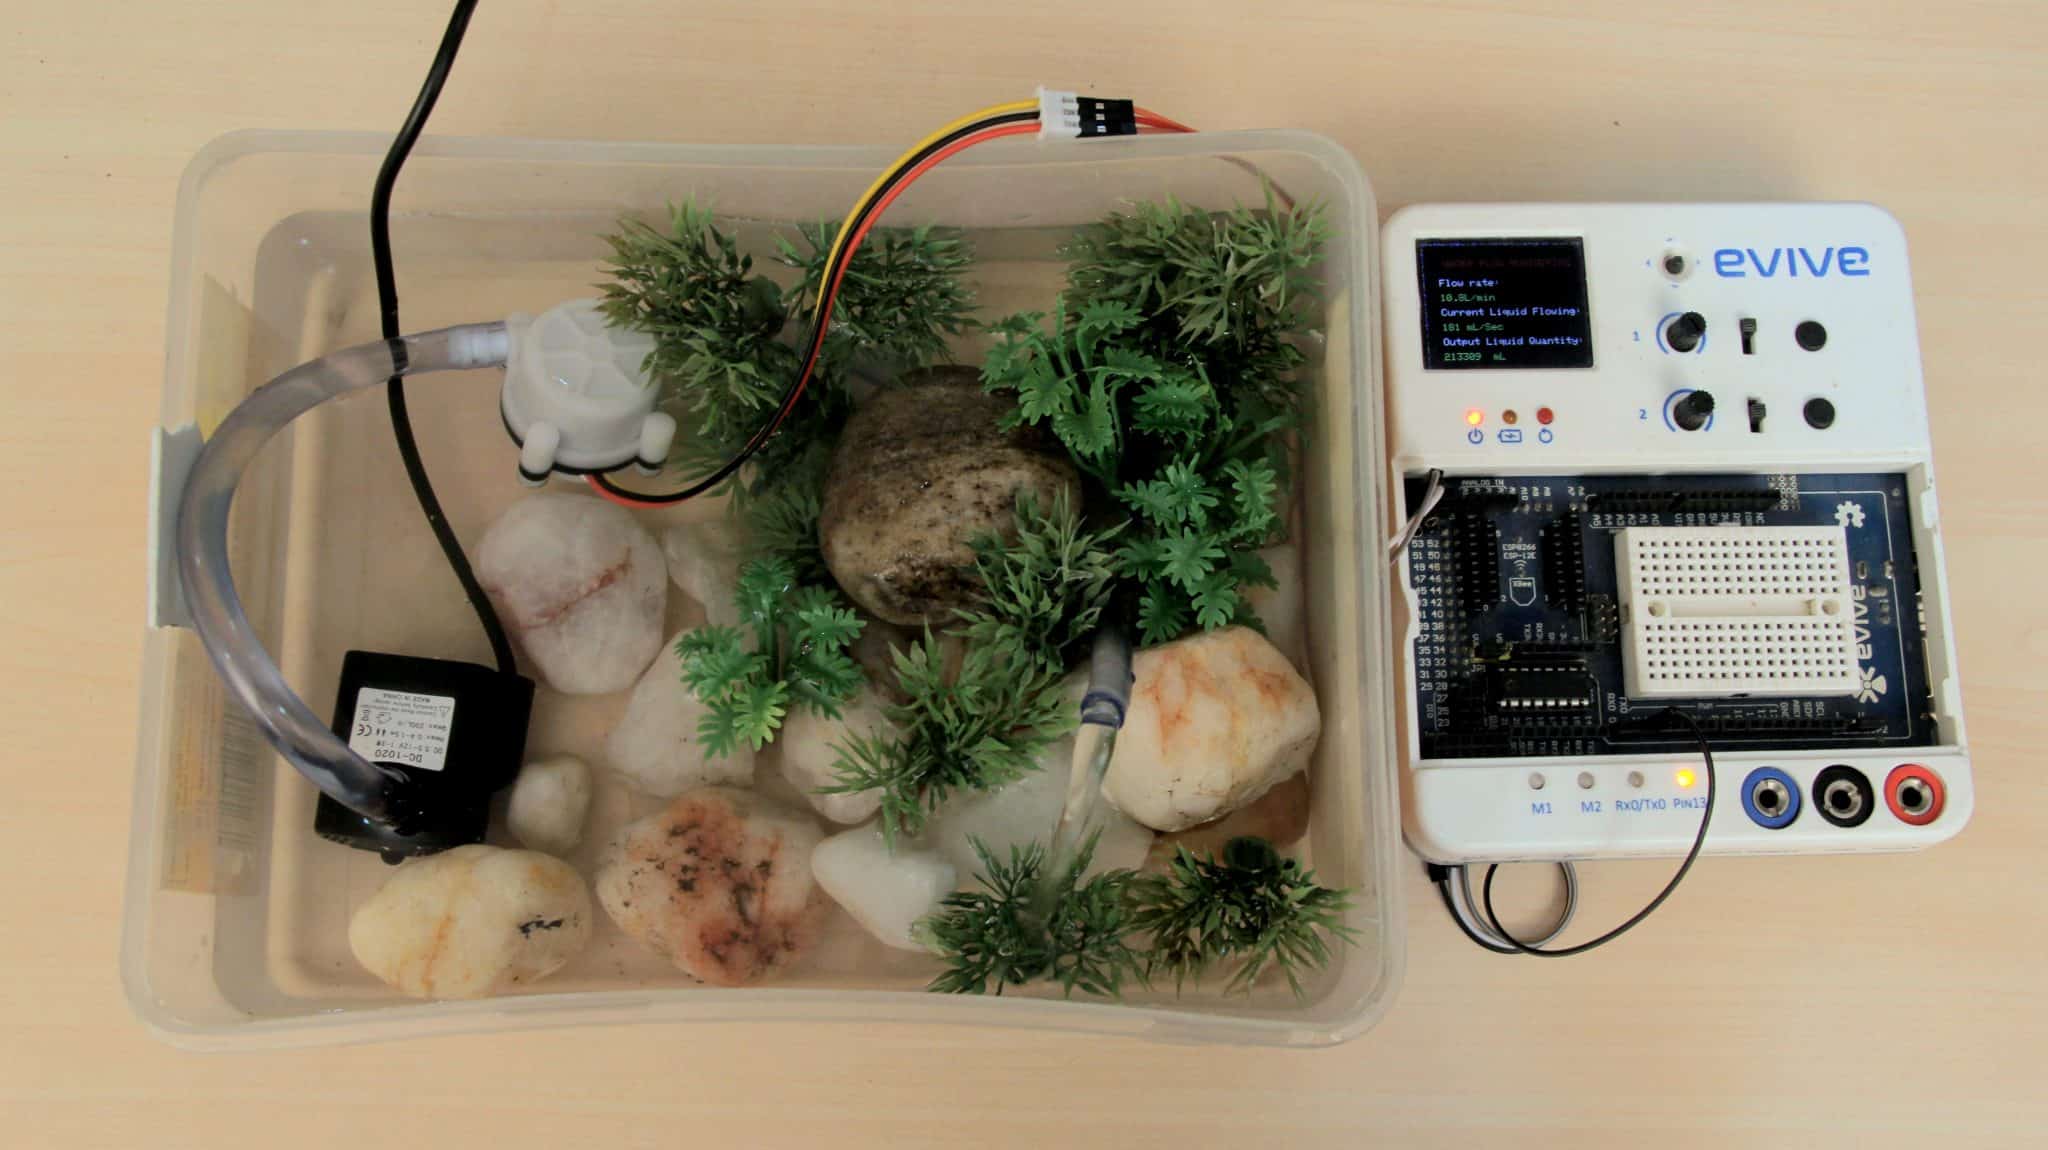
- The circuit after the setup looks as shown in the figure. Now control the water pump using the potentiometer pin A9.Finally, the Arduino code is uploaded in the evive.
Arduino Code
Below mentioned is the Arduino code for the water flow sensor which displays the flow rate of the water flow.
/**************************************************************************************
 * DESCRIPTION: In this tutorial, we will discuss how to interface water flow sensor
 * with evive. How water flow rate, current water flowing and output water changes?
 * The water flow rate in liters per hour, current water flowing and output water
 * flowing data flowed since starting is displayed on the screen.
 *
 * AUTHOR:Chetan Vashishtha
 *
 * DATE:2018/05/26
 *
 **************************************************************************************/
#include<evive.h>
byte statusLed    = 13;

byte sensorInterrupt = 0;  // 0 = digital pin 2
byte sensorPin       = 2;

// The hall-effect flow sensor outputs approximately 4.5 pulses per second per
// litre/minute of flow.
float calibrationFactor = 4.5;

volatile byte pulseCount;

float flowRate;
unsigned int flowMilliLitres;
unsigned long totalMilliLitres;

unsigned long oldTime;
int motor1Dir1 = 28; // motor direction 1 pin
int motor1Dir2 = 29; // motor direction 2 pin
int motor1PWM = 44; // motor pwm pin

Motor Motor1 = Motor(motor1Dir1, motor1Dir2, motor1PWM);


void setup()
{

  // Initialize a serial connection for reporting values to the host
  Serial.begin(9600);
  tft_init(INITR_GREENTAB);
  tft.setRotation(1);
  tft.fillScreen(ST7735_BLACK);
  tft.setTextColor(ST7735_RED);
  tft.setTextSize(1);
  tft.setCursor(20,15);
  tft.println("WATER FLOW MONIOTRING");

  // Set up the status LED line as an output
  pinMode(statusLed, OUTPUT);
  digitalWrite(statusLed, HIGH);  // We have an active-low LED attached

  pinMode(sensorPin, INPUT);
  digitalWrite(sensorPin, HIGH);

  pulseCount        = 0;
  flowRate          = 0.0;
  flowMilliLitres   = 0;
  totalMilliLitres  = 0;
  oldTime           = 0;

  // The Hall-effect sensor is connected to pin 2 which uses interrupt 0.
  // Configured to trigger on a FALLING state change (transition from HIGH
  // state to LOW state)
  attachInterrupt(sensorInterrupt, pulseCounter, FALLING);
}

void loop()
{
   Motor1.moveMotor(analogRead(A9));
   if((millis() - oldTime) > 1000)    // Only process counters once per second
  {
    // Disable the interrupt while calculating flow rate and sending the value to
    // the host
    detachInterrupt(sensorInterrupt);

    // Because this loop may not complete in exactly 1 second intervals we calculate
    // the number of milliseconds that have passed since the last execution and use
    // that to scale the output. We also apply the calibrationFactor to scale the output
    // based on the number of pulses per second per units of measure (litres/minute in
    // this case) coming from the sensor.
    flowRate = ((1000.0 / (millis() - oldTime)) * pulseCount) / calibrationFactor;

    // Note the time this processing pass was executed. Note that because we've
    // disabled interrupts the millis() function won't actually be incrementing right
    // at this point, but it will still return the value it was set to just before
    // interrupts went away.
    oldTime = millis();

    // Divide the flow rate in litres/minute by 60 to determine how many litres have
    // passed through the sensor in this 1 second interval, then multiply by 1000 to
    // convert to millilitres.
    flowMilliLitres = (flowRate / 60) * 1000;

    // Add the millilitres passed in this second to the cumulative total
    totalMilliLitres += flowMilliLitres;

    unsigned int frac;

    // Print the flow rate for this second in litres / minute
    Serial.print("Flow rate: ");
    tft.setTextColor(ST7735_WHITE);
    tft.setTextSize(1);
    tft.setCursor(15,35);

    Serial.print(int(flowRate));  // Print the integer part of the variable
    tft.print("Flow rate: ");
    tft.setTextColor(ST7735_GREEN,ST7735_BLACK);
    tft.setTextSize(1);
    tft.setCursor(15,50);
    tft.print(int(flowRate));
    tft.print(".");

    Serial.print(".");
    // Print the decimal point
    // Determine the fractional part. The 10 multiplier gives us 1 decimal place.
    frac = (flowRate - int(flowRate)) * 10;
    Serial.print(frac, DEC) ;      // Print the fractional part of the variable
    tft.print(frac, DEC);
    Serial.print("L/min");
    tft.print("L/min");
    // Print the number of litres flowed in this second

    Serial.print("  Current Liquid Flowing: ");             // Output separator
    Serial.print(flowMilliLitres);
    Serial.print(" mL/Sec ");

    tft.setTextColor(ST7735_WHITE);
    tft.setTextSize(1);
    tft.setCursor(15,65);
    tft.println("Current Liquid Flowing:");

    tft.setTextColor(ST7735_GREEN,ST7735_BLACK);
    tft.setTextSize(1);
    tft.setCursor(15,80);
    tft.print(flowMilliLitres);
    tft.print(" mL/Sec ");


    // Print the cumulative total of litres flowed since starting
    Serial.print("  Output Liquid Quantity: ");             // Output separator
    Serial.print(totalMilliLitres);
    Serial.println("mL");
    tft.setTextColor(ST7735_WHITE);
    tft.setTextSize(1);
    tft.setCursor(15,95);
    tft.println("Output Liquid Quantity:");
    tft.setTextColor(ST7735_GREEN,ST7735_BLACK);
    tft.setTextSize(1);
    tft.setCursor(15,110);
    tft.print(totalMilliLitres);
    tft.print("  mL  ");

    // Reset the pulse counter so we can start incrementing again
    pulseCount = 0;
    // Enable the interrupt again now that we've finished sending output
    attachInterrupt(sensorInterrupt, pulseCounter, FALLING);
  }
}

void pulseCounter()
{
  // Increment the pulse counter
  pulseCount++;
}
Output
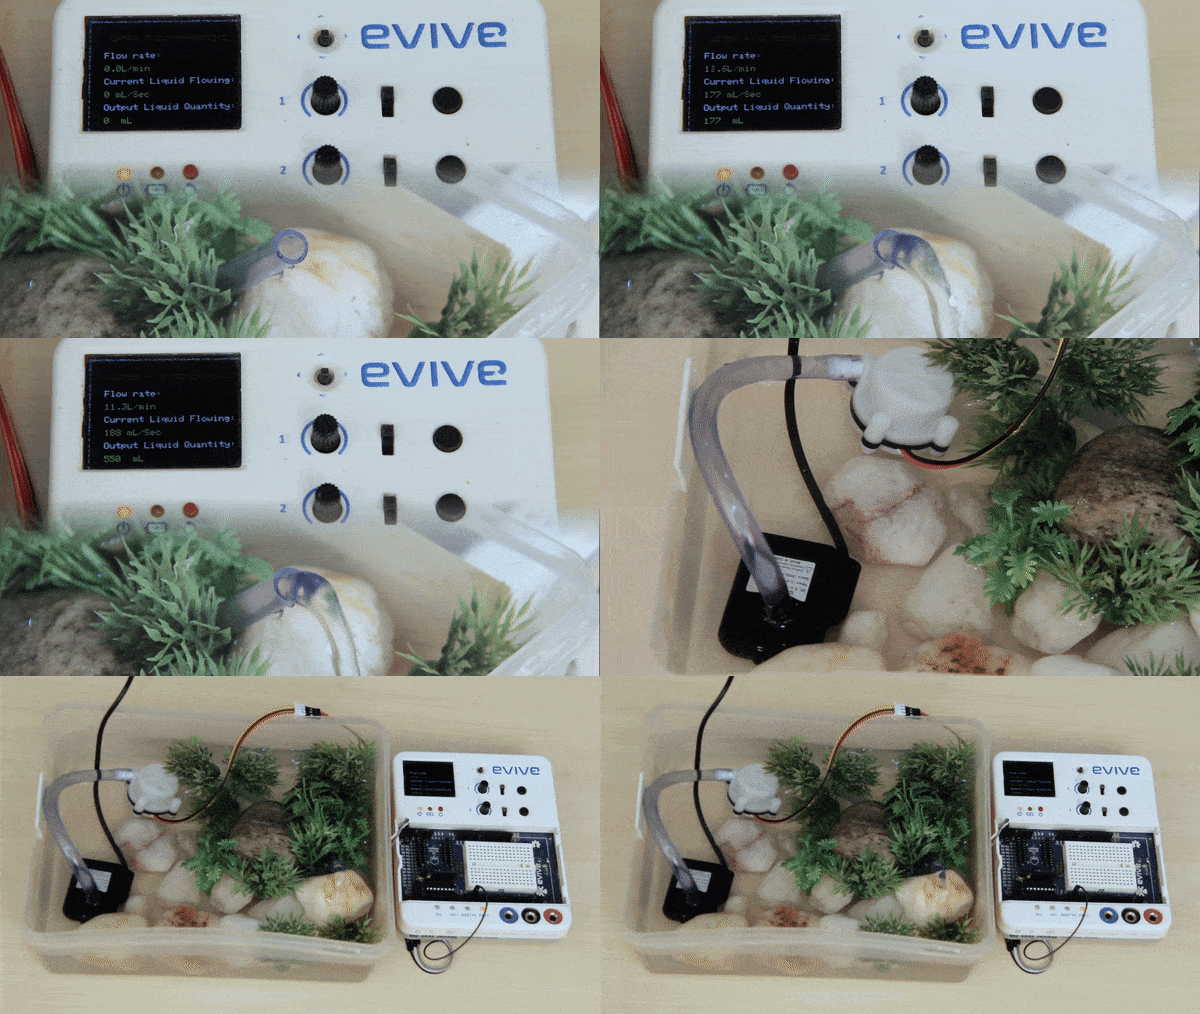
Now our setup is ready. Change the water flow to get different flow rates.

Conclusion
In this lesson, we learned how to interface a water flow sensor with evive and how to measure the flow rate of the water flow. We also learned to calculate the current water flowing and the output water flow data. We used a 3W-12V water pump, a water flow sensor, and Evive to regulate the flow rate of the water. The Arduino Code accepted the data from the water flow sensor and displayed the flow rate of the water flow, current water flowing and output water flowing data on the TFT screen.

