
How to Switch to Draw Mode?
To switch Wizbot Neo to Draw Mode, follow these instructions:
Step 1: Press the Action and Reverse buttons together.
Step 2: Upon successful activation, you will hear a distinct buzzer sound, and Wizbot Neo’s LED indicator will turn purple. This light and sound cue confirms that Wizbot Neo has transitioned from Grid Mode to Draw Mode.
How does Wizbot Neo move in Draw Mode?
Let’s observe Wizbot Neo’s movement in Draw Mode.
Step 1: Press the Forward, Right, Reverse, and Left directional buttons in sequence.
Step 2: Insert your pen into the pen holder. Ensure the pen tip just lightly touches the paper, applying appropriate pressure—neither too firm nor too light.
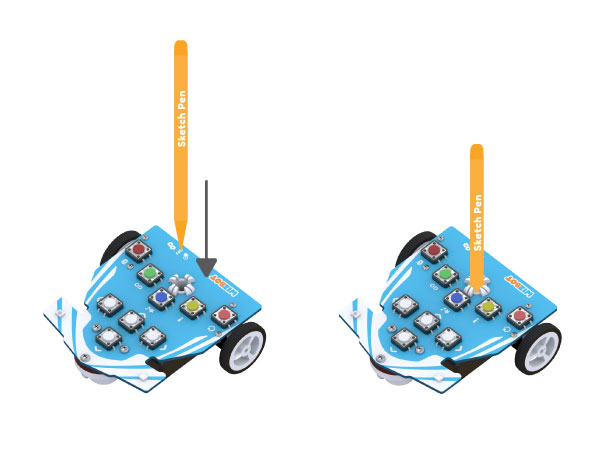
Please note to always make sure to insert the sketch pen before Wizbot Neo starts its movement.
Step 3: Now, press Go.

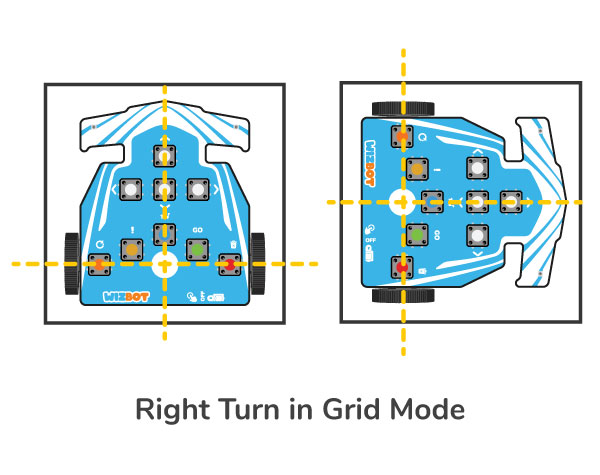
Do you observe a difference in its movement? In Draw Mode, Wizbot Neo’s steps are notably shorter, and its turns are executed precisely on its axis. This precise movement is essential for creating accurate lines and drawings.

Let’s Draw Curves with Wizbot Neo
You may find it impressive that Wizbot Neo can even draw curves!
To create an arc:
- Hold down either the Left or Right directional button for a few seconds until you hear a buzzer sound.
- Then, press Go.
Activity 1: Drawing a Heart Shape with Wizbot Neo.
Are you ready for a little more fun? Let’s create a heart shape!

To draw a heart, follow these steps:
Step 1: Position Wizbot Neo to establish the initial angle for the heart shape.
Step 2: Press the Clear button first to erase any previously stored codes from the playlist.
Step 3: Press Forward twice.
Step 4: Long Press Right to create a right arc.
Step 5: Repeat the Long Press Right to create one more arc.
Step 6: Press the Left button for a left turn.
Step 7: Now, create two more arcs using the long-press method for the appropriate directional button.
Step 8: Conclude by pressing Forward twice to complete the heart.
Activity 2: Drawing a Right-Angle Triangle
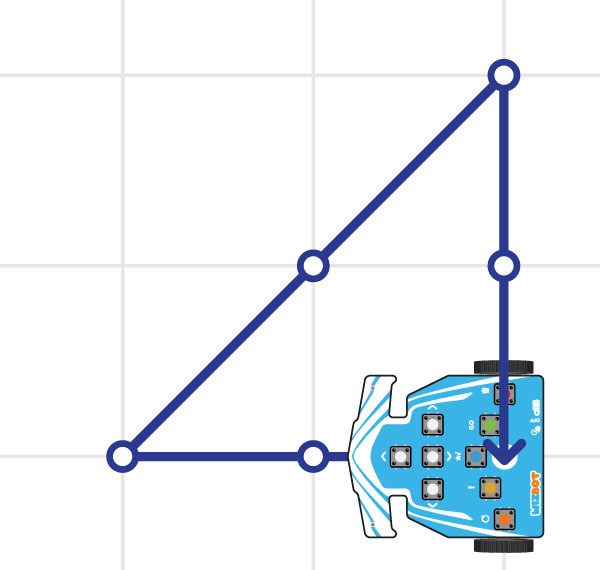
To draw a right angle triangle, follow these steps:
Step 1: Position Wizbot Neo to establish the initial angle facing forward for the triangle
Step 2: Press the Clear button first to erase any previously stored codes from the playlist.
Step 3: Press Forward twice.
Step 4: Press the Forward and Right button together to take a 45 degree angle to create the hypotenuse.
Step 5: .Press the reverse button twice.
Step 6: Conclude by pressing the forward button twice, again.
![]()


If your drawing appears slightly off or unusual, there’s no need to worry. Please refer to our calibration video, which will provide the necessary guidance to realign Wizbot Neo for optimal drawing performance.
Conclusion
In conclusion, Wizbot Neo draw mode helps enable children to explore creativity, engage and understand spatial awareness with the help of draw activities such as lines, shapes, and patterns through coding logic.

